|
It was a very busy year in 2010, perhaps our busiest, and we managed to get a number of projects finished or pretty far along. Last year, our primary emphasis was on shop projects some of which were started years ago and had languished for quite some time. This year it was a pretty even balance among construction projects, shop projects and other projects.
|
|
We tackled a number of construction projects this year that had been in the planning stages for quite some time.
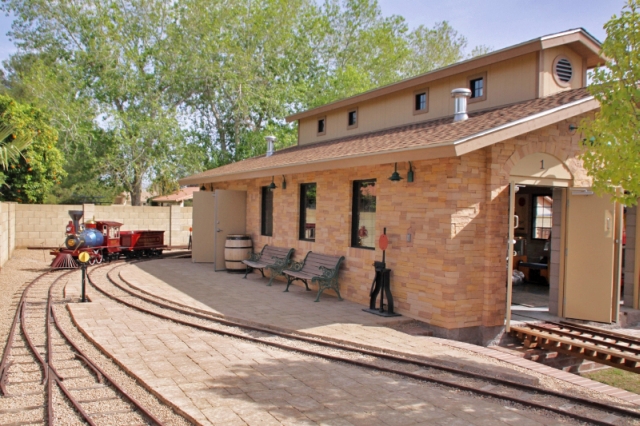
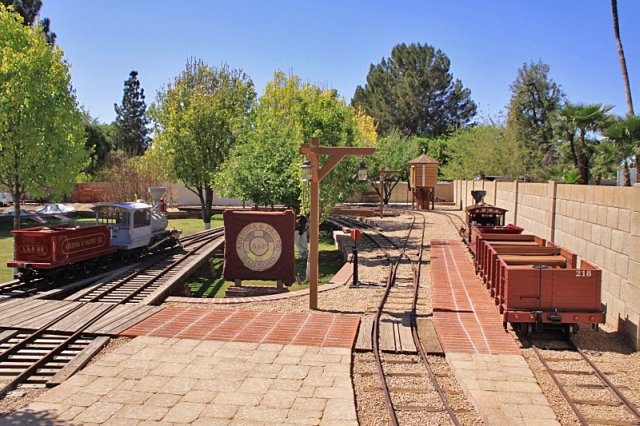
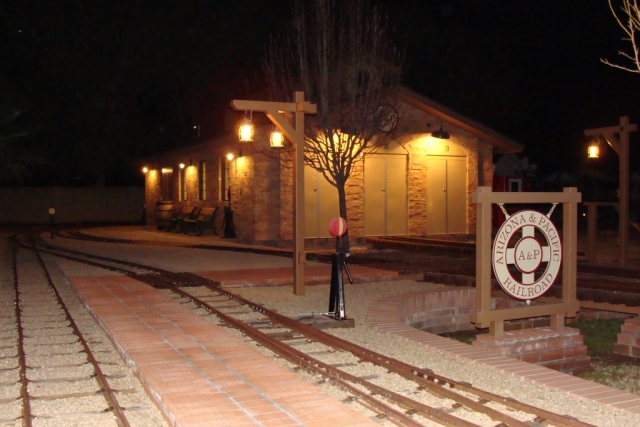
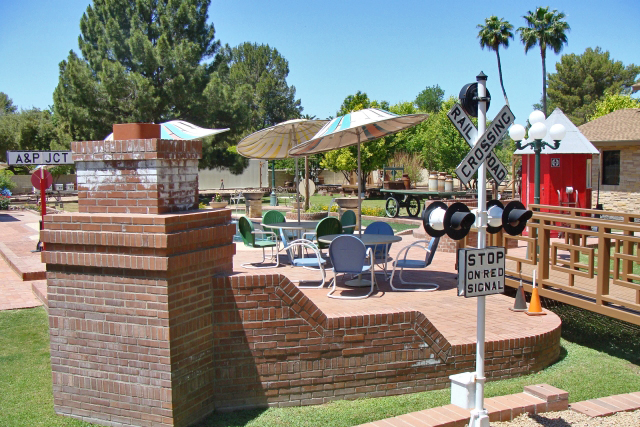
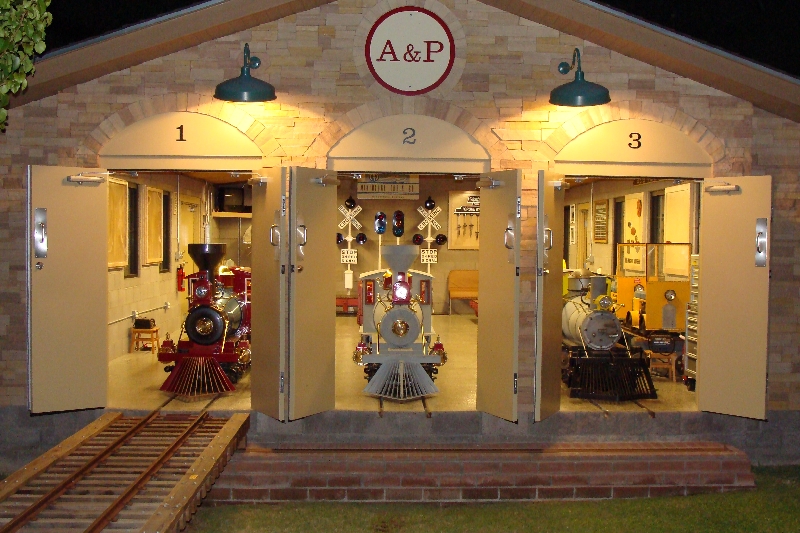
The waiting area patio behind the engine house underwent a major expansion. It is constructed of mega pavers and now measures 60 feet by 17 feet with railroad tracks cut through it length wise. We added a third exterior light fixture to the engine house to help illuminate the expanded waiting area. The area is now well lighted and a comfortable place to train watch - even after dark.
|
|
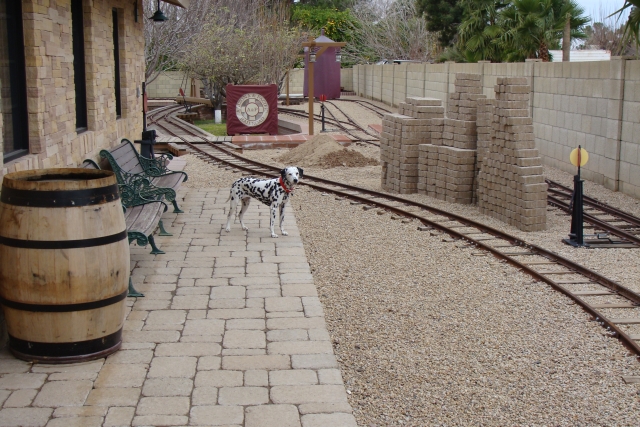
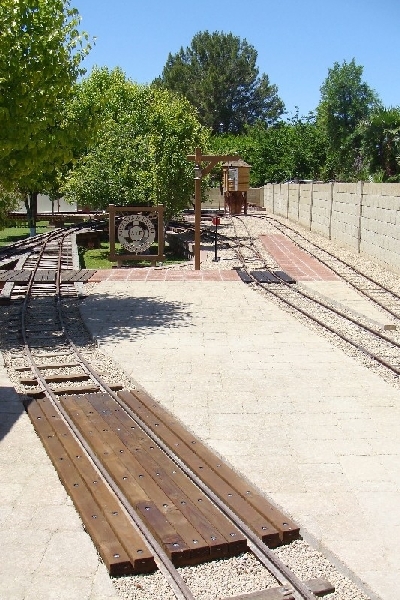
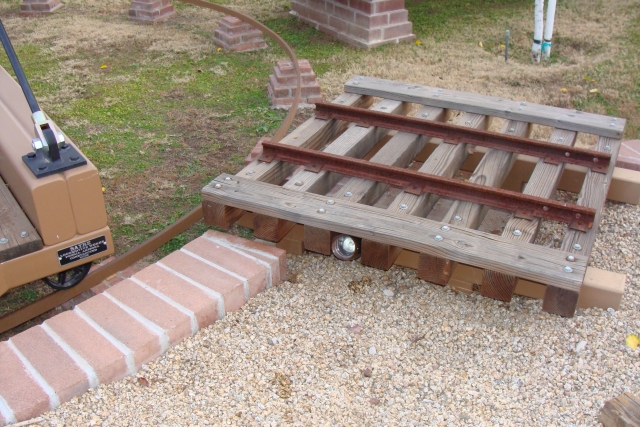
We completed a wooden plank walkway between major sections of our waiting area patio. It is 90 inches wide and allows you to walk from the engine house to the loading area without stepping into the gravel and over the track.
|
We extended our loading platform in length from 15 to 40 feet. It was long enough to load and unload one car previously; now it will handle two cars and the engineer can also use the platform to get on and off the tender.
|
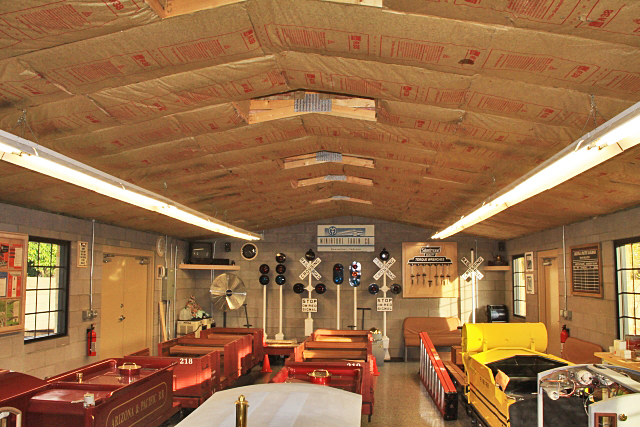
We added some additional outlets, lights and exhaust fans to the engine house and insulated it with R38 in the ceiling and R19 in the second story walls. It was a huge project that involved moving and re-hanging the lights, trimming and fitting what seemed like hundreds of pieces of insulation and shooting almost 15,000 staples. We also finished the framing to box out the four vertical shafts that penetrate the ceiling to the windows in the clerestory area.
|
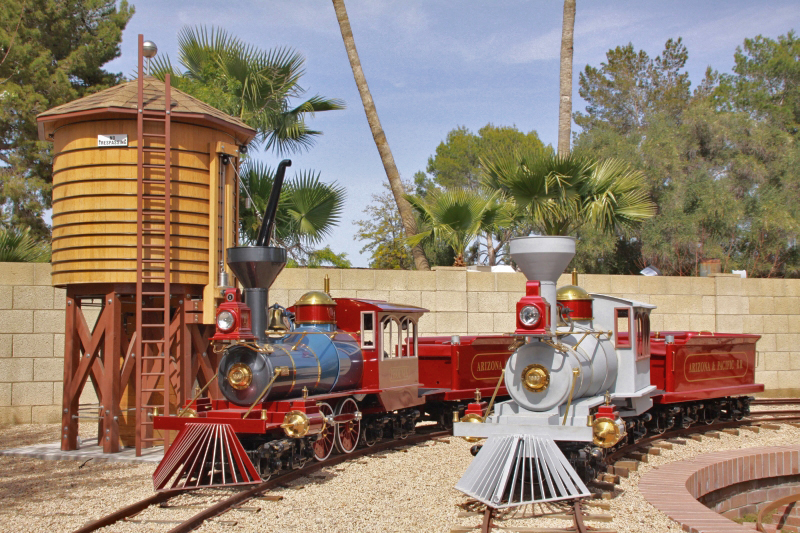
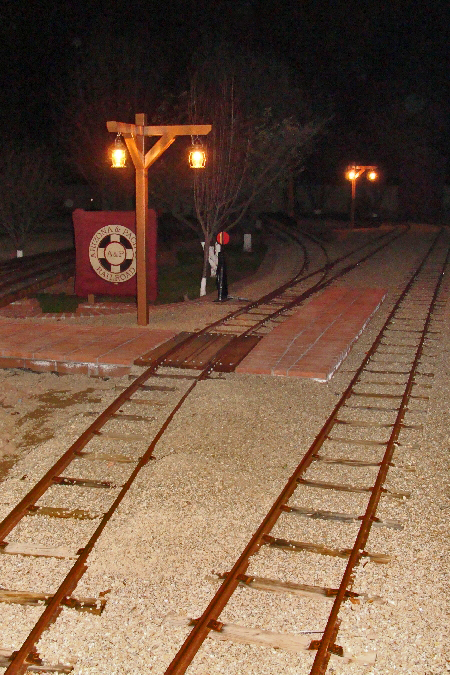
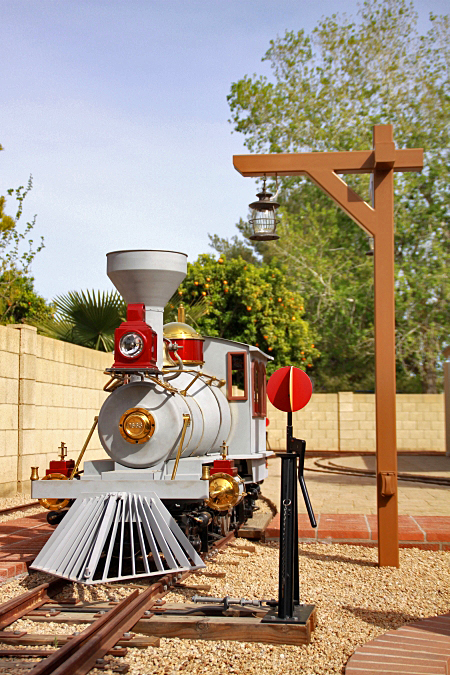
We fabricated and installed five period-looking light poles with seven lanterns at key spots along the right-of-way. They provide enough light to make the occasional after dark operation in the Summer possible without “over lighting“ the area. We selected an older style 60 watt bulb for the lanterns that puts out a yellowish light that adds both light and ambience to the railroad. The lantern poles are painted a tan/brown color to simulate the look of wood and structural washers are placed where they would be located on a wood version. The wiring is all concealed within the steel tubes.
|
|
|

|
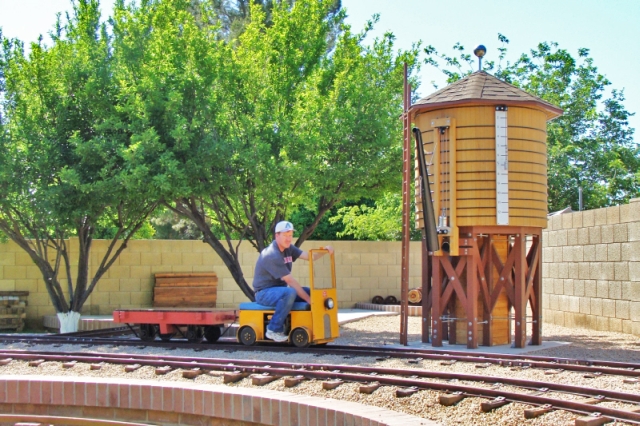
We added two low voltage lights to illuminate our water tank for our after dark runs in the Summer. The wiring isn’t completely finished, but they work very well, are hidden in the daytime and provide the lighting effect I was hoping to achieve.
|
In addition to the routine track and train maintenance projects, there is always something on a railroad that needs refinished, repainted or replaced (wood). While we were painting our new lamp posts, we decided to get another coat of paint on our turntable which was completed in 2005. It didn’t really need painted that badly, but had faded a bit over the years and with a new lamp post standing nearby, I thought it was a good idea. We removed all the planking and re-coated it with a water and termite resistant product. The ring rail was also painted.

|
We also re-coated the wood planking of our pedestrian walkway to the loading platform.
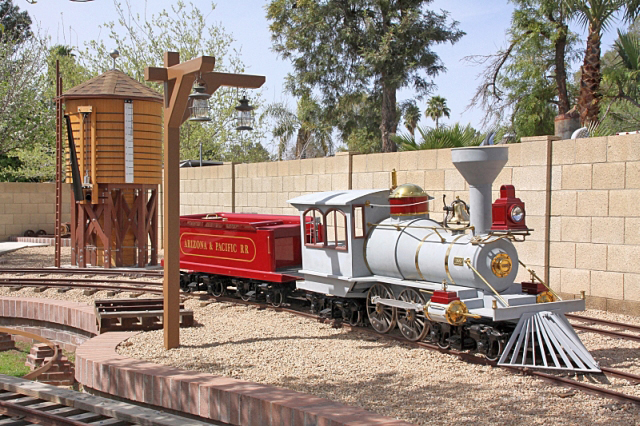
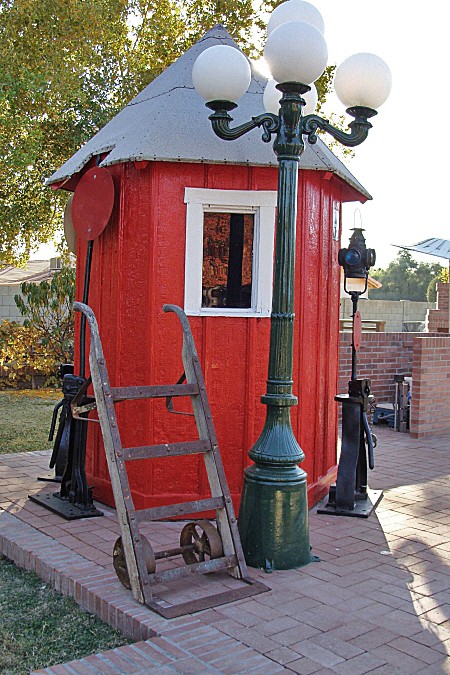
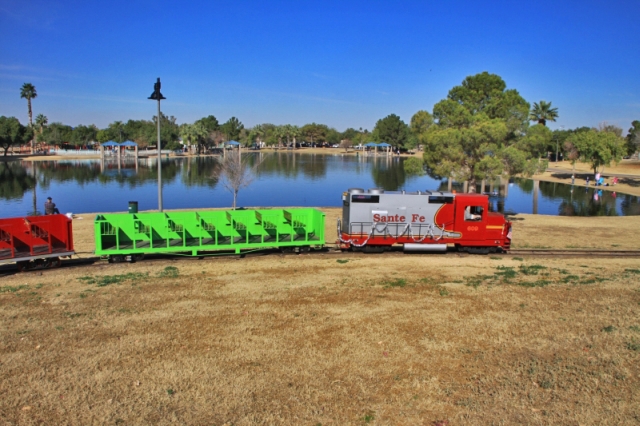
We sanded, stained and resealed the water tank and painted both the red portion and the white trim on the Santa Fe phone booth.
|
We repainted several items in the backyard including the baggage cart and 3 park-style lamp posts, four of our full size switch stands and targets and the braces of our A & P Jct. sign.
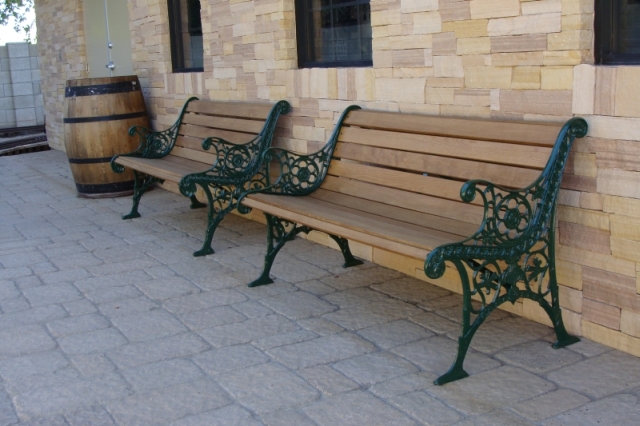
We also replaced the wood in and rebuilt two of the park benches that serve the waiting area near the engine house
|
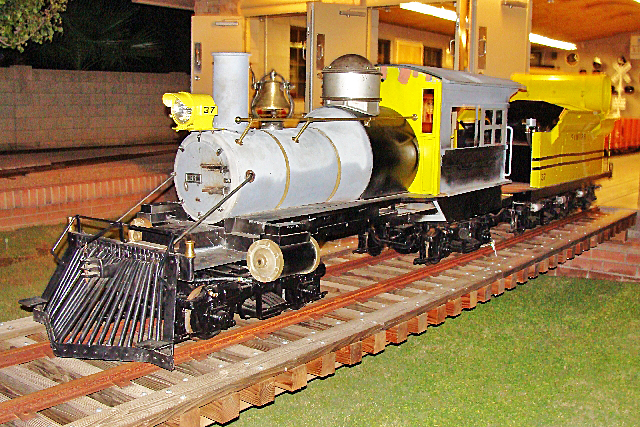
We made considerable progress on both the S-16 Bumble Bee project and the G-16 project this year, but neither is quite finished. We also worked on a number of other projects in the A & P Shops this year.
|
We completed fabrication and installation of the pilot, fabricated the pilot beam support rods, mounted the new smokestack and headlight, cut out and replaced the front section of each running board, removed and replaced two of the truck safety hooks that were sheared off and modified the smoke box breast plate to closely resemble the prototype including the staybolts.
We fabricated grab irons for the side of the engine cab and replaced the original engine handrails (tubing) with solid brass. We pressure tested the air tank and replaced all its brass fittings and pop-off valve. The drain cock was cleaned, rebuilt and reinstalled.
We rebuilt the bell cradle with new bushings, spacers and zerk fittings. It was also thoroughly cleaned and stripped with a wire wheel and hand sanding.
We added a brass ball at the end of the handrails and added another staunchon near the smoke box for support. The two additional staunchons were originally on my A & P No. 1. Our four long staunchons were originally all different lengths and the two short ones differed in length by 3/8 of an inch. We took each apart, made the lengths uniform and spun the bases so that all the mounting holes are square with the handrail.
|
The cylinder on the left side was torqued and twisted upward by a collision years ago; it was cut free of the chassis and re-welded back in into place with the proper alignment. The brass pipe was missing from the left side cylinder head likely also a casualty of the collision years ago. We made a jig and after a couple of tries had a dead-on duplicate that was silver soldered into place. We also repaired some old collision damage to the side of the cylinder head.
We fabricated and installed the drawbars for both the engine and the tender.
|
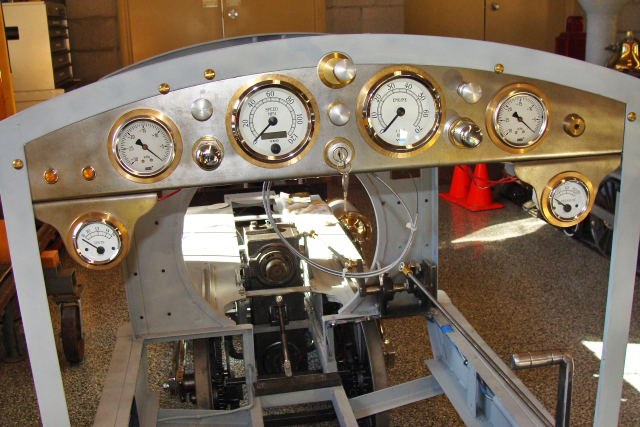
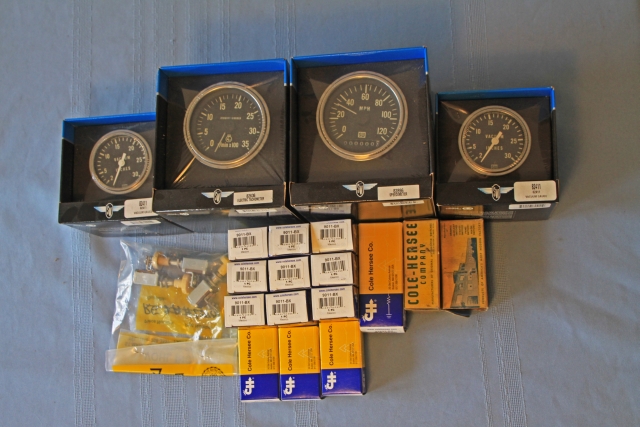
The instrument panel on the S-16 Bumble Bee was bent, drilled and carved up by one of its previous owners. We replaced it with a new panel. The tachometer, speedometer, air pressure and voltage gauges are rear lighted and the two glycerine filled vacuum gauge are front lit. The instrument panel has been rewired.
|
We polished the bell, cylinder ends, staunchions, handrails, sand dome (removed dents) boiler bands, boiler slide flat bars and brass tubing from the cylinder heads.
We wired the head light and the pressure tank on the engine and rewired the tender.
We fabricated the pig tail wire bundle from the engine to the tender and completed the last of the hoses that connect the engine and the tender
We had multiple welding projects on the Bumble Bee engine frame continuing to fill holes, replace damaged brackets etc. Extensive welding was completed on the cab roof and on the tender end to repair prior damage. We ground off a number of non-original brackets and sharp edges and have begun filling numerous unnecessary holes in the front of cab. The cab still has a way to go, but significant progress is being made – one dent at a time
We designed, fabricated and installed the transmission shifting linkage.
|
We completed the hard plumbing.
We replaced two small damaged brass bands around the boiler with three wider ones.
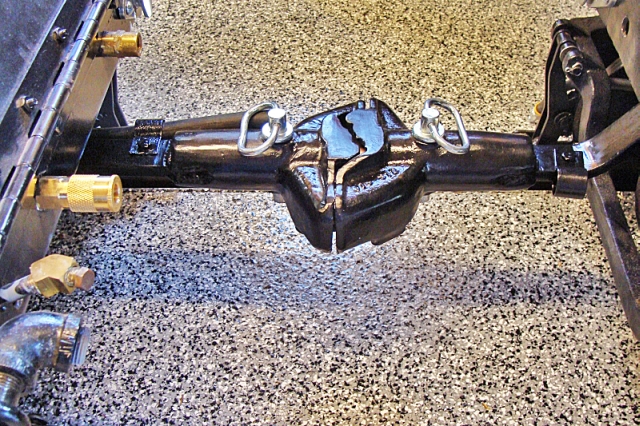
We replaced the trucks that were under the tender with trucks that we recently rebuilt in our shop. The new trucks are painted charcoal gray which is the color all the trucks will be when the train is completed.
We fabricated, commissioned or purchased dozens of parts for the false drive wheel assembly that will go under the Bumble Bee. I still have quite a way to go with the reassembly, but I am happy to report that all the parts are finally on site in the A & P shops.
We installed the fuel pump on the Wisconsin engine that will go in the Bumble Bee next year
We fabricated a new brass bar skid plate for the rear of the engine. The tender footplate rests on this component.
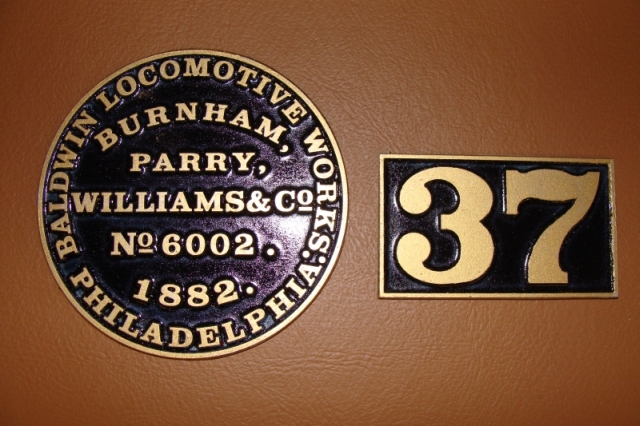
We ordered the builder's plates and several other plates for No. 37. The builder’s plates are a scaled duplicate of DRGW No. 268 – the original Bumblebee
|
There were numerous other small projects completed on the Bumble Bee, but you get the idea just how big one of these ground up projects is…
|
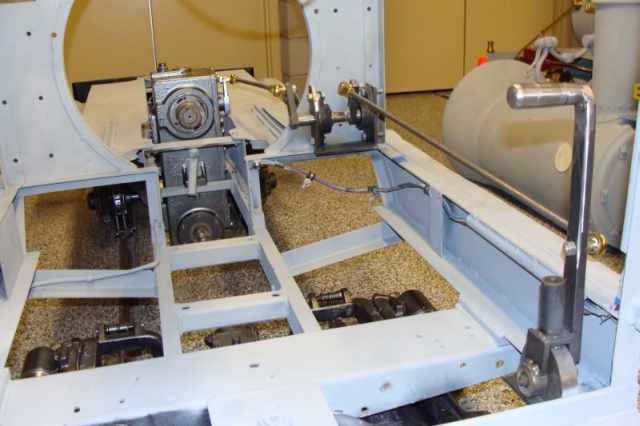
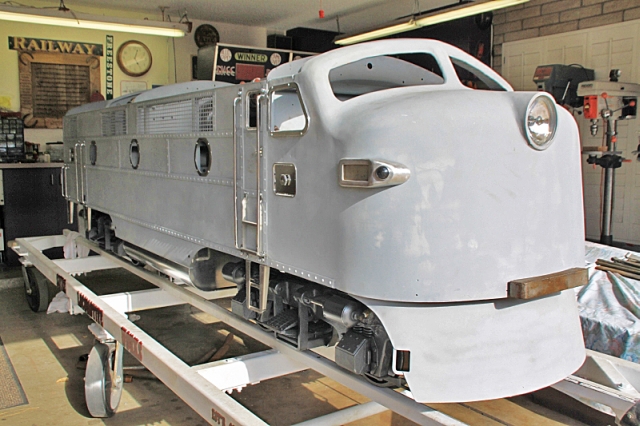
We also made considerable progress on the rebuild of our G-16 No. 582 this year.
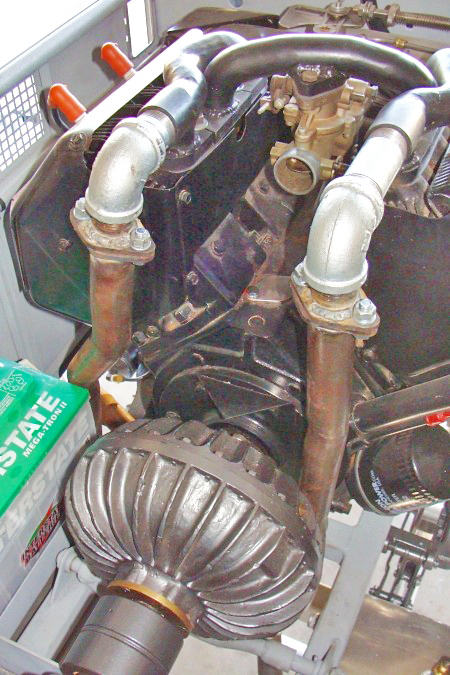
Our rebuilt Wisconsin VH-4 engine is in place in the G-16. It replaced the original VE-4 in this unit. Our low profile custom manifold is in place and looks very much like the exhaust on the VE and VF models. The stock manifold on the VH model is a high profile design and would not fit under the hood of the G-16. We built our own low profile version and it leaves plenty of room under the hood.
Our custom headers are completed and in place.
|
|
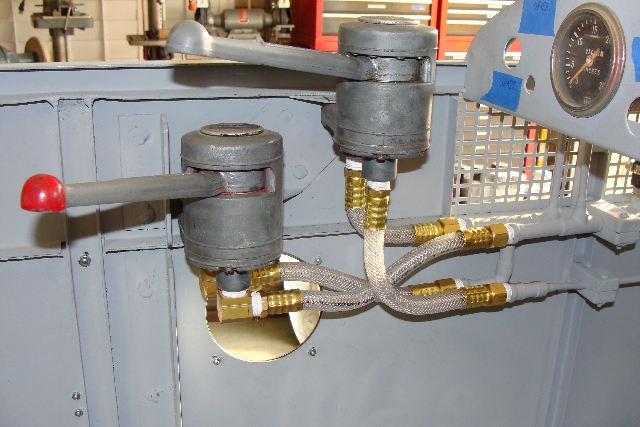
We completed the hard plumbing for the four vacuum systems – brakes, throttle, transmissions shifting and vacuum pump.
We fabricated the rear drawbar for the A unit and the two drawbars for the B unit – the B unit drawbars are not installed yet.
The vacuum pump, transmission shifter, fuel pump and fuel regulator are in place.
We located a number of the original light sockets we were looking for and got them installed. We got our number board castings back after some aluminum welding and had them polished. We are working on the number lenses and hope to have them ready soon.
We had two new gas tanks fabricated out of aluminum for the G-16 which are really trick. We added interior baffles and placed the fitting mounts where they made the most sense for our year and model. We also added a shared air line to equalize air pressure in the two tanks. They will look great polished up for the final assembly after the rest of the engine is painted.
|
We located and purchased the Stewart-Warner gauges and all the Cole-Hersee switches, push buttons and knobs for the instrument panel of the G-16.
|
We fabricated the mounting brackets for the vacuum tank. They look pretty good and very similar to the original brackets.
We re-welded the four G-16 smokestacks to the hood from the bottom. They had torn partially away and we wanted a clean factory look from the top.
We tracked down and acquired some additional spring clips, door handles and grab bars that we were missing to complete our B unit and coaches.
We had fabricated and installed the four hoses to the vacuum throttle and vacuum brake valves
|
We added most of the bolt on trim that we have acquired. We have a few more pieces that we will get mounted soon.
We completed additional minor projects on the G-16 that are too numerous to mention.
|
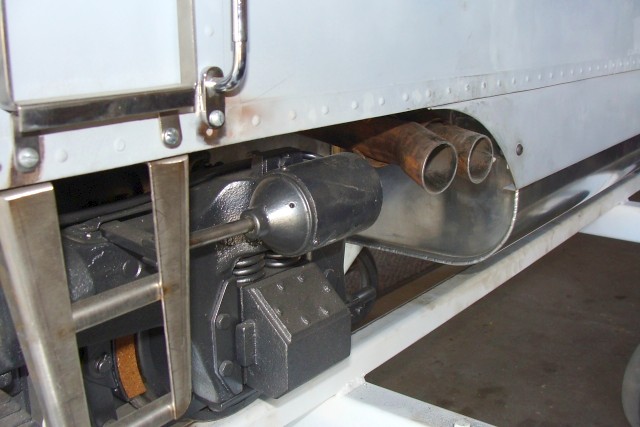
We added front and rear lifting/collision bars on speeder No. 2. They provide some protection to the front grill and rear muffler and tail light and provide a great area to lift from when moving the speeder. It looks very much like speeder no. 1 now.
Last year we designed and built couplers on the rear of our speeders to enable them to tow our maintenance-of-way trailers. When I later changed my mind on the design of the trailers themselves – it meant I had the couplers in the wrong place on the speeders. We had to cut out the original design and fabricate new ones that sit much higher. We also had to move and rewire the tail lights on the speeders. There was a great deal more cutting, grinding, fitting and welding than the last two sentences imply, but the changes are complete and the coupler assemblies have been reinstalled.
The controller on our engine no. 2 wasn’t performing quite the way we had hoped, especially on the low end performance. Brian Stepaniak, one of our friends from Redbridge, Ontario, Canada, came by and reprogrammed the controller with a lap top computer in less than 15 minutes and now the performance of that engine is really, really sweet.
|
We installed stake pockets on both of our recently built maintenance of way trailers. We painted the stake pockets, truss rod washers and nuts and the couplers to match the wood frame. We still need to letter and number the trailers.
|
In addition to building/rebuilding the false drive wheel (FDW) assembly for the Bumble Bee S-16, I am building two additional FDW assemblies at the same time. Several years ago I built and assembled my No. 1 and No. 2 FDW assemblies at the same time and it just makes it easier in the acquisition, fabrication and assembly of parts.
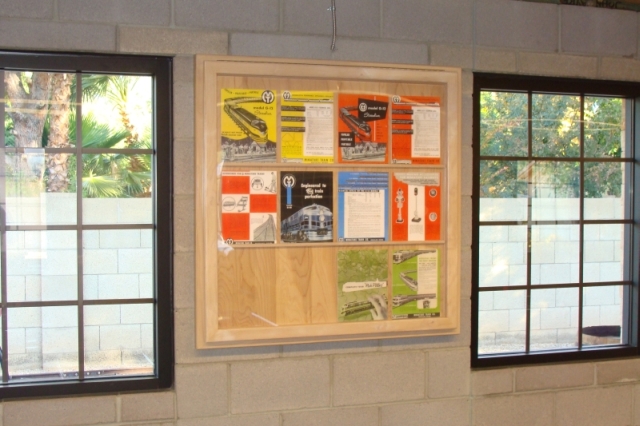
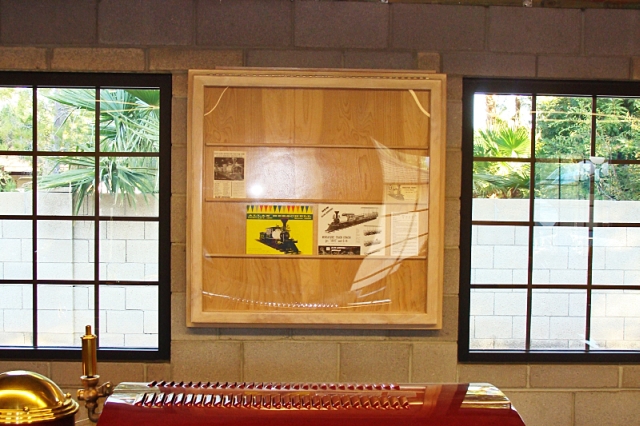
The wood frame and glass covers for our two display cases in the engine house were completed and we now have a display of our Allan Herschell and MTC catalogs and sales literature in the engine house.
|
|
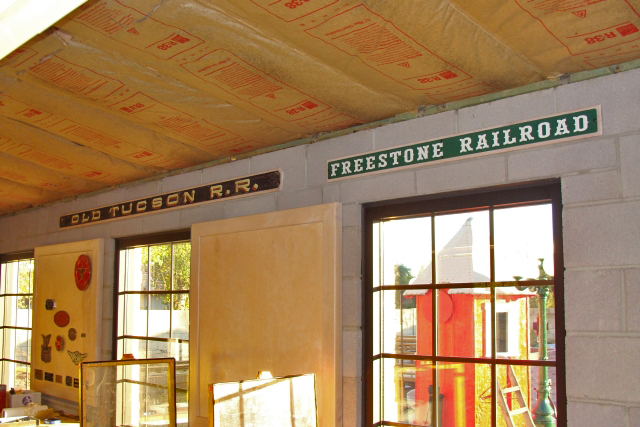
We made wood backing boards and mounted our Old Tucson RR sign and our Freestone Park RR sign. They look great in the engine house and preserve historical pieces of our Arizona park train past. Thank you Carey!
|
About a year ago, we added two high-density seat pads to each of our gons to soften the wood seats a bit. The thought being that the adults might like the padded seats while the younger people probably wouldn’t care if the seat was padded or not. As it turns out, everyone wants a padded seat. We had four more padded seats made so now all the seats are padded
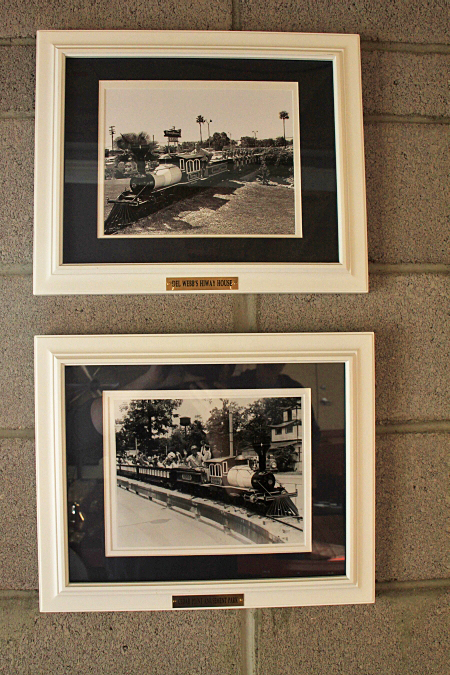
One of the things we had been missing in the engine house was photos of our engines at their original homes and in their original livery. Dave had a photo of our No. 1 “Phoenix” running at the Phoenix Hiwayhouse circa 1961 and our No. 2 “Sandusky” running at the Cedar Point Amusement Park in Sandusky, Ohio also circa 1961 framed and we have them mounted on the wall in the engine house
|
I have had three metal benches in the engine house that provided a place to sit while swapping stories and lies for some time. The metal eventually started to become uncomfortable. I added padding to the seats and back and covered the benches. They are much more comfortable.
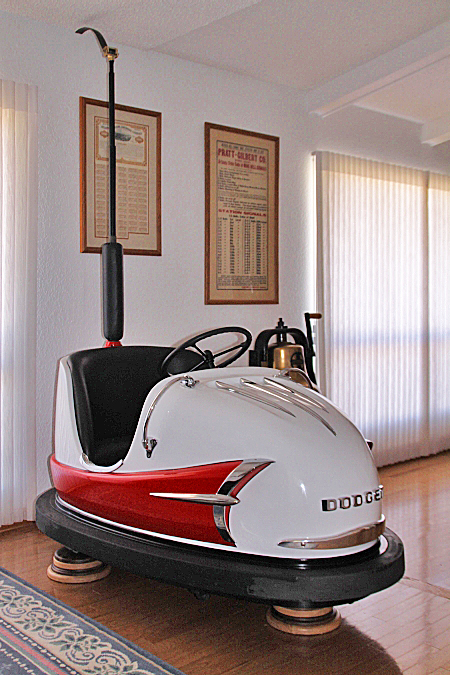
We finished our 1961 Allan Herschell Dodgem bumper car project and moved it into the game room. Oak and Walnut pedestals we designed support the rear metal wheels of the bumper car above my Oak floor. The pedestal on which the front wheel sits has a bearing concealed within which allows the top half of the pedestal to spin and thus the front wheel turns when the steering wheel is turned. It’s a little thing, but it is pretty cool to be able to turn the steering wheel. We shortened the pole slightly so that it would fit, but I thought having the pole and the electrical pick-up on the back of car was a nice touch. I originally started this project about 10 years ago and got off track a number of times before getting back to it and getting it finished.
|
Another of the big projects was rebuilding my four gates and replacing the wood in them. The tracks of the A & P run through two of the gates and they desperately needed the makeover.
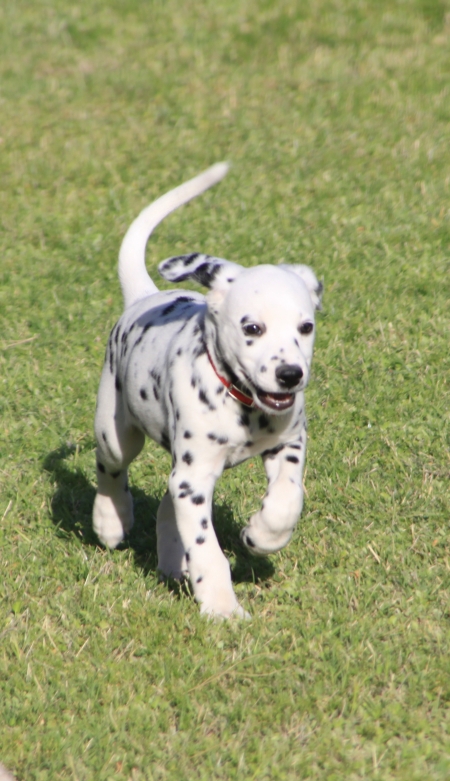
We added a new rail hand to the Arizona & Pacific crew this year. Her name is Lodi and she is already hard at work chasing leaves off the right-of-way…
|
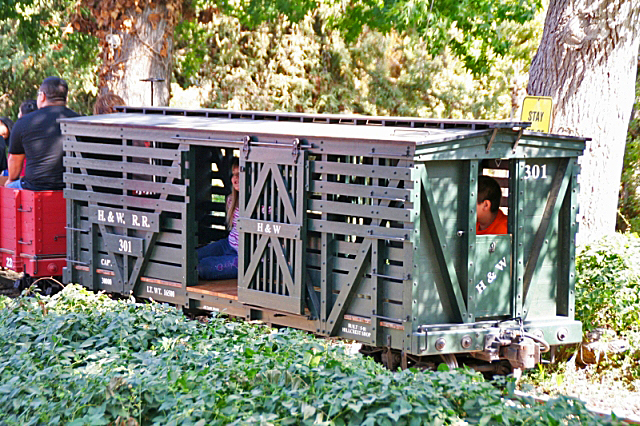
I have always thought it would be cool to have a stock car and a caboose to add to our train. I am a big fan of Sean and Melissa at the Hillcrest Shops in California and really like the stock car they produce. Over the years, I had purchased about ˝ the metal parts that go into that project and this year purchased pretty much the rest of the metal components that they offer. I will still have to fabricate a few components and all the wood, but at least the metal parts will be here. The stock car is a long range project and may be five years away, but I like to plan ahead. The caboose will be after that.
|
We obtained several sunbrellas (aluminum patio umbrellas that were very popular in the 50s – 70s) through the hard work and persistence of one of our friends, Dan Richins. We were able to salvage and swap parts and made five nice ones from the seven bodies and parts we acquired. You can never have enough shade here in the Summer!
|
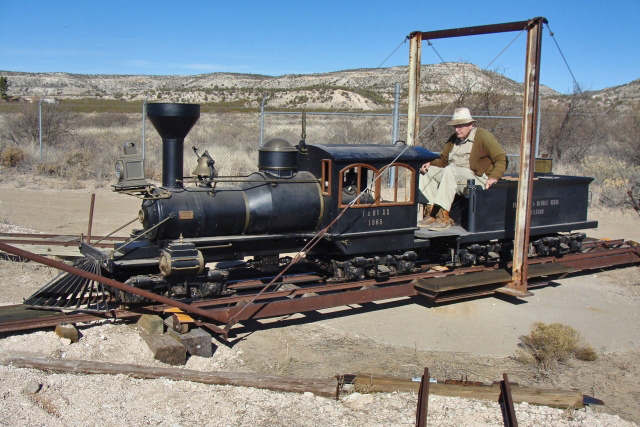
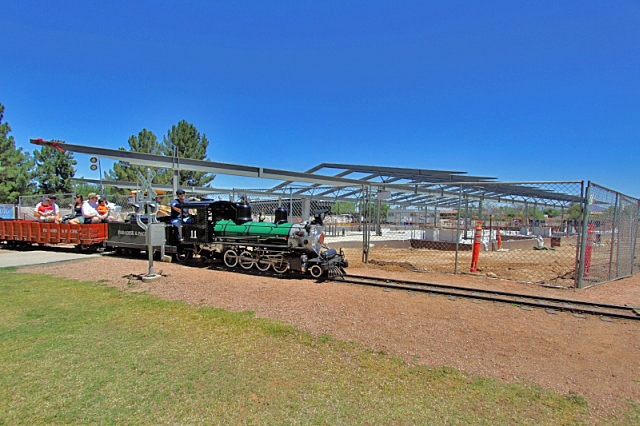
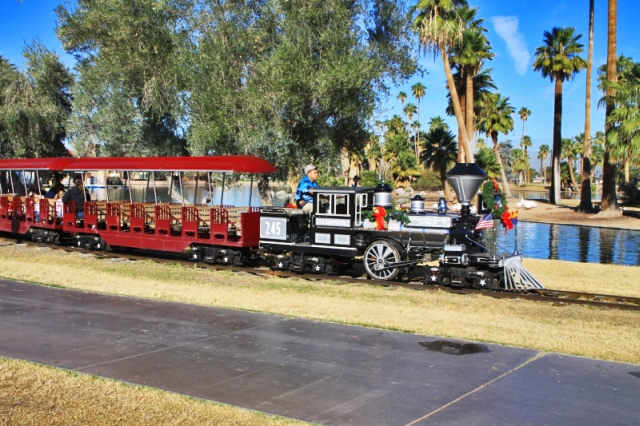
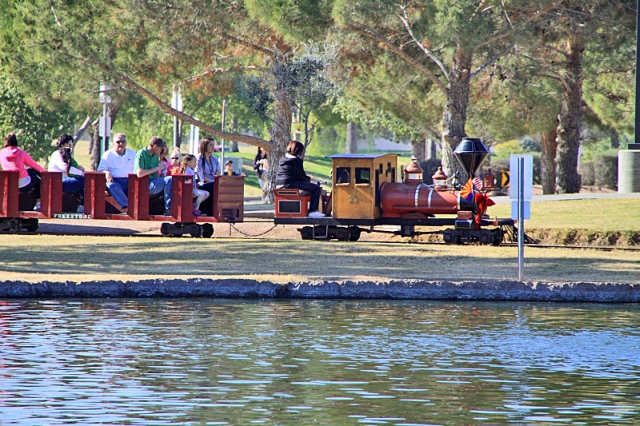
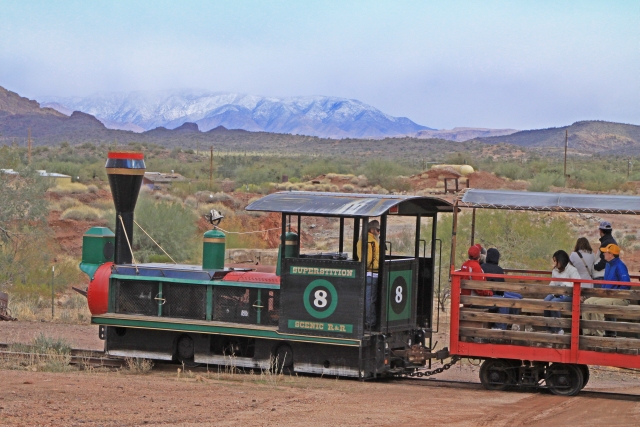
We didn’t have quite as much time to visit railroads this year, but still managed to get out a little bit. The railroads we visited in Arizona were:
|
|
|
|
|
|
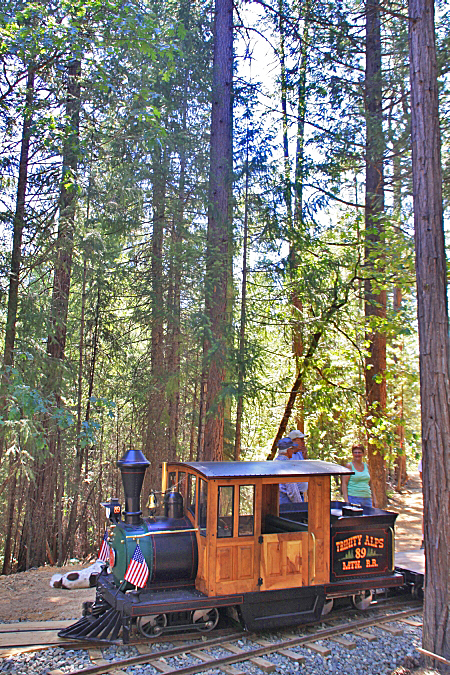
The out-of-state railroads we had the opportunity to visit this year included:

|
|
We had the opportunity to host many friends and guests during the year and look forward to more of the same next year. The ten visitors who traveled the farthest to get here this year, in no particular order, came from Trinity Center, CA, Cincinnati, Chicago, Detroit, Salt Lake City, Yardley, PA, Flint, MI, Shreveport, LA, North Bay, Ontario and Redbridge, Ontario, Canada.
|
We had a very productive year in 2010 and have lots of plans for 2011 and beyond including:
We started our website in June of 2002 not knowing if many people were interested in large-scale trains, the construction of our railroad or our shop projects. Since then, there have been more than 75,000 visitors to our website and many have shared thoughts, ideas and encouragement. If you like what we are doing out here, drop us a note. We hope you’ll keep coming back to visit our website in 2011 and beyond.
Have a Great New Year and Happy Railroading Everybody!
|