2008 Arizona and Pacific RR Current Projects
Arizona & Pacific RR Projects 2008
Arizona and Pacific Railroad Project Pages: Current Projects
/ 2020 Projects / 2019 Projects / 2018 Projects / 2017 Projects
/ 2016 Projects / 2015 Projects / 2014 Projects / 2013 Projects
/ 2012 Projects / 2011 Projects / 2010 Projects / 2009 Projects
/ 2008 Projects / 2007 Projects
Back to The A&P RR Home Page
         
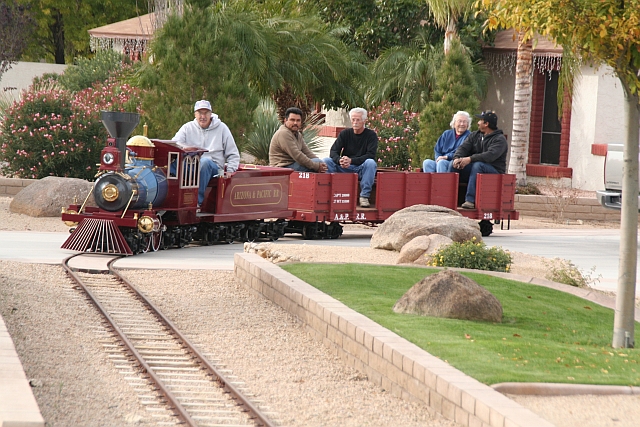
This page of the website follows projects taking place at the Arizona and Pacific Railroad
and gives visitors a chance to see the progress that was made in 2008.
January
2/09/08
         
Significant progress was made on our enginehouse project in January. Our second electrical inspection planned
for the last week of December was delayed by the holidays. That inspection as well as our “Service Section”
inspection and “Final” took place the first two weeks of January and went very smoothly. The electrical is
complete and it sure is nice having service out there without dragging 200 feet of extension cords!
         
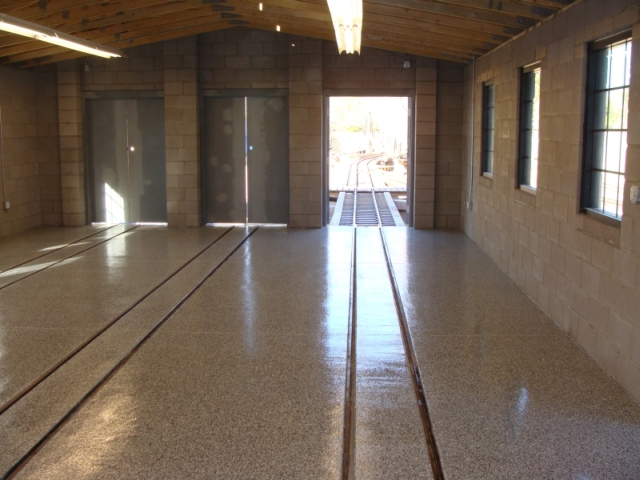
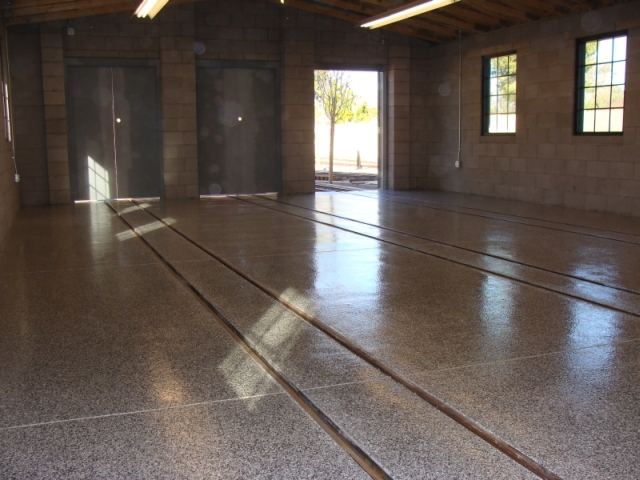
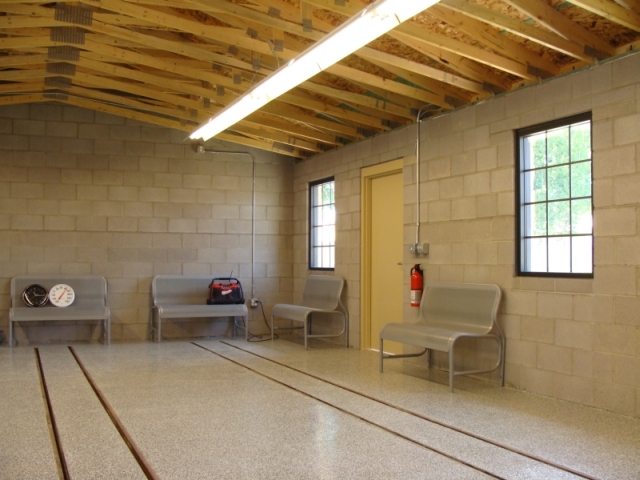
The next project we tackled was an epoxy floor finish for the enginehouse. As most train owners will tell you,
each engine has her own personality, idiosyncracies and leaks. There is a practical limit to eliminating every
leak so I wanted to coat the floor such that cleaning up afterward is as easy as possible. We met with several
vendors and made our material, color and contractor selection. We were initially told it would take four days to
complete the floor. Well a cold front hit us the same day they started on the floor. This is the desert and can
get much colder than many people realize. We had night time temperatures in the low and mid twenties several days
in a row with highs in the low fifties. This meant instead of applying a coat of material first thing in the morning
and another late in the day after the earlier coat had cured, only one coat per day could be applied. It took eight
days to complete the floor, but was worth the wait. It looks good, has texture to keep it from getting slippery and
best of all oil, hydraulic fluid etc. wipes right off.
Epoxy Finish on the Engine House Floor
|
A&P Engine House Floor
|
         
Our current focus is applying one inch stone veneer to the outside of the enginehouse. We wanted a look reminiscent of
some of the old stone railroad buildings in Colorado and throughout the West. The product we selected is a real stone
product quarried north of Prescott, Arizona and distributed by 3North Stone. We started on the most labor intensive side,
the west face, first. The columns, arches, corners and border around the round logo required hundreds and hundreds of
cuts and made for very slow going. Trust me, you don’t want to know how many hours we put into that first wall. We are
currently working on the south wall and the pace has picked up due to less cutting and our familiarity with the product
and process, but you still don’t want to know… We hope to have all the rock work finished this month – February.
I’ll try to get some photos of the rock work taken and added soon.
         
After we finish the rock work, we will paint the doors and door frames, install the door hardware, sweeps, stops etc.
and get the security system installed.
February
2/15/08
         
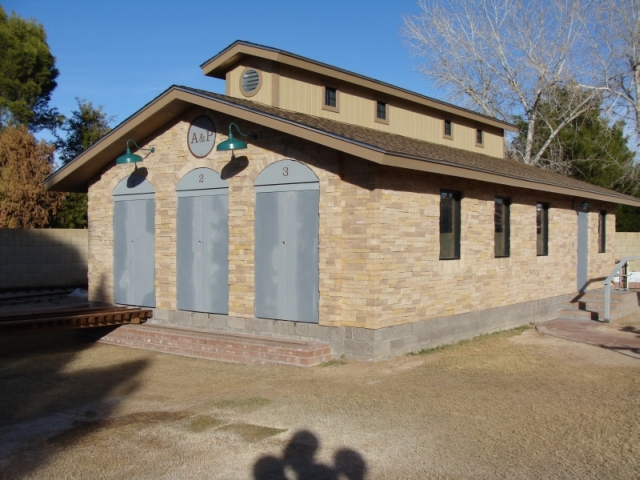
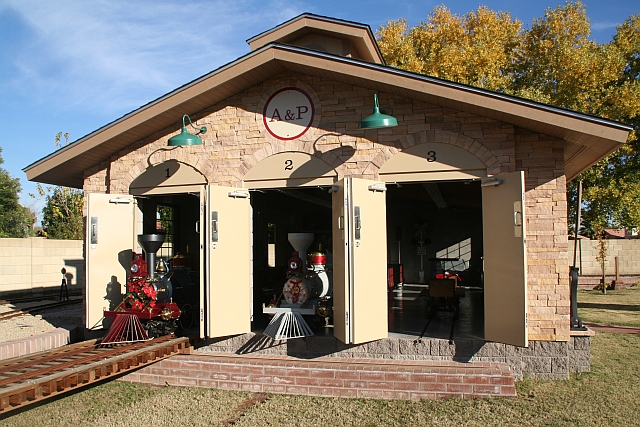
Last week, I stated I would try to get a few photos of our progress on the rock work posted. Well,
as promised, here are a few photos of the rock work on the west and the south sides of the enginehouse.
The columns, arches above the doors and the trim around our logo took seemingly forever, but add some
detail and character to the west face. The two large gooseneck light fixtures also contribute to the
look and put out a great deal of light. The soldier course window sills, the window trim and the length
of the building were the main challenges on the south side. We have the two toughest sides done and have
started on both the east and north sides of the building. We are probably about sixty percent finished
with the rock work overall. We wanted a really distinctive rock look for the enginehouse and we definitely
have achieved that, but to quote a line out of one of the old Rocky movies, “Ain’t gonna be no rematch”
- read no more stone buildings for me after this one is finished.
Rock Work on the West and South Sides of the Engine House
|
March
3/29/08
         
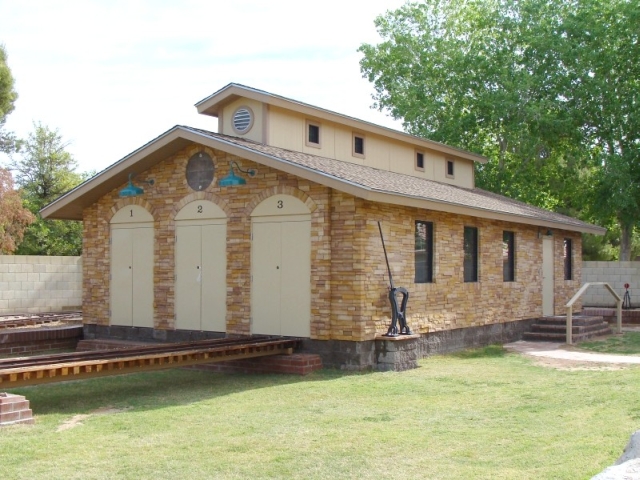
There are still lots of things to do on the interior of the engine house from finish carpentry to mounting
fire extinguishers, but we finally put the finishing touches on the stone work this week. Did I mention how
excited I am that we are done cutting and fitting stone? We also finished the final coat of paint on the doors,
door jambs, arch panels and the hand railing. The doors are back up and we have a good start on getting the balance
of the hardware installed. We have already run the wiring to tie the security system in the engine house into the
one already in place in the superintendent’s house. After the door hardware is all in place in the next week or
so, we can get the sensors hooked up and won’t be too far from moving our equipment into its new home.
         
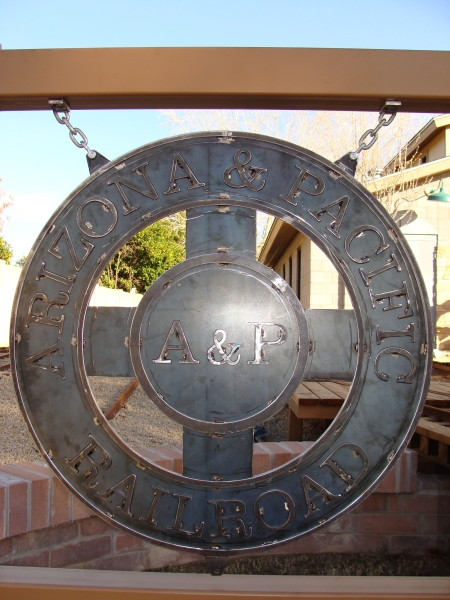
We still have a bit of finish work on the exterior to complete with the two logo signs that have to come down and
have some finish grinding and the rings and letters welded in place. Plenty of seam sealer, a few good coats of
paint and a nice layer of clear coat later and they will be ready to reinstall. We also have a stone pedestal which
needs finished to display our harp switch stand.
Enginehouse with painted doors and completed stone work
|
         
As our engine house project is beginning to wind down, we have started on another significant project in the
reassembly and conversion to battery power of our second S-16. Our first S-16 (No. 1) runs great with its Wisconsin
engine and has plenty of power for all our needs, but even with its muffled exhaust it is a bit loud for our “urban railroad”.
We have neighbors on each side who are somewhat less enthusiastic about railroads and railroading than we are – I know hard to believe!
         
We rebuilt the original power trucks and drive lines of our No. 2 with all the standard parts. The engine, transmission
and fluid clutch were replaced with a 48 volt electric motor and drive assembly designed by Brian Stepaniak of Scaled Plus in Ontario Canada.
The battery tray and all components were designed to fit into the original brackets and mountings holes on the S-16.
It is a very clean and professional conversion. We have her assembled and have made several break-in runs with her. We still
have a couple of minor bugs to work out with a faulty DC converter and a problem draw bar, but we have more power and top end than with
our Wisconsin, no leaks, no exhaust and no noise. We also have a parking brake in addition to the factory original vacuum brakes – all things
other G-16 and S-16 owners can appreciate. We haven’t run enough yet to have a good feel on the actual run time versus calculated run time,
but the calculations indicate 8-10 hours of run time with three fully loaded cars per charge.
Brian Stepaniak takes The Sandusky for one of her intitial runs
|
         
It appears to be a great solution to many of the challenges faced by G-16 and S-16 owners as their unit’s age and engine, transmission and
clutch parts become more scarce and expensive. It also helps private owners and park railroads effectively deal with neighbors concerned
about noise and pollution. The only problem so far – it may be too quiet…
         
Anyone interested in contacting Brian can access his website at
www.scaledplus.com or call him at 705-663-1546. Tell him you heard about him here.
April
4/05/08
         
We made some progress on the engine house in the last week. The logo signs on the building have been
completed and installed. The pedestal for our harp switch stand has been completed and the switchstand is
in place – forgot how heavy that thing is. The four interior fire extinquishers have been mounted. Although
a great deal of door hardware awaits mounting, the dead bolts are finally in place and the doors can be locked.
The main logo sign has been completed and mounted in its frame; we still need to paint and mount the lower sway
bracket. Now the engine house focus can shift to the interior and we will get started on the balance of the
finish work.
Harp switchstand on completed pedestal & painted logo sign installed
|
Now we can focus on the interior of the engine house
|
A&P main logo sign painted and mounted in it's frame
|
Laser cut letters & rings are welded to both sides of this A&P logo sign
|
May
5/24/08
         
We're making progress at the Arizona and Pacific Railroad despite the crazy weather. Last Sunday it
was 109°F while we were working on the walkway to the loading platform. Dave's job had him in Dallas
on Thursday and when he returned it was 55°F and there was an inch of rain at his house (~15% of our annual rainfall).
Weather permitting we'll have an update soon.
         
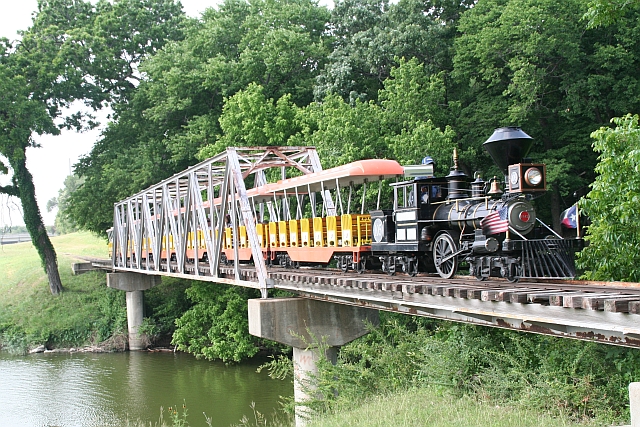
I didn't get any photos at the A & P RR last weekend but I did visit the Forest Park Miniature Railroad
in Fort Worth while I was in Texas this week.
You can read the spotlight article of my trip here: Forest Park Miniature Railroad
Engine #105 at the Forest Park Miniature Railroad
|
5/10/08
         
We shot some video of the Arizona and Pacific that you can see by clicking here:
Arizona and Pacific Video Page
Engine #1 Phoenix poses on Trestle #5
|
5/05/08
         
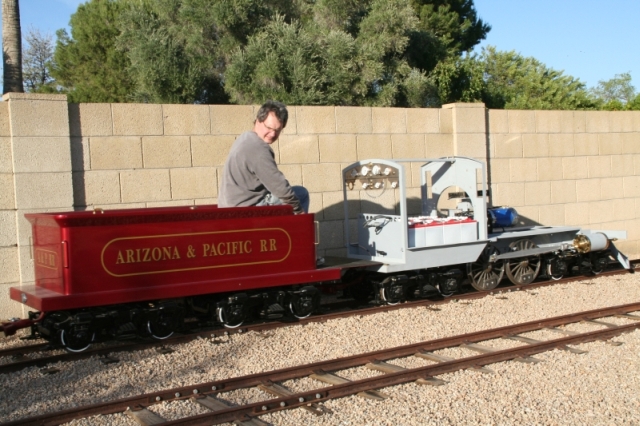
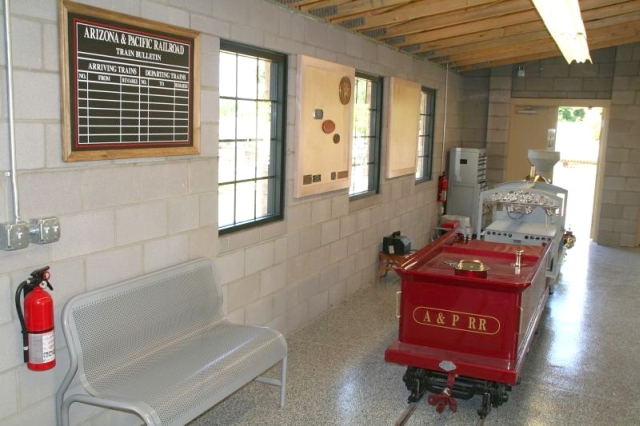
We have been working on several projects in the four weeks since the last update. We finally got the telephone,
clock and thermometer mounted in the engine house. The stereo and TV shelf is mounted in the corner so I can work
on trains and have something to listen to in the back ground. We also got the A & P RR train schedule board up on
the wall. We bought a new craftsman toolbox and moved many of the tools used exclusively on the trains from the
garage into the new box in the engine house. We also mounted our grand scales railroad builders plate display in
the new engine house. We have several original and a couple reproduction builders plates from past and present
manufacturers of 15 – 24 inch gauge park locomotives on display. Among our favorites are an original Sandley and
Cagney and a reproduction Chance plate. We have plenty of room for more and are always looking to add to the collection…
We've Begun to Utilize the Inside of the Engine House
|
Display Showing Our Collection of Builder's Plates
|
         
We have started fitting and mounting the various brass components to engine No. 2. We still have quite a way to go,
but have made noticeable progress. We are continuing to fine tune her operation with brake adjustments, wiring dash gauges
etc. Nos. 1 and 2 both make their home in the new engine house now.
Engines Number One and Two Inside The Engine House
|
         
We extended our pedestrian walkway and constructed a 16 foot long by 33 inch wide loading platform which makes it easier to
get in and out of our cars. We still have a bit of unfinished work to complete to finish the wood planking where the pedestrian
walkway crosses the first set of tracks. A covered (read shaded) waiting area will be to the east of the pedestrian crossing.
We haven’t quite finished our two maintenance of way flatbed cars, but one was thrust into service with a make shift piece of
plywood as decking on our loading platform project. We have resumed work on an additional siding which will allow us to enter
and exit the engine house without using the turntable.
The Loading Platform is Nearing Completion
|
Maintenance of Way Car Pressed Into Early Service
|
         
We also had an open house and had railroad guests on two other weekends during the month and during the “off Saturday” the
Arizona and Pacific Railroad and its structures served as the backdrop for wedding photos (no not Dave or I); who says people
don’t dress to ride the railroad anymore… Coming soon, Dave is working on a video of A & P No. 1 in action. Happy Mother’s Day!
June
6/7/08
         
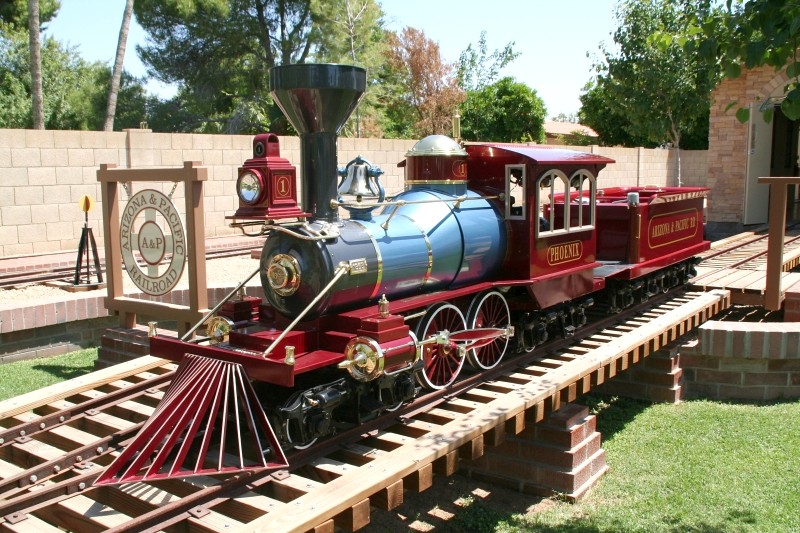
Fitting and mounting the various brass components to engine No. 2 continues. We made three custom brass bands for the boiler
and are still adjusting our custom made stanchions and handrails. We have quite a way to go, but are continuing to make
progress.
         
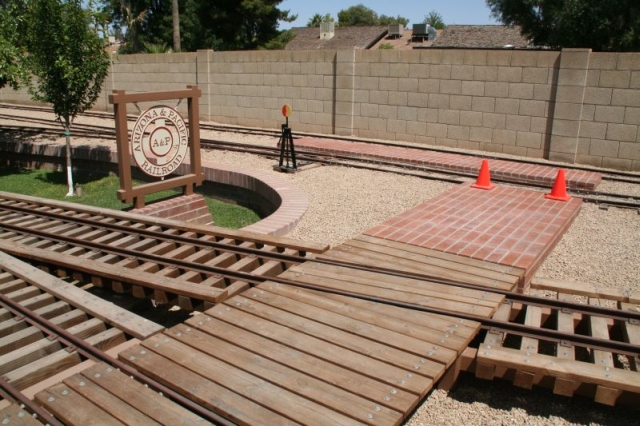
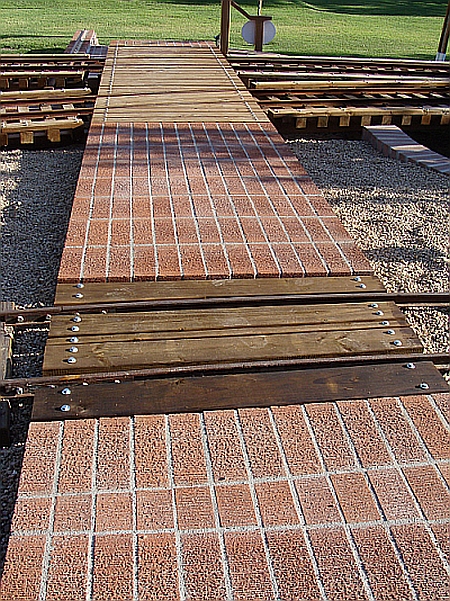
We completed the last of the wood planking on our pedestrian walkway which allows guests to walk comfortably and safely across
the three sets of tracks on their way to reaching our primary loading area. The 16 foot long by 33 inch wide loading platform
was finished and discussed in a previous update.
Pedestrian walkway to the loading platform
|
         
We have resumed work on an additional siding which will allow us to enter and exit the engine house without using the turntable.
This siding involves rebuilding the trestle over Rock Creek once again; this will be the fourth incarnation of our trestle at this
location in 12 years. We are widening it to facilitate a switch to the new siding. We are also building the new switch that will sit
on the expanded trestle. We have patterned it after our existing MTC/Allan Herschel switches. The switch stand will be located just
south of the trestle and the points and frog are on the trestle itself.
Building a switch on trestle #1
|
         
We did quite a bit of digging to level the ties of the partially completed siding with the mainline and added several additional ties.
A great deal of work remains on the siding especially with rail bending, but we hope to have the switch portion completed and operational
this month.
Digging down to level the new siding
|
         
The rail bending is a slow, tedious and physical process for us. Friends of ours in California initially rolled eight pieces of rail that got
us started with our curves years ago. They had a beautiful homemade bender that utilized a Wisconsin engine, hydraulic pump and rollers that
matched the profile of the 12 pound rail exactly. They set the adjustment on the bender and the powered rollers pulled the rail back and forth
curving it to the desired radius.
         
Our regular process is a bit different. We use an old fashioned “Armstrong” bender. We set the bender in place, crank the shaft three 90 degree turns,
loosen it and move the bender six inches. We repeat this process until we reach the end of the rail and then reverse direction and work our way back to
the other end of the rail. It may take several passes until we get the smooth radius curve that we desire. We actually have a hydraulic version of our
manual bender and it is a great deal less work, but we just don’t get the same “baby-bottom smooth” curves with it and thus it rarely gets used. Our
“old school process” may be one reason we cringe when a NEWBY asks “where did you buy those curved track panels that you bolted together for your curves?”
"Armstrong" rail bender
|
         
We also started on a longer range project and disassembled the power trucks of our G16 last week. The worm gears look great and I was very pleased with
that turn of events. We will replace the bearings and seals and add brand new wheels. The axles are fine. The vacuum cylinders will be rebuilt and new
brake shoes will be added as part of the process. The copper vacuum manifolds are a mess and we will build two more as replacements. The truck frames
will go the bead blaster this week. Our G16 won’t be placed back in service until next year, but having another project that I can work with inside when
it is 116 degrees outside is always nice. Happy Father’s Day!
6/22/08
         
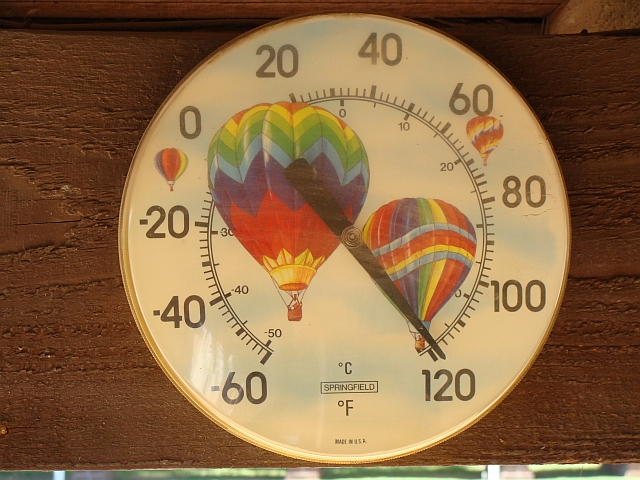
Well, summer has definitely arrived on the Arizona and Pacific. Saturday the 21st was the first full day of summer and
the thermometer in the shade on the back patio read 118°F at 4:30 and climbed to 119°F before heading back down. This is the
desert and it is supposed to be hot this time of year, but anything over 110°F and it is tough to stay motivated to get
much accomplished out there. The heat pulls the water and energy right out of you.
First day of Summer
|
         
Despite my whining, we have made some progress on our new switch since the last update. It still needs some adjustments,
but the switch stand has been installed and the switch is functional. We continue bending rail on the siding we are constructing
and a few feet of additional rail has been tied down. The ties have been spaced and some ballasting has been completed.
Switch on trestle #1
|
         
We hosted some railroad friends from Flagstaff, Arizona early last weekend and everyone had a good time. The pump car, speeder and No. 1
all performed well. By the time we started to get No. 2 out of the engine house, it was just too hot to be much fun and we decided to leave
her in there. That will be the last of the “tours” until the end of September when the weather becomes a bit more accommodating.
         
The frames of our G-16 power trucks returned from the bead blaster last week. Rebuild and reassembly will begin next month.
July
7/12/08
         
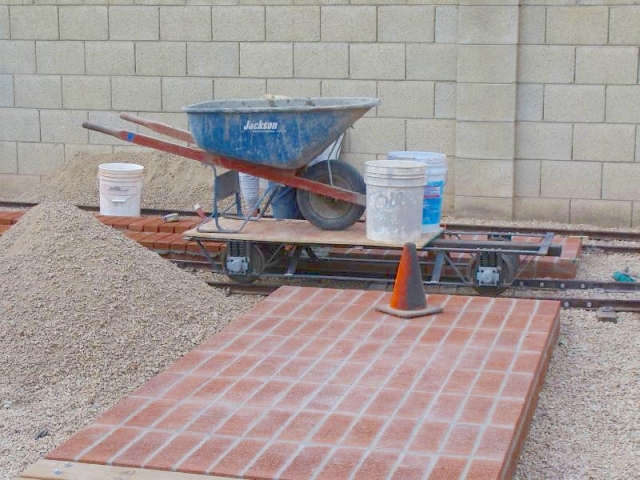
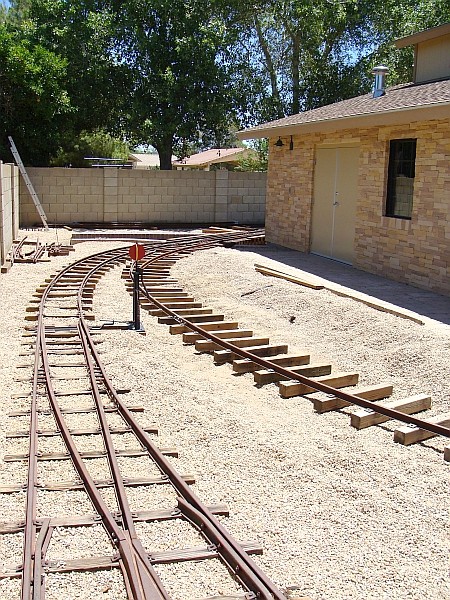
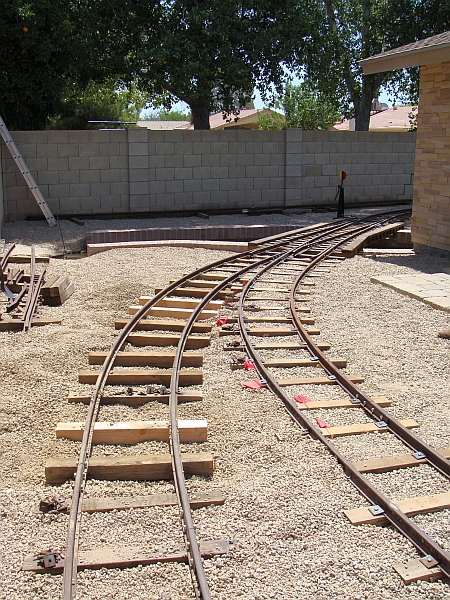
Two weeks ago, we finished the bending and gauging on the final section of rail in our new spur. The spur is 120 feet long.
The final ballast work remains to be completed, but the rail and tie work is finally done. We also have a couple of minor
adjustments to make on our new switch and that will happen later this month.
         
Well, the temperature plummeted to 110°F last weekend so Dave and I seized the opportunity to do some track work. We dug out
twenty-five of the ties we originally set in 1995 and replaced them with new ties. The problem here isn’t water causing the ties to
deteriorate, it is the dryness and the heat. The ties check, splinter and crack after several years cooking in the hot gravel ballast.
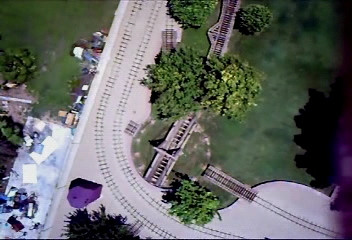
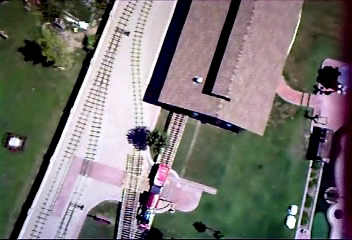
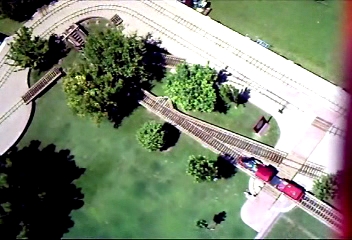
ROW maintenance taking place (left) and new spur (right)
|
         
I had ten more tons of that hot gravel delivered yesterday to finish the new spur and refresh some other areas where track work has created
a need for additional ballast. To assist in moving the gravel from the front street to the rear yard where it is needed, the smallest of the
Flagstaff and Middle Verde Railroad ballast cars is visiting the A & P this week. Constructed nearly twenty years ago, it last saw service on
the F & MV several years ago. She will see 10 tons of activity down here this weekend.
10 tons of ballast
|
F&MV RR small ballast car visiting the A&P RR
|
         
We are still plugging along and trying to get the miserable jobs completed this summer so that we can play the rest of the year. Labor Day to
Memorial Day is the best weather and most fun time of year here, pretty much the opposite of most of the rest of the country. We already have
June behind us – just half of July and August to go!
         
Last year, we contracted with Sean and Melissa Batista of Hillcrest Shops in Reedley, CA to build us two gondolas to pull behind our S-16 engines.
Their craftsmanship is always in great demand and thus they have a waiting list for their cars, but their work is always well worth the wait.
Melissa recently sent me some progress photos which show the cars under construction in their shop. Only the sides, seats and lettering remain to
be completed. We will utilize our own trucks. We plan to have the gons in use on the Arizona and Pacific this Fall.
Hillcrest gondola construction photo
|
         
Rebuild and reassembly on our G-16 power trucks will have to wait a month or two as I don’t want to waste the opportunity to complete our track work in this cool weather – smile!
Here is a photo of the track gang. Dave is on the left and I am on the right. That “but it’s a dry heat” thing isn’t what it is cracked up to be…
Photogenic track crew
|
August
8/23/08
         
We just completed editing last week's video footage taken by remote controlled airplane. You can check out the finished
video by clicking here:
Arizona and Pacific Video Page. It's the second video on the page. We also managed to get a few screen captures that
are shown below.
Screen capture from the video
|
Nice view of the turntable
|
|
The loading platform is visible in this screen capture
|
Phoenix sits on trestle #5
|
|
The engine house and new siding
|
8/16/08
         
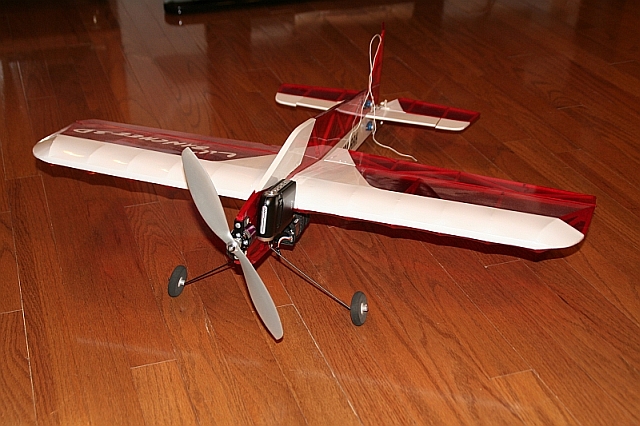
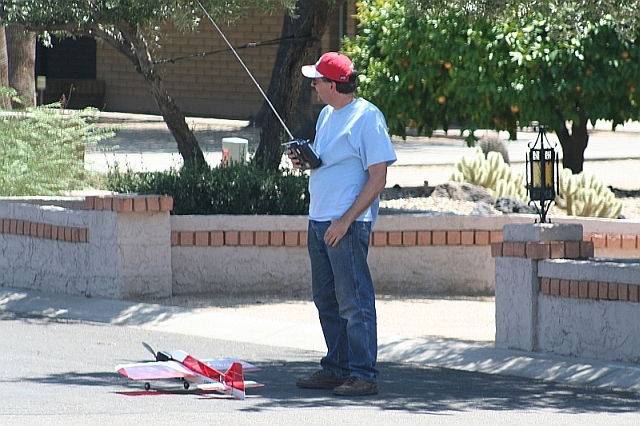
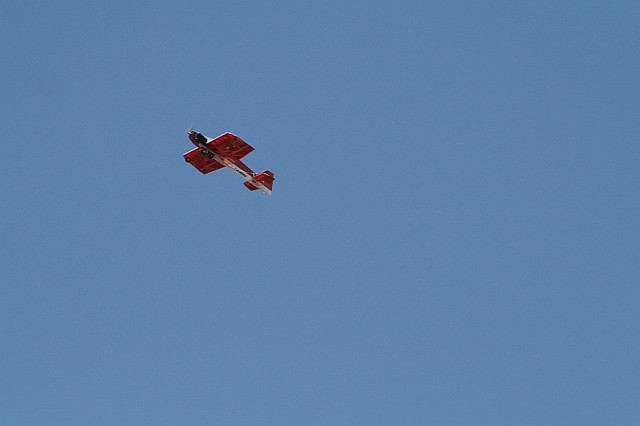
A friend of Dave's named Jerry Carter brought his remote control airplane to the A&P Railroad
today. Jerry's RC plane has a video camera attached and he shot a few minutes of video as he flew
over the Arizona and Pacific Railroad. After we get the video and have a chance to edit it we'll
post it on this site.
"Lil Banchee 3D" Airplane
|
Preparing to take off
|
A&P RR Flyover
|
         
We've been making good progress on the Sandusky. The brass boiler bands, custom made stanchions
and handrails have been installed since the last time she was photographed. The headlight
has been wired and we're working on the plumbing for the vacuum gauges on the instrument panel.
Sandusky
|
September
October
10/08/08
         
It has been a while since I updated the projects page so I figured you deserved an explanation of what
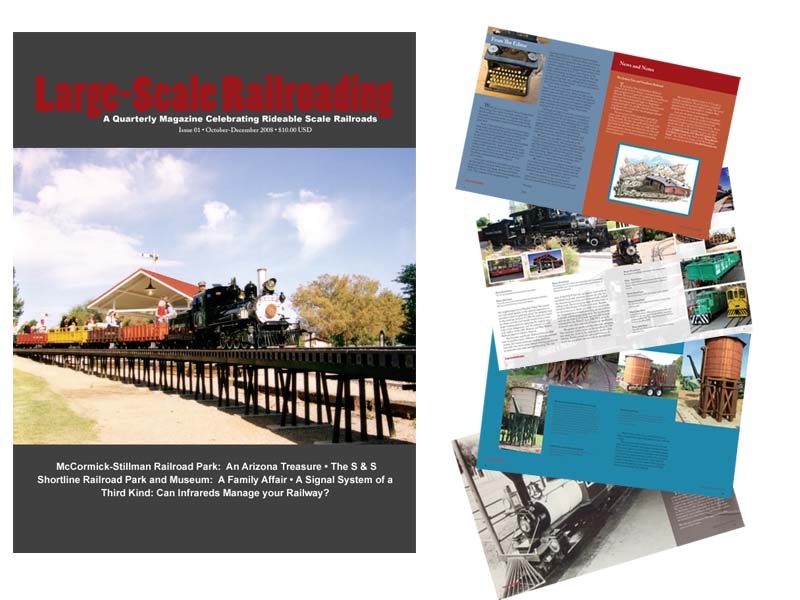
I have been up to the last several weeks. I started a magazine entitled Large-Scale Railroading which
in many ways is a celebration of rideable scale railroads. If you think you might have an interest in
subscribing, check out the link to that website (click on photo below). The inaugural issue ships the week
of October 13. It isn’t a big publishing conglomerate, just me with some help from some friends, but I’m happy
with the first issue and hope it will get bigger and better as we go along. The first issue is 56 pages. If you
like my writing style and sense of humor here, you will probably enjoy the magazine.
Click to visit Large-Scale Railroading Magazine
         
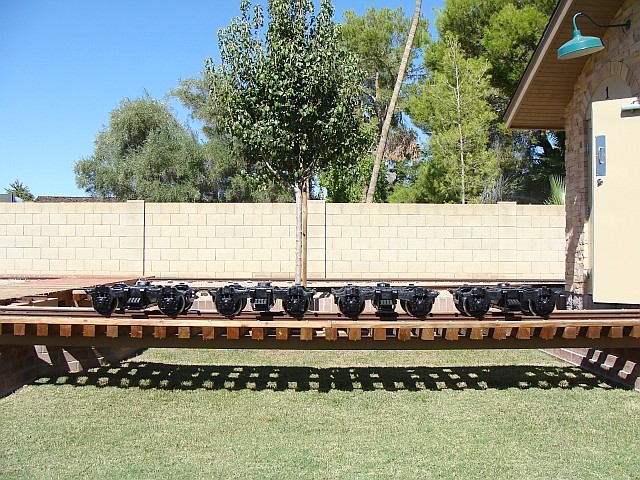
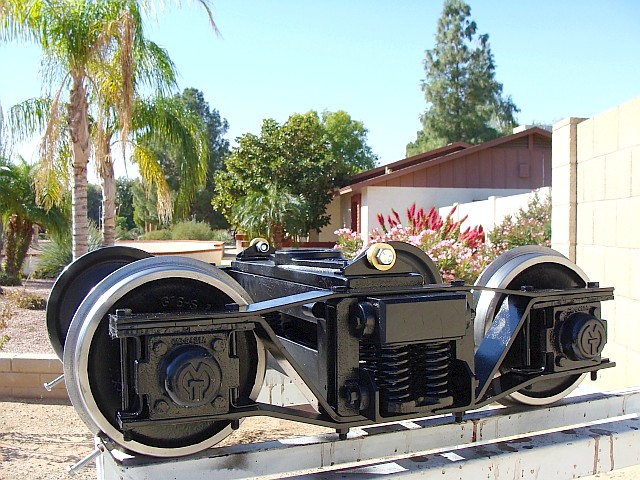
I am in the midst of rebuilding 10 Allan Herschell coach trucks, two power trucks and designing and building four
arch-bar trucks utilizing Allan Herschell wheels and axles. These AH and MTC trucks were all purchased very used
many years ago from a variety of sources and have been stored all this time and I am finally getting to them. The
trucks were completely disassembled and bead blasted. The leaf springs were checked for condition and alignment
and the plank bearings were checked for wear. Wheels and axles were replaced as needed. The bearings and races were
all cleaned and checked for wear. About 60% of the bearings and races were still in great shape and just needed
cleaned and fresh grease; the balance were retired. All the seals were replaced. The wheels and axle assemblies and
the frames were painted separately and then touched up after assembly.
Coach trucks in phase one of their rebuild
|
         
Phase two of the AH coach truck rebuild process will start in November when I start to clean, straighten, paint and
hang brake rigging. I also will be building 12 brake line manifolds as the originals were too mangled to be reused.
Then it is on to brake shoes and vacuum canisters… - no, there won’t be “film at eleven”, but I will keep plugging away.
Four coach trucks being rebuilt
|
         
The two power trucks are apart and the journal boxes have been rebuilt. The bearings and seals for the gear boxes are now on site
and I hope to have these power trucks done early in 09 as time permits.
Power trucks, bearings and seals for rebuild
|
         
I am also about half way along in building two small (4 foot long and 6 foot long) MOW flat cars that can be used to haul tools
and other materials back and forth to assist in maintenance and new construction. The MOW cars also utilize Herschell wheels and
axles, but not its trucks.
         
There are three major reasons why I have tried to build as much of our rolling stock as possible out of MTC/ Hershell wheels and axles.
One, it is technology proven over time. Two, the bearings, seals, axles, wheels and other components are the same on most of our equipment
thus I know the parts are available and the parts shelf doesn’t have hundreds of different parts. Okay, it does have hundreds of different
parts, but not thousands… Three, mixing and matching multiple wheels and flanges can make for an interesting afternoon.
         
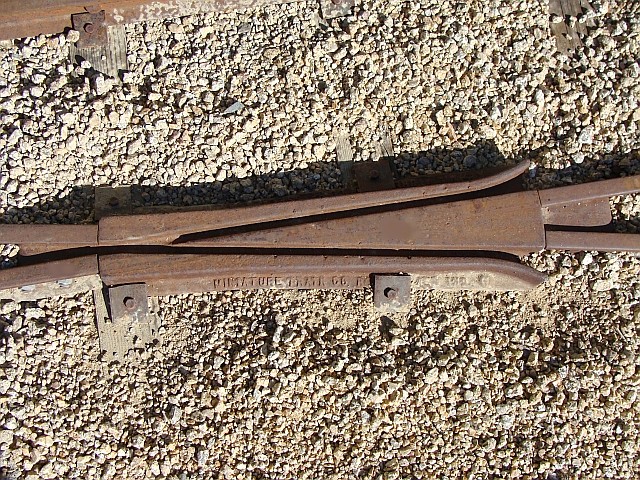
The Arizona and Pacific Railroad utilizes cast frogs of the Miniature Train Company or Allen Herschell variety on all but one of its switches.
The frogs are exceptionally smooth when MTC and AH wheels or wheels which follow those wheel and flange profiles are used. Wider and deeper
flanges as well as taller wheels make for a rough ride through the frogs and frequently the ride gets even rougher through the gravel…
The real “fun” starts getting the wheels back on the rails.
Miniature Train Company Cast Frog
|
         
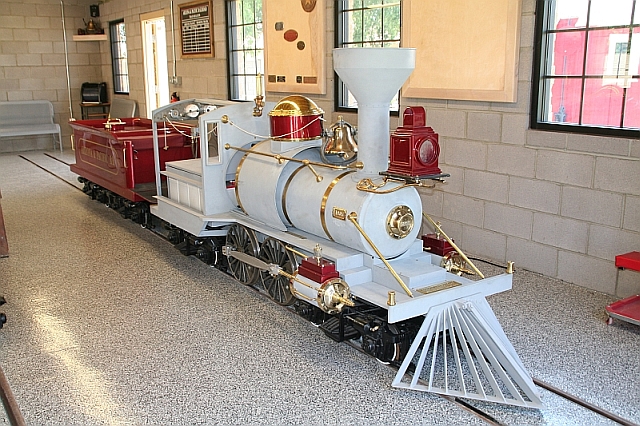
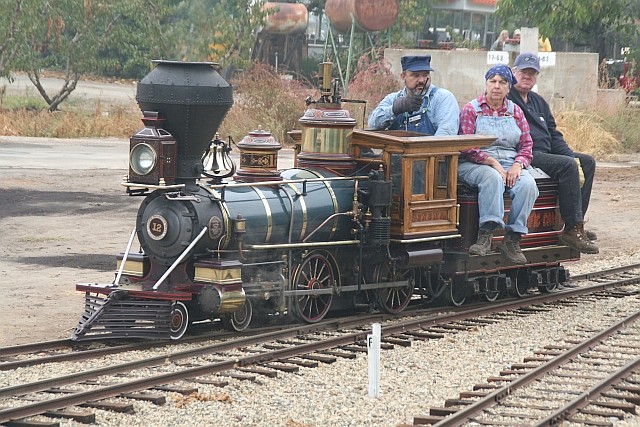
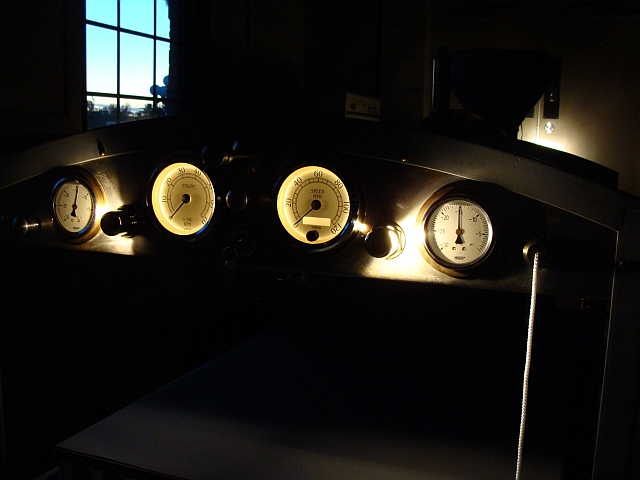
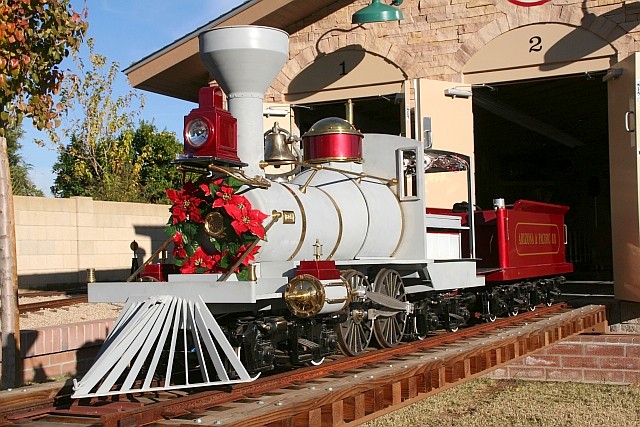
Progress continues on the “Sandusky”. The plumbing for the gauges is complete, some additional wiring is finished and a number of “odds and ends”
have been finalized. The headlight sealed beam and retaining ring have been installed. You would think that would be an easy task – well not so much.
The headlight pocket was originally designed for a 6 volt sealed beam in a style which was slightly thinner. Problems arose when the retaining ring
grove was not accessible with the new 12 volt sealed beam in the pocket. Lots of adjustments, modifications and hours later, the headlight and retaining
ring are in place and look pretty good. The “to do” list on No. 2 is getting shorter.
         
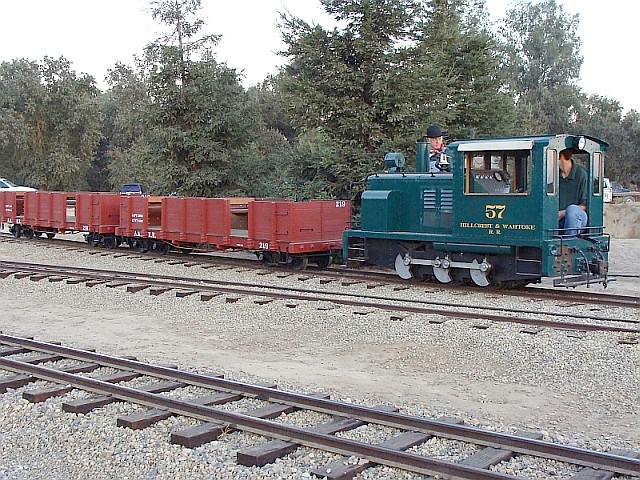
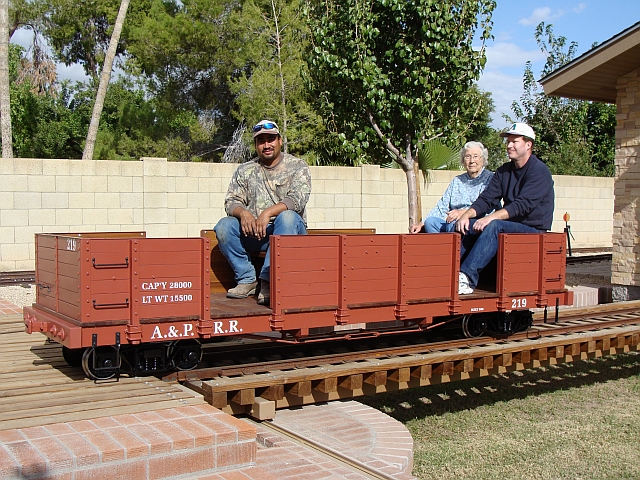
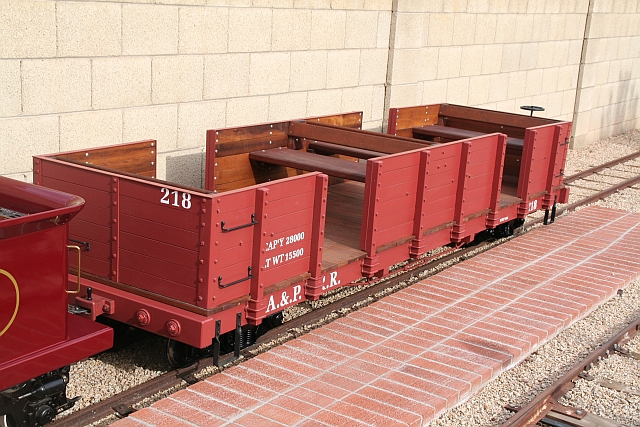
Our four arch bar trucks which also utilize AH/MTC wheels and axles are finally nearing completion. They will go under our two gondolas built by Hillcrest
shops. The cars will get their “christening” the weekend of October 11 and 12 at the Reedley Railfest held at the Hillcrest Shops in California. They were
a couple of cars short for their festival so we volunteered our cars which will be rolling on their trucks for the weekend. We plan to have the cars here
by the end of the month, so I better quit typing and get going and get some more work done on the trucks. Have a great weekend everybody.
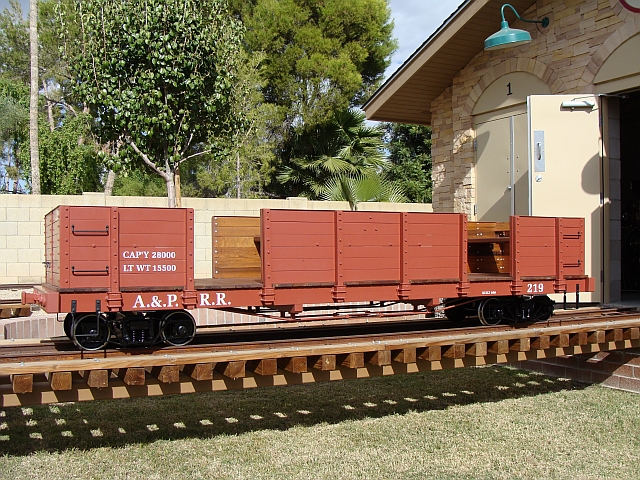
November
10/31/08
         
Several months ago, I contracted with Sean and Melissa Bautista at Hillcrest shops in Reedley, California
to build us two gondola cars. They are always busy building or restoring cars and engines, laying rail on their
railroad or someone else’s and working on various construction projects around their railroad – not to mention
their real jobs. There is always a waiting list for their equipment, but it never disappoints. Our cars were completed
the end of September and we loaned them to the Hillcrest and Wahtoke Railroad for use at their Reedley Railfest held the
weekend of October 11 and 12. They made their public debut on a train lead by the beautiful engine named the “Sonoma” at
the popular and well attended festival.
Sonoma running at the Hillcrest and Wahtoke Railroad
|
Moving the A&P RR gondolas with a Hillcrest Davenport engine
|
Removing the 15" trucks used for Reedley Railfest from the new A&P RR gondolas
|
         
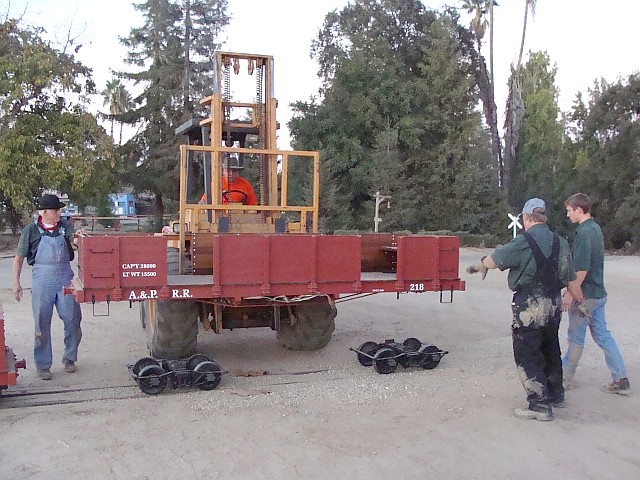
I headed off to northern California bright and early at 5 a.m. (okay not bright, but it was early) on the morning of October 25
with a 22 foot trailer in tow to retrieve our two gons at Hillcrest in Reedley and to pick up a “project” B unit for our G-16 from
our friends at the Panella Pacific Railroad just south of Lodi, CA. Prior to this trip, I thought the interstate highways in Arizona
were in need of some resurfacing and repair work - and they are… Even traveling at only 55mph through southern California, I think
I may have rattled loose a couple of teeth fillings… Unbelievable roads!
Loading the new gondolas onto the trailer for the 16 hour drive to Peoria
|
Loading the B unit at the Panella Pacific Railroad
|
         
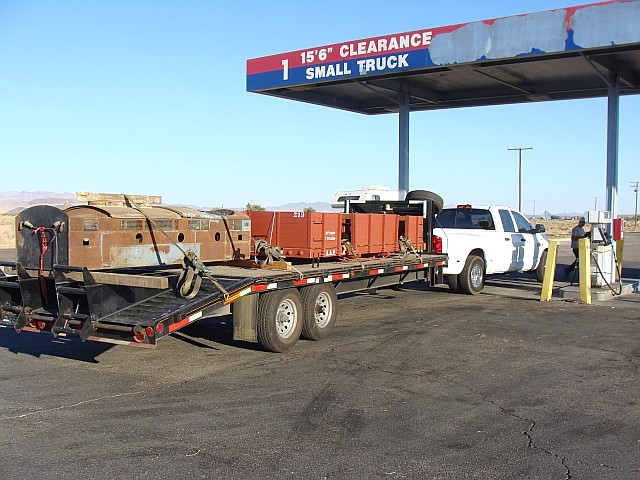
We did get some thumbs-up on the way back from other motorists and props from a really cute gal at a gas pump outside Newberry Springs,
California who knew the B unit was a Miniature Train Company product. How unbelievable is that? No, not that she was really cute and
speaking with me, but that she knew the sheet metal was MTC when most of my railroad friends wouldn’t even have known that… I was so
surprised and stunned, that before I could even ask how she knew it was MTC equipment she and her friend were back in their truck and
driving off…
Loaded trailer heading for the Arizona & Pacific Railroad in Peoria
|
         
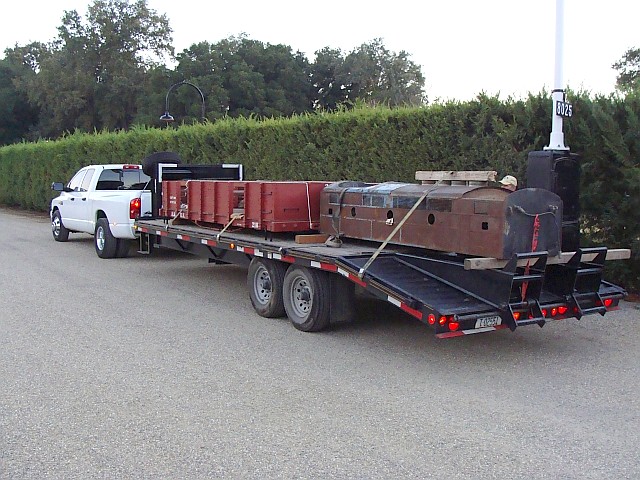
Anyway, after 16 hours of windshield time Saturday followed by 16 more on Sunday, the gondolas and the B unit were unloaded here in
Peoria. Years ago, traveling 1600 miles and 32 hours in two days was an adventure and fun – maybe not so much in my fifties…
It feels good to be home.
         
I planned to have the arch bar trucks that will go under these gons completed by now, but still have some final details and
paint to complete. I will get after that in the next couple of weeks. We should have the gons on the rail and operating here by
Thanksgiving – at least that’s the plan. The B unit will go into storage for now.
         
On another topic, we finished wiring the instrument panel on our S-16 No. 2 the “Sandusky”. The switches for the headlight,
dash lights and tender back up light were installed. The sockets were wired and everything was tested and works fine.
We are currently working on the sound system.
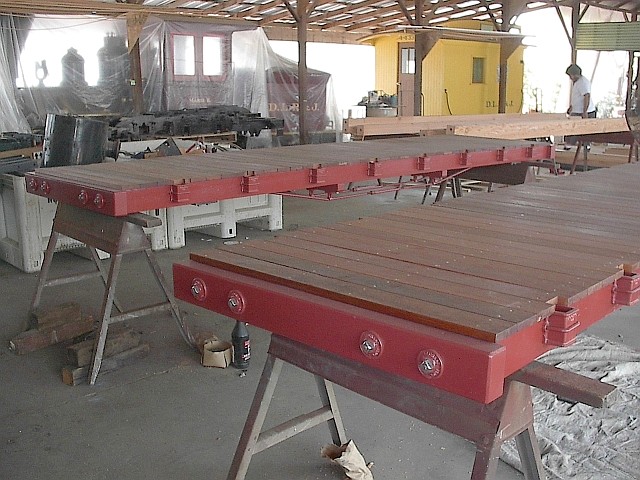
11/23/08
         
The first week the new gons were here in Peoria, they spent on blocks and under tarps in the driveway. The following
weekend we placed temporary trucks under them and got them moved into the engine house where they were again placed
on blocks while we worked to complete the arch bar trucks.
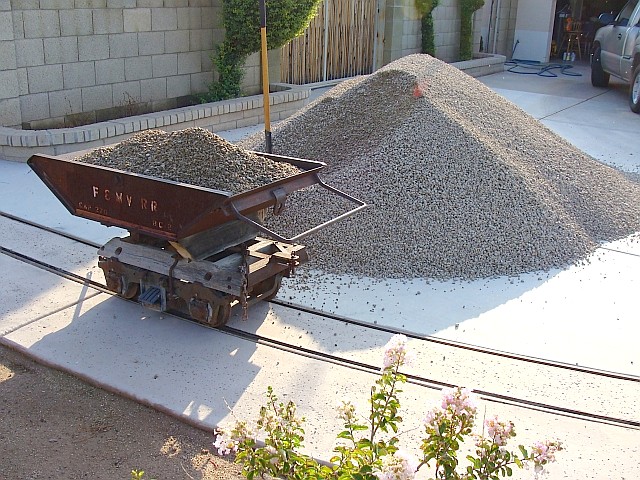
Arch Bar Trucks
|
         
The first set of trucks were completed and painted the weekend of Nov. 8. Late that Sunday afternoon, we got them
under gon No. 219 and she made her first appearance on the A & P. There were a couple of locations where we were concerned
that the clearance might be somewhat tight, but everything was just fine.
Gondola #219 on the transfer table
|
         
The second set of trucks was finished the next weekend and that Sunday we got those trucks under No. 218. We had the
transfer table, turntable and several switches all in use as we repositioned No. 218 behind locomotive No. 1 in stall 1 in the
engine house. No. 219 was moved in behind locomotive No. 2 in stall two of the engine house. Stall three is currently storing
our pump car and will soon house the two speeders as well.
Three passengers tryout Gondola #219
|
         
We are in the process of fabricating couplers for the rear of the two S-16 tenders and moving some wiring and connectors to make
room for a stiffener panel on the inside of the tender frame. If all goes well, that will occur over the long weekend with Thanksgiving.
We purchased a brake wheel assembly from Hillcrest to see if we would like the look of a brake wheel and shaft on our gons even though we
will not have it connected to brakes. It looks good so we bought a second wheel from Sean and Melissa and are fabricating our own mounting
hardware on the second one. We should have both of those mounted next weekend too.
         
We finished the speaker wiring and installation on No. 2 this week and they work fine and sound good. We still have some work to complete
on the handrails and then I need to get after the cab sheet metal and get that finished. The four remaining window frames have already
been bead blasted and are in very nice shape.
The instrument panel on engine #2, Sandusky
|
         
We finished rebuilding (new seals, bearings and wheels) three more Allan Herschell trucks this weekend. The frames were bead blasted,
primed and repainted. They still need new plumbing, brake shoes, and vacuum canister rebuilds as well as rigging adjustments, but we
have a good start on the process and they really want to roll!
         
The Saturday and Sunday after Thanksgiving will be a track work weekend with some rail being cut to allow better expansion in the summer,
replacement of several ties, replacement of lag screws in areas near the lawn with galvanized lag screws and reballasting and leveling in areas.
After those projects are complete we should be good to go for the next few months on our track work.
         
Happy Thanksgiving Everybody!
December
12/26/08
         
The Saturday and Sunday after Thanksgiving was a track work weekend. There were four of us
on Saturday and five on Sunday. It was a long, hard weekend, but we did get a lot accomplished.
We cut several pieces of rail and increased the space between rail ends to better allow for expansion
in the summer, dug out and replaced several ties, replaced the original lag screws in areas near the
front lawn with galvanized lag screws and re-ballasted and re-leveled some areas. We still have several
more ties that will get galvanized screws after the first of the year, but our track in general should
be in great shape for several months.
         
In our last update we shared we had our new arch bar trucks under our two new gons. Prior to positioning
them behind No. 1 and No. 2, we pushed them around the entire layout in both directions to make sure the
trucks were happy and that we had plenty of clearance with switch stands. The cars are 10 inches wider
than the standard S-16 cars and I had calculated that before ordering them, but a slow speed field test
is always a good idea anyway. They fit and roll beautifully.
Gondola 218 waits at the loading platform
|
         
The custom couplers we made for the back of the S-16 tenders are about an inch higher than the couplers
on the new gons, so the “link” we had intended to use wouldn’t work. So we made a custom drawbar to
connect the two. It looked great, but the small radius of our curves created a serious binding problem
on our first pass through our tightest curve. The gon was pushed back into the engine house. We took
a second pass at designing a draw bar and modified the gon couplers by widening the throat significantly.
We also built about an inch of “slack” into the draw bar to make the ride a bit more realistic. We will
see if we like that effect long-term, but we have it for now.
         
No. 1 pulled from the engine house with gon No. 218 in the rear for that gon’s maiden-powered trip around the
layout on December 13th and performed very well. It wasn’t long before several passengers from the neighborhood
and friends from San Diego were aboard. After we knew the changes were a success, we made the same parts for and
changes to gon No. 219.
Passengers take Gondola 218 for a test ride
|
         
We also added brake wheels to the gons for effect. One of the assemblies we purchased from Sean and Melissa at
Hillcrest Shops and the other we fabricated here. We did modify the first one significantly and added spring
tension and a clicking ratcheting effect to both assemblies. I thought it would be a nice effect for the kids,
but every adult that walks past seems to “have” to turn the brake wheel and listen to the ratcheting sound.
They are not actually hooked to the brakes, but they do give that effect.
Custom brake wheel added to gondola
|
         
For years I have had a MTC crossing signal, Allan Herschell crossing signal, MTC two light block (mid 50s style),
MTC three light block (mid 50s style)and MTC Non Electric crossing signal stored in the back of my garage.
Several years ago, Dave and I took them all completely apart and cleaned and repainted everything. We replaced broken
lenses, repainted all the signs, lubricated the bells etc. Then because I didn’t have a place to put them, they went
back into storage. We just custom built some heavy raised plates to mount them to so that I can display them in the
engine house without fear that they will topple over (they are very top heavy) on anyone. I also have a mid 50s MTC
crossing gate that I may rebuilt one day – we’ll see. After being in and out of storage and then being moved, the
crossing signals and blocks have accumulated a few nicks and scratches that need touched up but at least now they are
out where people can enjoy them. In time, we will have a control box out there that will allow people to activate the
signals. If the bells get too annoying those wires may come loose – smile…
MTC and Allen Herschell signals on display
|
         
We finished work on the stanchions on engine No. 2 last week. What a time consuming project that was getting them
set just right and grinding the heads on new bolts in the steam dome to allow the boiler assembly to slide smoothly!
We have just barely started on the cab sheet metal for No. 2, but hopefully will have the cab on the Sandusky in the next
month or so and she’ll look a bit more like an engine.
Sandusky poses for a Christmas photo
|
         
All in all it has been a very busy five weeks. Thank you for checking in and seeing what we are up to out here on the
Arizona and Pacific Railroad. Have a great New Year everybody!
Merry Christmas from the Arizona and Pacific Railroad
|
Arizona and Pacific Railroad Project Pages: Current Projects
/ 2020 Projects / 2019 Projects / 2018 Projects / 2017 Projects
/ 2016 Projects / 2015 Projects / 2014 Projects / 2013 Projects
/ 2012 Projects / 2011 Projects / 2010 Projects / 2009 Projects
/ 2008 Projects / 2007 Projects
Back to The A&P RR Home Page