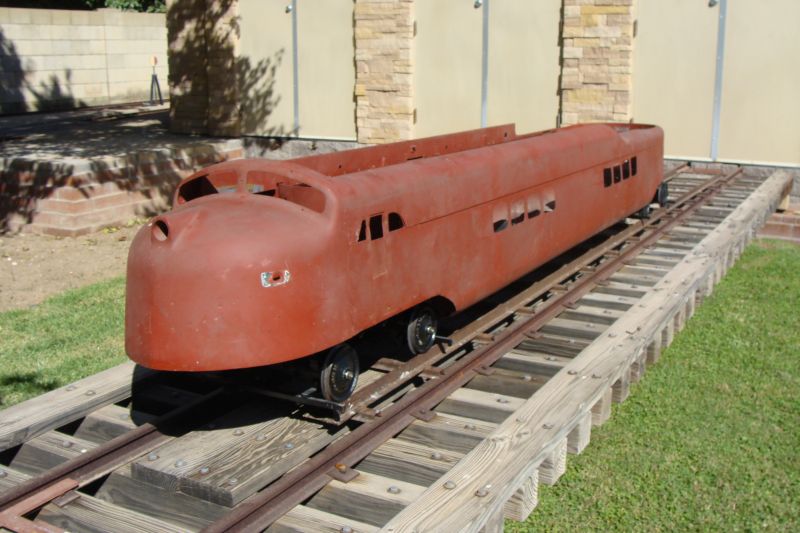
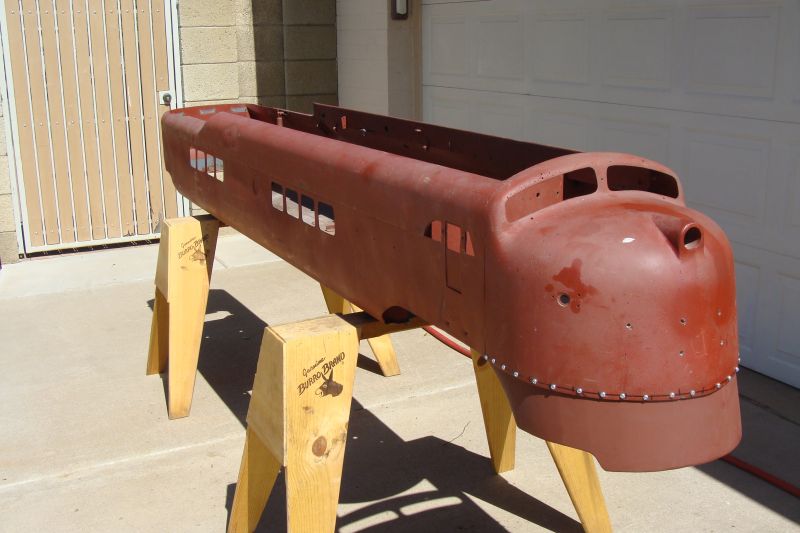
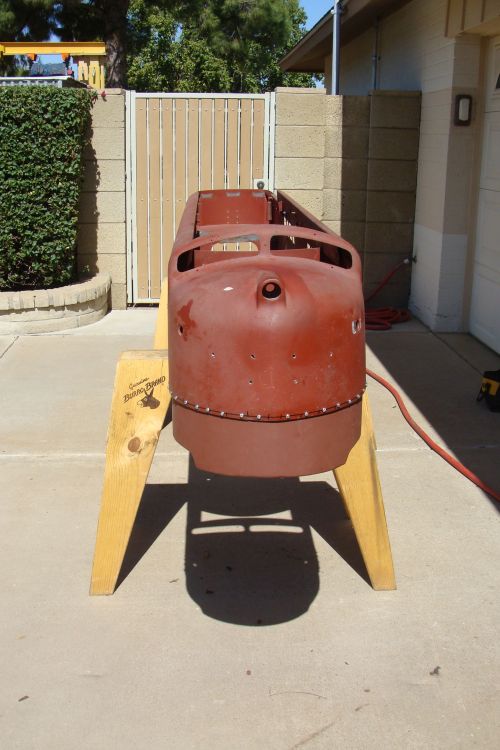
|
01/11/20
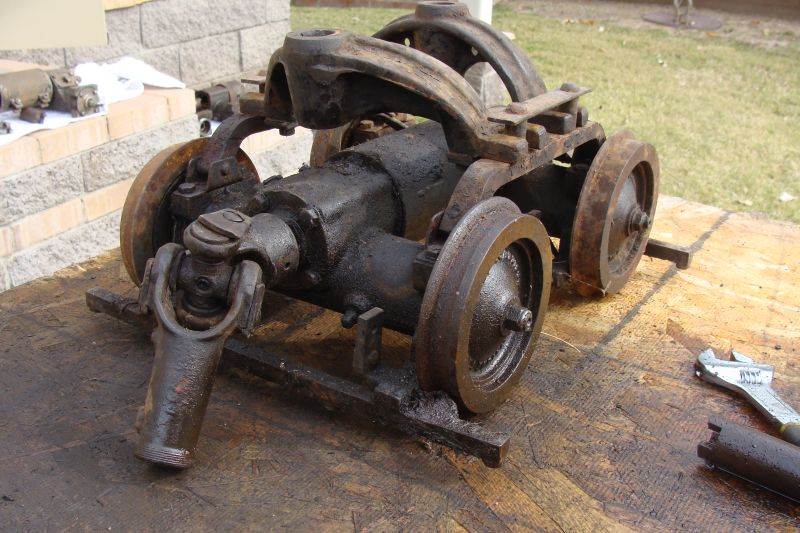
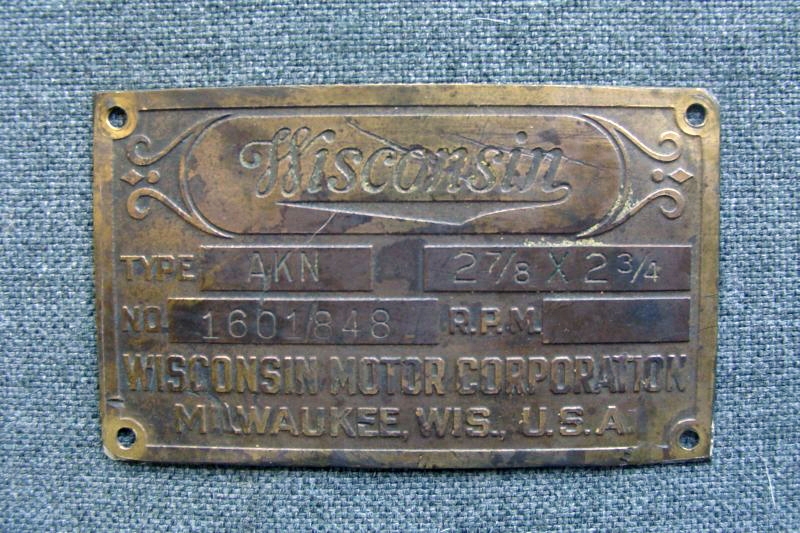
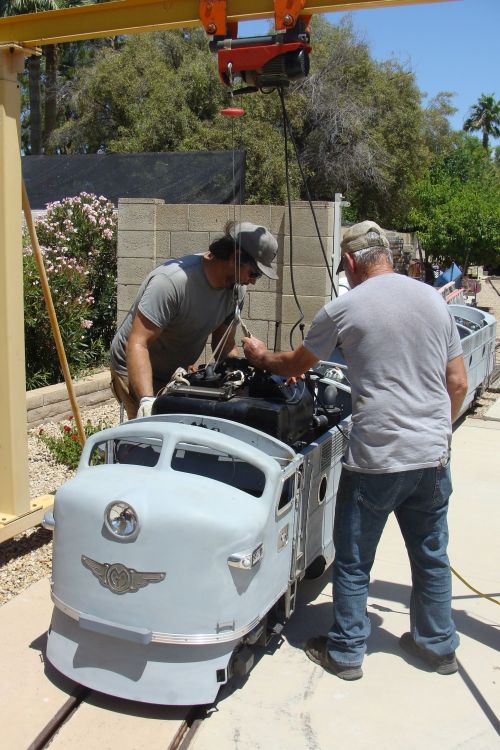
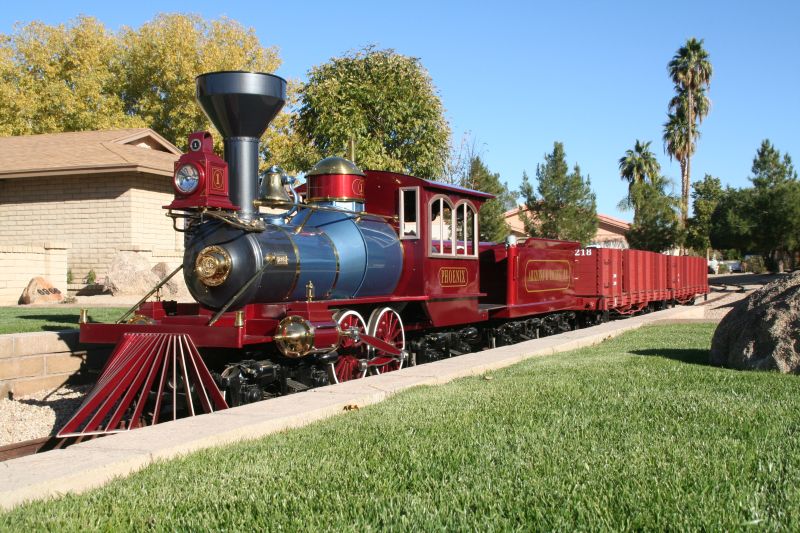
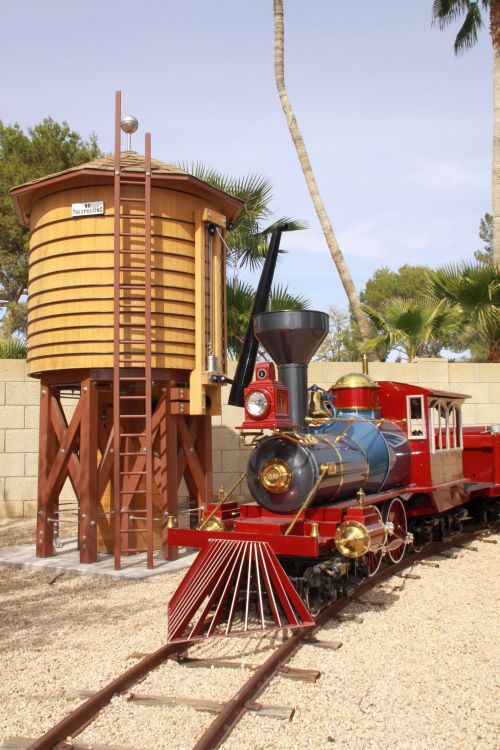
My friend and Wisconsin engine expert, Jerry Graves, came over this month and we got the Wisconsin AKN engine that will go in our G12 running. It had been sitting in storage for some time in Kansas and I was anxious to know if it would run. I spent quite a bit of time last month cleaning all the grease and grime off of it and matching hardware to all the brackets that no longer had any hardware. We changed the oil which was black and filthy and changed the spark plug.
We had to get a little creative with our gravity feed gas can for the fuel supply and used jumper cables from a battery and a short jumper to
get her to turn over. The second try and she started right up and ran well. Once we knew she would run we replaced one of the fluid clutches
which was wobbling all over the place. Here's a
Video of the Wisconsin Engine for the G12 Running
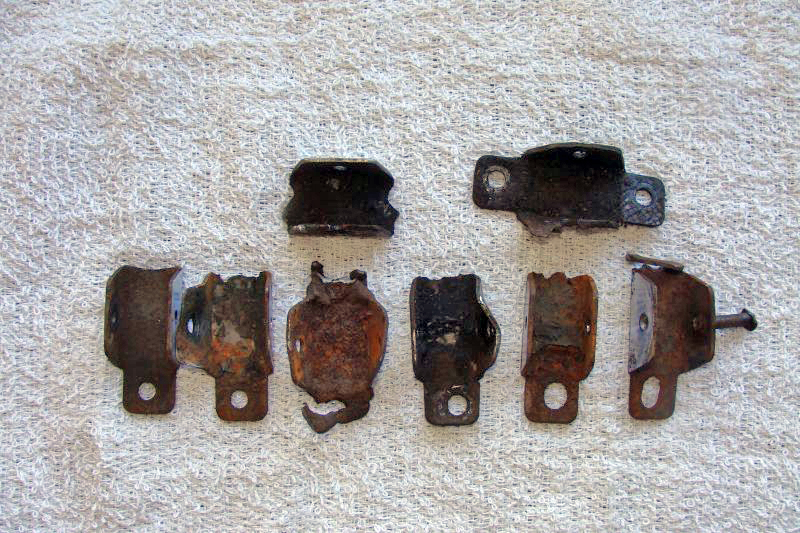
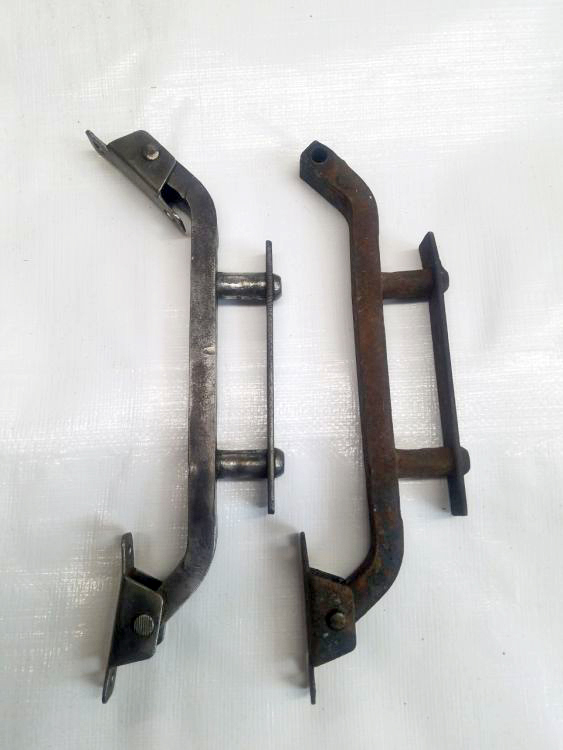
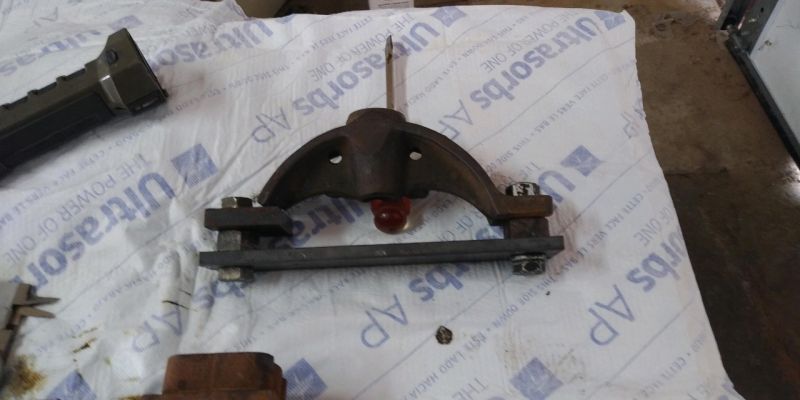
We are still missing some of the throttle and brake linkage, in particular the linkage from the sliding rod brackets on both the brake and throttle to the carburetor on the throttle side and to the motor bracket on the brake side. We are pretty fortunate in that we have the rest of the linkage that I have mixed and matched from several sources over the years. We still need the springs that keep the brake shoes positioned properly and secure in the engine mounting pan, but I am not quite sure what size springs these are supposed to be at this point.
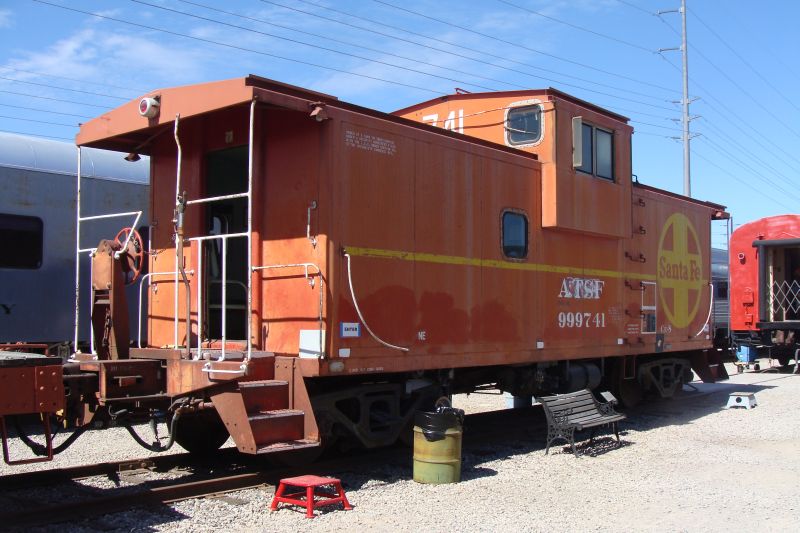
It turns out that our Wisconsin AKN engine is actually a BKN engine. The exhaust port exits the head at 45 degrees instead of 90 degrees as with the AKN. Once you know that obvious distinction, telling the difference is pretty easy. These engines replaced the AKN in the G12 in the mid-fifties. Once I track down the springs and remaining linkage, I will repaint the motor, clean up the linkage and mount them in the really nice mounting pan.
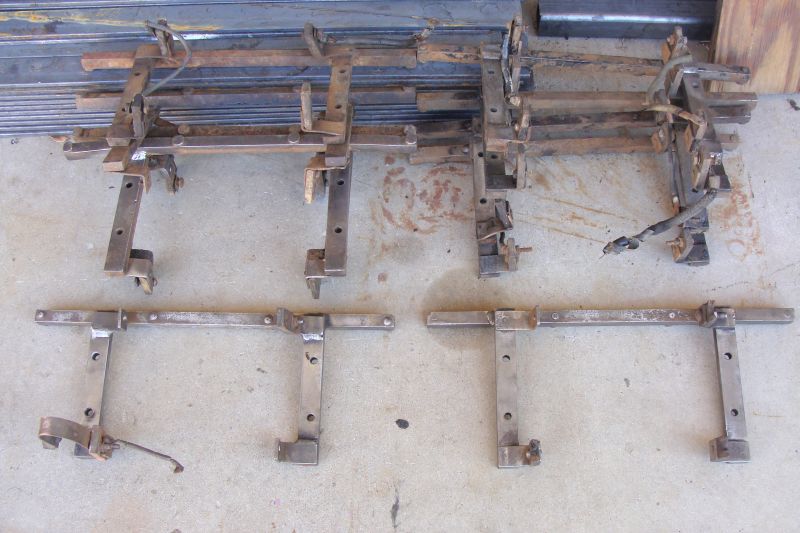
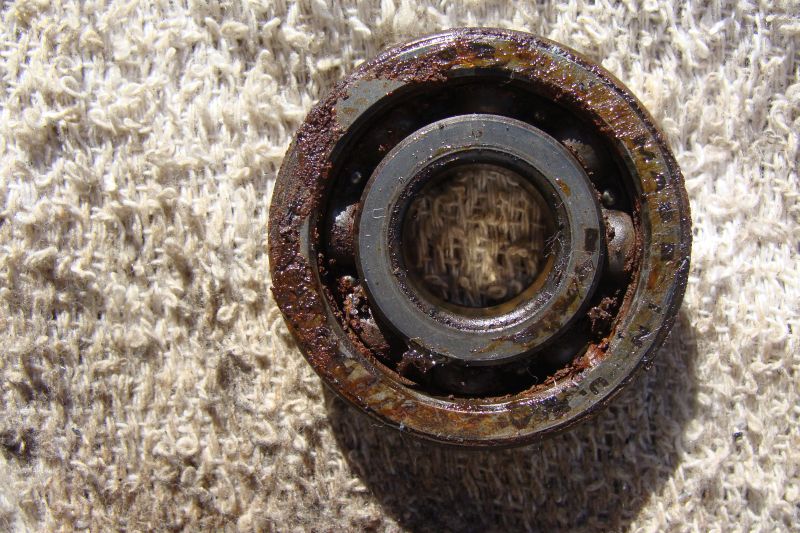
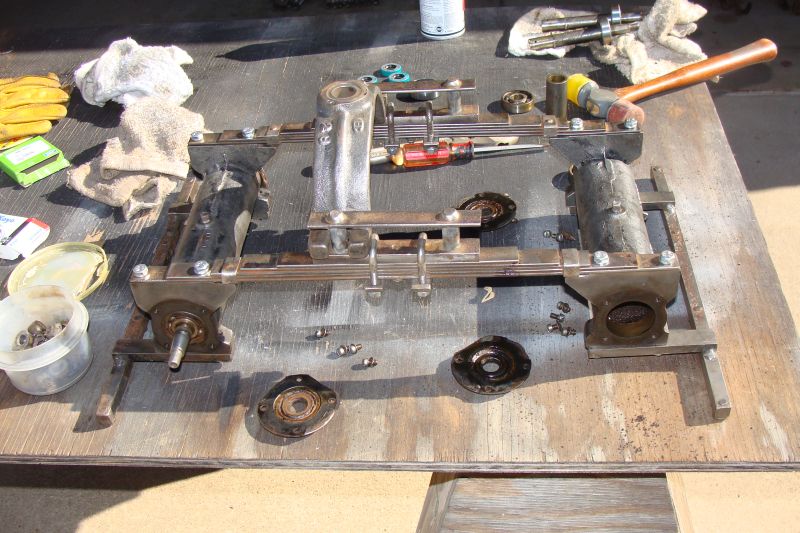
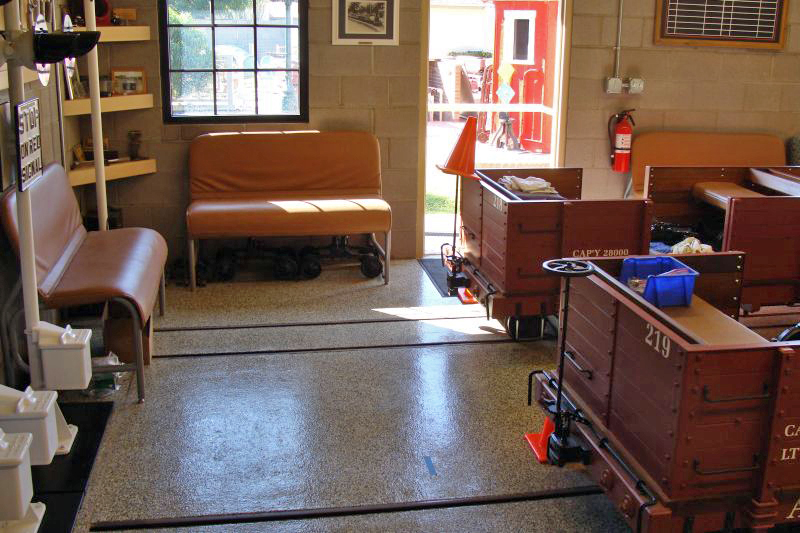
The five E10 coach trucks have been disassembled and cleaned. We will start replacing the bearings and seals in January.
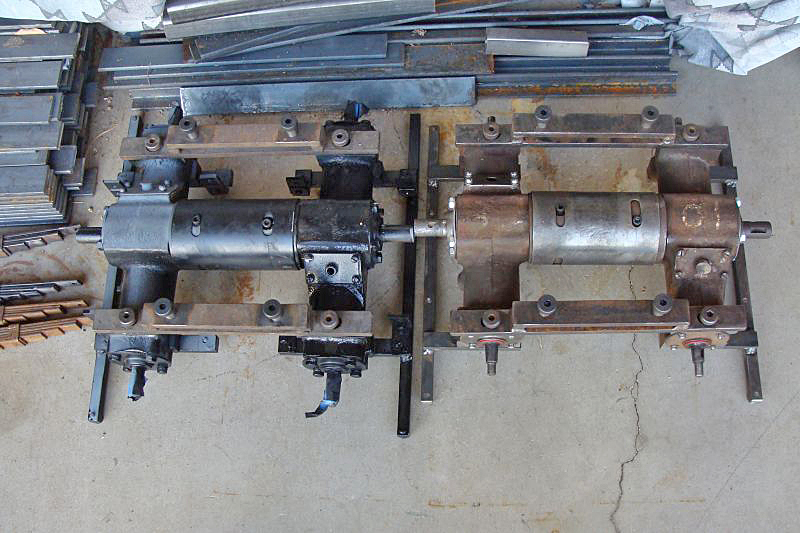
I have the five E10 power trucks disassembled and the first phase of degreasing completed. There is still a great deal to be done. Almost all of the power truck frames had at least one of the mounting tabs sheared from the foot. Dave and I spent quite a bit of time, removing good feet and bushings from frames with one good foot and matching them to another in similar condition. With all the mixing and matching, we were able to assemble 12 complete frames. Currently we only need eight, but I have plans for more in the future.
|
|
|
These are the second version of the E10 power truck frame assemblies. We are rebuilding four power trucks with this configuration and one for display with the original E10 frame which had zero flex and was very unforgiving if the track wasn’t perfect. The zero flex frames were the frames used on the original E10, G10 and pre-war G12 models. All were upgraded over time.
|

|
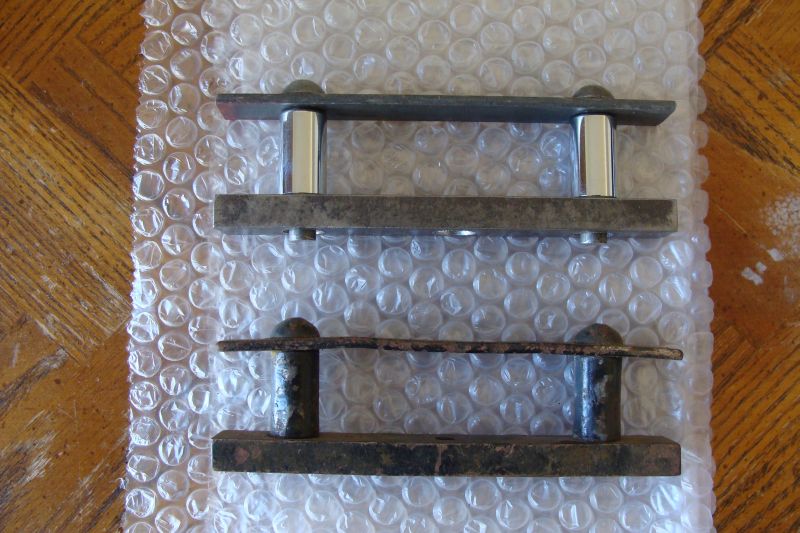
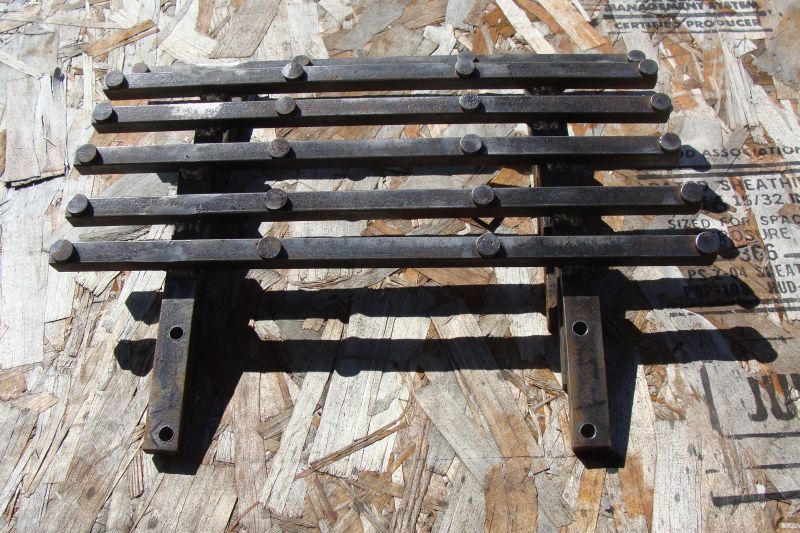
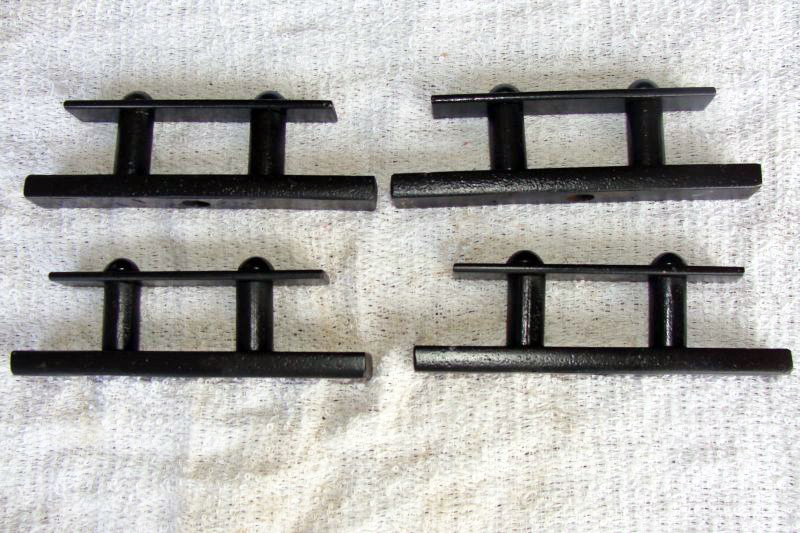
I degreased and cleaned the six arches we need for the four E10 power trucks. We have started cleaning and rebuilding the ten power truck safety bar (bumper) assemblies. We need to fabricate four E10 safety bar assemblies that will be used on the coach trucks under the back end of the two E10 observation cars as unlike the G12 which passes power from the alternator through each car back to the observation car, the E10 ob car pulls its power directly from the rails via the rear truck of the observation car. The power is used for the rear drum head light, side marker lights and the rear marker light. These safety bar assemblies match those of the power units. We are also building ten E10 standard coach safety bars as we have more E10 cars than we have trucks for currently.
|
We acquired a case of unused MTC G12 safety bars this year and although there are similarities, the E10 safety bars are shorter by two inches and the flat head rivet pattern is different. We are modifying some G12 safety bars (cutting, welding, replacing T rivets) so that they will be exact duplicates of those of the E10. It isn’t rocket science, but will be a little time consuming.

|
|
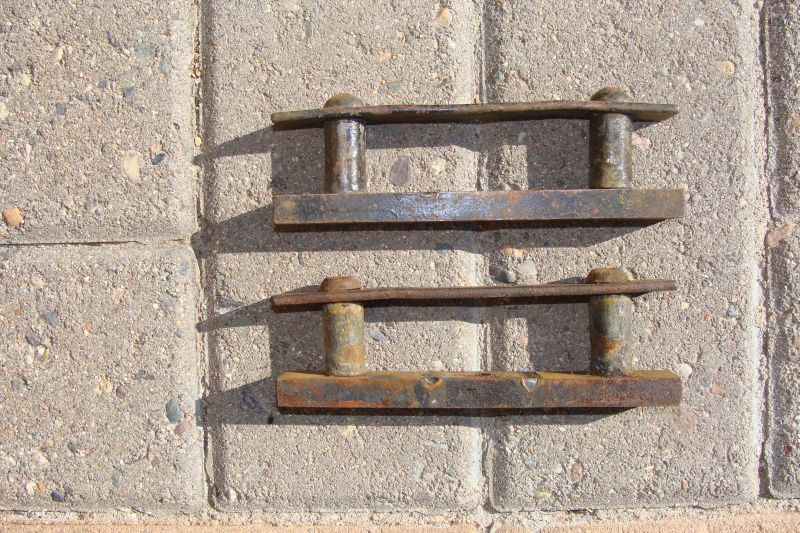
We have also acquired the rivets, spacers, bottom and top flat bar to build ten E10 spring pad assemblies. There will still be quite a bit of drilling and fitting, but these will be a January project.
|
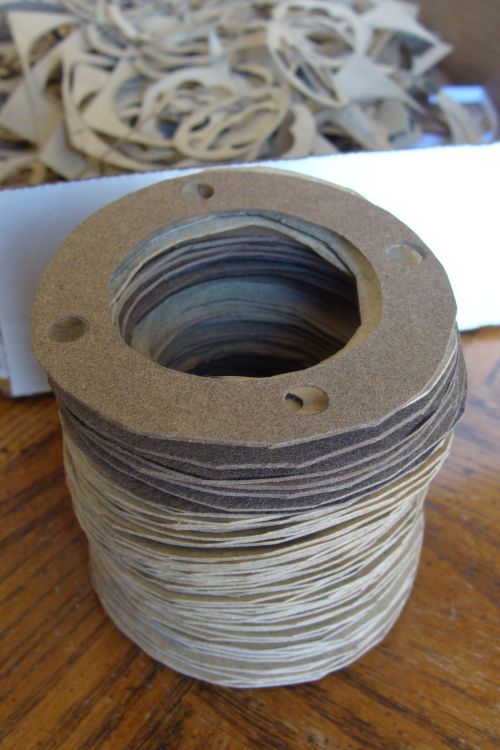
I spent a few hours cutting and punching out 104 gaskets for the E10 and G12 axle assemblies. I know some guys send the specs to a vendor and have these punched out, but this is more of a low tech operation than that out here.
|
We will start replacing bearings and seals in January and hope to make a big dent in the backlog for that operation.
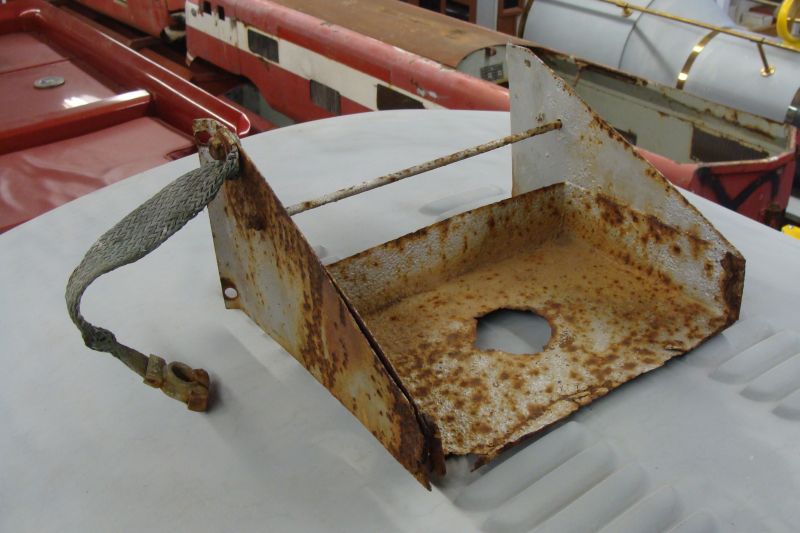
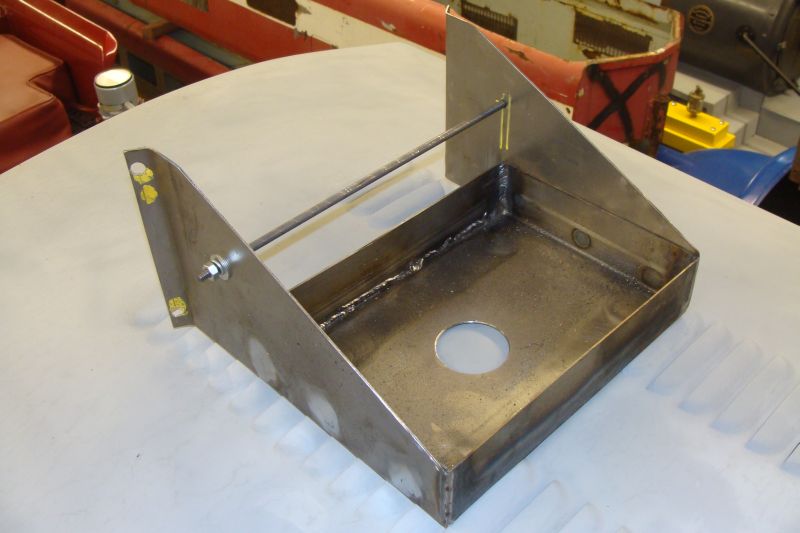
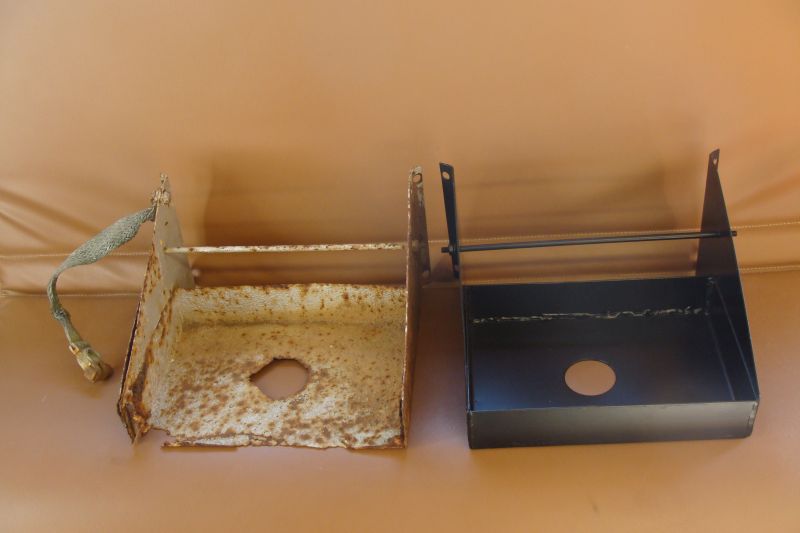
We will be fabricating a G12 battery tray either in January or February. It seems like things always take longer than I hope so think February.
We added several AH catalogs, early press photos of S16s and other park train photos to our collection this month. We also added several catalogs of other park train and carnival equipment manufacturers to the collection. We also added three MTC torque wrenches (one was almost mint) to the collection. The challenge remains of how to display these in such a way to do them justice. I will be redesigning our display at some point.
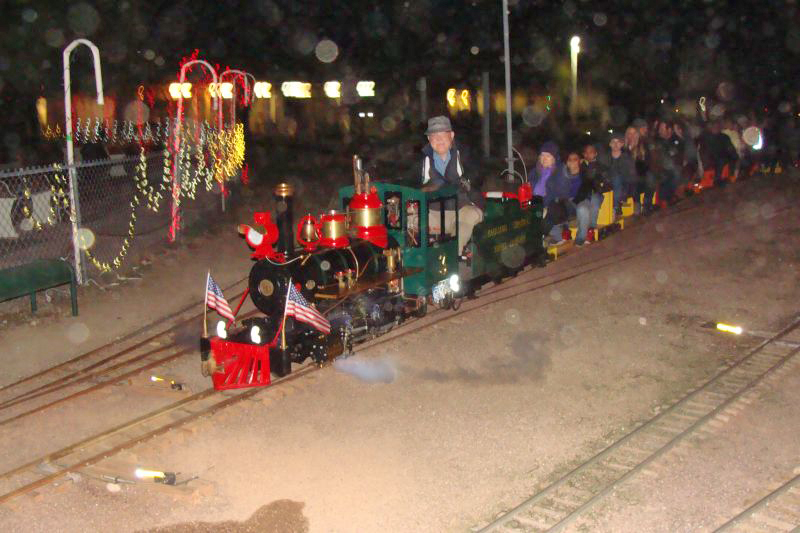
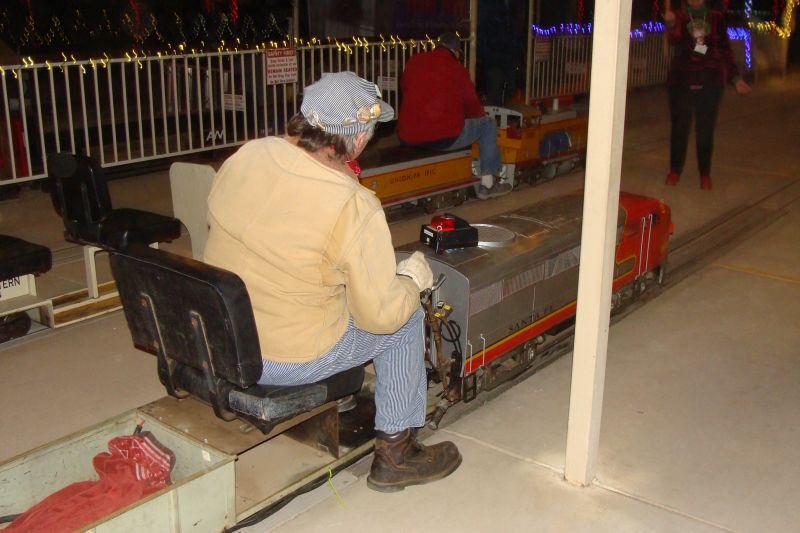
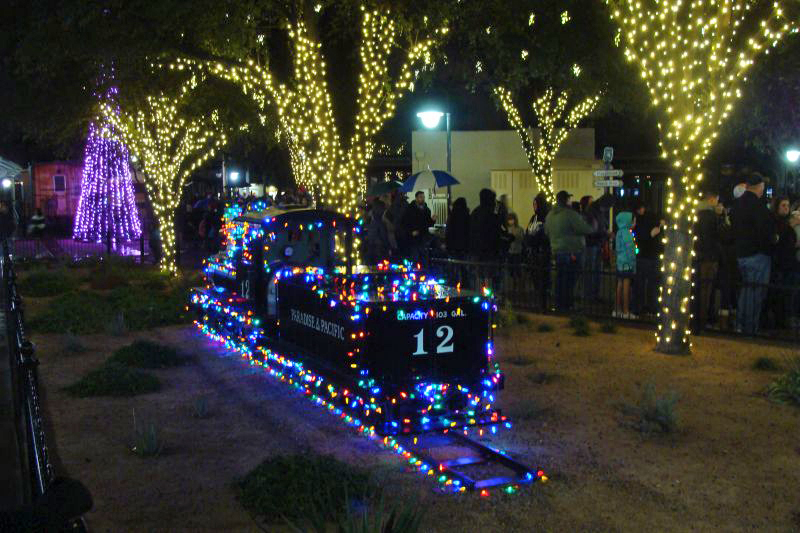
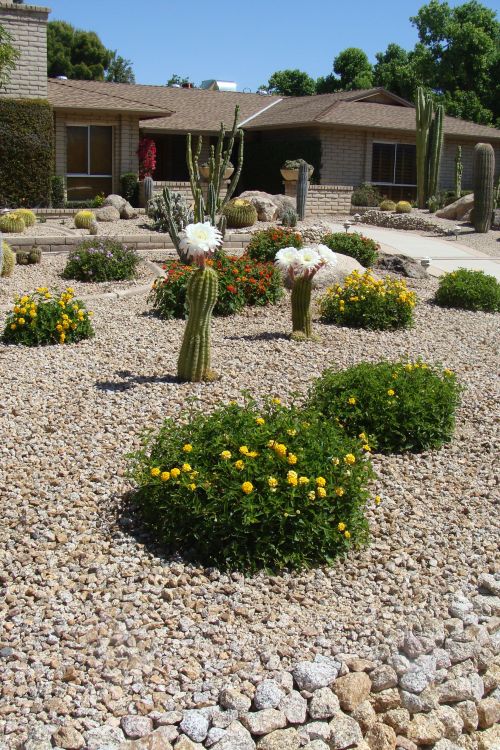
As has become my tradition, I made it out to the Maricopa Live Steamers track at Adobe Mountain for its Holiday Lights display. For years, they have operated the trains for free and have a donation jar that they point out after the ride. I have stood and watched half a dozen trains unload with only a couple folks actually making a donation. This year, a ticket was required to board the train. The kids were free, but they asked for “$5.00 or whatever you can afford” for the adults. No one left without a ticket, but it was a dramatically different approach and I heard a number of complaints. The train rides and lights were still impressive and the ride was worth the wait.
|
|

|
|
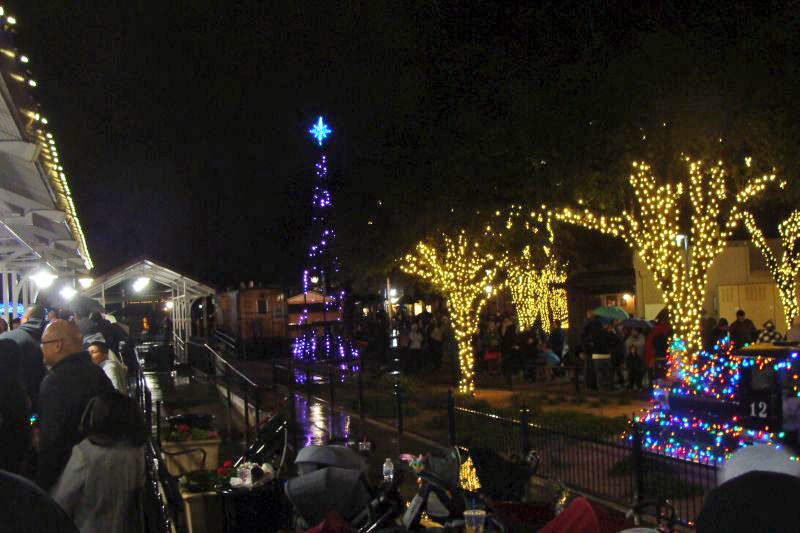
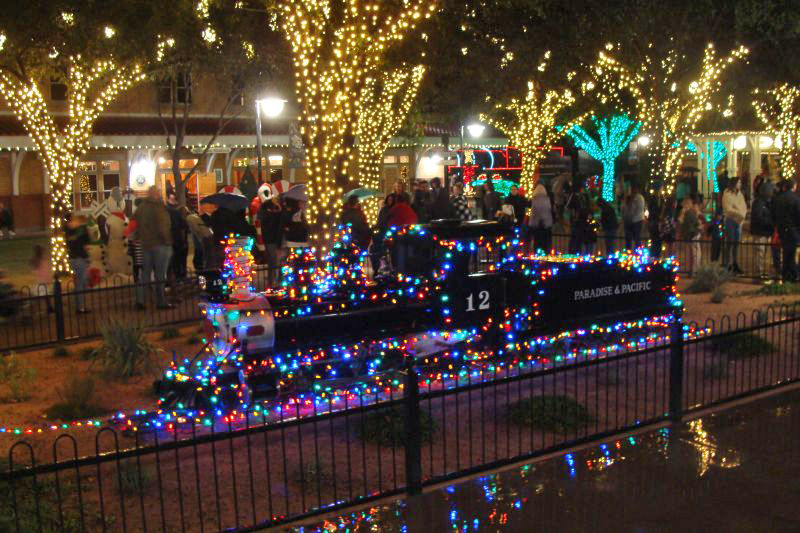
I also made it out to McCormick – Stillman Railroad Park in Scottsdale for its Holiday Lights display. I have been attending this event for years and was never rained on until this year. It started as a sprinkle and turned into a steady rain. It was a 2 hour and 20 minute wait in the line to ride the train. It should be pointed out that this ride is $5.00 and is not a donation; fast pass tickets were $15.00. The Scottsdale clientele is a very different socioeconomic group from the single moms hoping to get their children a train ride at Adobe Mountain. Next year, I will take a smaller group and go for the fast pass. We were wet, cold and tired by the time we boarded the train, but theride and lights were as impressive as ever. By the time we finished our ride on the Paradise and Pacific, the model displays and Scottsdale Live Steamers had shut down for the night. That will give me an excuse to head over there in a few weeks to check those groups out and enjoy their hard work.
|
|
|

|
Happy New Year and happy and safe railroading everybody!
|
02/04/20
We sourced the parts and material and fabricated eight E10 spring pad assemblies. We acquired two extra of the assemblies with our Pennsylvania parts cache so we now have the ten assemblies we need for the five E10 coach trucks that we are building. The two original ones still need cleaned and some straightening. We built them the same way they were built originally and utilized ¾ inch bar stock from our PA cache in the newly fabricated ones and they match the original ones in every way.
|

|
|
We went through each of our coach trucks and inspected the bearings and seals. Most of the bearings were rough, but there were a few that must have been replaced relatively recently and were very nice. We just repacked them and they are good for many more years of services. We replaced the rest of the bearings. All the seals were petrified and we replaced all of them. These trucks are now ready for wheels and paint.
|
|
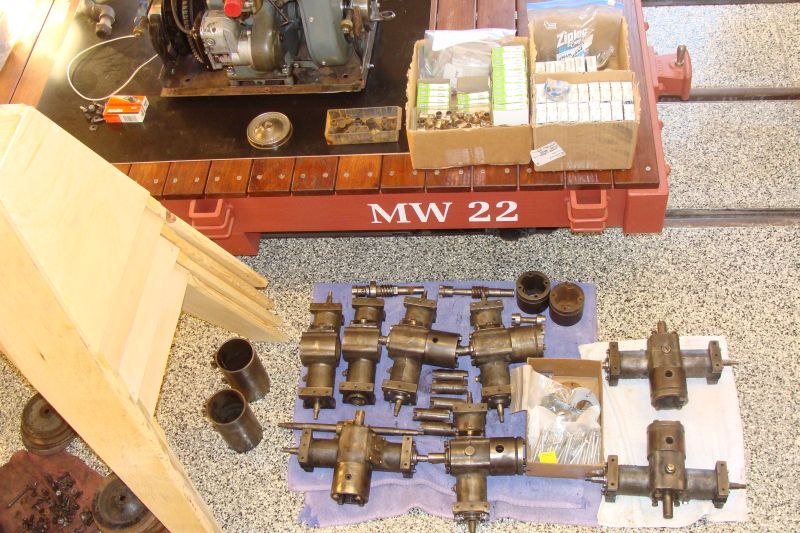
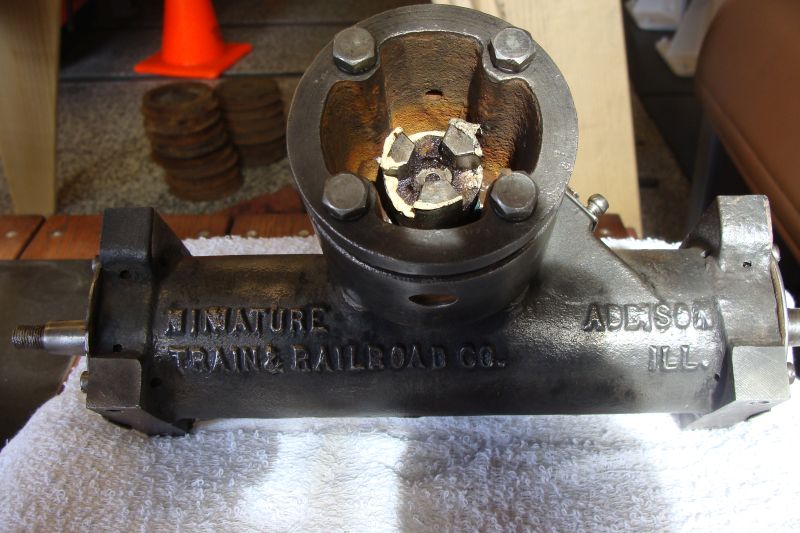
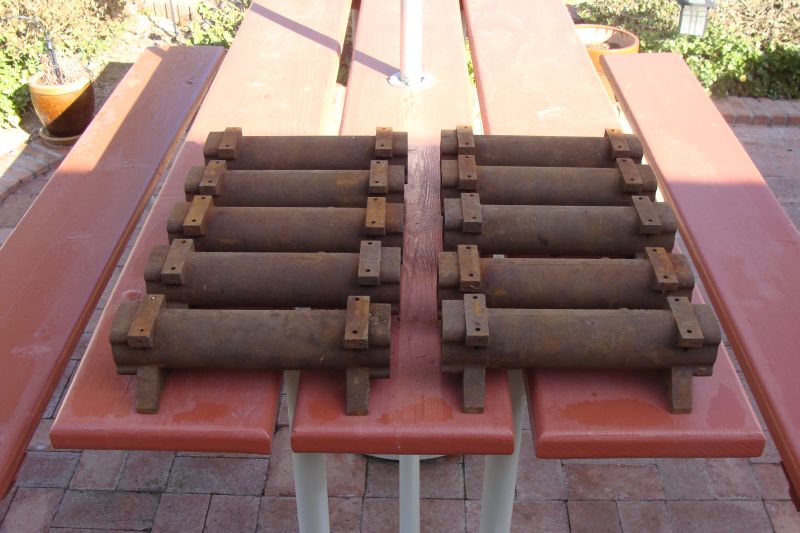
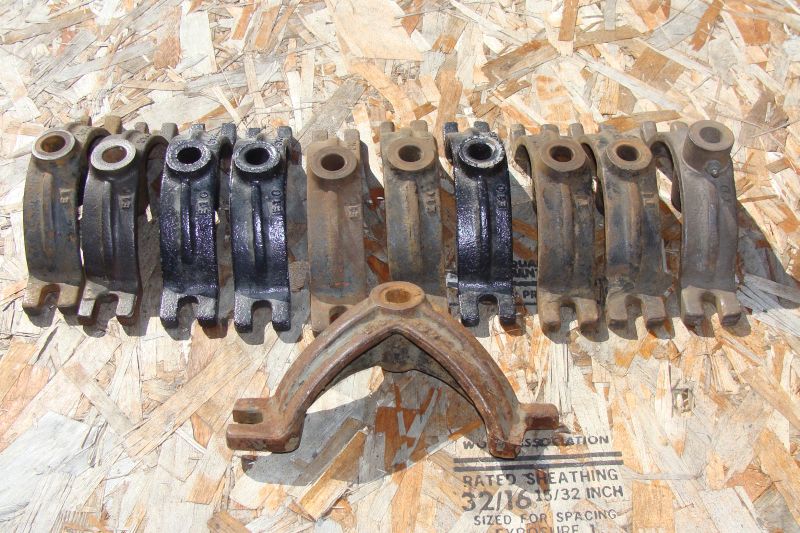
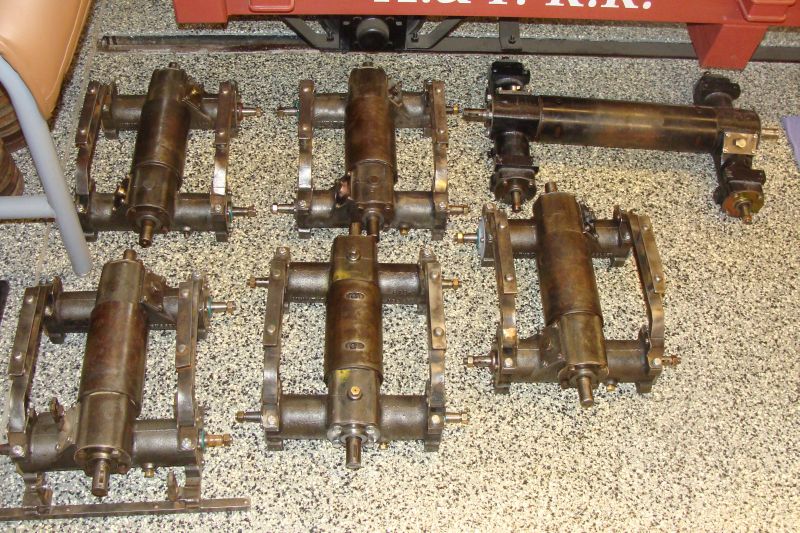
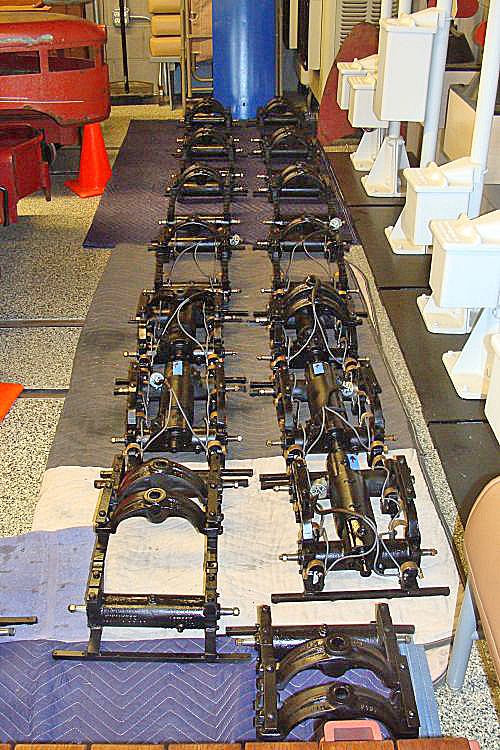
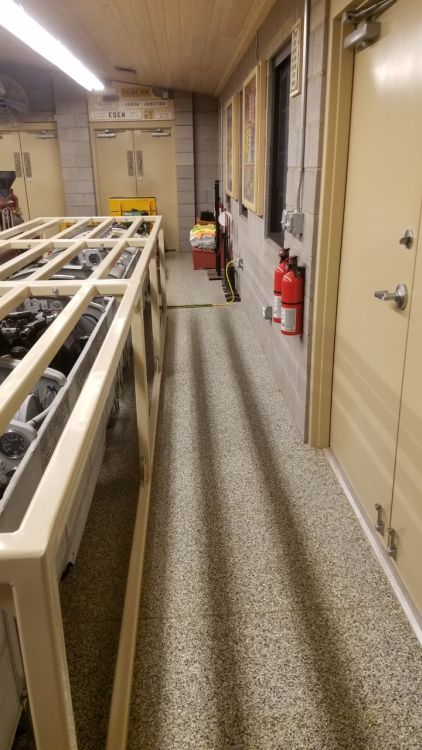
I completed phase 2 of cleaning the 5 E10 power trucks this month. They all look reasonably clean. We have all of the power trucks disassembled to the point where we are ready to pull and replace the bearings and seals. We completely disassembled one of our E10 power trucks. We replaced the bearings and seals on one axle and also replaced the bearings and seals on the corresponding worm gear shaft. The second axle assembly is completely disassembled and ready to go back together. None of these assemblies came apart easily as everything is rusted or corroded in place and fought us at every opportunity. I was able to find all of the parts we will need to have five fully functional E10 power trucks. Many, but not all, of the power truck parts are shown in the photo as some are still being cleaned and others are stored out of view.
|
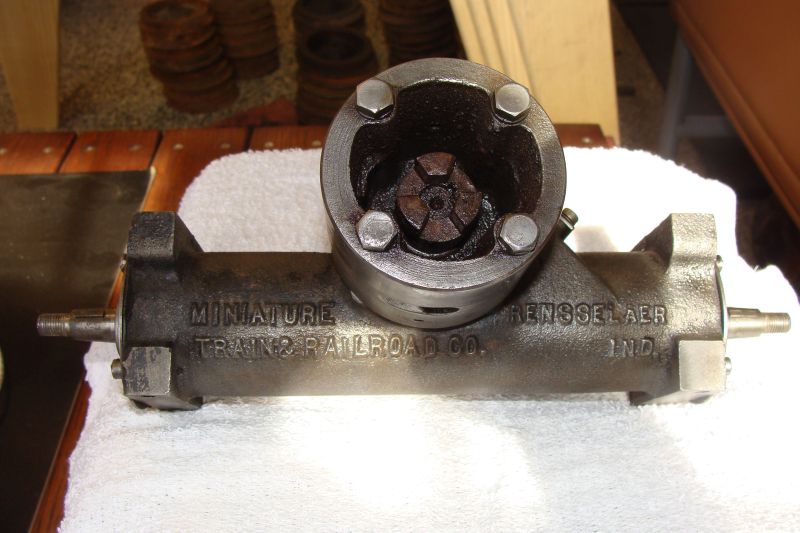
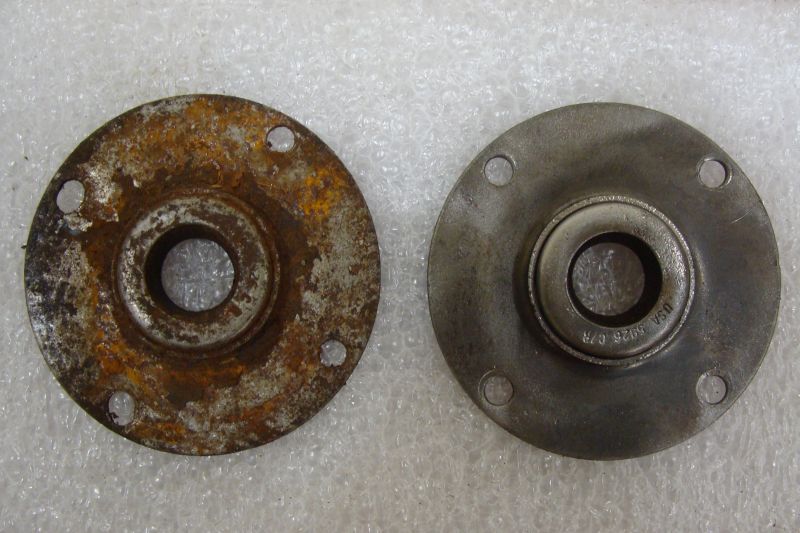
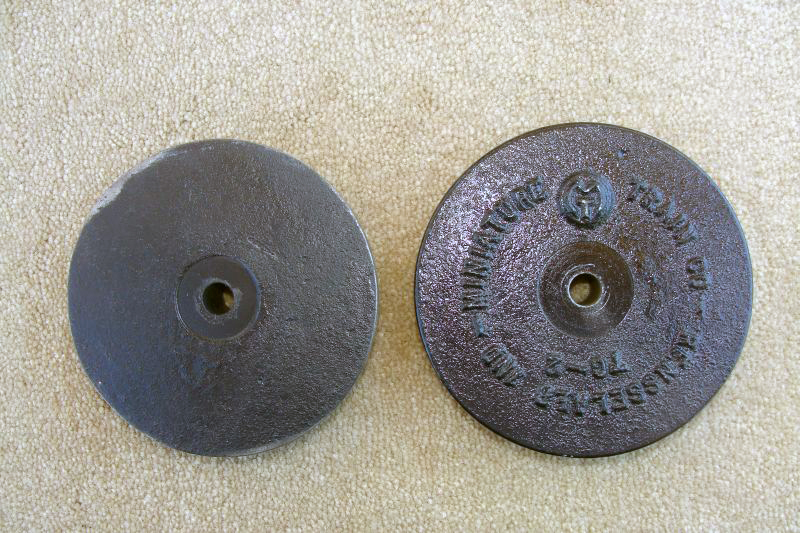
We have some of the very early E10 power truck castings from Addison, some of the second version of Addison castings and a couple of the Rensselaer castings. The older Addison castings do not have the inspection plate and oil fill cap. Instead oil was added through a fill plug on top of the casting and the worm gear shaft and axle had to be removed to check the wear on the bronze worm gear as well as the steel worm gear. Clearly, the inspection plate which is the same as on the Rensselaer G12 was a big advancement in terms of ease of maintenance.
|
|
|
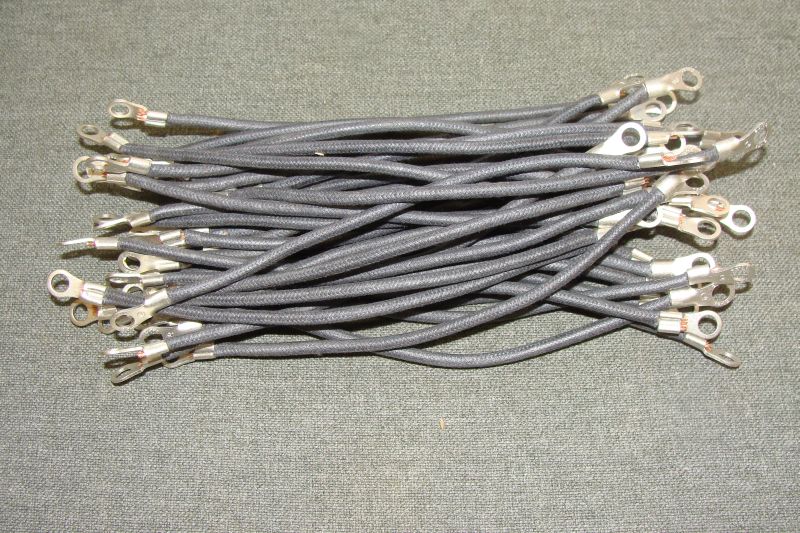
We started fabrication of four E10 safety bar (bumper) assemblies that will be used on the coach trucks under the back end of the two E10 observation cars. Unlike the G12 which passes power from the alternator through each car back to the observation car, the E10 observation car pulls its power directly from the rails via the rear truck of the observation car. The power is used for the rear drumhead light, side marker lights and the rear marker light. These safety bar/bumper assemblies match those of the power units with the wheel brushes and wiring. We are also building six E10 standard coach safety bars for additional E10 coach trucks that we are building. We have more E10 cars than we have trucks for currently.
|
We acquired a case of unused MTC G12 bumpers this year and although there are similarities, the E10 bumpers are shorter by two inches and the flat head rivet pattern is different. We are modifying some G12 bumpers (cutting, welding, replacing T rivets) so that they will be exact duplicates of those of the E10. It isn’t rocket science, but has been very time consuming. Although we have made considerable progress, it will be February before this project is complete.
|

|
Three of the existing power unit bumper assemblies need significant metal repair and parts replacement. All of the power unit safety bars will need rebuilt with new electrical, but that is the next phase of the power truck rebuild.
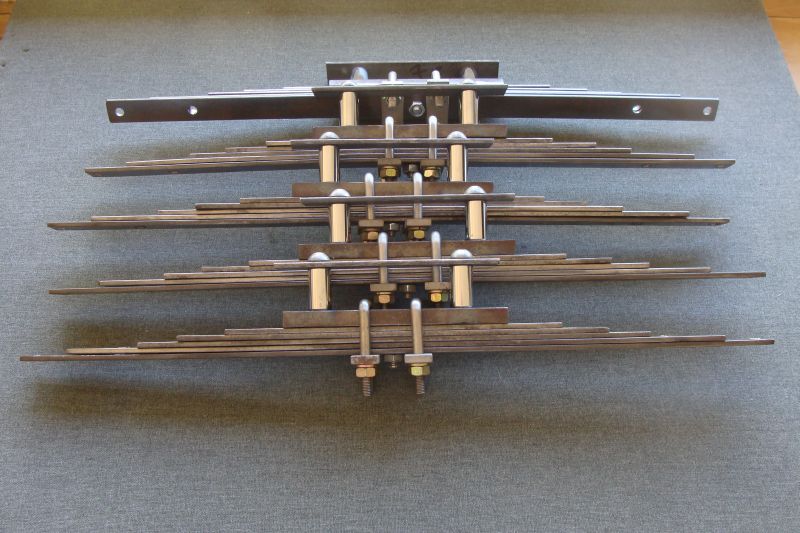
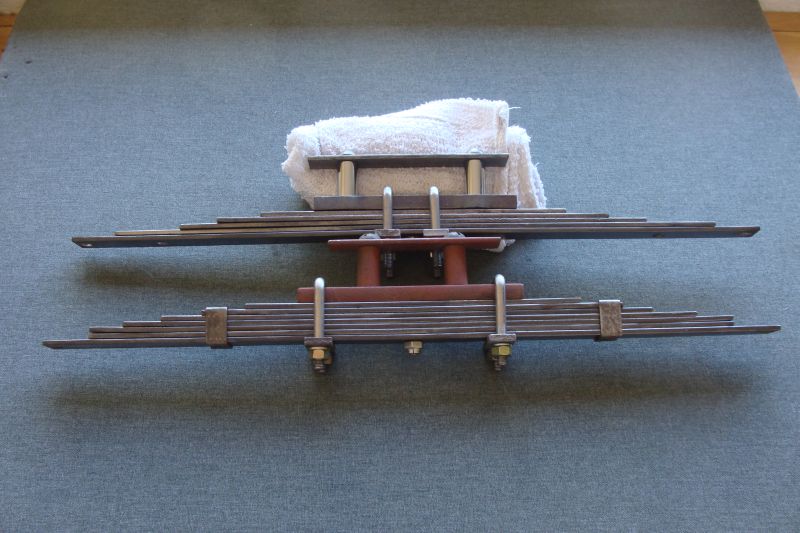
Dave and I finally completed drilling the leafs for the 10 E10 spring assemblies this month. The spring steel in these leafs is brutally hard and none of my regular drill bits would even make a dimple. I acquired a few carbide tipped drill bits and it was still a challenge, but doable. I cleaned each leaf individually and they will be primed and painted next month. I have located and acquired the twelve additional Ubolts we need (20 total) to attach the leaf spring assemblies to the spring pad assemblies and they will be here early next month.
|
As the first 5 E10 coach trucks are ready for wheels and paint, cleaning and detailing wheels will be one of the February projects.
I cut and punched a dozen power truck inspection plate gaskets this month.
|
Once I have two of the E10 coach trucks and two of the power trucks completed, I will spend a day moving car bodies out onto our transfer table and will get some roster photographs to add to that section of our website. Obviously, there is sheet metal work, trim and paint work needed on the coaches plus electrical and mechanical work needed on the engines. The roster shots will give us a before and after opportunity for comparison.
I have started gathering and cleaning the axles that we will use in the 5 E10 trucks that we are building. Some are G12 axles that I have obtained and will be shortening by an inch while others are E10 axles and G12 axles acquired in Pennsylvania with our cache of parts last August. The gentleman I purchased them from had always stored them inside as he prized these parts as much as I do, but clearly one of the prior owners had them stored outside for a period of time and there was a fair amount of surface rust.
|
|
I also gathered the 10 trail truck castings that we will use with the axles. The castings were exactly the same for the E10 as they were for the G12, but the machining was different. An extra inch was machined off each end on the E10 version and as the leaf springs attach differently one of the mounting holes is in a different location. We will have these machined to size in either March or April.
I had shared previously that with our PA parts purchase last summer that we acquired a number of NOS Miniature Train Company E10 and G12 parts. Among those parts were a number of Rensselaer trail truck castings for G12s. Some of the castings were machined and some were still raw castings. I thought it was pretty cool to find the raw castings in the mix.
|
|
Happy and safe railroading everybody!
03/16/20
We finished the 6 non-electrical safety bars for our new trail trucks, finished welding on the four electrical safety bars we are building and finished welding repairs and replacing parts on ten other electrical power safety bars that needed work. Next the electrical safety bars will get primed and painted and then the electrical components will start being added.
|
|
We will still need to make eight safety bar assemblies for G12 trucks and four more for E10 trucks. I have all the materials here, but that is a project that is a few weeks down the road.
We replaced bearings and seals in three more E10 axle assemblies so four are done which will allow us to assemble two complete power trucks. We still have six more axle assemblies to rebuild so that we can complete our five power trucks. Of the six that need rebuilt, we have two apart and both of those drive axles need a new Woodruff key slot cut. The original slots are all wallowed out. There is actually a great deal more involved on these power truck rebuilds than just bearings and seals. We are replacing as needed the bronze gear, worm gear and the worm shaft coupler. There were also a number of bolts sheared off in different castings. We got lucky and got them all out by welding a nut onto the remnants of the bolt and with some WD-40 ratcheted the nuts loose.
I acquired the torque hub “O” rings that we need for our ten E10 torque hubs.
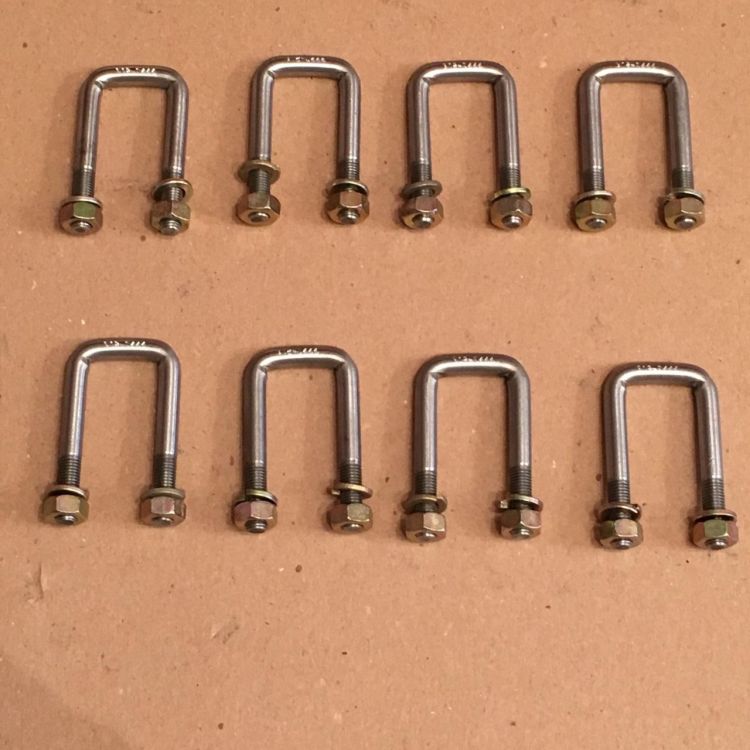
We received several additional E10 U bolts that I had made which will allow us to join our E10 spring pad assemblies and leaf springs together as assemblies.
|
|
|
I had hoped to prime and paint the five rebuilt trail trucks this month, but frequently things take longer than I hope and I never got to them. I still need to clean up some wheels and get some wheels on at least two of the trail trucks.
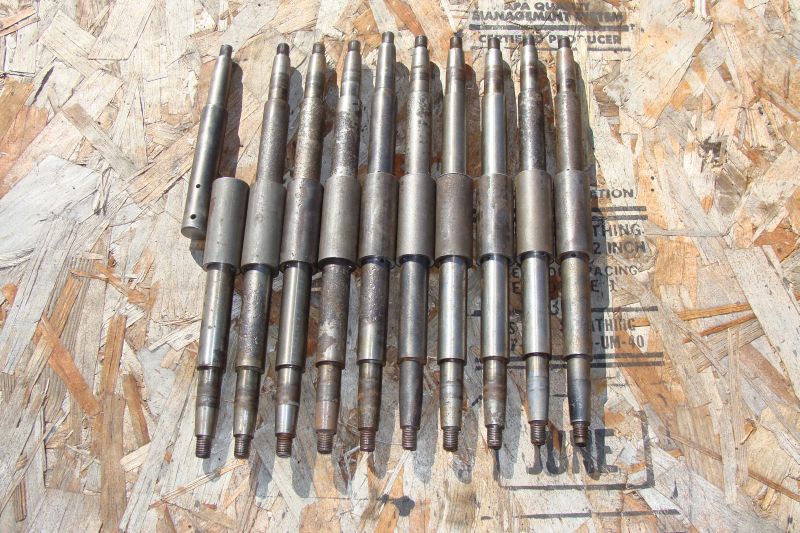
I now have accumulated a combination of twenty additional E10 and G12 half axles that are in the machine shop to shorten the longer axles and match them for length and drill new cotter key holes in the ones that are shortened.
I originally thought that the E10 and G12 trail truck castings were exactly the same and just the machining was handled differently. They are the same on the exterior except for the machining, however, once you machine away the extra inch on each end of the G12 axle housing casting you lose the internal shoulder that supports the bearing. We are working to see if we can either sleeve the casting or machine and press fit a shoulder in from each end. Not having the castings ready for assembly with the other components will delay that project, but we have plenty of other things to work on.
|
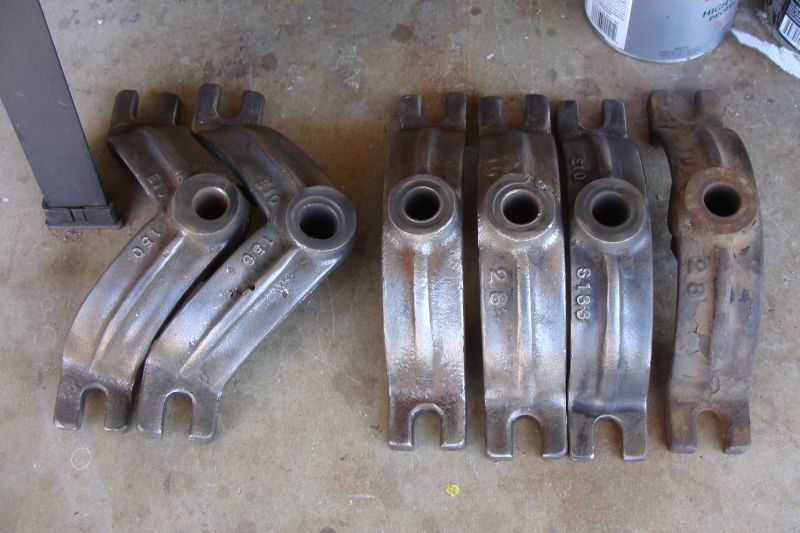
I acquired four additional arches this month and took three broken ones I had in reserve to a welding specialist to have new toes welded on one foot of each arch. I also took two E10 engine arches in for the same procedure. Once repaired, we will have the arches we need for our restoration projects.
|
I acquired an additional set of decorative horns for the latest E10 locomotive that we acquired.
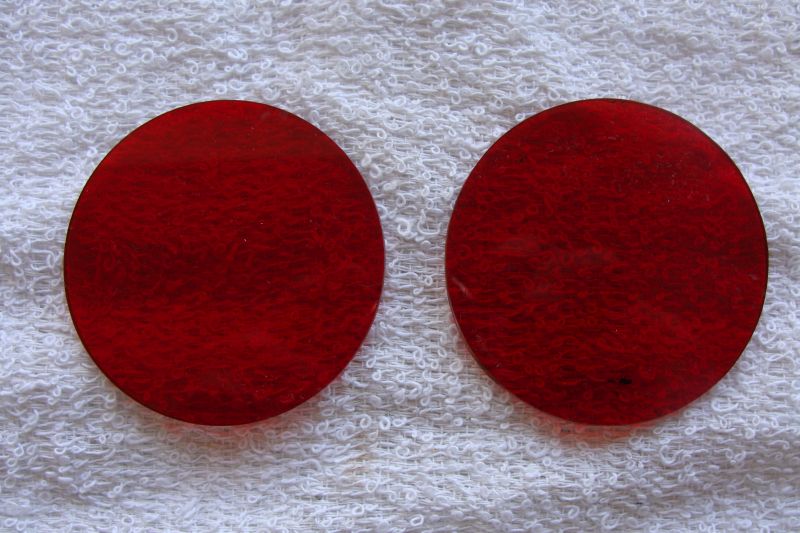
I shared a few weeks ago that we obtained 2 NOS red lexan lenses with retainer clips for the observation car drum heads in our PA parts purchase. The drum heads on the E10 and G12 are the same. Unfortunately, the two lenses were just tossed in a parts tray with other hardware and over the past 70 plus years they had been scratched pretty severely in places. One of our friends at the A & P, Marc Tiu, works locally for an international high tech company, but as a hobby specializes in detailing and polishing high end car restorations worked on buffing and polishing out the scratches for us. They look pretty good, only the remnants of the deepest scratches remain and we will be using the lenses in our restorations. It is cool for me to know they are original MTC parts.
|
I just finalized a deal to bring another G12 parts cache this way in April of this year. It has many of the hard to find and unusual parts that are always needed when working on these older pieces of equipment. I am really excited about the parts in this grouping.
I started repainting one of our cast iron “Stop Look Listen” railroad signs near the right-of-way in the back yard. I added some new sprinklers two years ago and one sprays on the sign – I need to work through a solution so this doesn’t get wet three days a week, but the grass stays green. It is great to have original cast iron signs, but one of the advantages of reproduction aluminum signs is that they don’t have the surface rust issue. I still have a few more letters to detail in black and it will go back up next month.
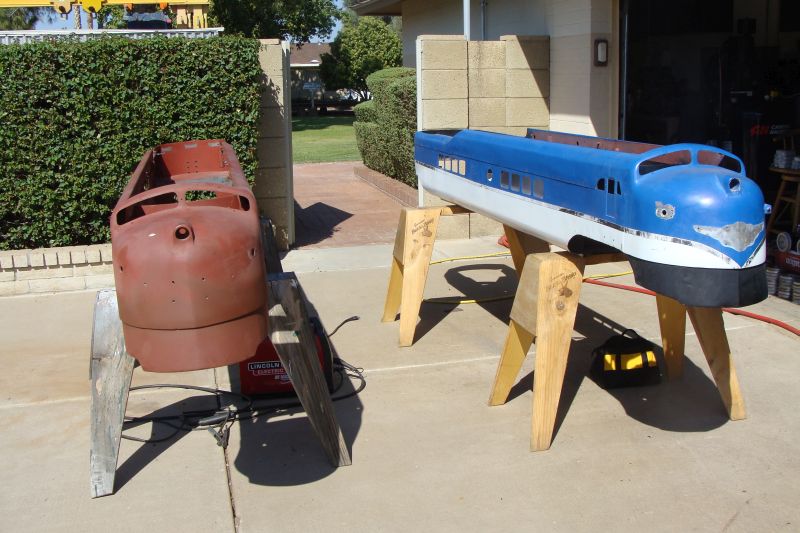
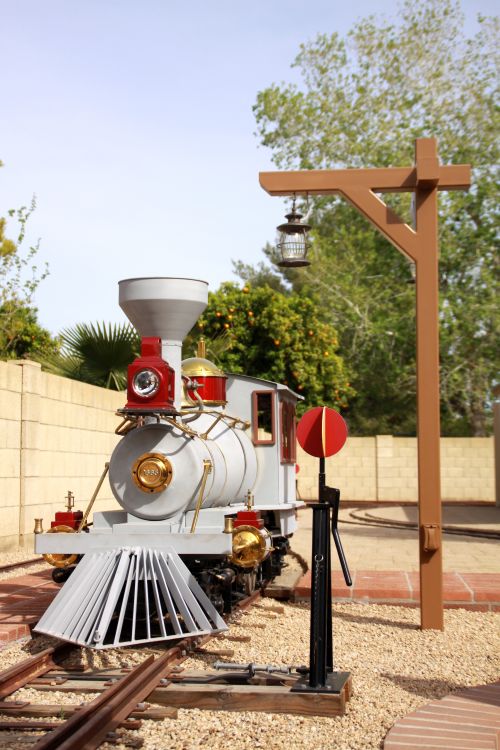
The Miniature Train and Railroad Company was enjoying great success with its “department store” trains in 1938 (later named the E10). The Sturtevant research and development team was working on E series prototypes for a G10 model as well as developing G12 and E12 models. It is believed that a handful of both G10s and E12s were built pre-war before it was decided to focus on the E10 for inside use and develop the “Addison train” (later named the G12) for outdoor use. We have been lucky enough to acquire a prototype of the G10 power truck and a prototype of the E12 power truck recently for our MTC display and collection. They look a little odd today knowing that neither of those configurations ever caught on. They should be here soon and I’ll have photos next month.
The Thompson Family from Champaign, Illinois stopped in for a visit of the A & P this month. They own a S16 and a G16 that they run on their private estate. We discussed all things Allan Herschell and Miniature Train Company and a little bit of Mopar was worked into the conversation for good measure. It was a fun visit.
|
Happy and safe railroading everybody!
04/13/20
We now have twenty half axles of the correct length matched and ready to build five new E10 trucks once we finish facing and sleeving the castings for the bearing shoulders. There is still a great deal of work to do on that front, but I hope to have the trucks completed in May.
|
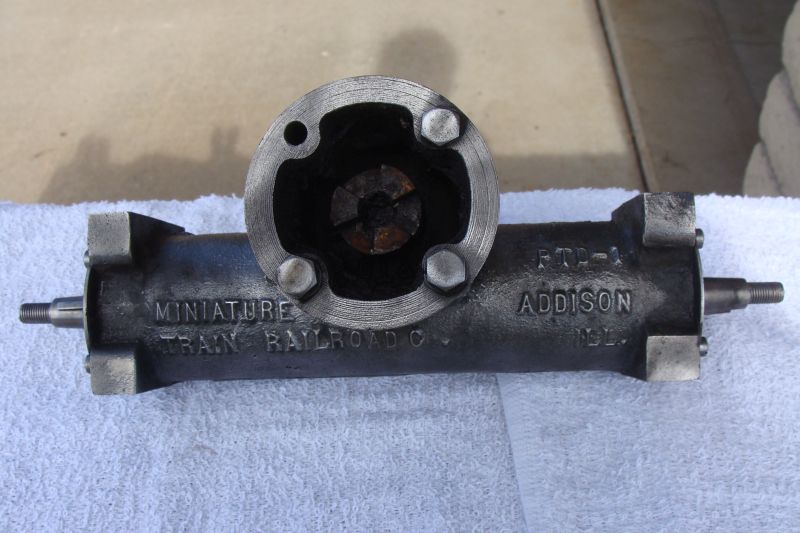
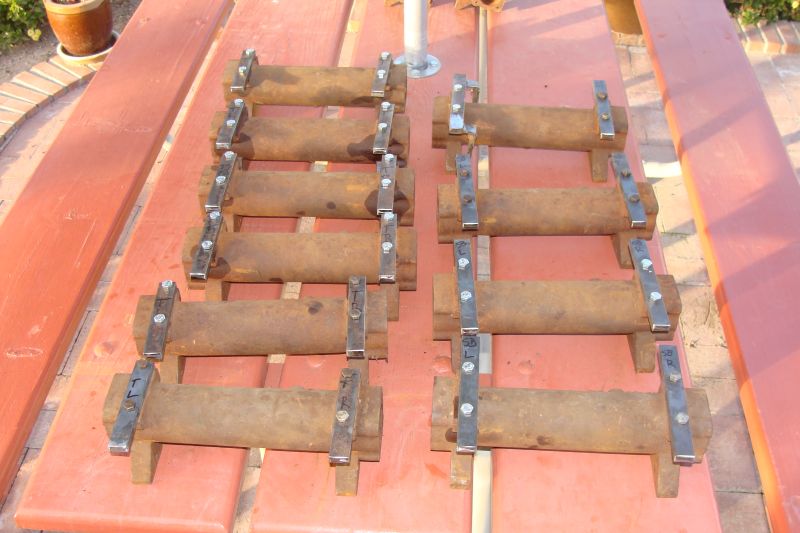
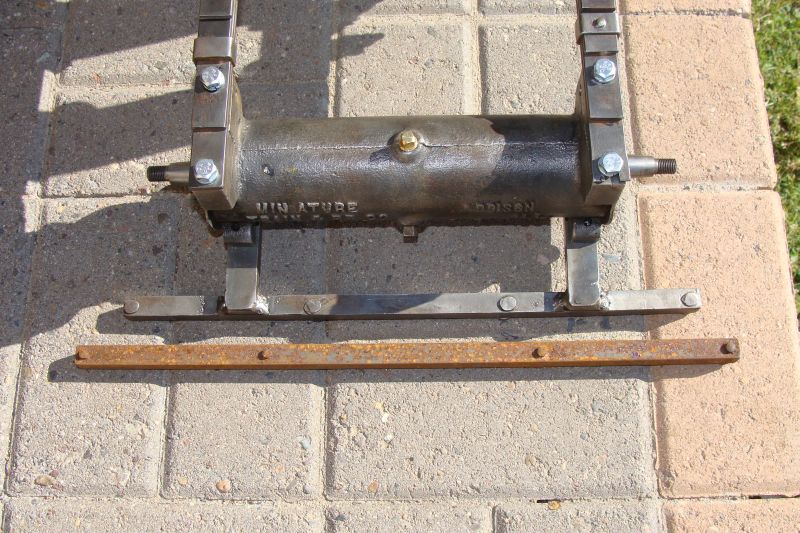
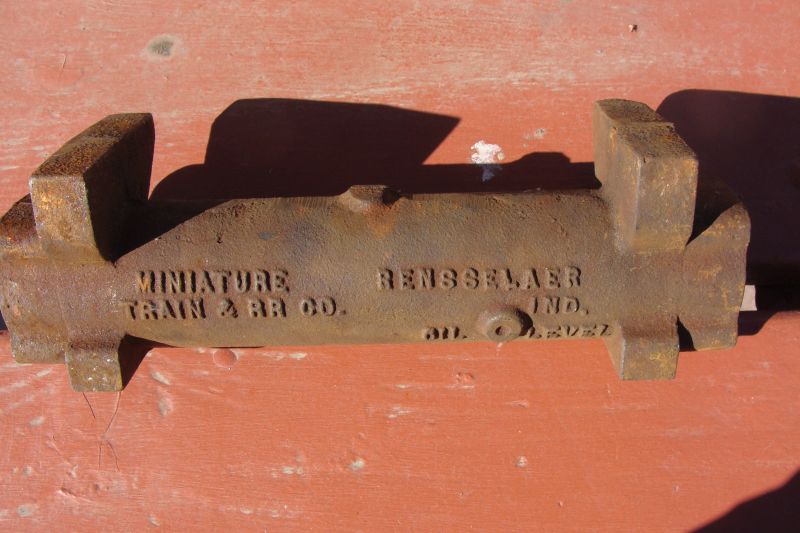
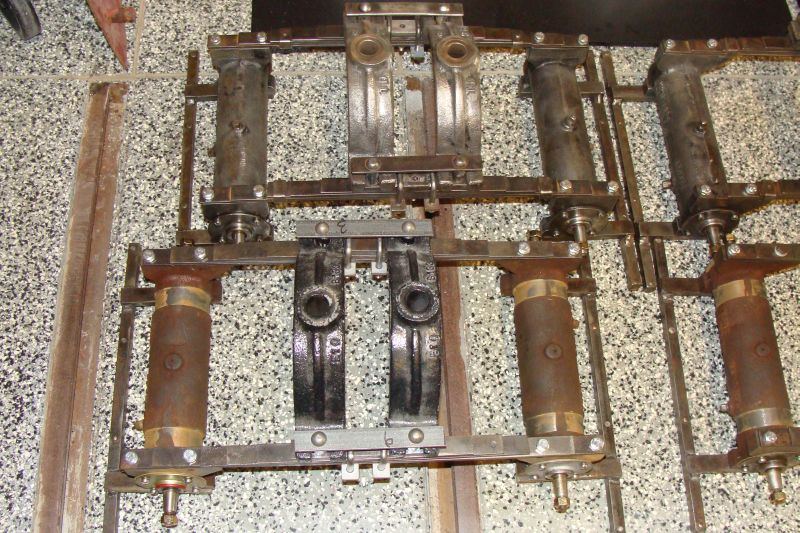
We completed rebuilding another three power truck axle assemblies this month. We have seven completed and three more to go. One of the axle assemblies we completed this month was a very early E10 Addison casting. The casting is an Addison PTD-1 casting and hand stamped next to the oil fill is PTD no. 13. There are numerous differences between it and later castings that I won’t bore you with, but the differences are very cool to me.
The work on facing and sleeving the E10 castings is underway, but far more involved than we originally envisioned.
We sent six arches out to be repaired and have five of them back. New feet were made from ½ inch thick steel plate. The original arches are cast iron and welding steel to cast iron is a little involved and not for the faint of heart. We sent these out for repair, but I watched one being repaired. The cast iron arch and replacement foot were placed in a jig and pre-heated to 500 degrees in a propane grille cranked up full blast. While still close to 500 degrees, they were welded together with special nickel rod. The assembly jig with arch was then placed in a metal trash can lined with several layers of thick ceiling insulation which allowed the arch to cool off gradually over more than three hours. The repairs came out pretty nice and we have additional arches to use in our restorations.
|
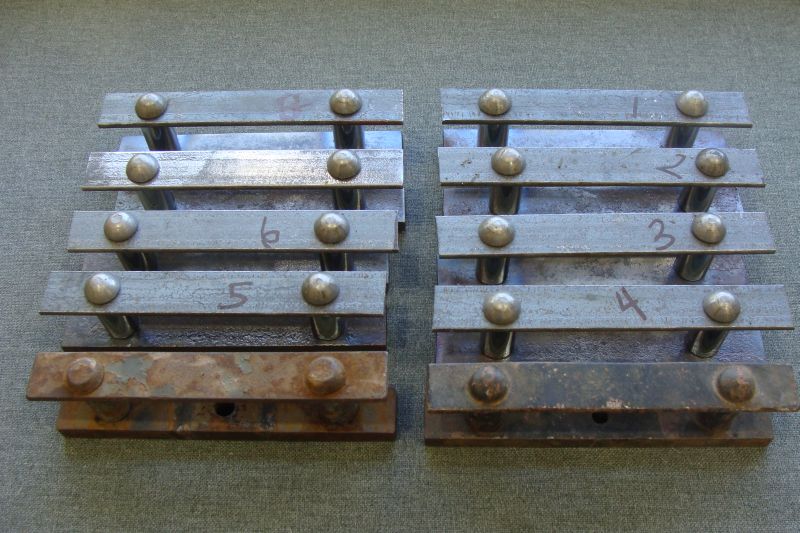
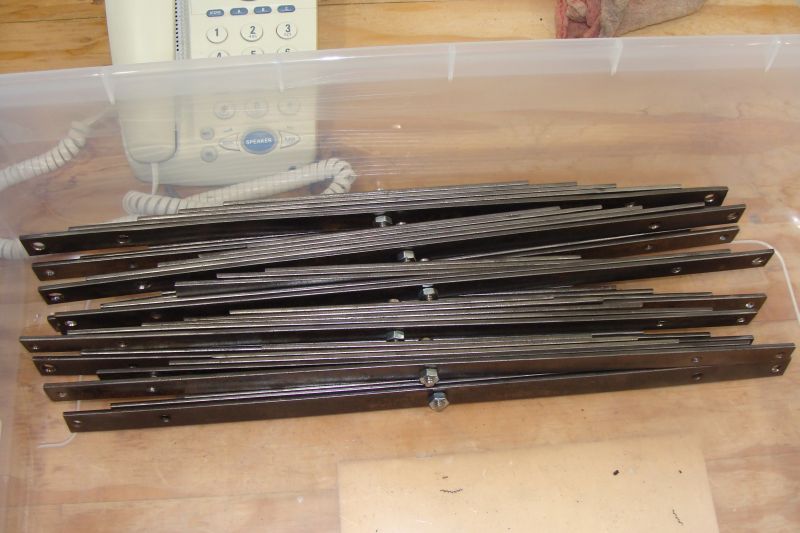
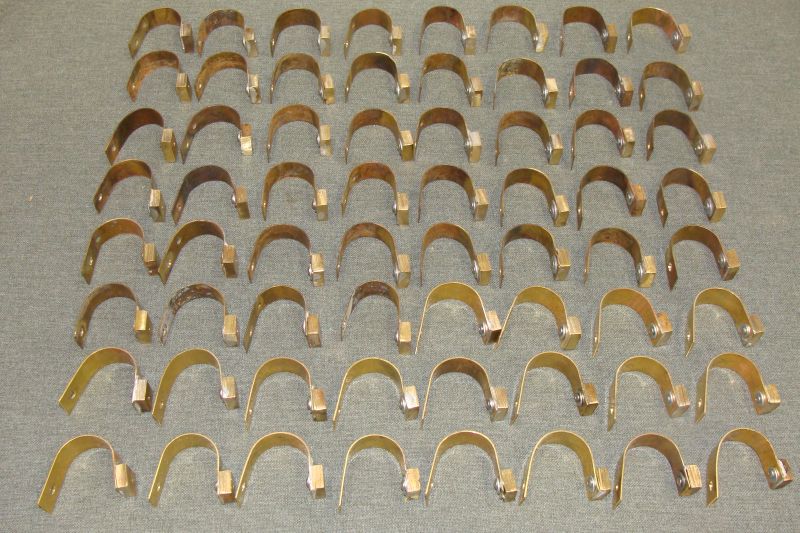
Dave and I started working on the electric components for the power truck safety bars. We sliced and trimmed 32 bakelite insulators from material that we had on hand. We used the table saw to slice the material at ¼ inch thickness; this was not as easy as that sounds as we had several issues, but eventually worked out a solution. Then we cut the insulators to 1 1/2 inch length and drilled the mounting hole and the sweep mounting hole. We now have insulators on 11 of the 14 power truck safety bar assemblies. The remaining pieces are cut and drilled and just await assembly.

|
We also built 32 wheel sweeps from material that we acquired last summer in Pennsylvania. We need 16 additional wheel sweeps so we are currently sourcing additional period correct materials to complete this part of the project. It is interesting see the variation in wheel sweep designs. Our earliest E10 power truck is a 1936-38 version, the E10 was built by MTC through 1948 and many ran in department stores well into the 1990s. The electrical components changed over the years as availability and price became factors. We have three distinctly different styles of wheel sweeps and will have examples of the two older styles displayed in our collection.
|
We have E10 ob car no. 20 which was an early Addison product and also have an E10 observation car made in Rensselaer in 1947 (which for various reasons I know is somewhere between ob. car no. 23 and 30). The differences are subtle, but significant. Our earlier version has less symmetrical window spacing, the location of the door is different, has a small window next to the door, the size, shape and spacing of the observation end windows are unique and the observation light is mounted much lower than on the later version. There are structural differences that I won’t bore you with. I just find the changes as this equipment evolved fascinating.
|
|
The E10 wasn’t called the E10 until 1946 when the G16 was created. After that the “Addision train” was renamed the G12 and the “Department store train” was renamed the E10. We have many of the earlier castings with the original PTD and TD numbers. The Rensselaer castings all carried the newer E10 casting numbers.
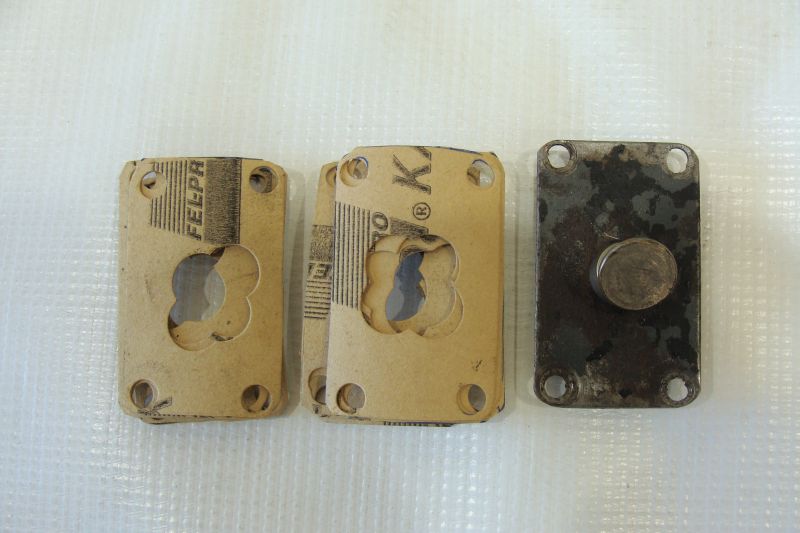
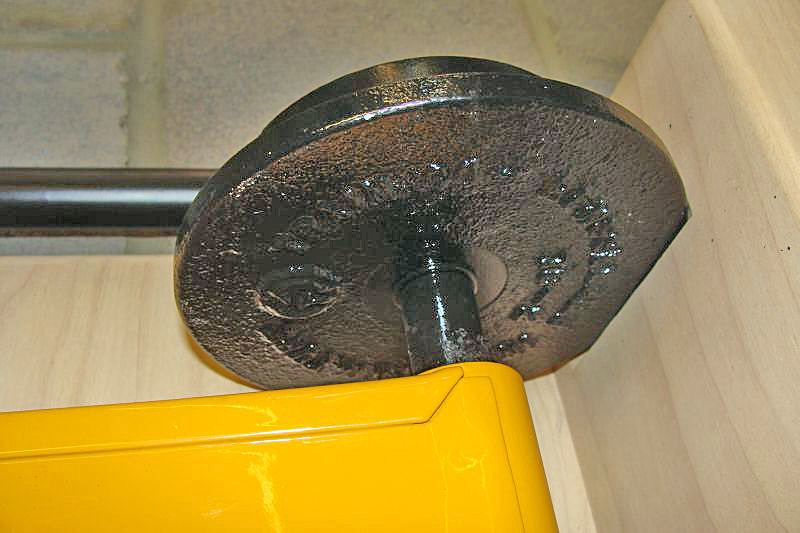
We located the inspection plates and gaskets for all of the power axle assemblies that we are rebuilding and with new hardware got the plates mounted.
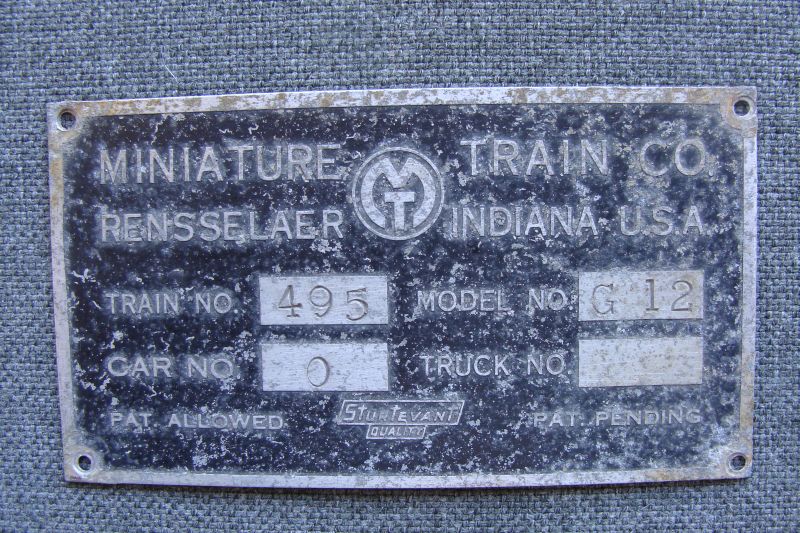
A friend of mine in Massachusetts had Rensselaer G12 no. 495. The sheet metal had significant and advanced rust damage, but the trucks, car body pins, aluminum trim parts and many other internal parts were in excellent shape. Over the past two years, I have purchased pretty much everything but the sheet metal bodies and Wisconsin engine from him. This month, we acquired the builders plates from no. 495 and will proudly add the one from the observation car to our park train builders board later this month. Although we have MTC represented on the board, we don’t have a G12 builder’s plate mounted.
|
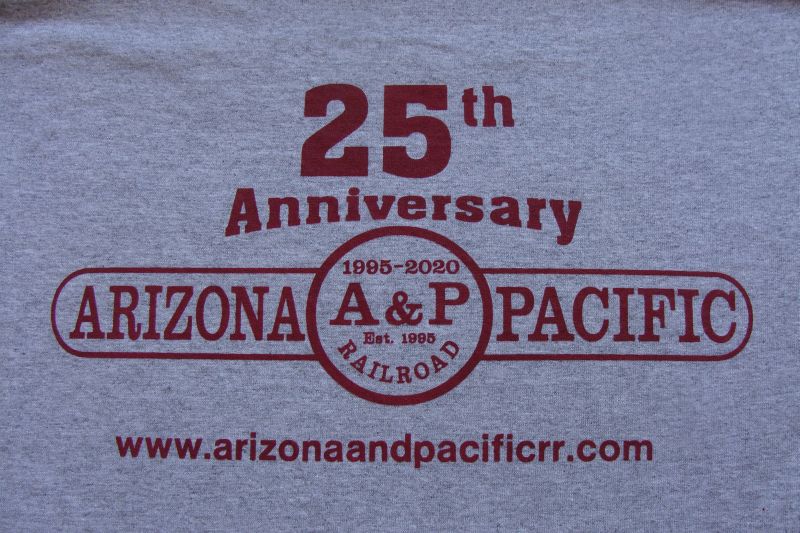
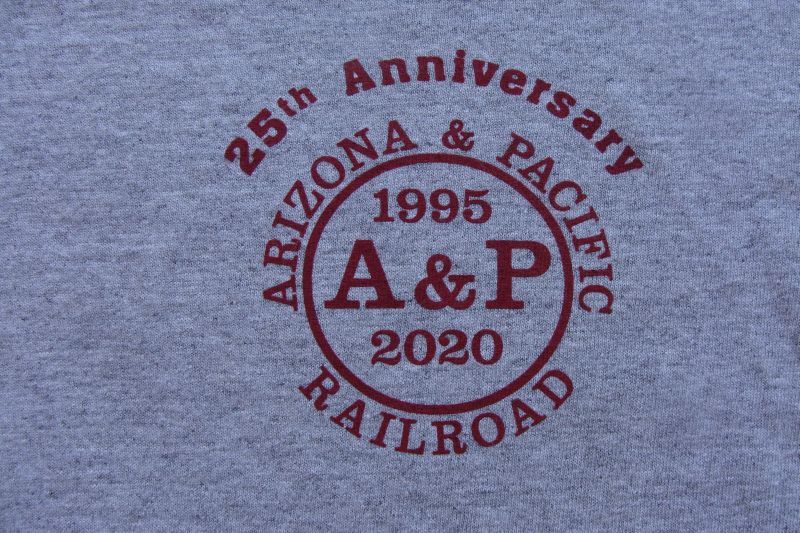
We received our 2020 t shirts this month. We went back to gray this year as Dave and I both have multiple dogs and the dog hair really shows up on the burgundy ones. We did add that 2020 is the 25th anniversary of the Arizona and Pacific; it is hard to believe that we have been at this that long.
|
|
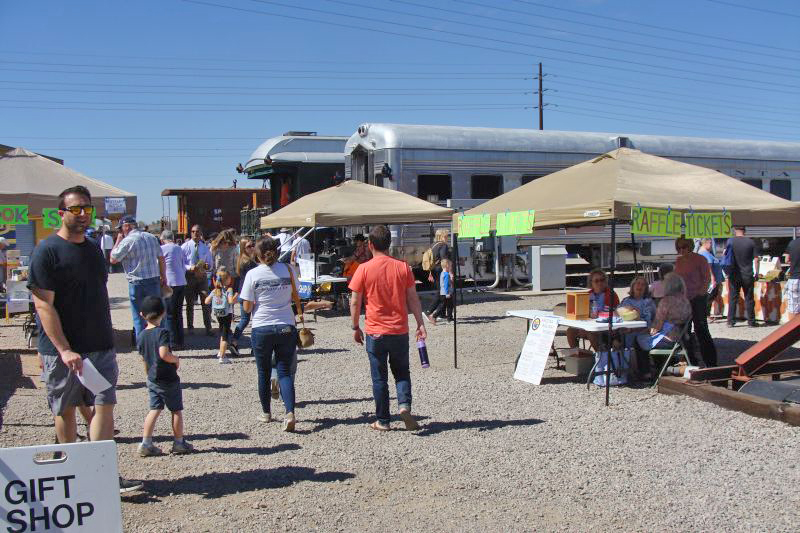
In the March update, I neglected to mention that on February 29 I traveled out to the Chandler Railway Museum to celebrate Arizona Railroad Day. It was great weather and a great turnout of railroad fans of all ages and sizes. Every year there is newly acquired equipment and restoration projects are notably advanced.
|
|
|
The Covid 19 situation has limited access to some of the machine shops and parts suppliers that I frequent and support out here, but we still managed to get a few things done this month. I am hopeful that we’ll get the last three E10 power truck axle assemblies rebuilt in April and hopefully complete sleeving the ten E10 trail truck axle assemblies in April as well.
Happy and safe railroading everybody!
|
05/11/20
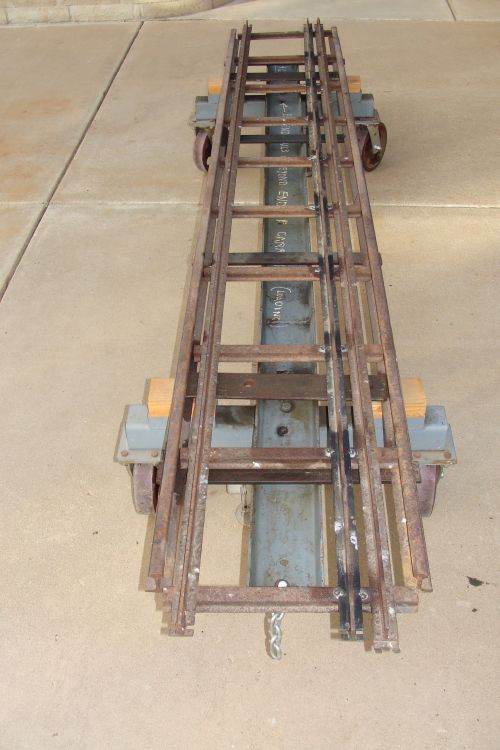
We received our ten shortened, bored and sleeved trail truck castings back from the machine shop this month. They started life as G12 trail truck castings and we have modified them into E10 coach castings. The machine shop bored and sleeved the castings for the bearings, drilled and tapped the new mounting hole for the leaf spring assembly and re-drilled and re-tapped the bearing retainer holes. We installed our half axles that we have been working on, new cotter keys, new seals and all new bearings. We built new bumper assembles and new leaf spring and spring pad assemblies for these trucks. We ran a die over the axle threads of all 84 axles and added new axle nuts. The trucks still need painted and wheels added, but it is very rewarding to have them essentially completed and it’s a huge space saver too!
|
We completed rebuilding three power truck axle assemblies this month and now have all ten E10 power truck axle assemblies completed and started assembling the components of the power trucks themselves. We added the side frames to all five power trucks and will add the arches next month. I am still working on cleaning the last few arches for the power trucks. We also plan to install the safety bars (bumpers) to the power trucks in May.
|
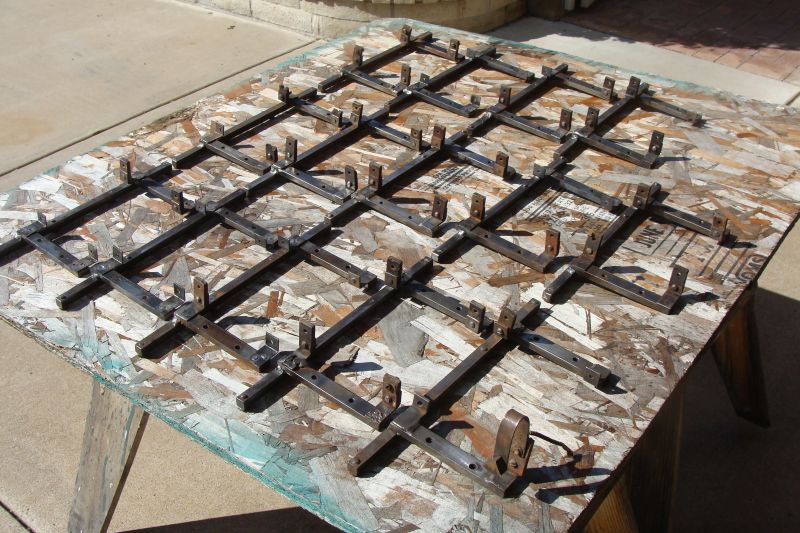
We will have 15 E10 trucks (5 power and ten coach trucks) ready for paint and wheels and hope to complete that process in May. We also completely rebuilt one G12 power truck and its leaf springs and spring pad assemblies this month; is also ready for paint and wheels. We are also in the process of rebuilding three G12 coach trucks that are missing several parts, have bolts sheared off in the castings and have been pretty much abused previously. We have located most of the parts. We are also working to preserve an E12 prototype power truck for display and a G10 power truck for our Miniature Train Company collection and displays. We hope to have all 21 of these trucks completed by the end of May except for wheels.
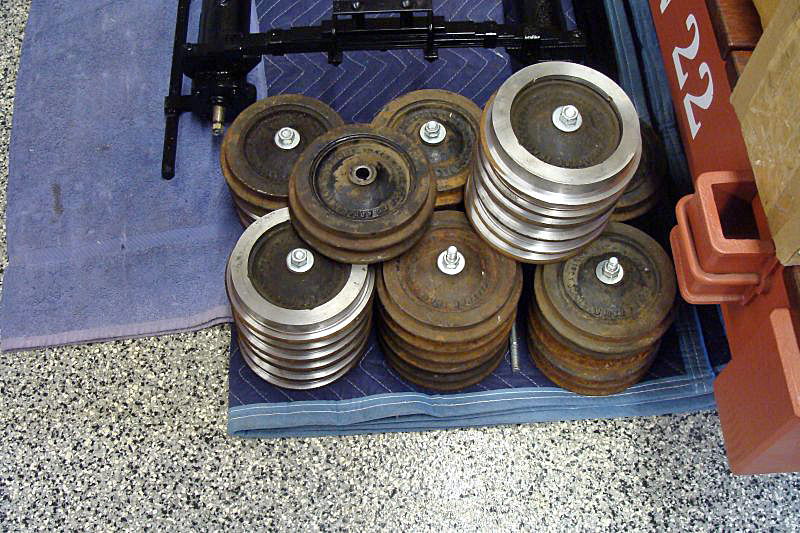
I now have all of the G12 wheels that we need and extras; I need 64 E10 wheels and have 44 in various conditions. I am not sure at this point if I will have some cast or use the E10 wheels on the power trucks and G12 wheels on the other cars. If you know anyone that would like almost new G12 wheels in exchange for E10 wheels, please let me know. We will be running our E10s on battery power so we can run the G12 wheels without issue, but clearly we would rather have the correct wheels if possible.
|
|
|
We finished mounting the Bakelite insulators on the last three power truck safety bar assemblies. All fourteen that we are rebuilding or fabricating will soon be ready for the assembly of the power truck components. As with the locomotive, the observation car pulled its power from the rails and utilized a transformer to reduce that to 6 volts to operate the drum head, side markers and rear light. We have five power trucks and two observation car rear trucks thus the fourteen safety bars with electrical components.
|
We started fabrication on our last batch of safety bars (bumpers). We are working on ten G12 bumpers and a G10 bumper set.
I ordered another thirty axle bearings and seals to complete the current projects and to have a few extras on hand for other projects that may present themselves.
Dave and I completed the drilling, tapping and soldering of 44 of the 64 needed wheel sweeps this month and devised a jig utilizing a 5/8 diameter mop handle to bend smooth and consistent curves in our brass wheel sweeps. We bent the first 44 sweeps this month and hope to bend the balance of the sweeps in May. We also ordered the cloth covered 14g wire for the jumper wires between the wheel sweeps. We hope to have the wiring on all the power trucks completed in June.
|
|
As mentioned earlier, we started on rebuilding six G12 trail truck axle assemblies. We will get these trucks assembled in May as we are still working to fabricate a few more safety bar assemblies.
We still have one more G12 power truck and a G10 power truck to rebuild and then we can move to the paint and wheels part of the process. l am starting to get a bit burned out on rebuilding trucks and I’m looking forward to having all the trucks finished and starting on the mechanicals for the G12 locomotive, 3 E10 locomotives, G12 observation car and 2 E10 ob cars soon. We will also start working on three large and four smaller display racks this summer. It is going to be a very busy next several months out here…
We had hoped to receive our Wisconsin stainless steel exhaust and exhaust trim ring for our G12 Wisconsin motor that we had ordered some time ago, but it looks like it will arrive next month. It will look great once installed.
I sent our original G12 battery tray pieces out for new pieces to be water jet cut. I should have the new pieces here early next month and then I’ll get the pieces for the battery tray to a friend with a sheet metal brake and then we’ll weld the pieces in place and add the threaded rod and battery ground cable.
I have been talking about it since last September, but I think we’ll be in a position to take Roster photos of our additional G12 and E10 equipment on their rebuilt and freshly painted trucks in June and we can update the website with photos.
We obtained a number of yoke style track clips that will be utilized inside the engine house on the display racks and track we will be building soon. These racks will straddle the gondola cars and tenders of our S16s in the engine house. Each will be double tracked with either G12 or E10 rail. The G12 rack for example will have a locomotive and coach on one track and an observation car and coach right next to it on the second track. The ob end and the locomotive nose will both be facing our other MTC displays. There will be two E10 displays with the same design just a little shorter as the cars are shorter. These racks will have the cars at nice display height and with a stool and some assistance allow little ones to sit in the locomotives.
|
I am starting to spec out all the materials from various vendors and the cuts that will be required in construction of the racks. We are going to build one and fine tune it before we build the other two. Each rack will be two sections that bolt together for ease of transportation. They will be powder coated and have wood ties. They should look very nice. I anticipate these will consume much of our July, August and September shop time.
Happy and safe railroading everybody!
|
|

|

|

|
|
06/08/20
We finished fabricating a pair of G10 safety bars, 4 pair of G12 safety bars and a pair of E12 safety bars. We also built eight more spring pad assemblies.
Dave and I finished making 30 additional wheel sweeps. We got the contact pads cut to size, cleaned and cut the sweeps themselves to length and drilled both required holes. We soldered the pads in place, drilled and tapped the pads and added the pad screws and washers on part of another workday. After cleanup, we used our jig to bend each sweep to the correct shape. This gives us a total of 74 sweeps. We needed 64 and wanted to have a few extras on hand.
|
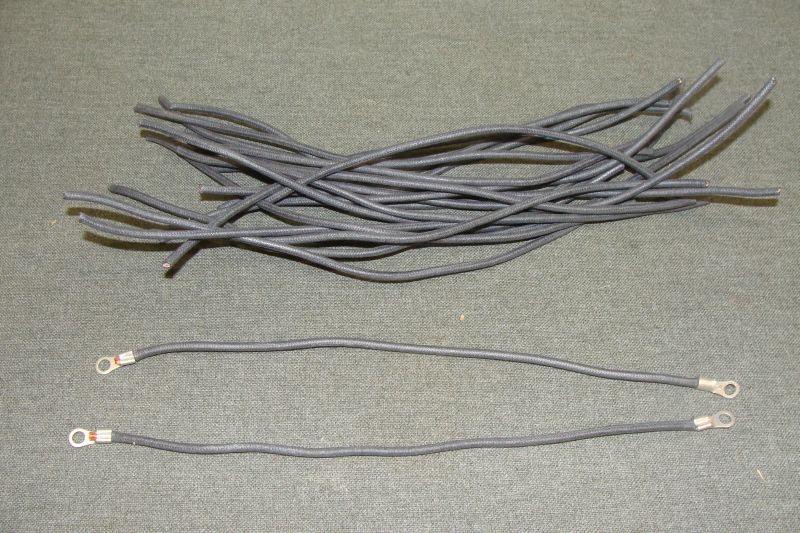
Dave and I started on the wiring harnesses for the eight electrified trucks. We completed the 32 jumper cables and the 16 loop cables. As with the sweeps, we will make several extra jumper and loop cables as we always like extras of all parts on hand. Still to come are the main harnesses.
|
|
We got our new battery box for the G12 back. Wow what an improvement from the original one that was all roached out from rust. The new box will be powdered coated in black before its final installation.
|
|
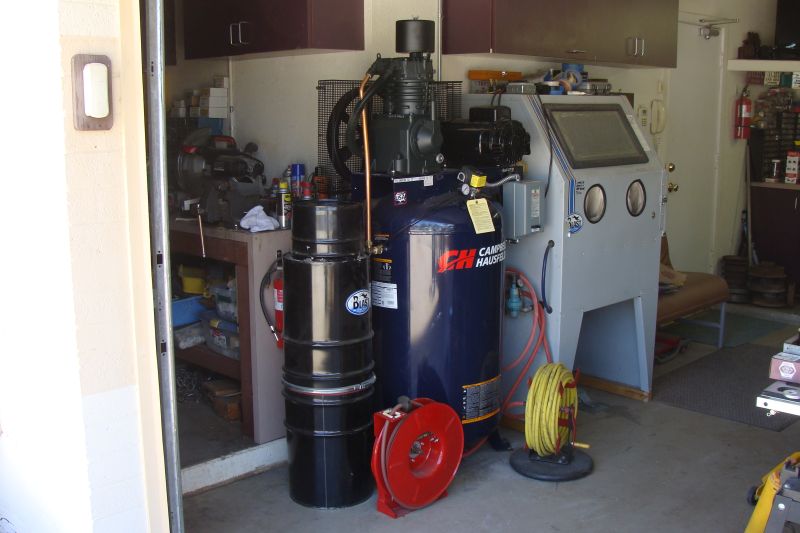
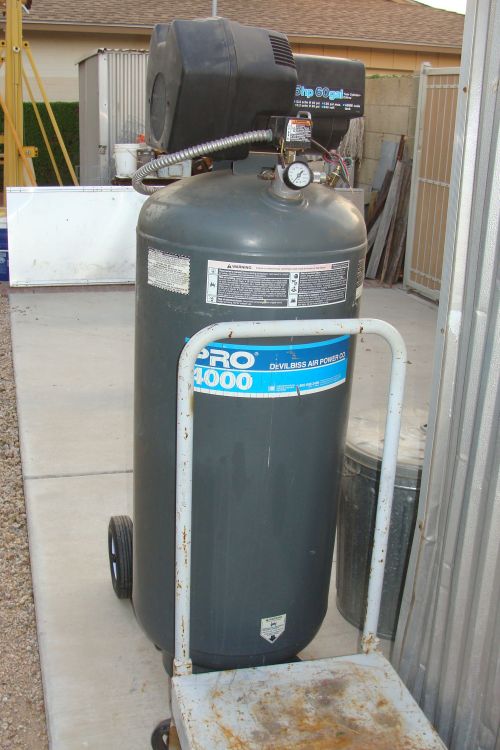
My low output shop air compressor has always struggled to keep up with my bead blasting cabinet. This month I purchased a larger unit rated at 25 CFM which should be plenty for my needs. This will make bead blasting projects much more efficient and be less frustrating going forward. The new unit is much larger and will require some rearranging of floor space, but will be well worth the effort. I will also be able to operate some air powered shop tools. I still need to have some additional wiring pulled before it will be ready to use. Happy birthday to me.
|
|
We rebuilt six G12 trail truck axle assemblies and attached our newly fabricated safety bar assemblies to each. I am still fabricating the leaf springs, but hope to have these trucks completed in early June.
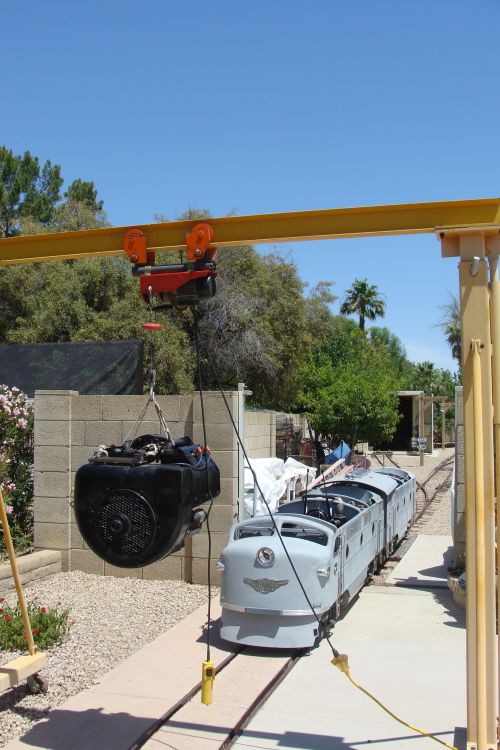
We pulled our Wisconsin motor out of G16 no. 582 and have our Wisconsin engine expert Jerry Graves looking at cylinder four and diagnosing the issue. It has been sluggish and always had an unexplained lope ever since it was rebuilt.. As any of you know that have pulled or mounted an engine in a G16, an automobile engine hoist isn’t configured quite right to do the job. We have modified a piece of 2 x2 tubular steel with .250 walls as an extension and it works great for pulling the motors. Note: I am not advocating that anyone else do this and I am certain this would not be OSHA approved, but we have utilized this method a few times on various pieces of railroad equipment and so far so good! I have to replace a bad caster, but we’ll use the gantry hoist next month when we reinstall the Wisconsin engine.
We still have a G10 power truck to rebuild and that is the last of the total of 21 trucks (E10 and G12) that we have been working on. We will have it completed early next month and then we can move to the paint and wheels part of the process. In preparation for our shop focus shifting to wheels soon, we built a shop tool for pressing apart and back together our E10 wheels.
I partially disassembled, primed, painted, reassembled and touched up the seven E10 trucks that will have electrical components. We will start adding the wheel sweeps and wiring next month. We will also add wheels next month after we swap out some tires and the new bead blaster is in place and functional to give them all a quick once over. A couple of these trucks are also awaiting arches that the bead blaster will clean up. We have fourteen more trucks that will need partially disassembled, primed, painted, reassembled and touched up next month.
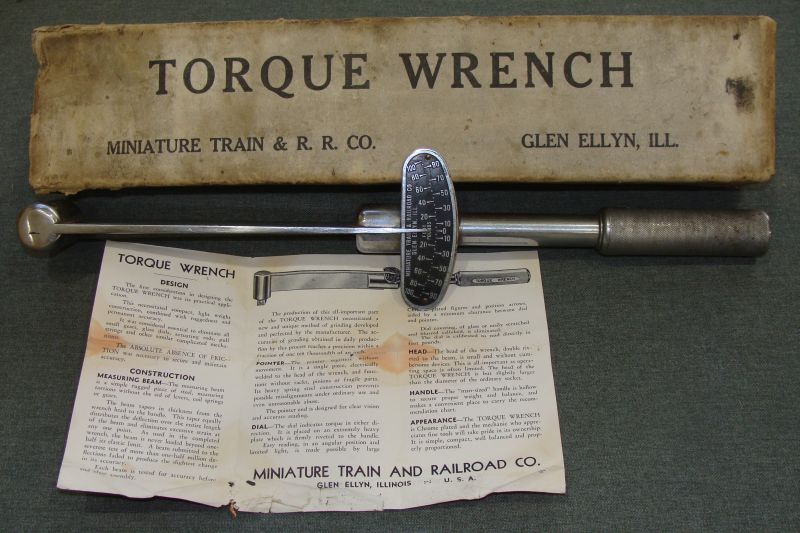
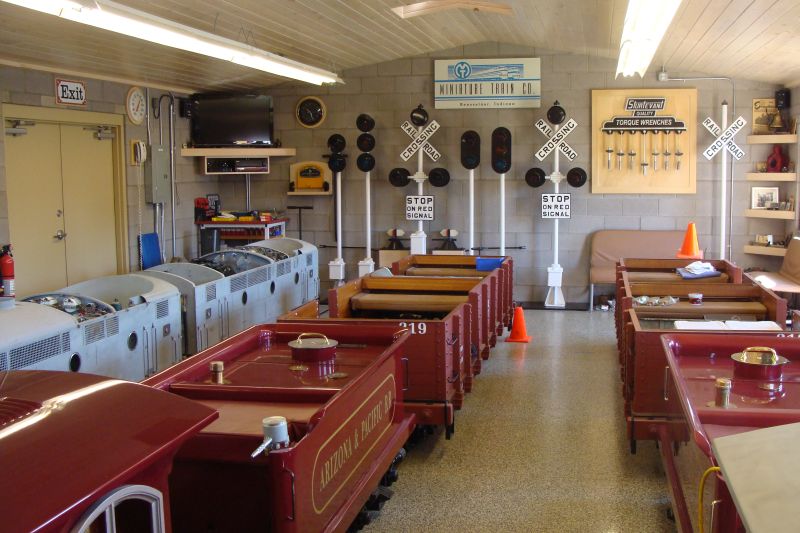
As any long-time visitor to this site is aware, we have a collection of Miniature Train and Railroad Company torque wrenches on display in our little MTC museum showing the different variations and changes as they evolved. The Holy Grail of MT & RR Co. torque wrench collection for me has always been one of the original 1938 torque wrench boxes and paperwork. I have been looking for one for many years. This month, we were fortunate to obtain a very early Miniature Train and Railroad Company torque wrench and original box and paperwork. In 1938, the Miniature Train and Railroad Co. torque wrench cost $9.75. As you would expect, the number of these boxes that have survived eighty plus years is very few. I have been collecting MT& RR Co. and MTC artifacts for more than twenty-five years and have only seen photos of one other torque wrench box. The wrench itself is in mint condition. I am so excited to add these items to our MTC collection and display. The box and paperwork will soon be displayed in a specially designed area on our MTC display wall!
|
I am still looking for a MTC track gauge box (we have a fully restored track gauge) from the 1950’s to add to our collection. Theses boxes are ten or twelve years newer than the earliest torque wrench box, but are still seventy years old and again few of these boxes exist any longer. I have only seen photos of two of these boxes over the years.
We continue to refine our design work on the engine house display racks for our E10 and G12 equipment and I am pretty far along in pricing out the materials from various suppliers. We hope to get started on actual construction of these racks in late June as soon as all the E10 and G12 trucks are completed and painted. The racks will be a big undertaking and it will be late in the year before they are completed with powder coating, ties, rail, lettering and MTC equipment sitting on top. Next year, 2021 will be the year that the sheet metal work gets completed on the E10 and G12 car bodies and they get their new, but period looking paint jobs. I am still looking for a few sheet metal and bolt on parts so I will continue chasing those this year.
Happy and safe railroading everybody!
07/14/20
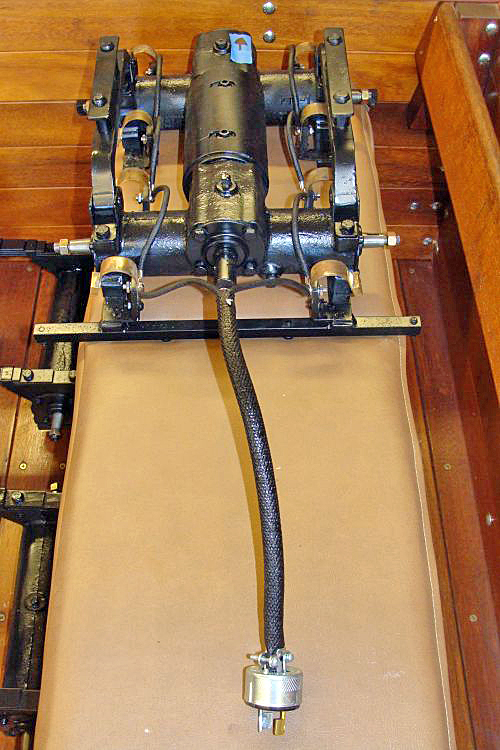
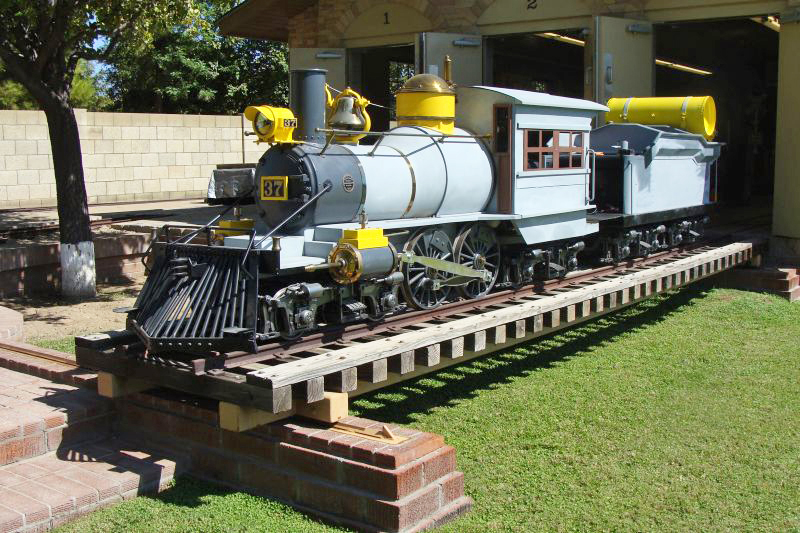
Our Wisconsin motor in our G16 was partially rebuilt this month. It was rebuilt completely several years ago, but then sat inside under a tarp for a few years while it awaited installation in our G16. It had the proper amount of Mystery oil and Stabil in it, but over the years the gas still turned to a sticky gel and the motor never ran quite right once it was installed in no. 582. The cylinders, heads and all internal components were cleaned thoroughly, new head and pan gaskets were installed and the carburetor was rebuilt. We also drained the gas out of the gas tanks and replaced it with new gasoline. We reinstalled the Wisconsin into no. 582 with our gantry and electric hoist which saves fingers and makes shimming and lining everything up so much easier than my conventional engine hoist! We reinstalled the hood and I bought a new battery as the previous one was on its last legs.
|
|
We completed fabrication of four more spring pad assemblies and four more G12 coach leaf spring assemblies this month. I am awaiting the arrival of 8 more Ubolts to complete assembly of these two G12 coach trucks.
|
With our PA parts cache, we received 30 partially completed E10 tires. We had 11 of them bored and faced as tires for existing E10 wheels that are badly worn. We pressed off the six tires that were in bad shape and pressed on the new tires and we also built five new wheels with existing hubs and Bakelite insulators. The complete wheels came out very nice. This gives us 44 very nice wheels. I still need 20 more E10 wheels for our restoration projects. I have 15 partially completed tires that we can finish with boring and facing. I could have 5 tires made from blanks. I would still need 20 hubs. I am still contemplating having some hubs cast next year, but would much rather find some. Another alternative is having a CNC machine just make me 20 more hubs.
|
I replaced two batteries this month – no. 582 and the Red River.
I was set to have an electric sub panel installed outside the shop with a dedicated circuit for the new 220 volt, single phase, air compressor, but two days before they were supposed to start the work I received a call that three of the company employees had contracted Covid 19 and the entire company was undergoing testing and lockdown. The work will get done next month by that company or another one. I did have to rearrange a bit in there, but this will really be a great set up once completed. I am also having a 110 V, 50 amp circuit installed for when friends visit with motor homes and travel trailers or when we are using the line feed welder. We refurbished my bead blasting cabinet with new bead blasting material, new window screen and new nozzle. We also re-plumbed a couple of things to accommodate the new compressor.
We were able to locate and acquire a complete gasket set for the Wisconsin BRN that will go in our G12. I wasn’t sure that we needed it, but it has a couple of small leaks and since it is still on the table anyway, we will replace all the gaskets before final installation of the motor in our G12.
We have finally completed the rebuild of the G10 power truck and it is sitting next to the E12 power truck. They both still need finishing touches. They need their aches, I am searching for two more of the old style oil fill caps that are in nice shape, I want to bead blast the side frames, and they will be partially disassembled, primed, painted, reassembled and wheels added. The E12 also still needs wired.
|
I partially disassembled the E10 and G12 trucks that we have recently rebuilt. I primed, painted, reassembled and touched up the paint on 20 trucks this month. Two trucks are awaiting their leaf springs and spring pad assemblies and 8 trucks are awaiting their arches, but everything is rebuilt and just awaiting those parts. All of those parts are here and just awaiting bead blasting, prime, paint and assembly. There are 14 arches, 4 leaf springs and 4 side frames awaiting bead blasting.
|
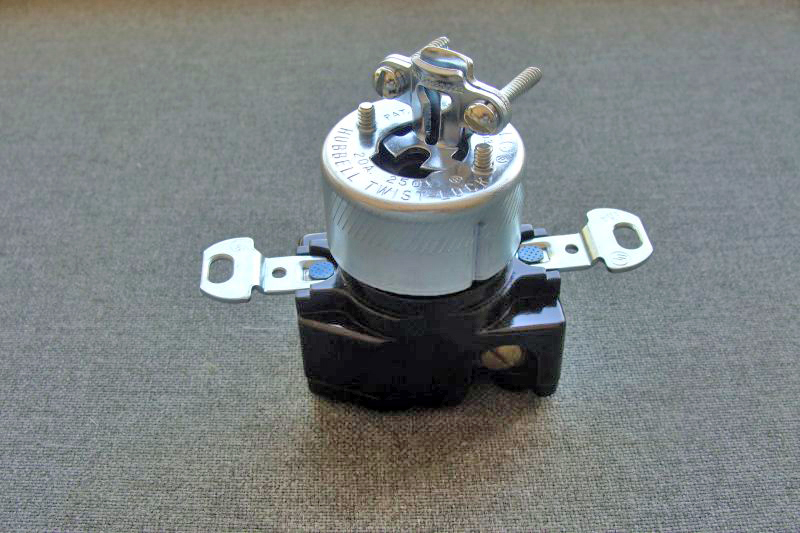
Dave and I completed mounting the wheel sweeps, jumper cables and loop cables on the five E10 power trucks and the 2 electrified E10 coach trucks (rear trucks – observation cars). We built the main wiring harnesses including the Hubbell 2 prong polarized twist plug for each truck. As you would expect, the harness is a very different length for the observation cars than it is for the power trucks. Dave was able to acquire brand new NOS Hubbell plugs and receptacles for our E10s that are the same exact parts used in the E10s originally. These were really great finds; even the old boxes are very cool. It is much easier doing this work without the wheels on the axles and for photographic purposes there is a much better view of the sweeps and wiring than after the wheels are on the axles.
After completing this wiring project with 14 gauge wire, we changed our minds and are rewiring the trucks with 10 gauge cloth covered wire that we located. We already know the exact lengths we need for everything so this will go more quickly than our original work did.
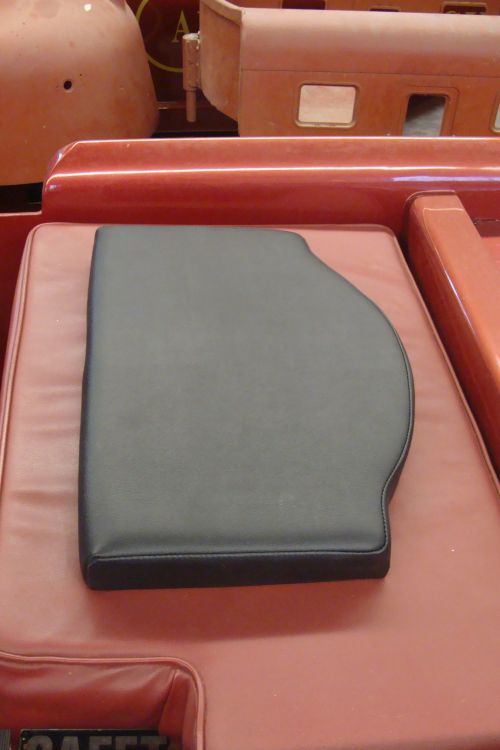
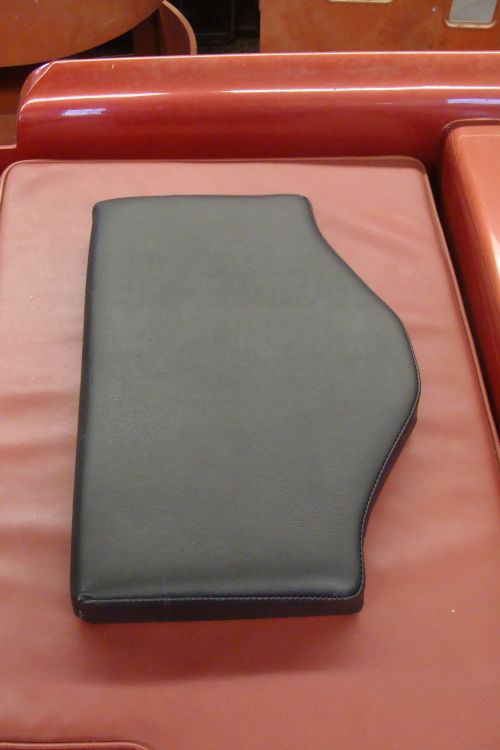
I made a pattern for the G12 engineer seat and the rear seat of the G12 observation car and also made a pattern for the E10 engineer seat and rear seat of the E10 observation car. I cut out enough pieces of plywood for 1 G12 engineer and 1 G12 rear ob car seat and 3 E10 engineer seats and 2 E10 rear observation car seats. The E10 and G12 seats are very different in shape and size. My next door neighbor does high end upholstery of custom street rods and speed boats, but is always willing to assist with my crazy train projects and is able to tone things down enough to work for my applications. When I took the plywood seat bases over last week, he was just finishing a complete interior of a super cherry, all metal, 34 Ford. The entire car was incredible! I got the seats done in basic black and just got them back this week; they look pretty good.
|
|
We may have another cool find or two for our MTC collection that I hope to be able to share in the next couple months – no not additional trains or cars, just MTC items that I have been hoping to come across for some time and may have done so.
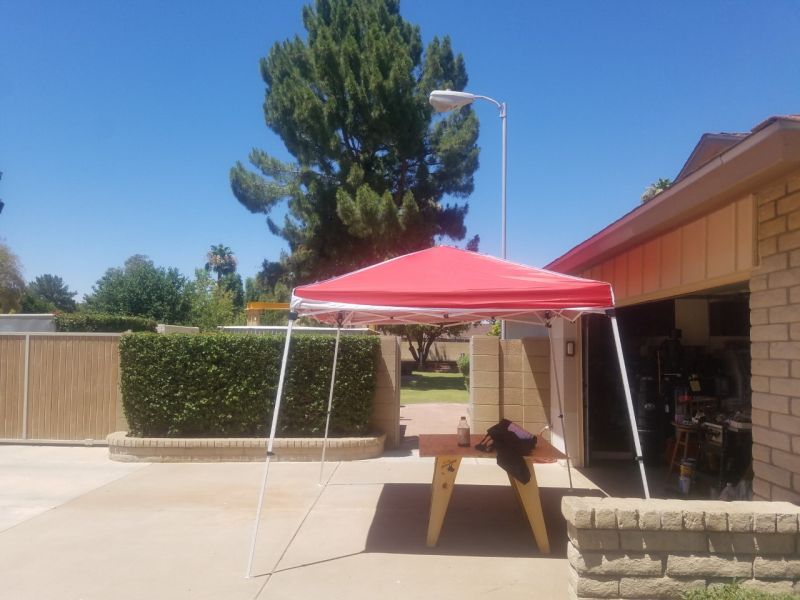
I finally broke down and bought a 10 x 10 nylon canopy to protect us from the sun when I need electric access and am working in the driveway. It will come in handy as it was 111 when I was working out in the driveway yesterday…
|
Happy and safe railroading everybody.
|
08/17/20
We installed our new tires and Bakelite insulation rings on our 13 E10 wheels that were in bad shape. The wheels are now like new. I still need to bead blast, prime and paint the 44 E10 wheels we have and install them on 11 of our E10 trucks. We have two additional E10 wheels, but one is for display and one has a hairline tire crack and the tire will be replaced, but hasn’t been yet. The 4 G12 trucks and the G10 truck that we just rebuilt will receive very nice G12 wheels after they are bead blasted, primed and painted. I am still trying to find additional E10 wheels and have beautiful G12 wheels and other goodies to trade or will buy outright.
|
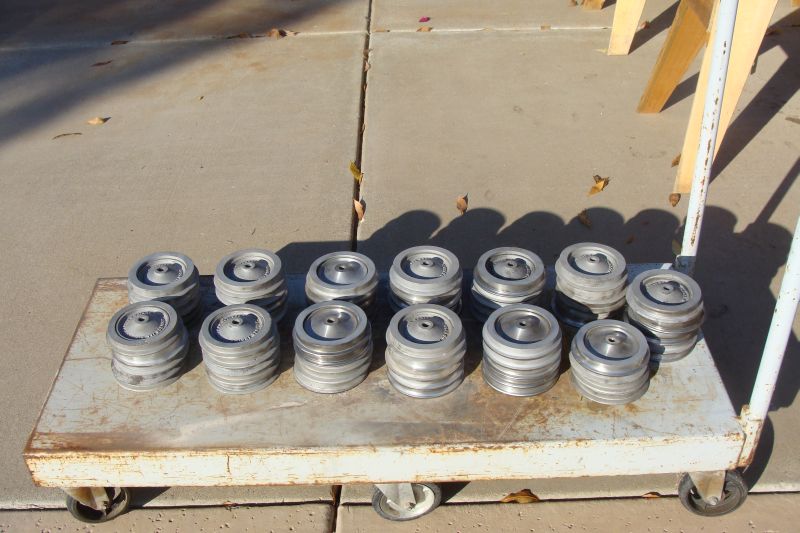
I made the decision to have 20 new E10 wheels manufactured via CNC machine. They will be delivered the second week of August. Then I will need 22 more tires finished so that we can match them with the new wheels for our remaining five trucks awaiting those wheels. I hope to have all those wheels completed in early September and bead blasted, primed and painted later that month.
I acquired a 2 ton electric hoist for our gantry crane. We had to build new mounting brackets and a new mounting bar to secure it to the trolley. It will make lifting some of our heavy loads a little less sketchy. My previous one was rated at 400 lbs and 800 if using the pulley. This one is rated at 4000 lbs and 8000 pounds with the pulley in use.

|
Dave had a tremendous find this month – the electrical connections for the E10 and G12s. We also acquired the polarized plugs and receptacles for the G12.

|
|
Dave and I rewired all of our seven E10 trucks and the E12 power truck with 10 gauge wire. We originally wired them with 14 gauge wire which is fine for automobiles and the G16s and S16s. The E10s use a direct short emergency button for emergencies and immediate stops. The fuse in the large transformer is supposed to blow immediately, but if it doesn’t, it starts frying the wiring of the trucks and engine with the smallest gauge wires going first. We decided to upgrade to the 10 gauge wire to prevent burning up the wiring if we have to apply the emergency stop switch and the transformer fuse doesn’t pop immediately.
|
We located the four period transformers we need to convert 32 volts to 6 volts to operate the various side marker lights, drum head light, head light etc. in the E10s.
The wiring for the new compressor to operate my bead blasting cabinet was finally completed two weeks ago. I still need to complete the break-in period and then I can start bead blasting. I have 14 truck arches, 4 G12 leaf springs and several side frames awaiting bead blasting, priming, painting and installation on trucks.
|
|
We sent out bid requests for the steel cutting and welding work on our three large display racks. The display racks will be built in modules for ease in transportation; each finished rack will be almost twenty feet long and weigh just at 1000 pounds once fully assembled. They will be completed in four phases: 1.) the welding and fabrication of the individual modules, 2.) powder coating the modules, 3.) assembly of the modules and leveling pads, 4.) adding the ties, rail and finishing touches.
The first rack will come here and be fully assembled to make sure we have everything designed and constructed just the way we want it. If we have no changes to make, we will green light racks 2 and 3 and disassemble rack one and take it to the powder coater.
We have two track gauges. One is a Miniature Train Company gauge that we have restored and is on display in our engine house. The second one is exactly the same but instead of being the familiar MTC yellow, it is black and has a Chance name plate. This is the one that we actually use on our railroad. For the diehard MTC fans and collectors, you know that the track gauges were manufactured in Rensselaer. There were two varieties of wheels over the years. The more common variety has the lubricant add port and cap and is otherwise plain. The rarer and highly desirable version is track gauge casting TG-2 and has the casting number, Miniature Train Company name, logo and city of manufacture in the casting. One of our great friends had a track gauge with the highly desirable wheel set and sent them to me to swap for my unmarked wheel set. He said the ornate wheels need to be on display for others to see and that is what my MTC exhibits are all about and he wanted them here where people can view them. What a class act he is and I appreciate his act of kindness so much.
|
|
I hope to get the wheels and arches on the trucks next month and maybe over the Labor Day weekend get us some roster photos of the E10 and G12 equipment in front of the engine house. They will provide a nice before and after contrast.
It has been 110 degrees plus here for about three weeks and the next two weeks look pretty much the same so it has been a little tough to get motivated on the heavier outside work, but progress is being made.
I received the 8 custom Ubolts that I ordered and which allowed me to assemble the spring pad assemblies for two additional G12 trucks.
|
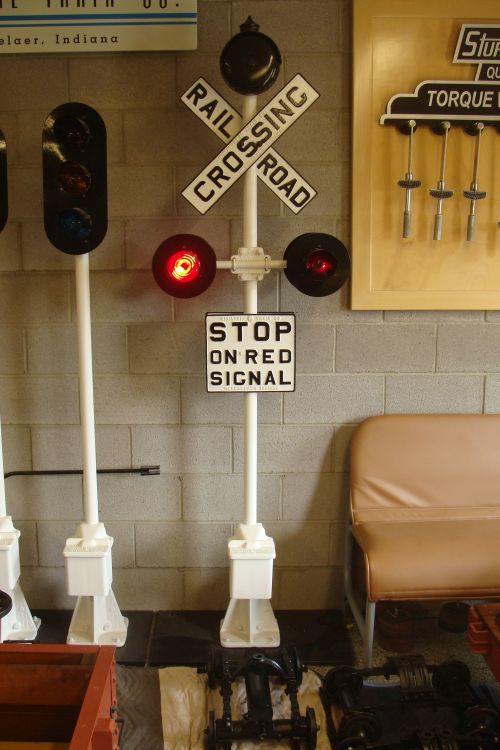
Dave and I spent quite a bit of time this month on displays in the engine house. As I mentioned earlier, we swapped out the wheels on our MTC track gauge, we designed and are working on a display for the 1938 torque wrench box, paperwork and wrench and have been working on one of our crossing signals so we can activate it from a key fob and can chose to have the bell operating or not.
Happy and safe railroading everybody!
|
09/14/20
I think I shared in one of our earlier updates that we were lucky enough to find a complete NOS gasket set for our Wisconsin motor that will go in our G12. This month our Wisconsin motor specialist, Jerry Graves who used to own one of the two Wisconsin motor franchises in town, took our motor to his “retirement” shop and replaced all of the gaskets and shaft seals. He also freshened up some of the paint. We look forward to leak-free operation once the G12 in placed in service. The engine is still sitting in the original pan. I am still working to track down the springs and clevis pins we need to complete the brake rigging and will then move everything to the new mounting pan.
|
|
Progress was made on our newest MTC display this month. The display will feature an original 1938 torque wrench box, its torque wrench and the paperwork that came in the box explaining what a torque wrench was, its applications and its price - $9.75. We hope to have the display completed and ready to hang in September.
We got the new bead blasting cabinet compressor run through its break in period and got all the head bolts re-torqued per factory directions and specifications. I got all of the side frames and arches bead blasted and many of the E10 wheels bead blasted as well.
Dave and I got the last two G12 coach trucks assembled and wheels mounted. They will need a little bit of touch up once everything is on our large display racks.
Our 20 CNC created E10 wheel hubs were delivered this month and look really good. We are in the process of having 22 new tires completed and these components will be mated with bakelite insulators next month to complete 22 new E10 wheels. We had two extra original wheel hubs in our parts bin thus the disparity in the number of the new components. Fifteen of the tires were completed this month and the wheels pressed together. The last seven of the tires are still in process and we should have them next month.
|
I met twice this month with the gentlemen we have selected for the fabrication of our metal display racks (Eaglewings Ironcraft) for the G12 and the 2 E10s. We made a few minor last minute modifications and I signed off on the final drawings and provided the initial payment. We hope to have the fabrication phase completed and racks back here from powder coating during the third week of October. Then we will need to assemble the modules into the full racks, level all the modules, mount 220 ties and then add the rail and some MTC logos. We will push to have everything completed by the end of the year, but that may be overly ambitious.
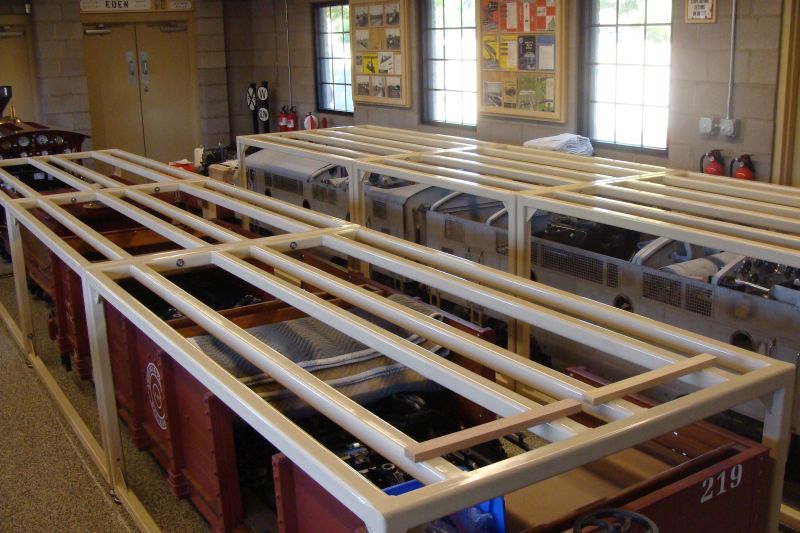
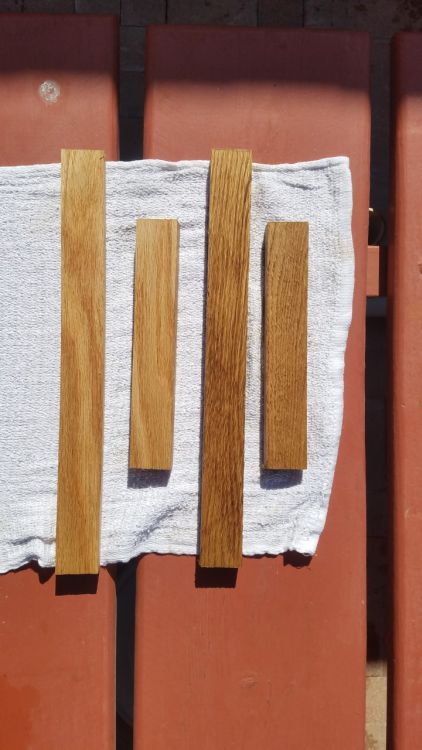
We started preparing the ties that will be used on the racks. We brought about 80 ties back from Pennsylvania last summer; they had been wet at some point and got pretty dirty over the years, but it was important to me that they be used in this project. We spent several hours this month trimming the ends, planing and sanding the Red Oak ties. They are slightly smaller than they were originally, but look really great. We need 70 ties for each E10 rack; we made 144 counting the ones from PA and the ones we made from new material. We need 80 more for the G12 rack and they are 2 inches longer. We hope to rip, trim, plane and sand the G12 ties in two weeks. Then all will get a medium oak stain and a spray polyurethane finish. There is still a great deal of work needed to complete the racks, but it is full speed ahead.
|
|
Several of the arch pins on our cars (E10 and G12) were badly bent. We drilled out the rivets, removed and straightened the pins and are conflicted between re-riveting them or simply using a button head bolt which looks similar to mount the pins back on the car bodies. We’ll decide on the attachment hardware next month.
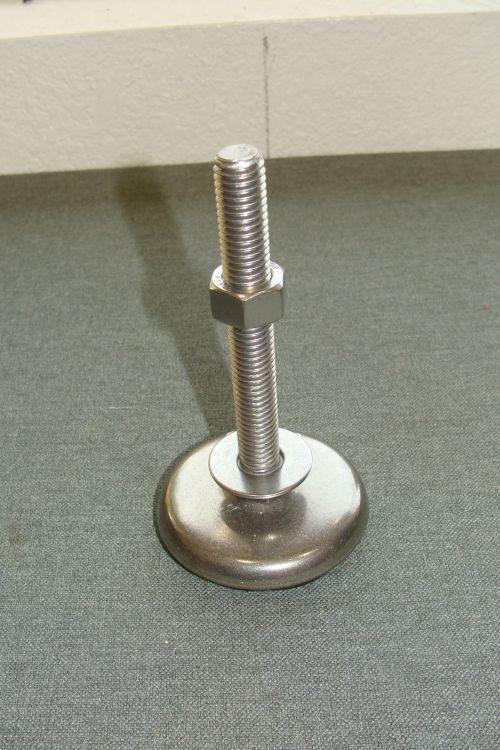
I ordered the first dozen of the levelers for the bottom of the three racks. Each module has 4 levelers so we will need a total of 36. I will order the remaining 24 later this week.
|
We are going to fabricate a new front skirt for our G12. A friend of ours has a sheet metal brake and a roller. The contour of the skirt is a little tricky as it has a much smaller diameter at the top where it mounts than at the bottom where it extends above the rail. We have a damaged skirt that we can use as a pattern; we’ll see if we can recreate it exactly or have to have a professional fabricator take it on.
For a number of years, Dave and I have talked about modifying one of our crossing signals in the engine house MTC display to operate on modern electronics and be activated by a simple remote key fob. Well it was much more complicated than that just sounded, but that project is complete and visitors can watch a MTC crossing signal operate and hear the bell ring out its warning. Click here to see and hear it operate It adds another dimension to our displays and also works into safety programs for the younger kids.
|
Next month (September 25, 1995) is the 25th anniversary of the Arizona and Pacific Railway. It really is hard to believe that it has been that long since we acquired the Phoenix at an auction and started work on our first railroad restoration project and little railroad. Once this Covid pandemic is over, we will have some kind of a run day open house for anyone who is interested in attending. Hopefully we can host in the spring or fall of 2021; we will just have to play it by ear.
I have a couple of problem areas for my lawn on the A & P. The east side of the engine house and also south of the transfer table are in the shade most of the day. I have planted grass and laid sod in those areas with Bermuda in the past and each year the grass gets thinner and thinner. My dad had good success at his house with St. Augustine which is a much thicker bladed grass, but will thrive with as little as four hours of direct sunlight a day. I found a local turf farm that grows St. Augustine and added 200 square feet in the problem areas. If this grass takes off and does well, I will add another 200 square feet to these and other problem areas next year.
|
|
Happy and safe railroading everybody!
|
10/12/20
The remaining 7 E10 wheel hubs and tires were mated with their insulating rings this month and really look good. We now have the 64 E10 wheels completed that we need for our trains. I only have a few more E10 wheels to finish bead blasting and we can start painting them and mounting them on the axles. I am looking forward to having all the E10 wheels painted and mounted and the trucks ready to display.

|
We will be starting on the sheet metal work and painting work in the near future and so we took the opportunity this month to get before restoration roster shots of the G12 equipment. The post-restoration roster shots are still several months away. We will get E10 equipment pre-restoration roster shots probably in late October or early November. We just have so much going on in October and early November with the racks, constructing track panels, finishing displays, bead blasting and painting E10 wheels that it will likely be a few weeks before we get to the E10 shots.

|
|
Our friend Jerry Graves did a great job fabricating a new front skirt for us with his sheet metal brake. He used a badly damaged one that we had acquired as a pattern to fabricate the new one and it matches exactly. We drilled the rivet holes this morning, and mounted the skirt with bolts so that we could pull the skirt tight after each bolt was installed. I thought I had the correct rivets and as it turns out I did not so they have been ordered. Once they arrive, we will start in the middle and remove one bolt at a time, countersink the hole and install the rivet. Then we will go on to the next bolt. Once all of the bolts are replaced with rivets, we will grind the rivets flush with the nose just as MTC did so many years ago. Gosh, it makes such a big difference in appearance having the new skirt in place.
|
|
I tried numerous sources searching for T beam rail to match that original used by the Miniature Train and Railroad Company on its E10s and G12s without success. We brought back a large quantity of E10 and G12 rail from PA last summer. I measured what we have and made the decision to use original MT & RR Co. rail in our displays. I still have enough track on hand to run both the E10s and G12 in an oval and am hoping to acquire additional G12 rail in the future. So the rail will be original as will be about 1/3 of the ties, but we are taking some liberty with the tie spacing. Originally M T & RR Co. ties were spaced at 12 ½ inches on center. We will be adding an additional tie between the original spacing so the ties in our display will be 6 1/4 on center. I just think that visually for us that it will present a better look. Our G16 ties are spaced at 12 inches.
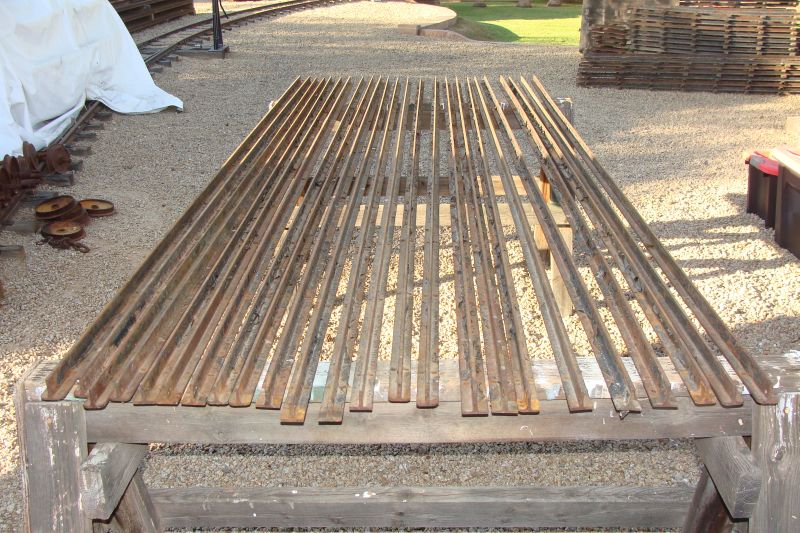
|
After all the rail is drilled for the additional ties, it will be cut to length, bead blasted and powder coated before it is assembled and added to the display racks. Last month we planed and sanded the ties we will use in the E10 displays. This month we purchased the material for our G12 ties and ripped, cut to length and sanded those ties. We need 80 for the display and had enough material to make 84. The G12 ties are dimensionally the same as the E10 ties except they are two inches longer. Our E10 ties are 14 ¾ inches long and the G12 ties are 16 ¾ long. The ties have all been sanded, but will still have the corners and ends sanded and get stained and then a couple layers of polyurethane will be applied.
|
After all the rail is drilled for the additional ties, it will be cut to length, bead blasted and powder coated before it is assembled as track panels and added to the display racks. MTC offered a choice of two different styles of track clips. We will be using the wrap around style on the E10 and G12 displays, but the other style will be on display as well in our effort to showcase the full range of MTC products.
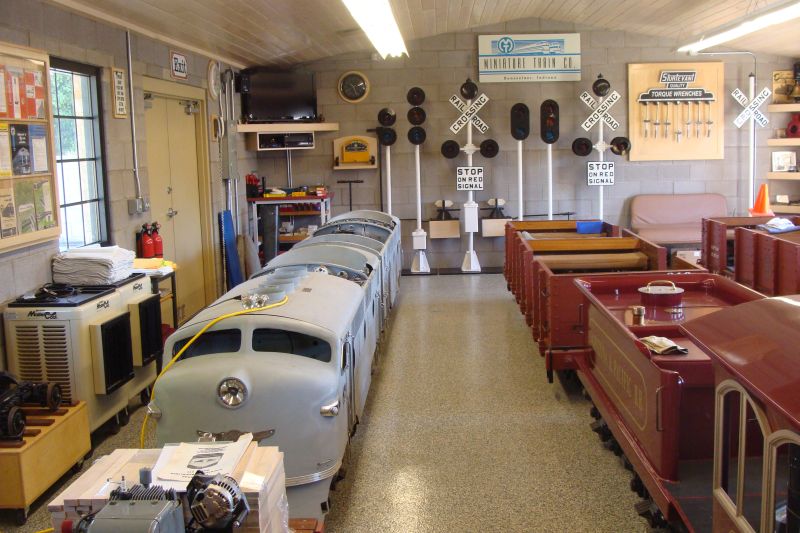
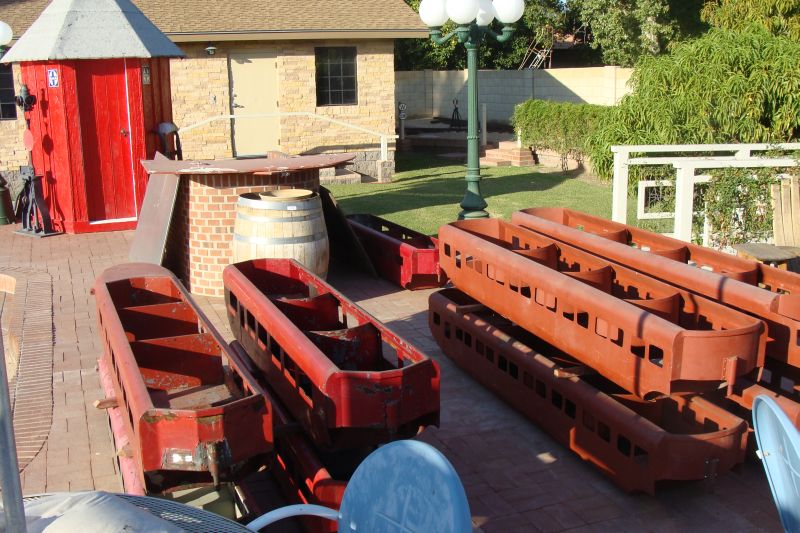
Our racks are set for delivery in four weeks and I have a great deal of rearranging to complete in the engine house before they arrive. We moved all of our E10 and G12 bodies out onto the patio for the next four weeks as this is the dry time of the year and no rain is projected. I will remove all of the equipment from the engine house and sweep and mop the floors and dust everything before the equipment goes back inside. It will take me the best part of two weekends to get everything done in there that I need to accomplish so we moved the smaller equipment out this weekend.
|
|
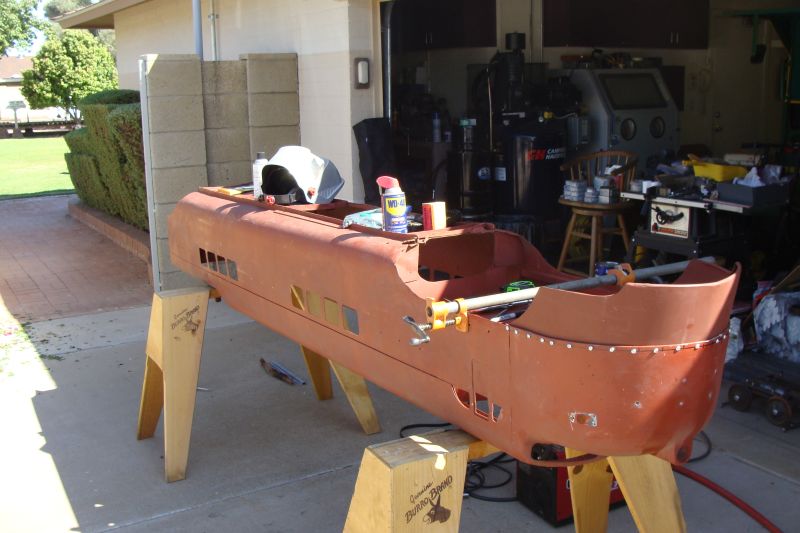
We started some of the sheet metal work on our G12 locomotive this month. We cut out the badly damaged front cross member and replaced it with one we had on our parts shelf. We removed close to a dozen bolts from various locations that were sheared off and now they can be replaced with new hardware. We also straightened and tack welded sheet metal in some areas and cut out and replaced sheet metal in others. We still have a great deal more work to complete before it goes to the professionals for finishing the sheet metal work and painting.

|
|
I have started sourcing the ties and switch ties that we will use when we replace most of our Arizona and Pacific Railroad 16 gauge ties next year. We have 650 regular ties to replace as well as the switch ties in 10 switches. We are speaking with Northern California and Southern Oregon suppliers. We should know in the next few weeks where our new ties will be shipping from.
Happy and safe railroading everybody!
|
We completed mounting the front skirt on the G12. We removed each bolt that we installed last month one at a time, used a countersink tool on the aluminum nose, replaced the bolt with an aluminum rivet and used the riveting hammer to drive and set the rivet. After all the rivets were in place, we used my angle grinder with a floppy sanding disk to sand the rivets flush with the G12 nose. We added a thin coat of red primer and you can’t see the rivets at all. It was a great deal of work fabricating the skirt and mounting it properly, but I think it really makes a statement and I’m happy with the way it came out.
|
|
|
|
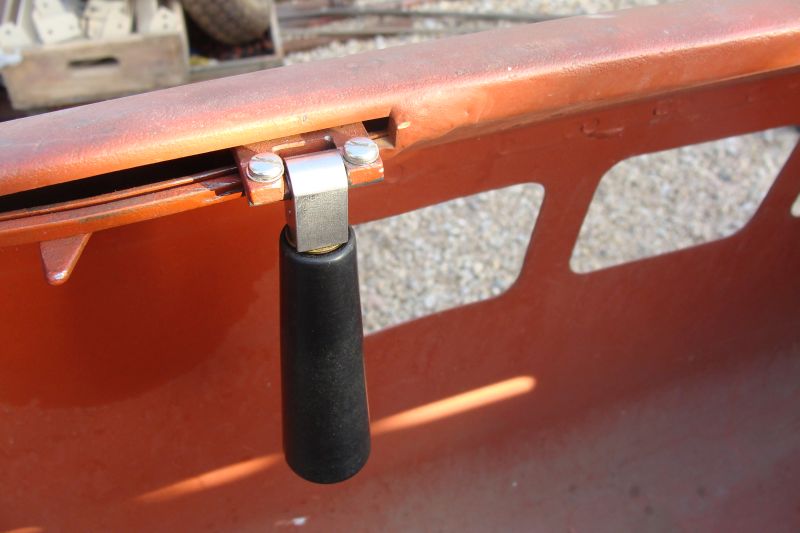
We also started on the throttle linkage on our G12. For some inexplicable reason, one of the prior owners had cut off the welded brackets on both ends of the sliding rod that runs from the throttle handle to the engine carburetor linkage. We had a donor rod and brackets. In the engine compartment, we had to cut into the sheet metal panel to access the rod. We welded the donor bracket in place and will close up the sheet metal access area the next time we work on the G12. On the other end (throttle handle end) we were able to leverage what was left of the bracket out far enough to weld an extension to it in place. We still need to cut it to length and shape the bracket like the original. This was a critical project to operating the G12 as designed and was crazy time-consuming, but the worst of it is done and it will work great.

|
|
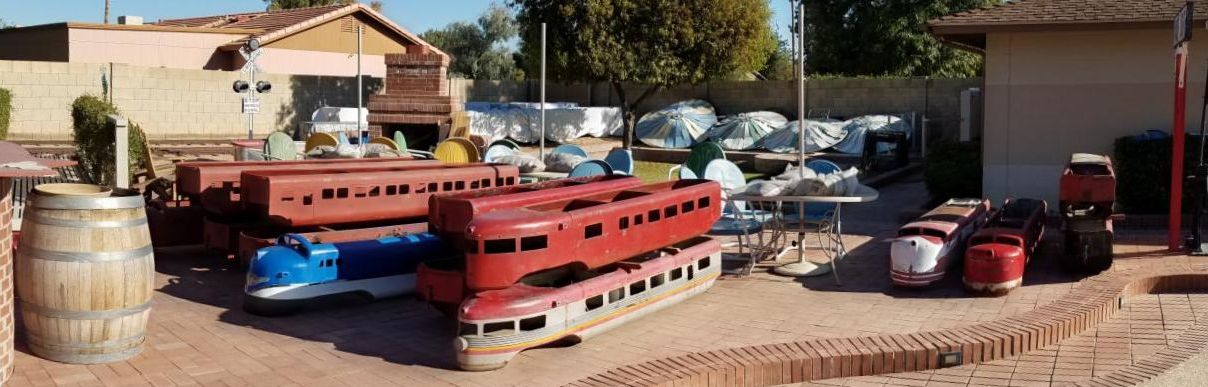
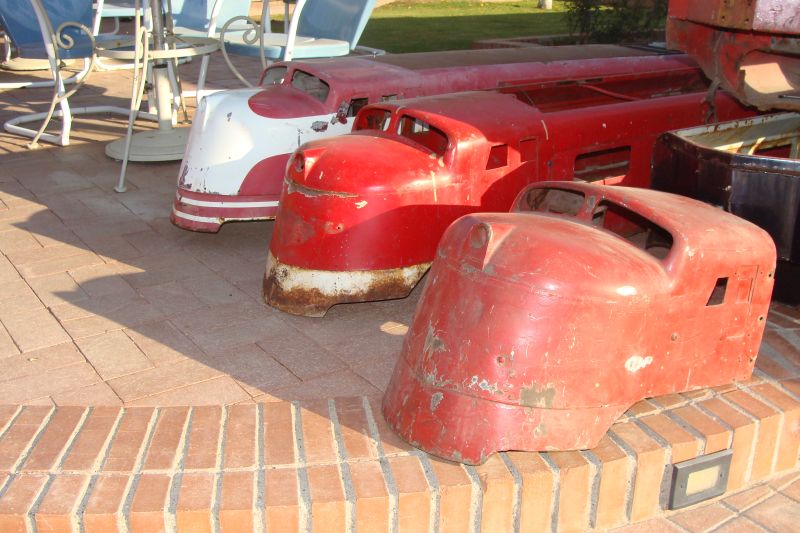
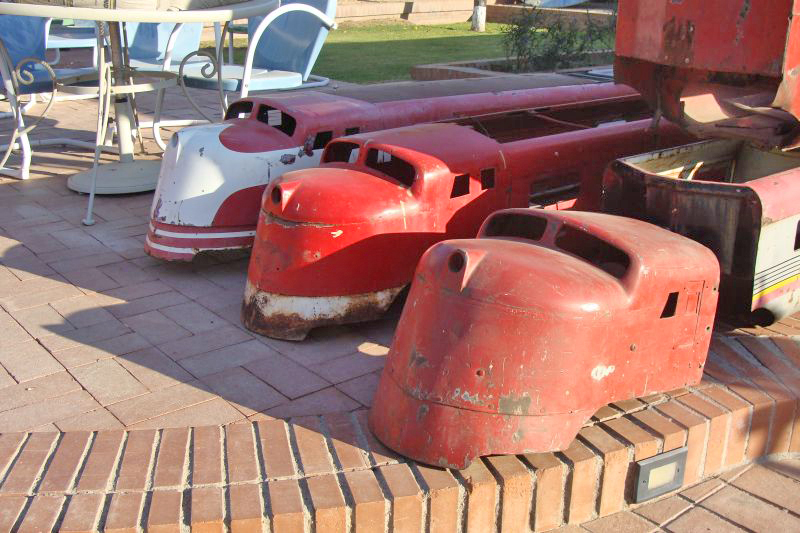
We had our two G12 locomotive bodies side by side as we “borrowed” brackets, mounting hardware and truck arch pins from the donor for the one we are restoring. In large areas, the donor is screen and duct tape covered with a quarter inch of bondo. It looked good in the photos when I purchased it off the internet, but it was disappointing when it arrived here a few years ago. It did have enough bolt on parts that when combined with parts from three other locomotives, we have all the parts and panels we need for a really nice restored locomotive.

|
I purchased five batteries that are ready to be installed soon. The Red River, Tucson, No. 582, the track inspection car and the Coconino are all getting new batteries.
I did install the new battery in the track inspection car this month. We also drained the old gasoline and added fresh and I changed the spark plug in the Wisconsin AEN that powers that piece of equipment.
We continue rearranging the engine house in preparation of the arrival of the new display racks. The Phoenix has been moved to track no. 2, the Sandusky has moved to track no. 3, the Red River has moved to the original engine house and the no. 582 has moved to track no. 1. Our 4 foot utility trailer is now stored elsewhere and additional changes will take place over the next couple of weeks. In the course of moving everything around, I swept and mopped the floor and cleaned the displays. The brass on some of our locomotives still needs polished, but it is starting to look pretty good in there.
|
|
|
|
Our racks were originally scheduled to be delivered on October 16, but timing issues arose among the fabricator, powder coater and the transportation outfit. If things go according to the current plan, they will be delivered here on November 4. We will get everything into the engine house and roughed into place that day and then start with the actual assembly on the following weekend November 7th and 8th.
It is still 100 degrees plus out here, but should be cooling down around the end of the month and we will get the new batteries installed, carburetors rebuilt and get the old girls on the track for the first time in a few months soon.
Dave and I have continued working with the original MTC rail that will be part of the three large displays as well as three small displays that we have been working on. There is still quite a bit more work to be completed before they are ready for powder coating. Our new battery tray, sixteen ten-foot rail sections and six five-foot rail sections will go to the powder coater in early November. Eight additional 10 foot rail sections, the gas tank and several smaller items will go to the powder coater later in that month.
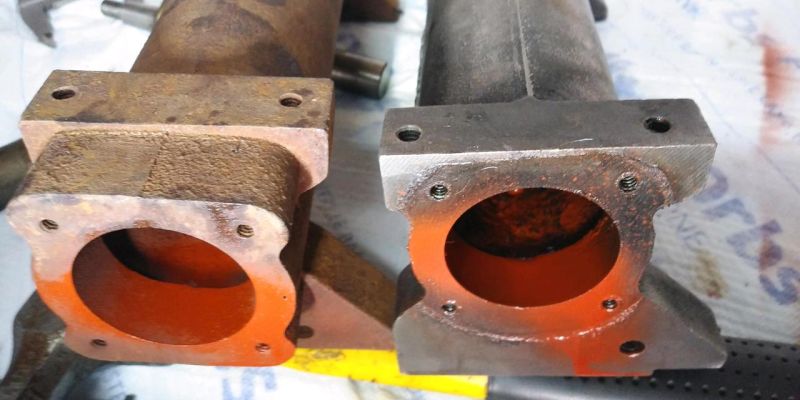
We received the BKN exhaust pipe and trim that we have been awaiting. I think it looks pretty good. You can be the judge when you view the before and after photos… We also located 2 older style E10/G12 power truck inspection plate fill caps, an original G12 light switch from Cole-Hersee, 4 brake rigging brake shoe clevis pins and an E10/G12 drum head and the red lens for it.
|
We have a supply of E10 rail, G10 rail and G12 rail. There were two different sizes of E10 rail, the early variety and the later version. There were also two different sizes of G12 rail, again the early and the later version. The differences were subtle with the width of the web and thickness of the rail foot, but the differences require matching differences in the track clips. I am learning more than I ever wanted to know about the early MTC rail and track clips…
We aren’t too far away from dry fitting the BKN into the G12 and measuring for the purchase of the two drive lines.
I purchased some Lexan this month and will be making some patterns for the observation car Ob end windows and then experimenting with the best ways to cut and shape the material.
|
|
|
Happy and safe railroading everybody!
|
12/14/20
Fabrication of the metal display racks for the G12 and the 2 E10s was completed and they were delivered from the powder coater the first week of the month. It was a huge challenge to get them from the trailer in the driveway into the engine house. No, I wasn’t able to transport them on a flatcar as they are a few inches too wide to clear several obstacles along the right of way. Just before fabrication, I made a few last minute modifications that increased the weight of each of the nine modules to roughly 600 pounds each.They are different lengths so some were just under that number and others are in excess of that weight.
|
The transportation team was supposed to be five guys; three showed up. Of course I jumped in to assist. I think I was just younger than the aggregate age of the other three guys… The four of us struggled, and I do mean struggled, to carry these modules over the gravel driveway in the rear, across the grass yard, up and across the pedestrian walkway, under the Kiefer pear tree and then through the double doors on the north side of the engine house. We saved the heaviest three modules for last which may have been a mistake, but after four hours of really getting after it all of the modules were in the engine house and roughed into place. My hat is off to the three guys that showed up for this move as they really busted their tail ends on this job. Our friend Jerry Graves came by the following weekend and we spent another four hours final positioning the modules, getting them bolted together and leveling and re-leveling them until they were perfectly level.
|
|
Dave and I finished drilling all the holes in the E10 rail and I delivered the rail to the powder coater. All 140 of the Red Oak E10 ties received two coats of Golden Oak stain and a coat of polyurethane finish in preparation for their installation on the E10 racks. I picked up the E10 rail a week later and despite the fact that I wish I had picked a color one shade darker, I’m happy with the way the rails look. Dave and I built a rail jig to center and square all the components while we mount the rail to the ties and once each set of four panels is complete, we’ll mount the ties to their racks. The first week of December, we’ll start our track panel assembly process.
|
Dave and I also finished our work on the G12 rail; it will go to the powder coater on December 5 and be picked up on the 12th. I finished sanding, staining and the poly work on the G12 ties; they are ready to install once we get the G12 rail back from the powder coater. We hope to have the G12 rack fully assembled sometime around Christmas. MTC logos, wheel stops and labeling will complete the racks in late December or early January.
|
Our G12 battery tray is back from the powder coater and I think we can agree it is a big step forward over what we started our restoration project with.
|
Our work continued this month on our G12 restoration project. We finished the fabrication work on our G12 throttle rod and brackets and installed new throttle and brake handles. I have a little Bondo work to do on one of the brackets but the heavy work on the throttle project has been completed. We removed a metal patch that covered the original exhaust port. It was held in place by 8 rivets and 2 spot welds – crazy. We removed the nose from our G12 donor; it will be in a display with another G12 nose and a type 1 E10 nose next year. We started the process of replacing the front hood latch and transferred instrument panel brackets. We are fabricating a new seat for the engineer and also one for under the gas tank as both originals have numerous rust pin holes. We are also fabricating a new instrument panel as both of ours are a bit rough.
|
I finished media blasting all of the 66 E10 wheels this month. As time permits, we will start painting the wheels and getting them mounted on the 15 trucks awaiting them.
|
We also hope to have the display for our MT & RR Co. torque wrench, original box and literature mounted in December.
I am close to having an agreement with a local shop on the body work and painting of our E10 and G12 equipment which would take place over the next year (2021). They are comfortable that they can squeeze one car a month in between all of their more conventional jobs. We have 14 E10 and G12 cars and hope to have all that work completed by the end of December of 2021. If things work out right, it may be expanded to include the Sandusky, the Red River and the 582 and 506 over the following twelve months (2022). I am cautiously optimistic.
My second order of Lexan arrived recently. The E10 windows and doors had Lexan widows as did the G12 observation cars. I have about a dozen patterns to make regarding this project; the racks and E10 trucks are in line in front of this one.
We modified an engine stand that had previously been used for S16s engines and also for the tenders for use with our E10 and G12 equipment. It is now tri-gauge G16, G12 and E10. It will receive a great deal of use over the next few months.
|
We continue rearranging the engine house to maximize the space and create room to easily view all of the exhibits. Some of the extra parts that had been stored in the engine house have been moved to other locations. We are still hoping to have the racks completed with rails, signage and logos by the end of the year, but that might be a little optimistic – we’ll see.
|
Happy and safe railroading everybody!
|