|
01/6/14
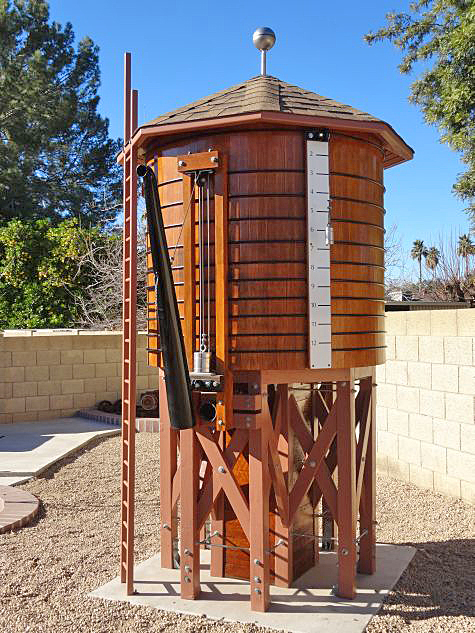
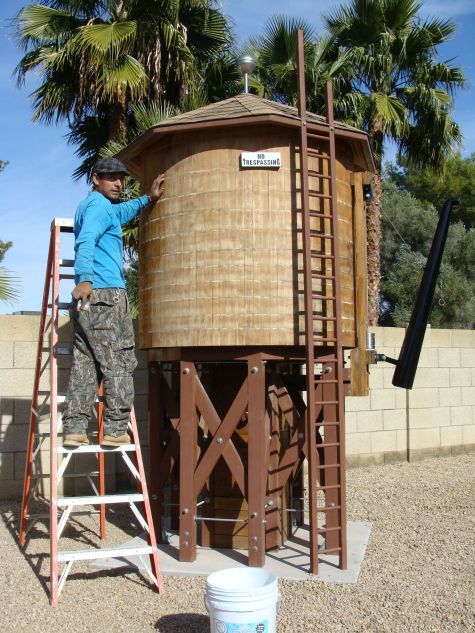
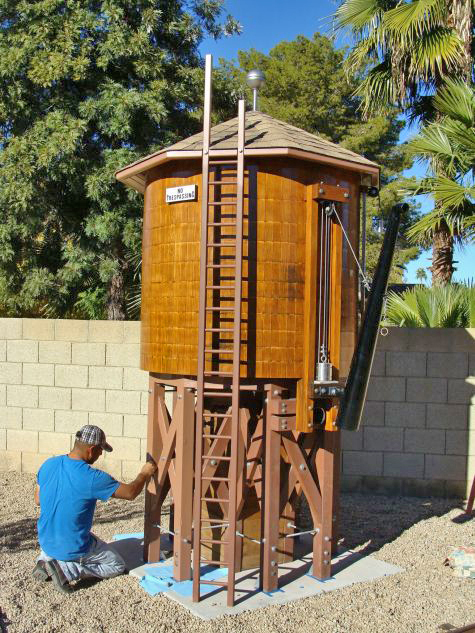
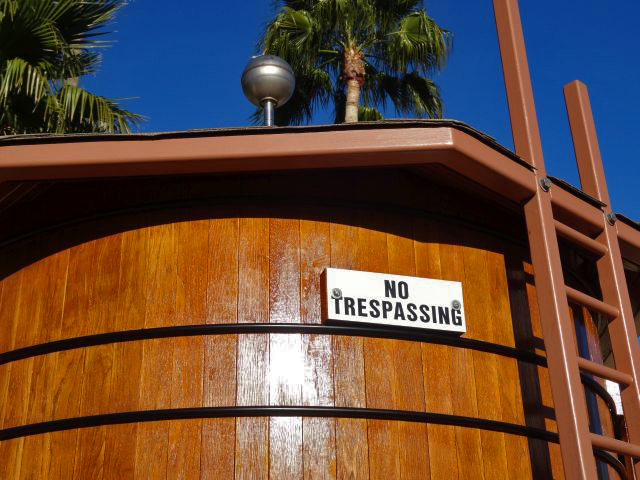
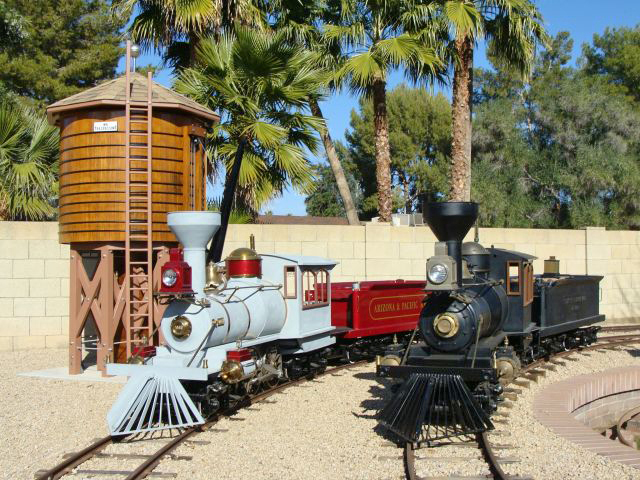
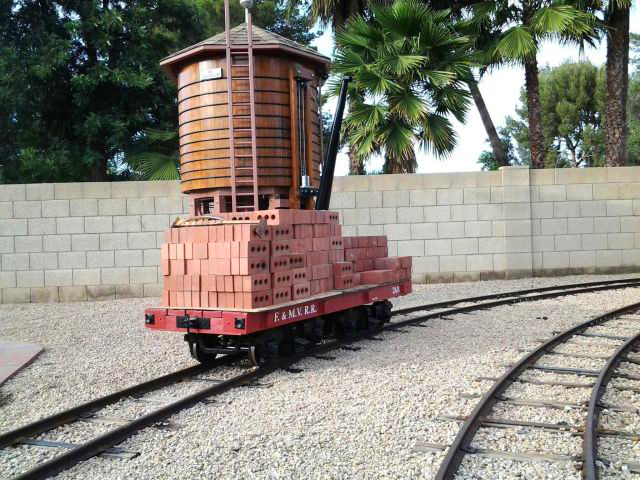
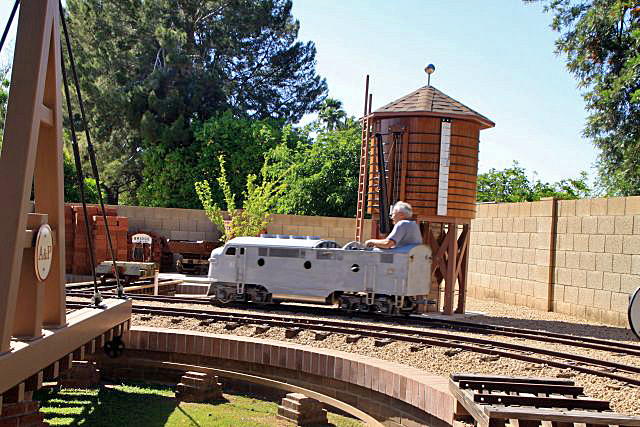
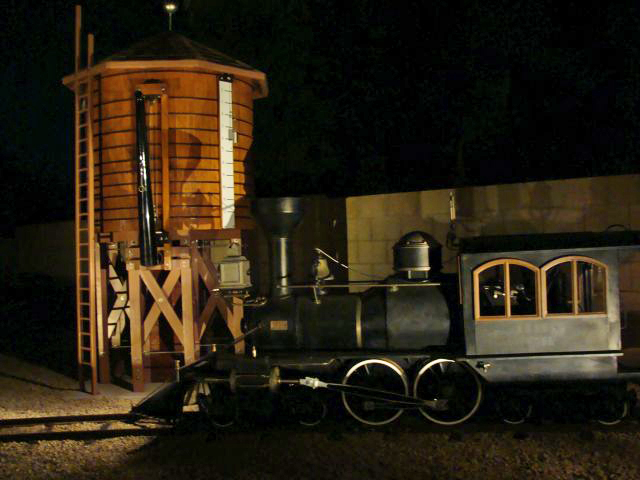
The big project this month was the restoration of the A & P water tank. Our water tank was completed in early 2005. The wood staves had received additional stain twice over the years, but the retaining rings and other bolt on detail made it difficult to get the stain everywhere it needed to go. The retaining rings also needed cleaned, lightly sanded and refinished.
|
|
|
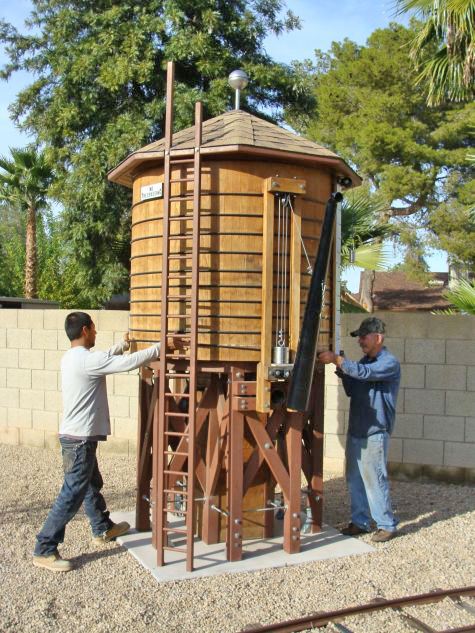
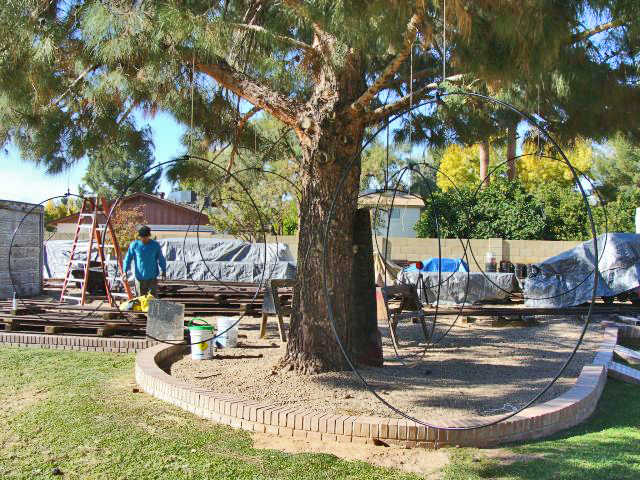
The retaining rings were originally mounted on the tank before the roof was attached. We didn't want to "spring" them by trying to simply spreading them around the staves as they would be distorted when replaced. We looked at unbolting them and lowering them to the ground and then lifting the tank supports over them, but the tank and supports weigh more than a thousand pounds and that would have been no easy task. After some thought and effort, we came up with a way to unbolt the rings, rotate them half way around the tank and out from behind spout mounting arms, then drop them to the ground and work them out and around the support legs one set at a time.
|
|
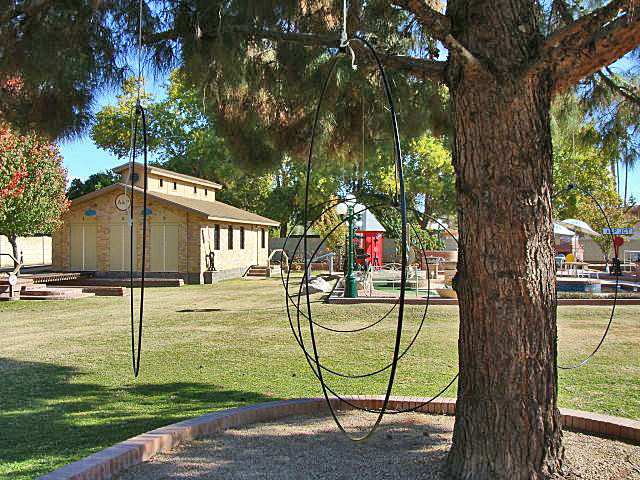
With the rings removed, we were able to sand the staves and get two good coats of stain and a coat of preservative on the wood which is hickory. We cleaned and sanded the rings and then had to figure out how to position them for painting. We ended up hanging them like ornaments from our large pine tree which made it look like the Christmas tree it was 23 years ago.
|
|
|
|
|
|
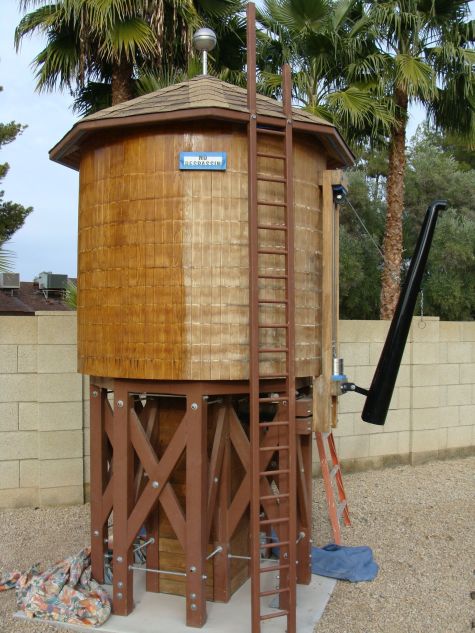
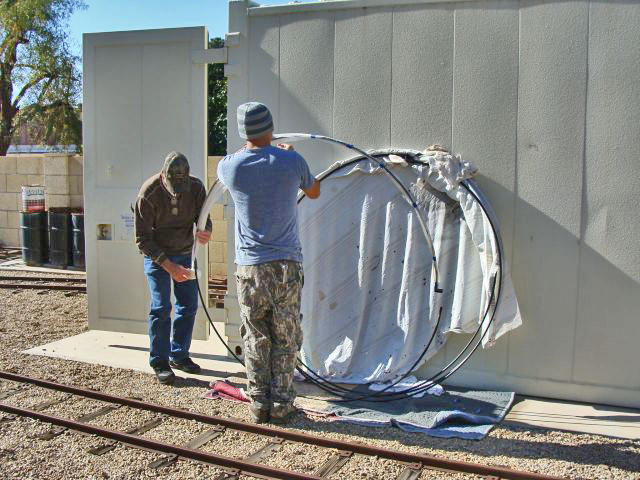
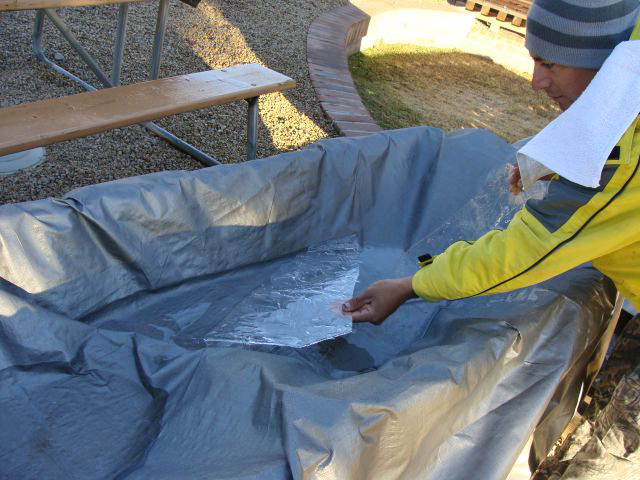
Getting the rings back in place without springing them and without scraping the paint off the rings or scraping up the water tank staves was an interesting challenge. We tried several approaches and eventually went with an approach where we taped a plastic sleeve around the ring. We feed the ring around the tank and through the narrow openings behind the spout arms and the water level float gauge. After the ring was close to its final position, we worked the plastic loose from one end and worked it off the other open end of the ring before we bolted it back in place. Five sets of hands held the ring tight level and in place while we secured each ring.
|
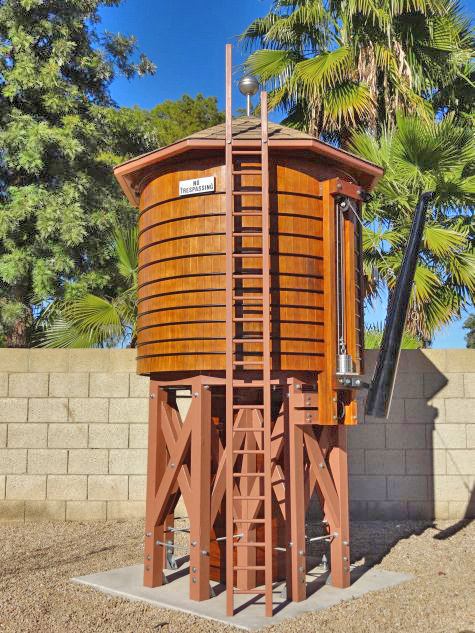
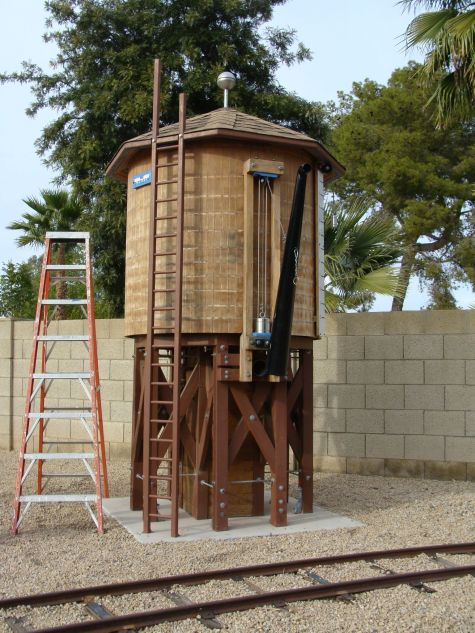
The original plan was to refinish just the staves and the rings. After they were refinished and repainted, it made the metal components on the tank look pretty dingy. We repainted the metal components of the roof and also repainted the ladder with two coats of paint each. Just like with a home remodeling project, one thing led to another. All the work on the tank and metal components, made the legs and cross-bracing look like they needed repainted. We lightly sanded and then painted the tank support structure. It is unbelievable how much surface area there is in the legs and cross-bracing. This was very time-consuming as we taped off bolt heads and threaded rods as I didn't want paint on them - I wanted them to look just the way they looked originally.
|
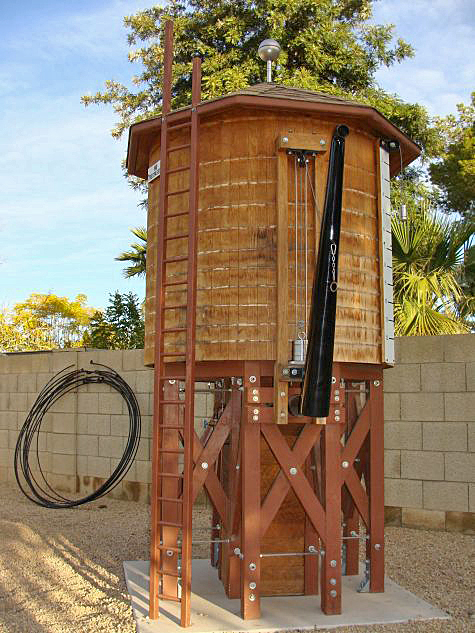
As had been the case with the other components that had been re-stained and resealed or repainted, the freshly painted legs and cross bracing made the frost box look pretty dingy. We refinished the frost box to match the wood staves of the tank and sealed it too. This project grew in scope tremendously after we got started and was a great deal of work, but she looks darn good and should look good for several more years. We had nearly fifty man hours in this project...
The "No Trespassing" sign on the water tank needed a little extra work as the nut on one of the mounting bolts had worked itself free inside the tank. Those nuts had been tightened from inside the tank before the roof was attached. Interestingly, we couldn't get the nut on the other bolt to come loose. We drilled that bolt out and replaced both with new bolts and butterfly nuts.
|
The rest of the projects during the month were much smaller in nature. We rebuilt one more axle set - only 2 more to go and this project will finally be completed.
We added wiring to the Red River engine and tender. We wired a "coach light" circuit to light up lights in any car it might be called upon to lead. Previously, Dave had wired each of our other four engines for this purpose and we finally got to this one. The "coach light" circuit is hot with the front headlight. It was a lot more work than this paragraph seems to imply...
|
We had a nagging oil leak from the transmission on G16 No. 582. Oddly, two of the four bolts at the bottom of the transmission side plate aren't blind holes - they actually go all the way through. We had tried a couple of things without any real success. We finally went ahead and drained the transmission, cleaned all the gear oil from the bolt holes with carburetor cleaner and let it dry completely. We used a teflon based plumber thread sealer product by Rectorseal that seems to have solved our leaking problems short term. Hopefully, it will provide a long-term solution as well.
As I shared a couple of months ago, we are starting to fabricate components for our mini-turntable for the speeders, handcar, track inspection car and mw trailers. It will be 84 inches long and 40 inches wide. We had the ring water jet cut out of sold one inch thick plate last Fall and it came out great and as one solid piece should be trouble-free. We received the 1500 pound each capacity rollers from McMaster-Carr last week and will fabricate the brackets that will hold them in place in the next few weeks. The next piece we will get cut is the 40 inch wide by 84 inch long 3/8 inch thick bottom plate.
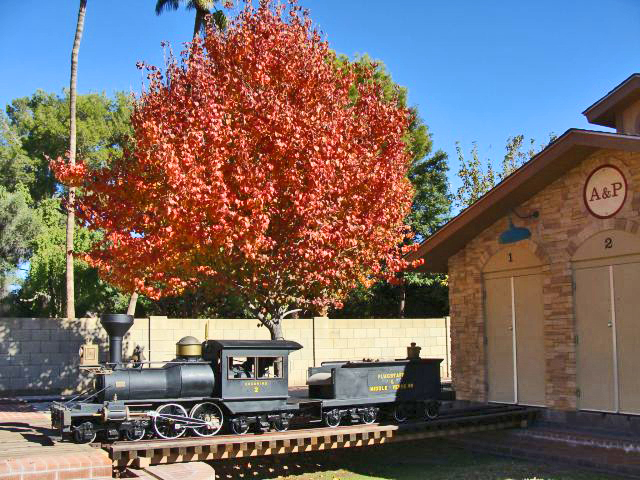
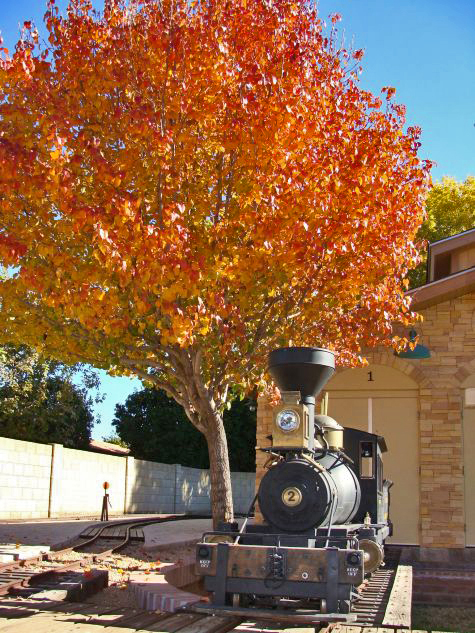
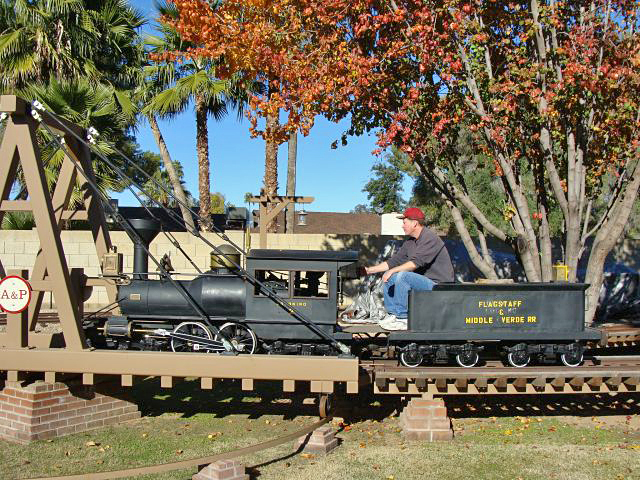
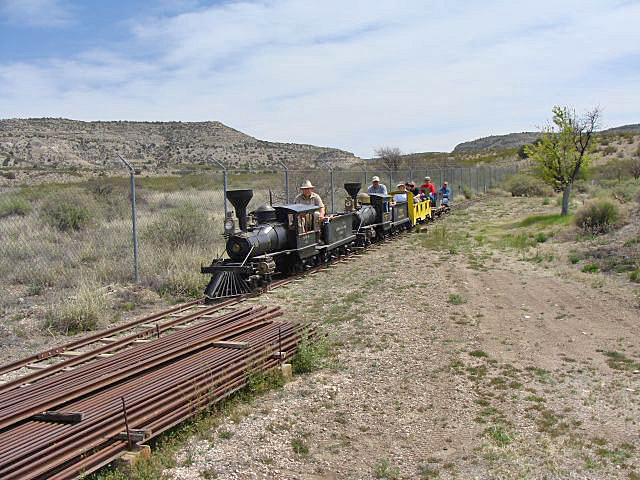
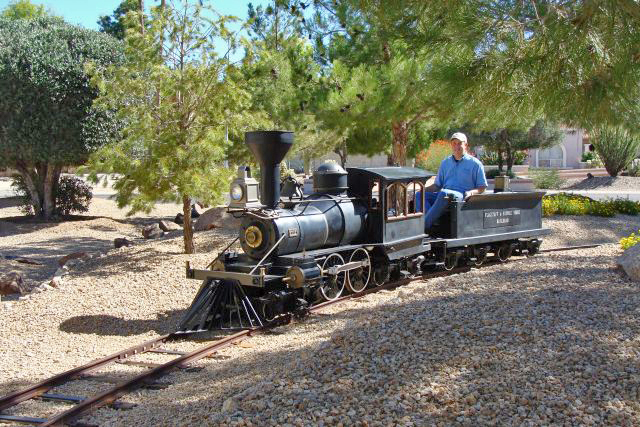
The Coconino and the Red River were out and about on December 15 as the bright red leaves of the pear trees provided a pretty back drop. It feels great on a chilly day having the warm air from the Wisconsin engine blowing on you as the operator.
|
|
|
|
|
|
|
Happy and Safe Railroading Everybody!
02/11/14
January was a busy month, but not for the usual reasons. We had visitors from all over the country stop by this month and made sure everyone got plenty of rides behind their equipment of choice. Seattle, Washington, Chatsworth, California, Waterman, Illinois and Surprise, Arizona were the home towns of this month's visitors.
|

|
|
|
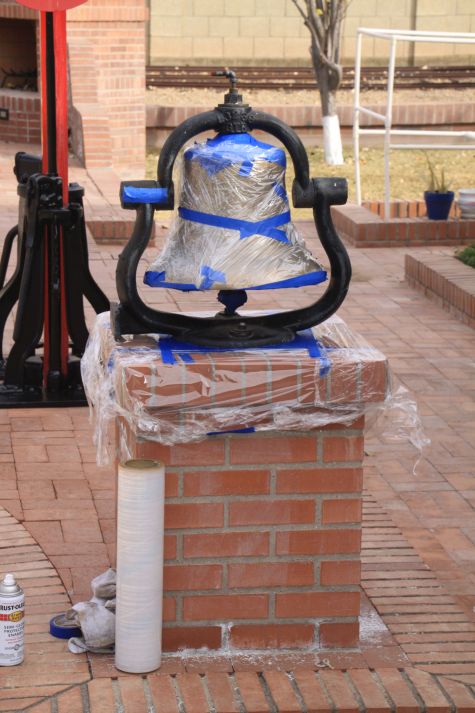
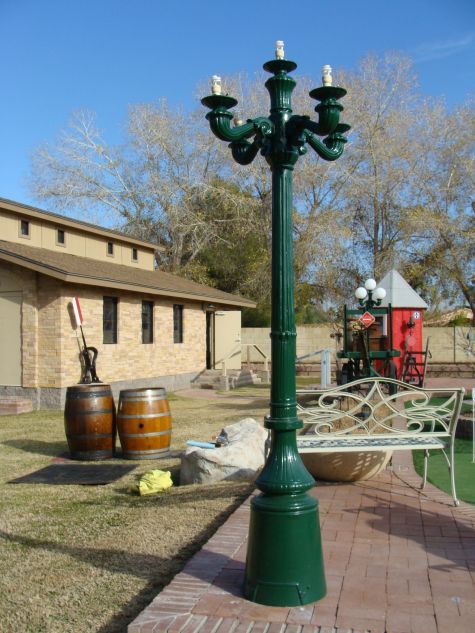
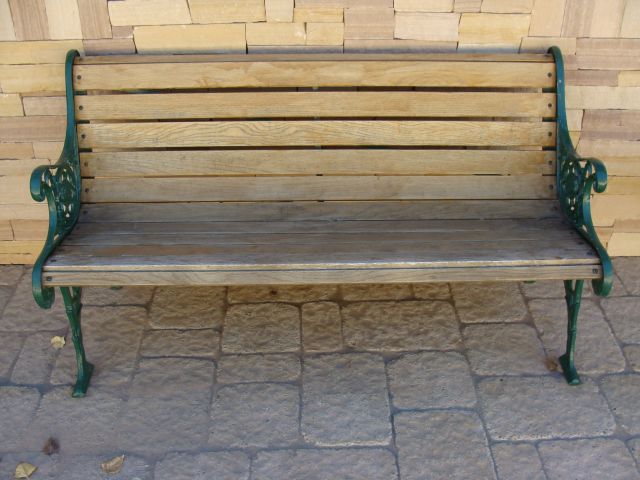
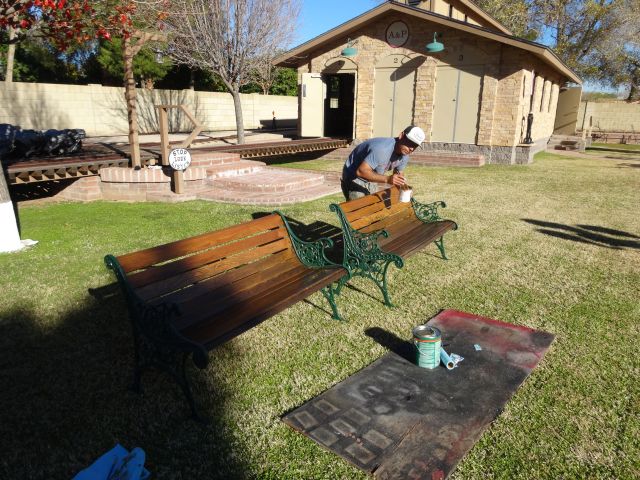
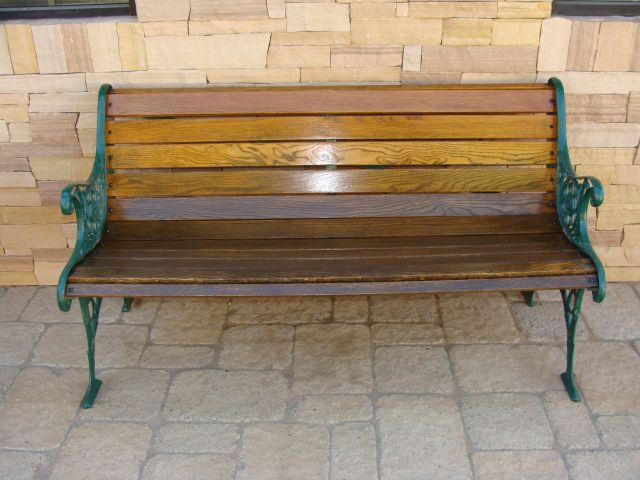
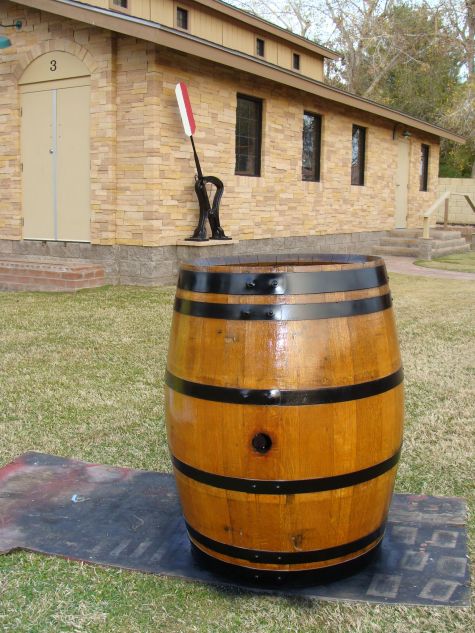
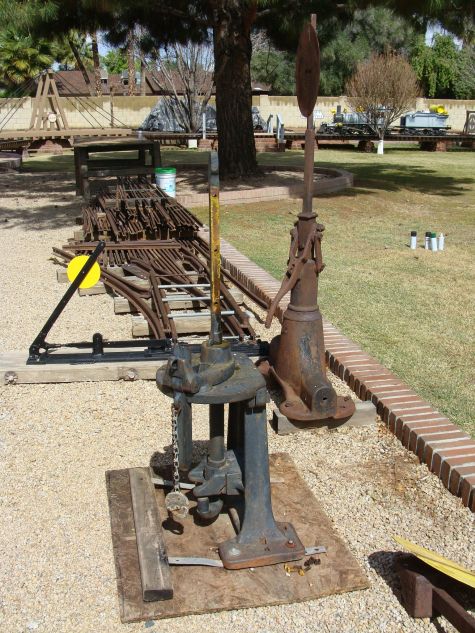
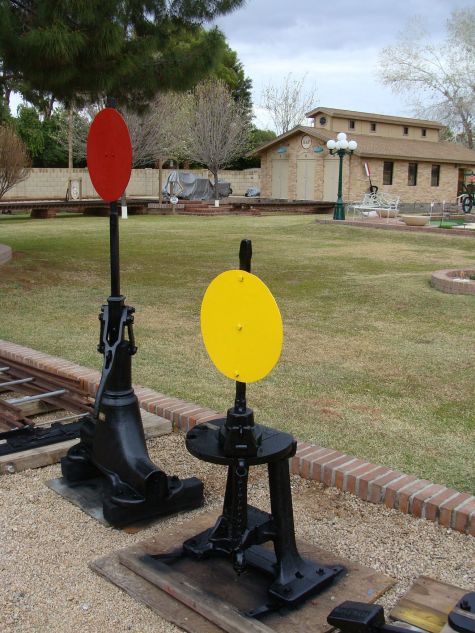
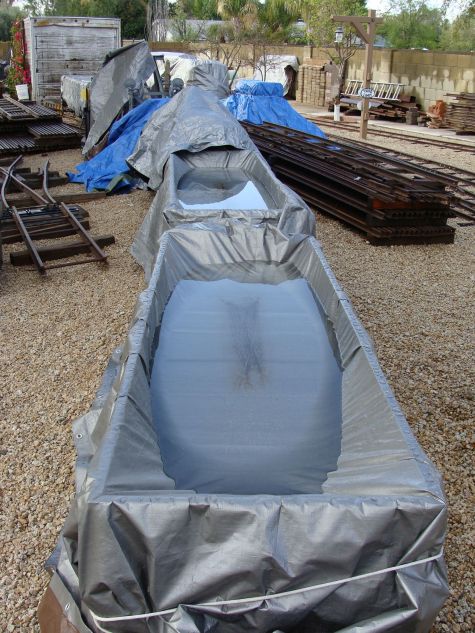
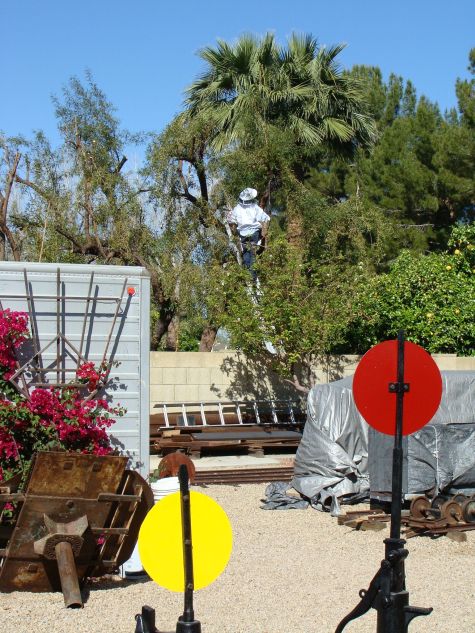
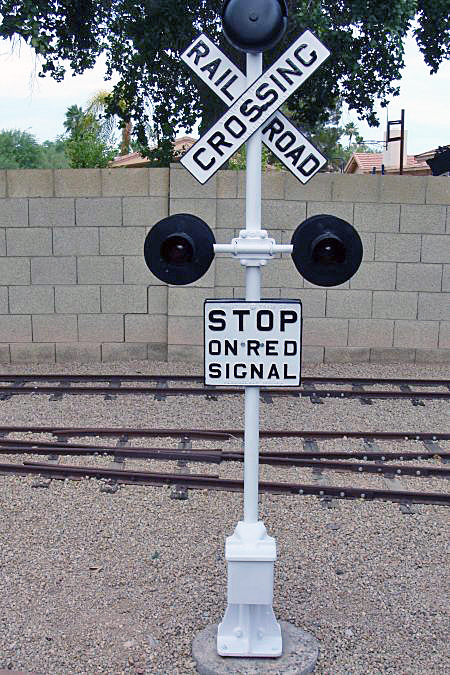
When we weren't hosting guests, we managed to get a few things accomplished. We sanded, stained and sealed our two park benches. Sanded, stained and sealed two of our barrels. Sanded and painted several of our full size switch stands. Painted our full size bell cradle and repainted the globe arms of our three park style lamp posts. The desert sun and dry climate takes a toll on everything that is exposed to the elements out here. Metal performs much better than wood long term, but metal items still need sanded and repainted every few years.
|
|
|
|
|
|
We obtained an old 6 volt starter for a Wisconsin VF engine. We had it rewound and rebuilt for a 12 volt system, wrapped it in plastic and placed it in inventory on our parts shelf. These are getting very hard to find and I wanted at least one on the shelf going forward.
You will recall last month I mentioned a nagging oil leak from the transmission on No. 582 that I had hoped I had resolved. As it turns out, one leak was solved, but not what turned out to be the major one from around the shifting sleeve o ring. We pulled the transmission and will either machine a second o ring groove or find an oversize O ring to better seal the bottom of the sleeve. The sleeve slides back and forth as the gears are shifted from forward and reverse.
|
|
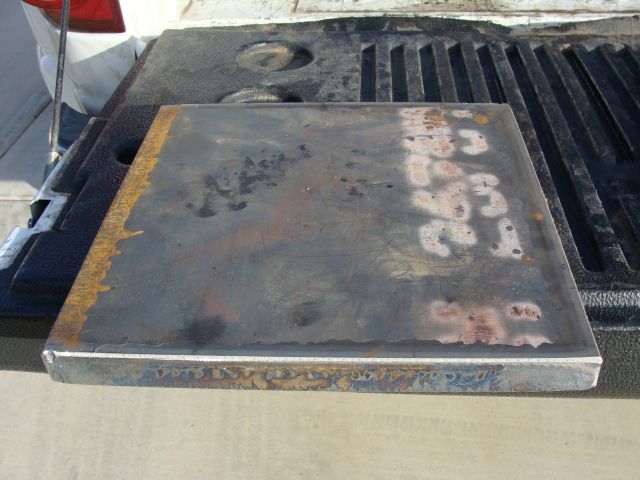
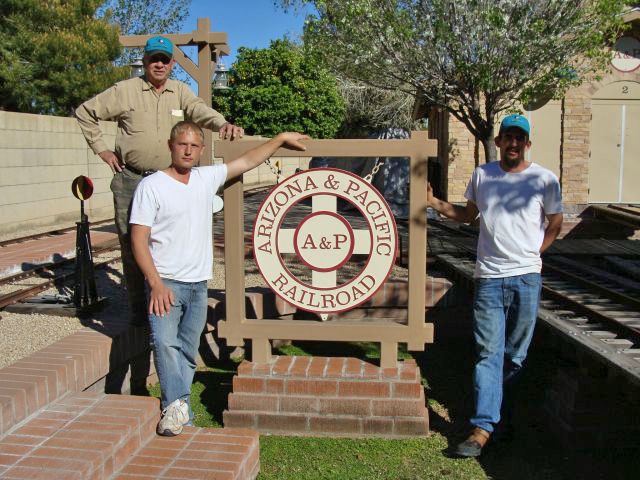
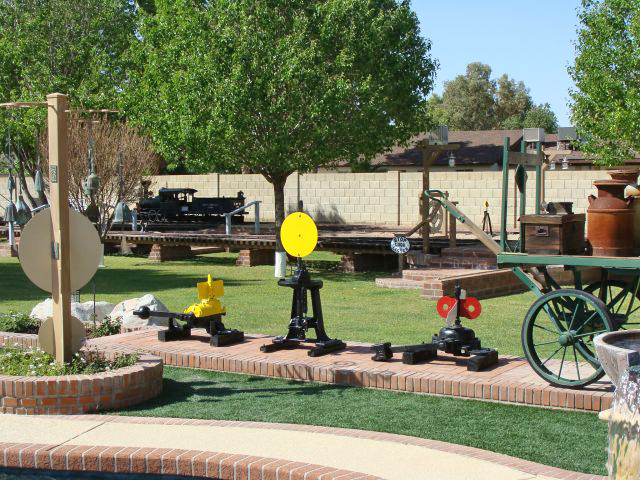
We had the bases cut for the three portable signs we have slowly made progress on. Next month we will clean them up and get the posts welded in place. I still have to finish the signs that get mounted on the posts.
|
We welded brackets on our 4 rollers that will serve as the rollers under the mini-turntable that we are slowly fabricating. A small step I know, but some progress was made.
|
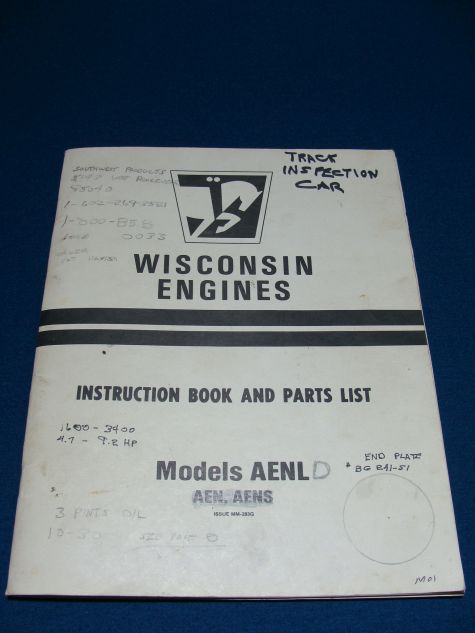
We obtained an instruction book and parts list for the Wisconsin AENLD engine in our track inspection car. This was a big find for us and will go with the collection of Wisconsin manuals and parts lists we have acquired over the years
|
As I mentioned earlier, we had the opportunity to do a great deal of train running this month. We put together several work trains and ran in both directions along the A & P mainline. Although we can run in either direction, it is a little less work getting everything on the main and set into trains if we run counter clockwise and we have fallen into that habit. This month, we took the opportunity to make numerous laps in the clock wise direction. In many ways it seems like a different railroad when we travel in the opposite direction as the throttle and brake points are so different. All of the engines operated this month as did the track inspection car. The track inspection car is ideal for moving and spotting cars at various locations.

|
|
|
|
|
|
Dave and I also reached a decision on our trestle No. 4 which connects to where I initially envisioned a speeder building. A few years ago, we partially disassembled the trestle with the thought that we would curve it to align with our turntable. We planned to construct two diamonds one across the siding and one across the mainline and could run there directly from the turntable. Grade disparity, two diamonds in curves and two parallel track panels being tied together lead us to recently scrap the idea. Next month we will reassemble the trestle in its original configuration.
Time permitting, it is always fun to have people over and share the railroad experience. It is especially fun when they are fellow large-scale railroad owners and operators as they have shared so many of the same experiences and 99.9% of them are great people. We were fortunate this month to have Pete Robinson of the Waterman & Western Railroad in Waterman, Illinois and Jerry Steibring of the P & JS RR, also in Illinois visit. They each have 15 inch gauge railroads and although most of the challenges are the same, they deal with a few issues foreign to the A & P like snow drifts and clearing ice from the switches. On the other side of the coin, they don't have the heat issues we have out here... They visited together and spent a whole day here as we operated equipment, traded stories and dreamed of future finds.
|
The visitor season here pretty much runs through April and then drops off dramatically after it starts getting over 100 degrees on a daily basis.
|
|

|
|

|
Happy and Safe Railroading Everybody!
03/05/14
The transmission is back in No. 582. Jerry Graves found an oversize O ring that fit great and is serving its purpose - no leaks from that location. We did discover another leak from the front seal that is just a drip at this point. We'll see if it starts to bother me enough to change it out while the engine is still up on the rack. With the locomotive up on our service rack, we have the opportunity to drop the transmission out the bottom instead of lifting her out from the top and this is a real advantage. We wanted to make sure that the oversize O ring wouldn't cause any issues with the transmission shifting and there is only one way to test that.
The shifter in No. 582 is vacuum operated so we started her up to build vacuum, then shut off the engine, turned the key to auxilliary and shifted gears. We shifted multiple times and it works great. The engine is wired so that the shifting mechanism is dead when the engine is running and is only hot when the key is in the auxilliary position. This is to keep someone from trying to shift gears while the engine is running and tearing teeth off the gears in the transmission.
Since we had the battery hooked up, had some vacuum in the system and wanted to let the Wisconsin run a little bit, we took the opportunity to have Dave jump in the cockpit and operate her for 1st time since she has been assembled. She only went back and forth on the rack, but covered about 8 feet. We will have her on the ground for her maiden trip in the next month or so.
We had one of our friends fabricate four more pairs of hinges and brackets for G16s. One set will be used on our B unit as we want to set it up as closely as possible to the way we set up No. 582. One set will go into the parts department just in case we tackle another G-16 some day and two pair of hinges will go to a home in the mid-west.

|
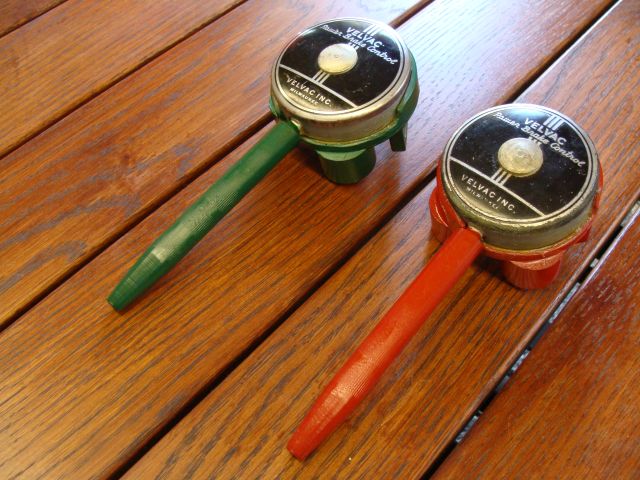
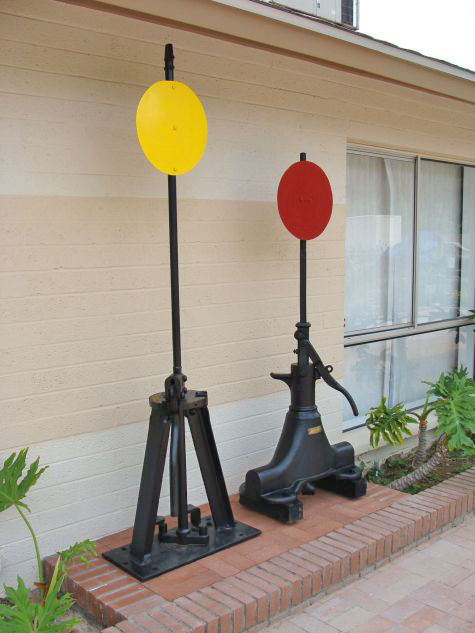
Keeping with the B unit theme, we painted the Velvac vacuum valves that will be mounted in the cockpit. The red is the brake and green is the throttle just as in the A unit. These valves will not be tied into the brake or throttle system, but will give "junior engineers" the opportunity to learn the operation of MTC equipment and learn that safety starts at an early age.
|
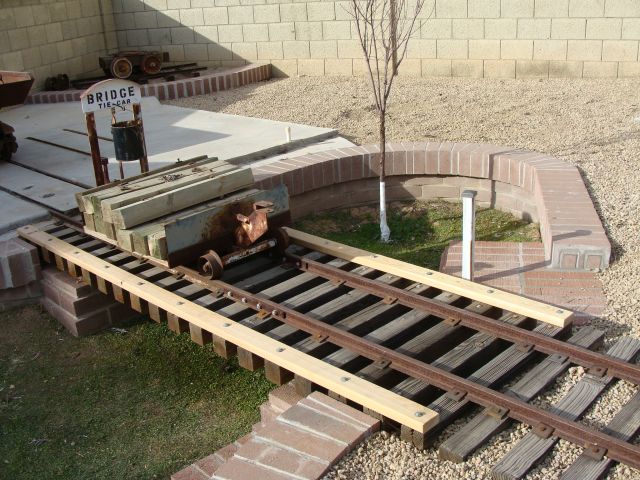
As I shared last month, Dave and I also reached a decision on our trestle No. 4 which connects to where I initially envisioned a speeder building. A few years ago, we partially disassembled the trestle with the thought that we would curve it to align with our turntable. We planned to construct two diamonds one across the siding and one across the mainline and could run there directly from the turntable. Grade disparity, two diamonds in curves and two parallel track panels being tied together lead us to recently scrap the idea. This month we basically reassembled the trestle in its original configuration. We regauged and reattached the rail, replaced and rebolted the side walking planks and releveled and reattached the ties on the run out. For now, we'll use the trestle to display the bridge tie car.
|

|
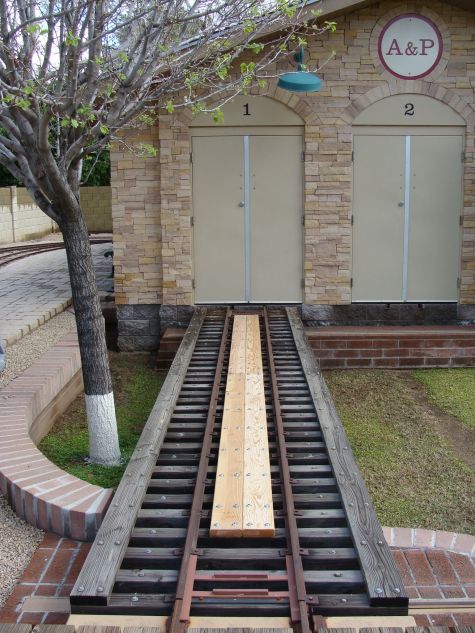
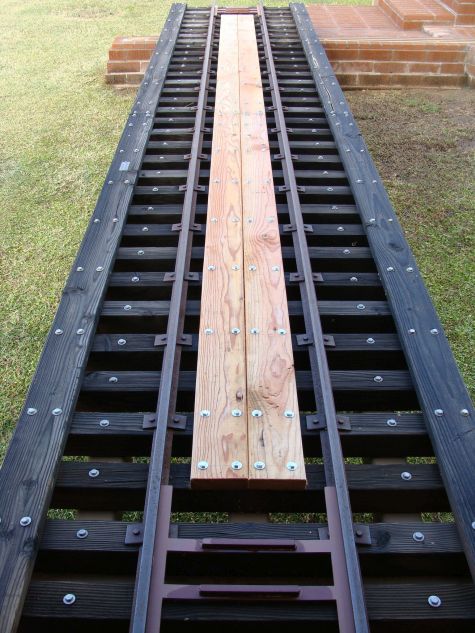
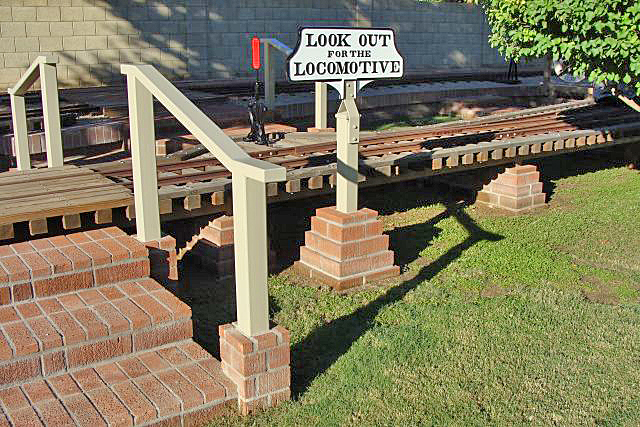
I have talked for years about adding walking planks to the center of the transfer table. The table frequently gets used as a method of entry into the engine house when we are working on a project and planks make much easier walking than the 4 x 4 ties that are spaced for rail support, not for foot comfort. Dave and I got the planks cut and in place and securely bolted just as a major rain storm hit. It won't be long before the color of the planks will match the color of the original wood in the transfer table.
|
|
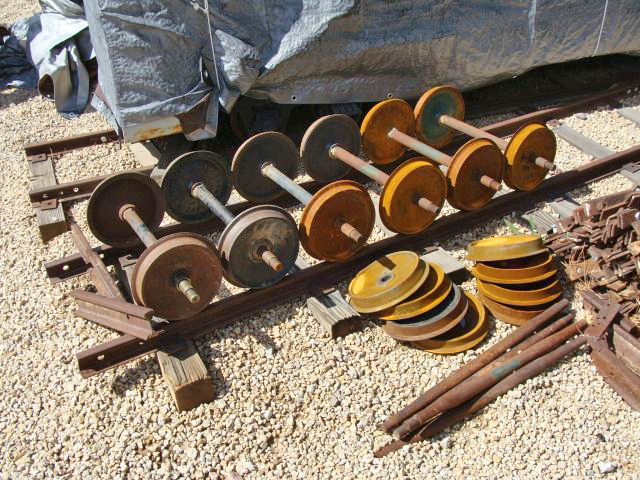
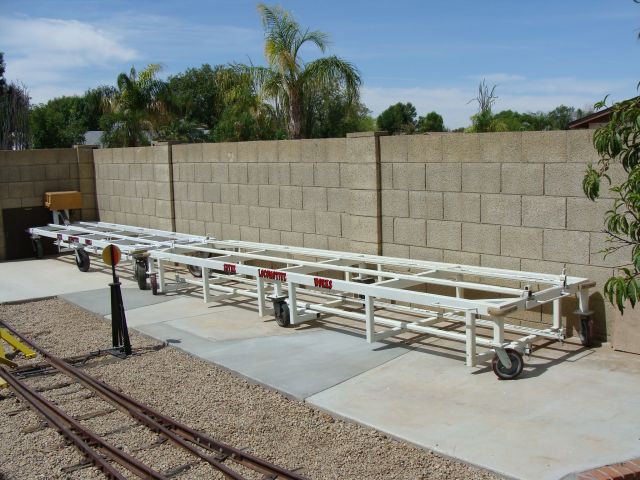
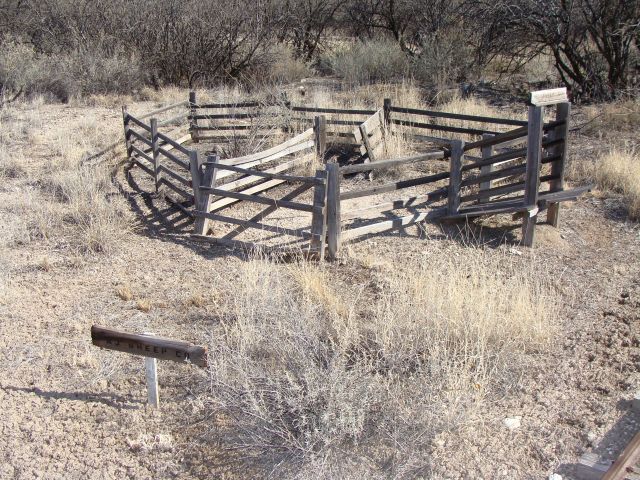
In many of the photos of the old Colorado narrow gauge railroad yards, wheel and axle sets can be seen sitting on or near the repair facilities. We have several wheels and axles that we have taken out of service as the result of wear and condition. We assembled 6 sets of wheels and axles and tack welded the wheels into place. We have identified four more axles and eight more wheels that we will assemble and tack in place the next time we have the welder out. We will place the wheel and axle sets in a couple of places around the railroad to add to the ambience.
|
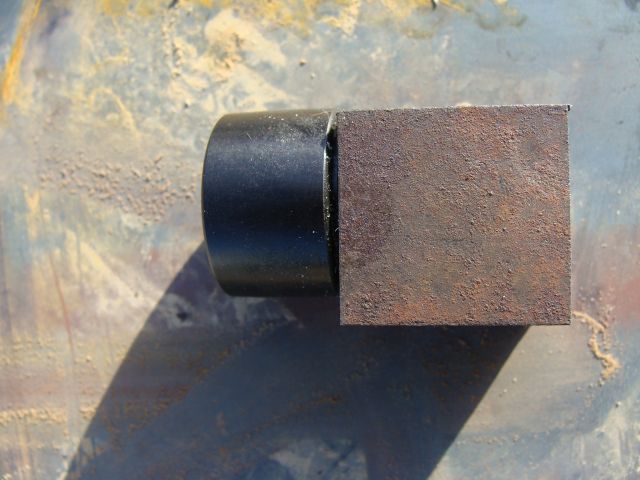
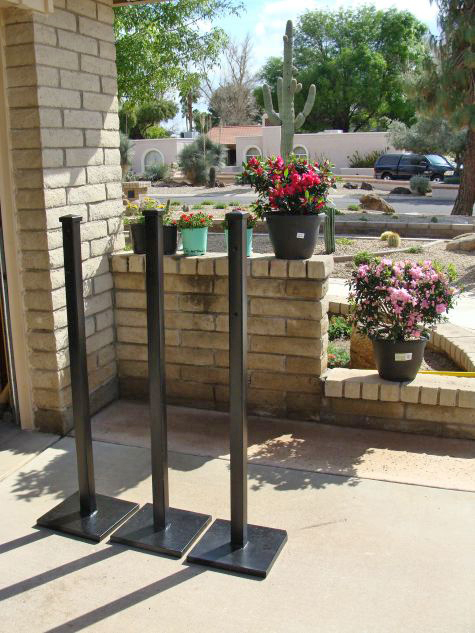
We welded the bases onto the posts that we previously drilled and tapped for three signs that we can move into place when we are having large gatherings, but they can be moved and stored away when not needed. The one inch thick base plates weigh almost 25 pounds each and keep the wind or children from knocking the signs over.
|
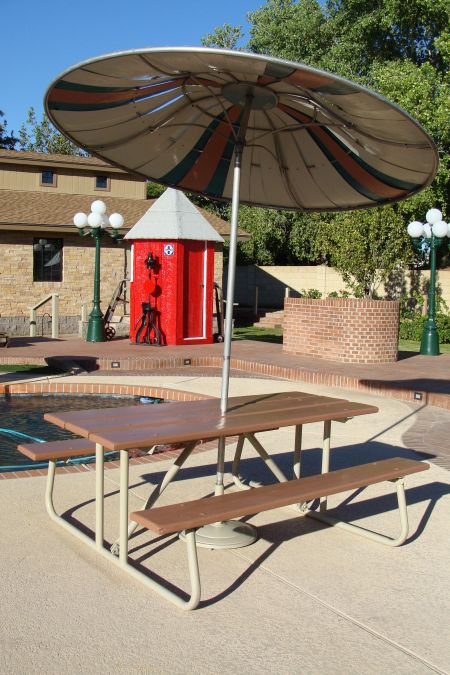
We also spent quite a bit of time this month, sanding, priming and painting the white frames of our retro patio furniture. The wind catches the chairs and flips them during the summer dust storm season and scrapes the paint off so that rust can get started. We also cleaned and buffed the top layer of paint oxidation off the seats and backs. The furniture looks good, but not too good as I want it to look correct for the period.

|
We had visitors from Chicago and from north Phoenix this month.
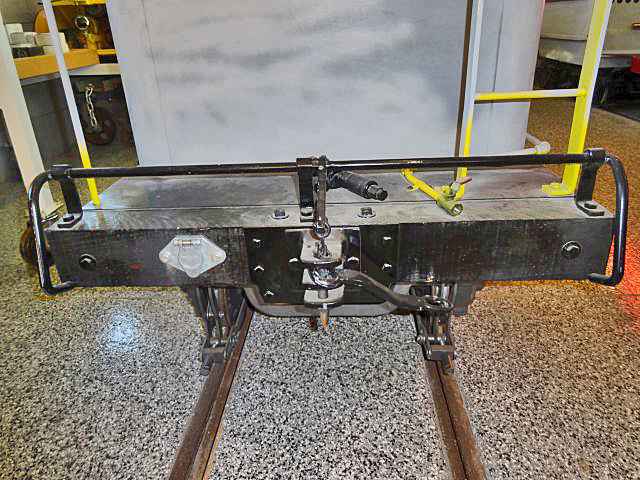
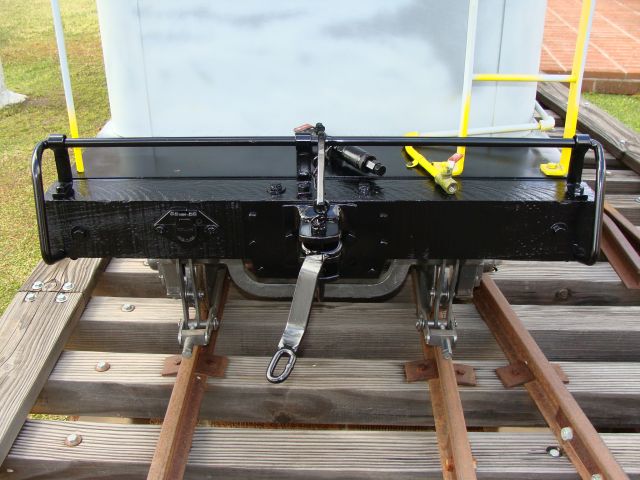
It was several weeks ago that we installed the trailer pin electrical connector on the rear of tender No. 37. We finally found the time to repaint the rear beam.

|
|
We have a dozen full size switch stands in different styles and from different railroads scattered around the back yard and its various patios. We have been cleaning, priming and repainting the switch stands a couple at a time to keep them operable and presentable. The sun takes its toll on anything left outside here and every few years the switch stands need attention.
|
|
The Friday-Saturday of Feb 28 - March 1 was crazy here. After almost 70 days without a drop of rain, the A & P received 2.2 inches of rain in less than 24 hours, we average 8.04 inches a year here. Things were a little soggy here on Sunday, but we got everything emptied of water and nothing was damaged.
|
Happy and safe railroading everybody.
|
04/13/14
The weather on the A & P has been fantastic this month ranging from the mid-seventies to mid-eighties almost every day. We did have the first major dust storm of the year which left everything a bit dirty, but there wasn't any damage and we sprayed everything off. All in all, it was a great month for railroading and we spent a great deal more time playing with the trains this month than working on them.
We had a number of visitors this month. The cities represented were Richards, Texas, Albuquerque, New Mexico, Stevens Point, Wisconsin, Rochester, Minnesota, Portland, Oregon and Anthem, Arizona. On many visitor's first trips to the A & P, they are surprised at just how crazy I am to have built all of this into my backyard - but in a good way.
|
|
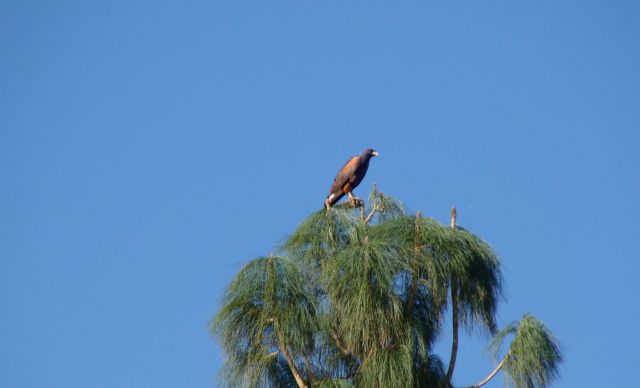
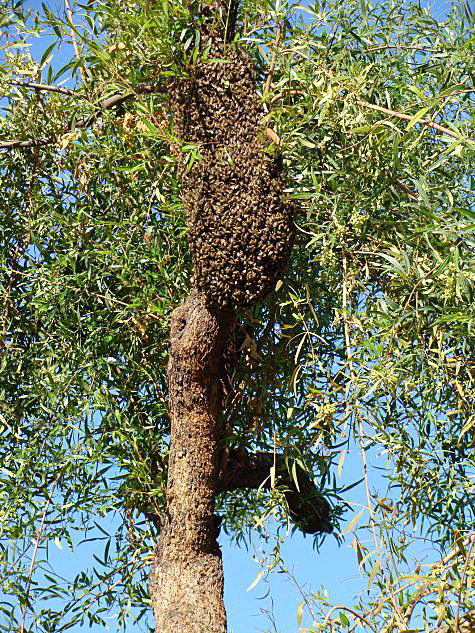
We also had some unwelcome visitors this month. A large swarm of bees took up residence in a neighbor's tree right next to the property line fence and within about 20 feet of the A & P mainline. A bee exterminator was called and arrived within the hour. A swarm of Africanized bees was exterminated from a residence about a mile from here a couple of weeks earlier and we didn't want to take any chances. It turns out this swarm was not Africanized, but the bee wrangler stated it was not a situation where he could move these to a new home. He eliminated the bees from the tree and solved the problem. There were still plenty of angry bees around for a couple of hours before they moved on to find a new home.
|
|

|
Staying with the visitor theme, we had our 100,000 visitor to the website mid month. I have stated before that it amazes me that so many of you check in each month to see what projects we are working on out here in metro Phoenix. We don't advertise or sell anything, don't give anything away and don't have photos of naked women on here. Pretty amazing that we get so many visitors to the site!
|
We had the Tucson (No. 4), Coconino (No. 5), Sandusky (No. 2) and Red River (No. 37) as well as the track inspection car on the rails multiple times during the month. Everything ran great and there weren't any issues.
As I shared last month, we have a dozen full size switch stands in different styles and from different railroads scattered around the back yard and its various patios. We have been cleaning, priming and repainting the switch stands a couple at a time to keep them operable and presentable. Between last month and this month, we finished cleaning and painting the last four of the switch stands.
|
|
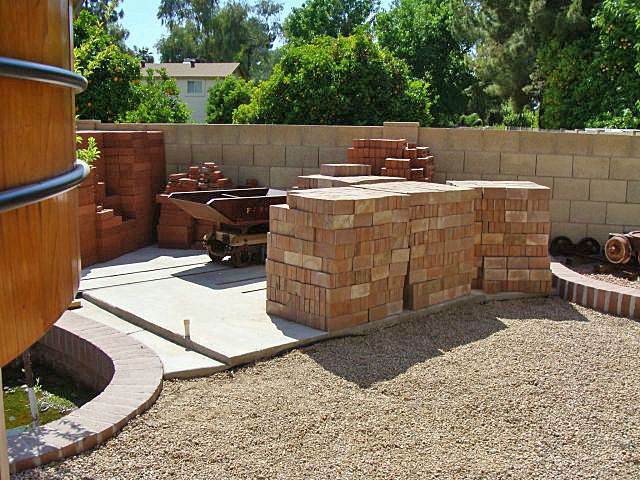
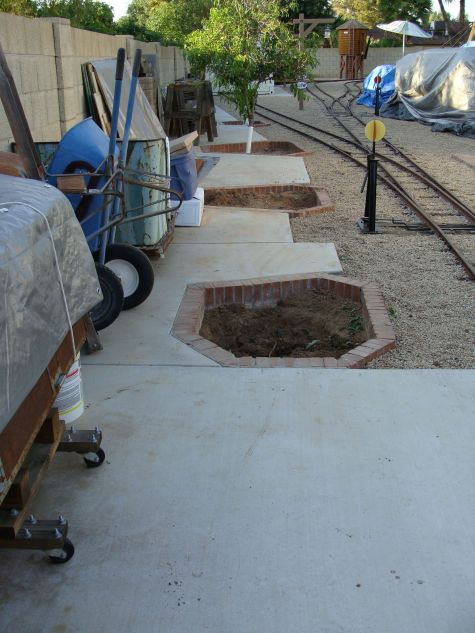
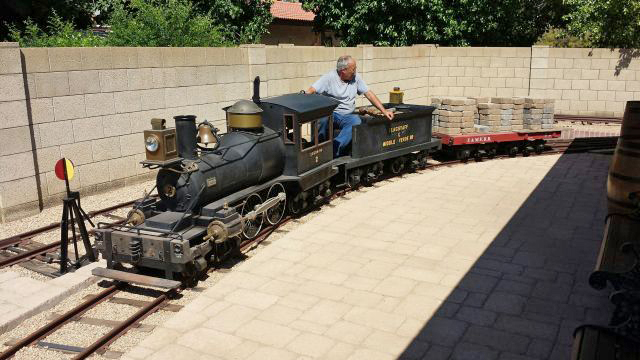
I wanted to create additional places to view and operate them in which they were out of the walking areas so no one was going to trip over anything or have to walk around anything. I decided on two places that met the criterion set forth and we set about building elevated brick display areas within two of my large planters. I purchased a couple pallets of bricks for this project and another project planned in the future. Getting the extra bricks from the front driveway to the far back corner of the property could have been done if a few different ways, but we used one of our flat cars. How cool is that!
|
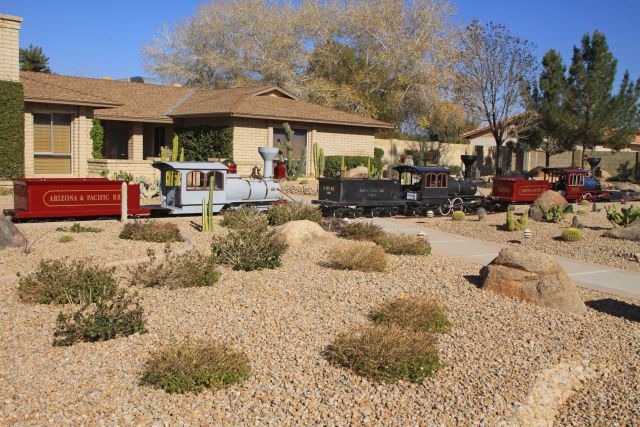
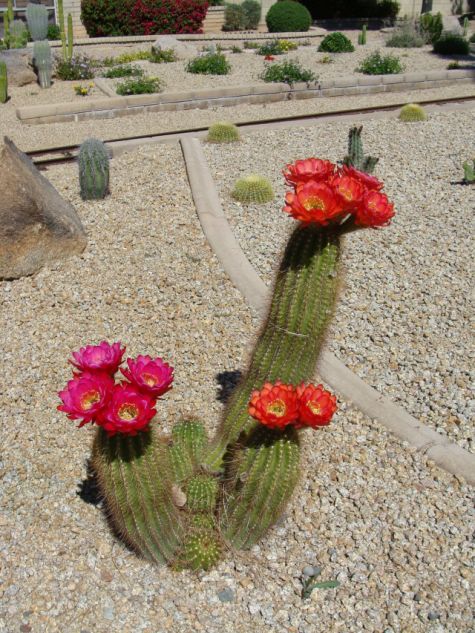
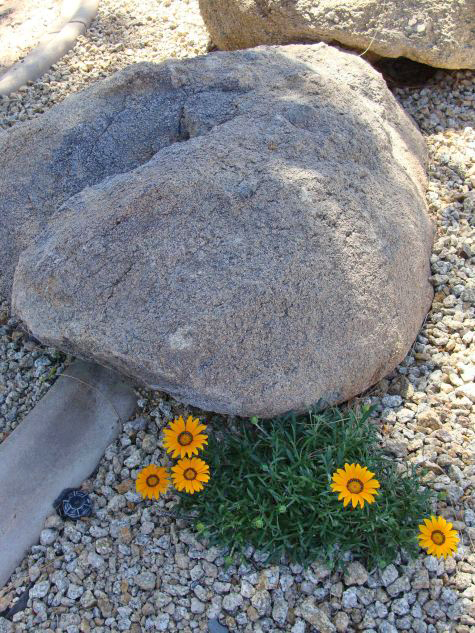
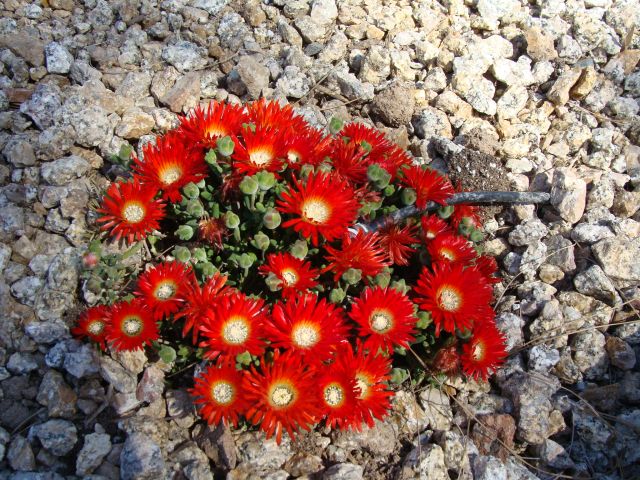
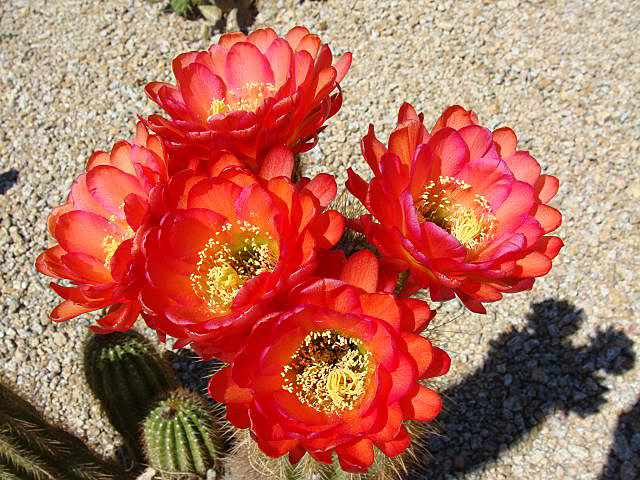
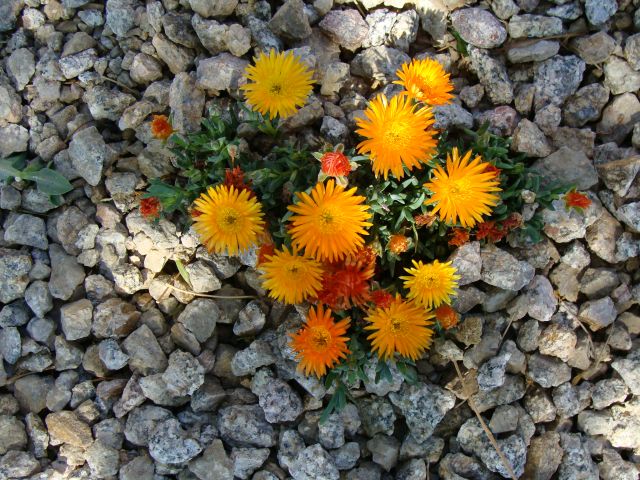
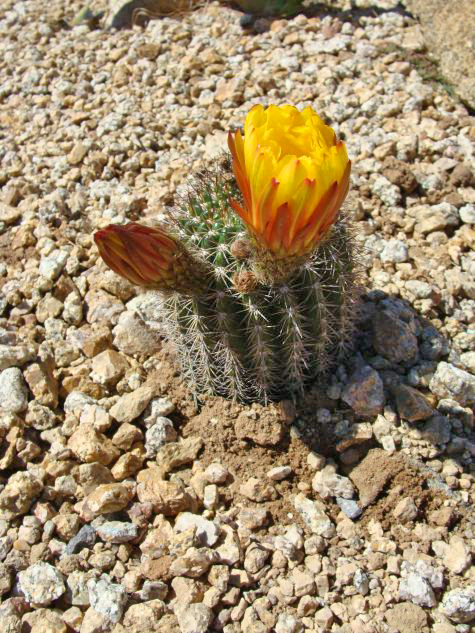
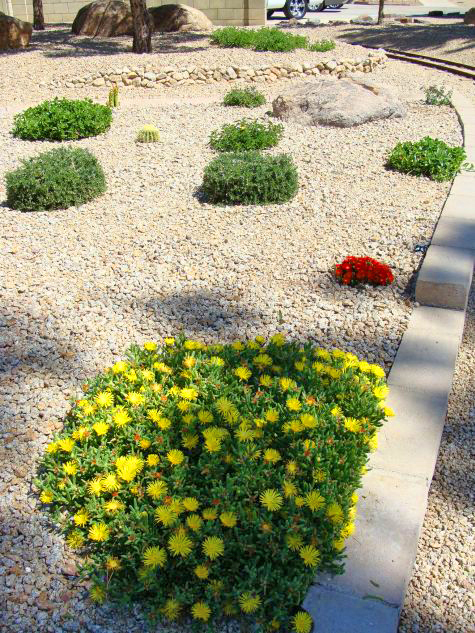
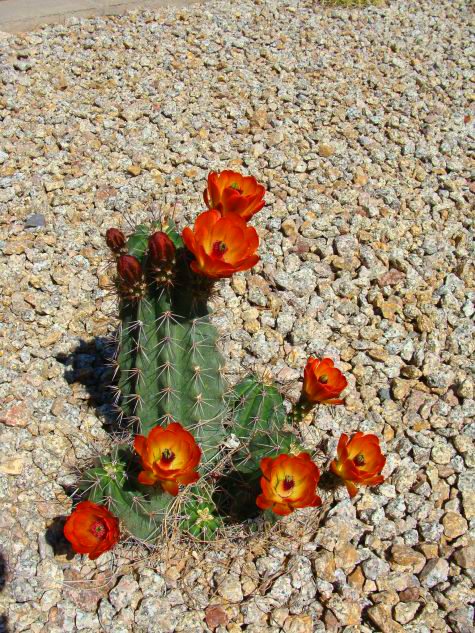
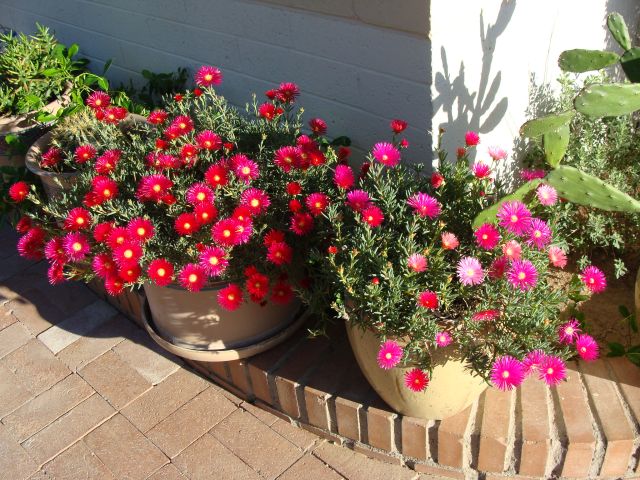
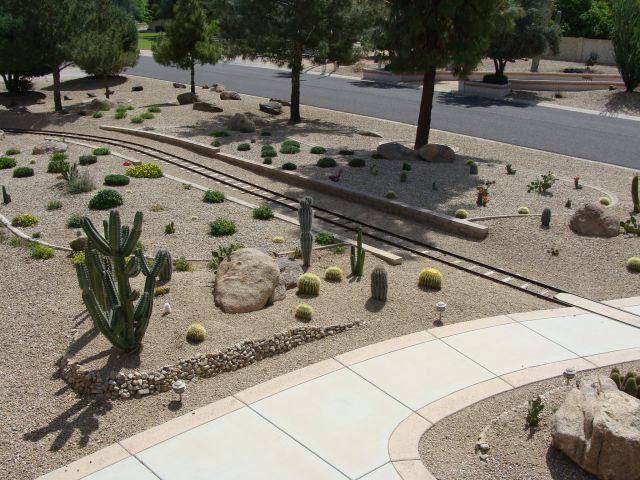
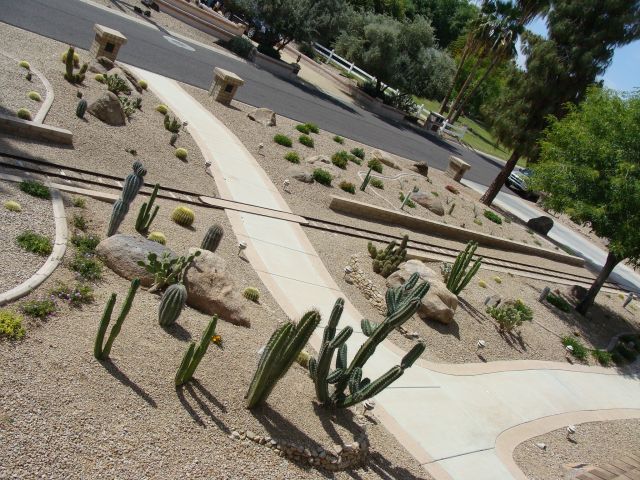
When I made the decision three years ago to remove my beautiful green grass from the front yard and replace with desert xeriscape landscaping, I had plenty of second thoughts. The fact that I no longer had $500 monthly water bills helped convince me that I made the right decision and this is the desert and water should be conserved. The first year, the front yard just looked so barren with only small cactus and small patches of ground cover. Everyone told me it would take five years for the plants to grow large enough and spread wide enough to really look nice. It has been three years and I must say I am very pleased. The various plants still have a ways to go growth wise, but the spring flowers and color are really spectacular.
|
|
|
|
|
|
|
|
|
|
|
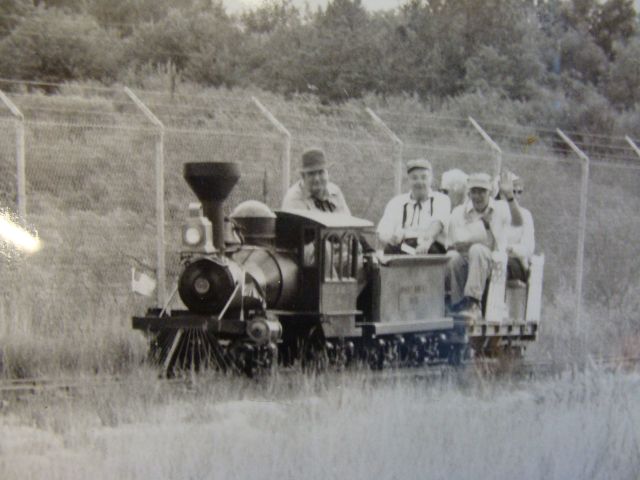
We were gifted a black and white photo of the Tucson operating on the Flagstaff and Middle Verde Railroad on its "golden spike day" September 22, 1991. Everyone was dressed in period costumes for the event. It is on display in the engine house.
|
I purchased and installed a new battery in our rebuild rack. It operates the winch that allows us to slowly lower engines from the rack to the rail and vice versa. We needed the new battery in preparation of the lowering No. 582 onto the rail for her inaugural trip around the A & P in April. I'm sure we will have a number of bugs to work out since rebuild and reassembly; we will start that process next month.
We have two axle sets to finish rebuilding next month and we will finally be done with that project. It seems like it has drug on for several years and actually has taken almost a year and a half to complete. The bearings and seals have been replaced on every journal box of our equipment. Several bad axles and numerous wheels have also been replaced. With respect to these last two axle sets, I had a few wheels that might have gotten us by. However, I elected to purchase two new wheels and go that route. The last axle set will have two new wheels and a new axle to go with new bearings and new seals.
|
We took some video this month of the Red River (No. 37) running on the A & P. There is a great deal of editing that still needs completed, but we hope to have a video up on the site in the next few weeks showing her polishing the rails. Check back in late April for an update on that project.
Happy and safe railroading everybody.
05/10/14
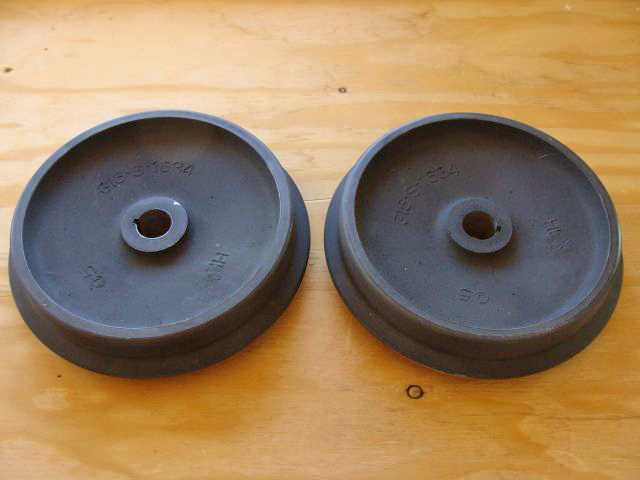
We finished rebuilding the last two of our axle sets this month. This was a time consuming project that took almost a year and a half to complete. The bearings and seals have been replaced on every journal box of every piece of our equipment. Several bad axles and numerous wheels have also been replaced. In this most recent phase, we rebuilt 48 axle sets. That is 48 axles, 96 wheels and 96 journal boxes. We have eight wheel and axle sets (4 G16 and 4 S16) already rebuilt and on the parts shelf ready to roll. I am so pleased to finally have this project completed.
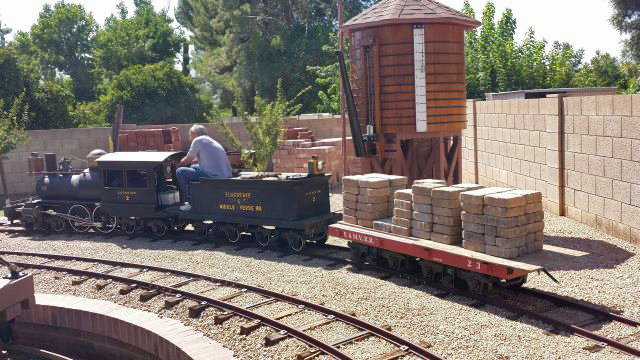
I bought four additional pallets of used bricks for a long term project that will get built later rather than sooner, but the bricks were removed from a neighbor's rear patio and if I wanted them I needed to get them now. We utilized flat car 203 much as we did with some edge bricks last month to get them to the rear of the yard where they are stored.

|
|
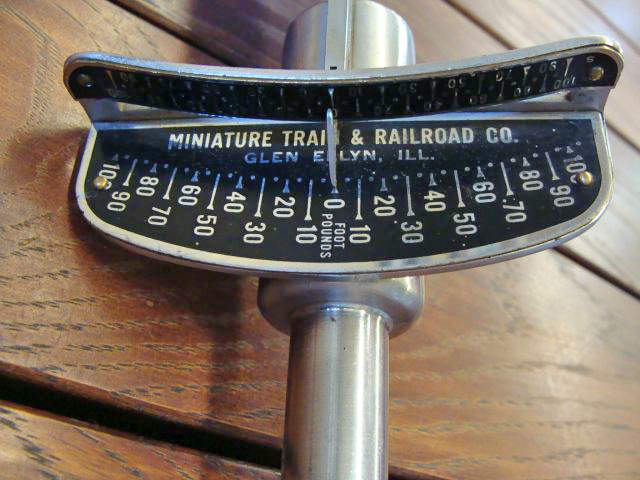
We acquired another Miniature Train and Railroad Company torque wrench for our collection. There are several different variations of the MT & RR Co. torque wrench and we have several of the variations in the dozen or so we have collected over the years. The recent acquisition looks like it was never used and maybe never out of the box in almost 70 years. We are glad to add it to the collection.
|
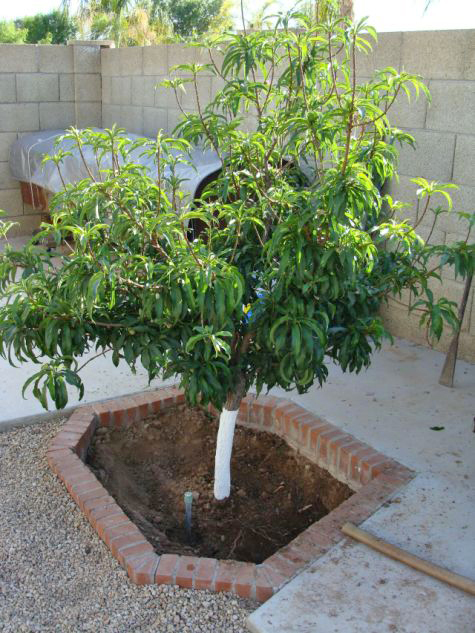
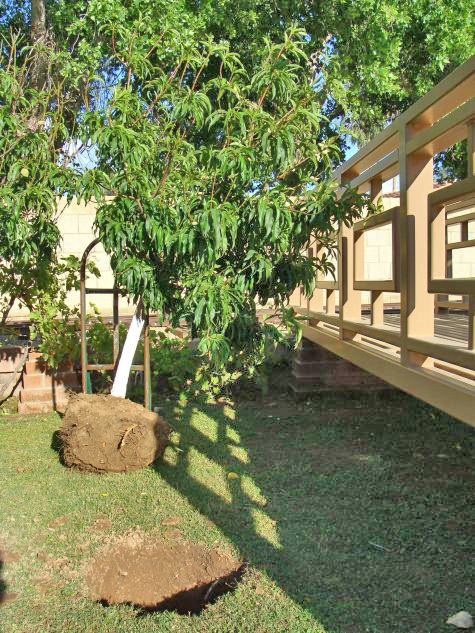
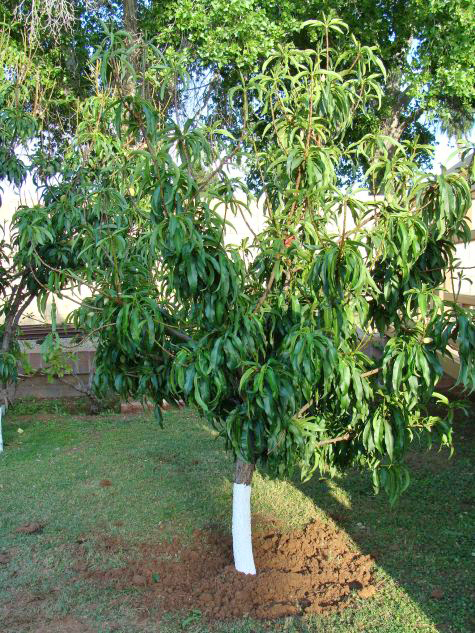
We removed one tree, relocated another and poured some fresh concrete this month to provide a concrete pad for our two large racks that were originally built when we were rebuilding our first two S16s. We got a great deal of use out of the racks over the last 19 years and although I don't have any plans to acquire and rebuild any more S16s in the immediate future, you just never know. The racks will be stored on the newly enlarged pad next month.
|
|
|
|
|
|
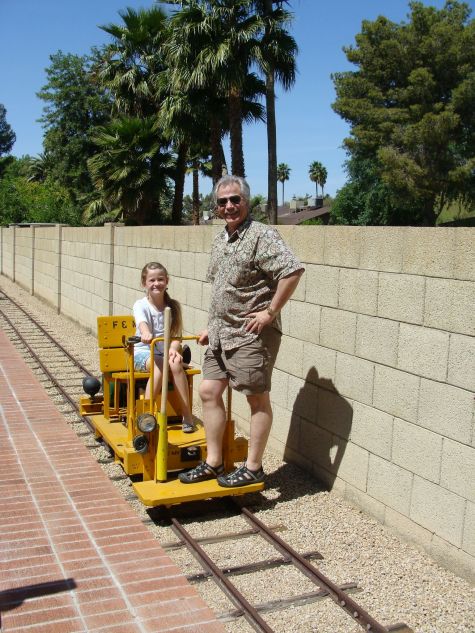
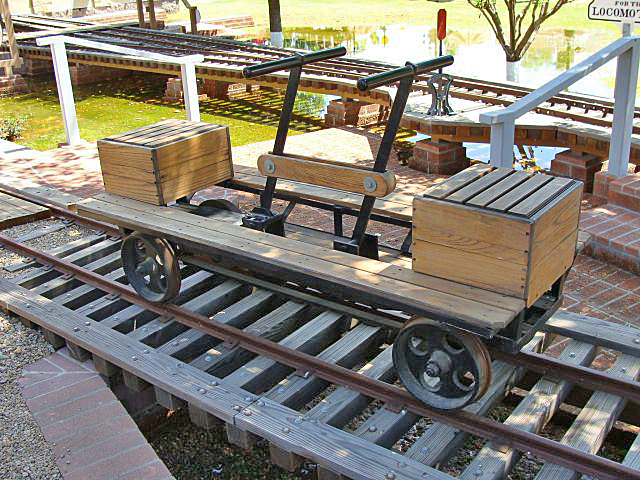
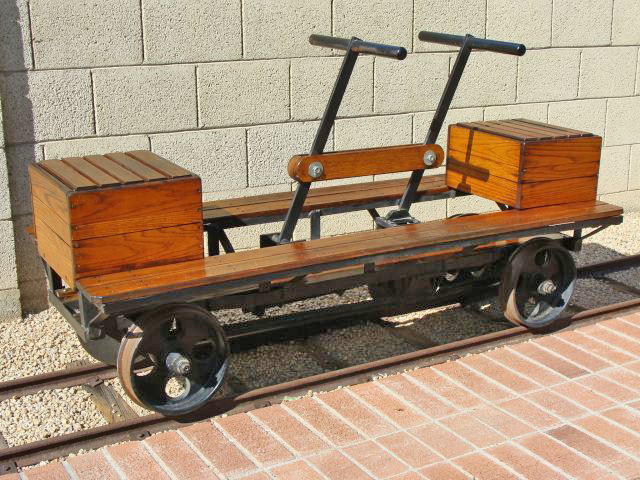
Our pump car hasn't received much attention recently. Before we had any powered equipment, it was our only piece of equipment and got quite a bit of use. We got it out this month and refinished the wood components and repainted the black frame. She looks pretty good again. Dave and I took her for a little spin and she still handles well.
|
|
We touched up some of our railings, added some additional solar lights, added some plants along the right of way in the front yard and generally got some spring cleaning accomplished in various places in the yard.
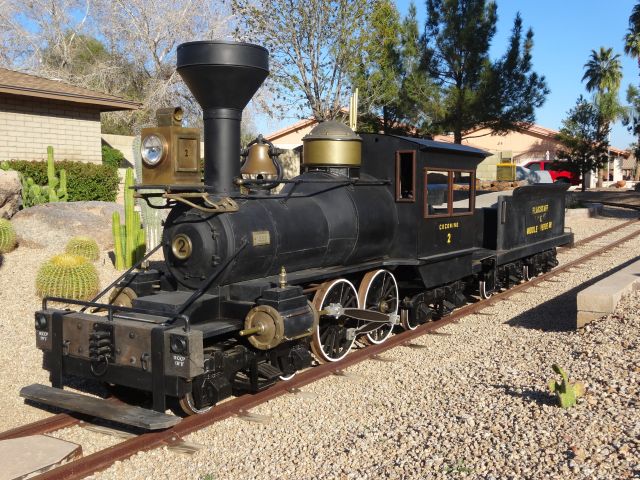
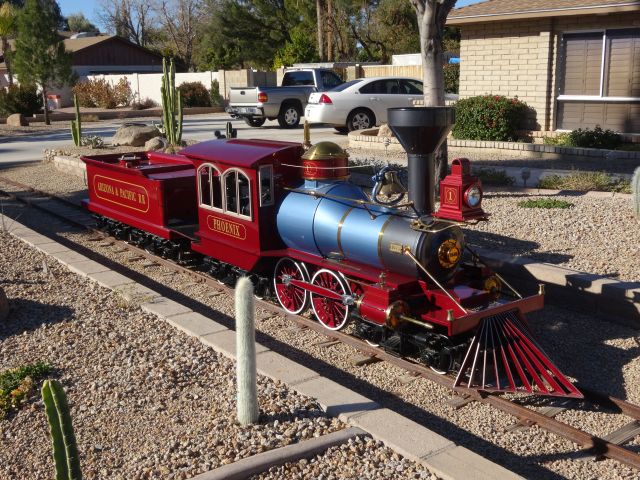
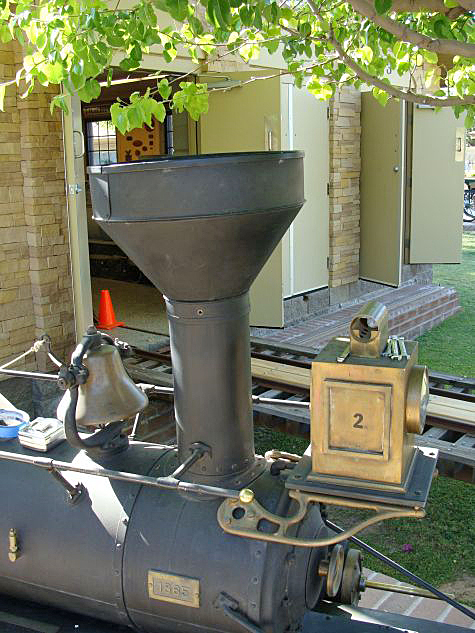
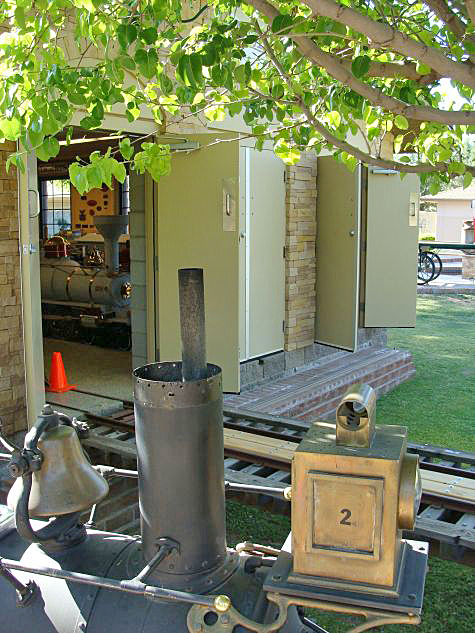
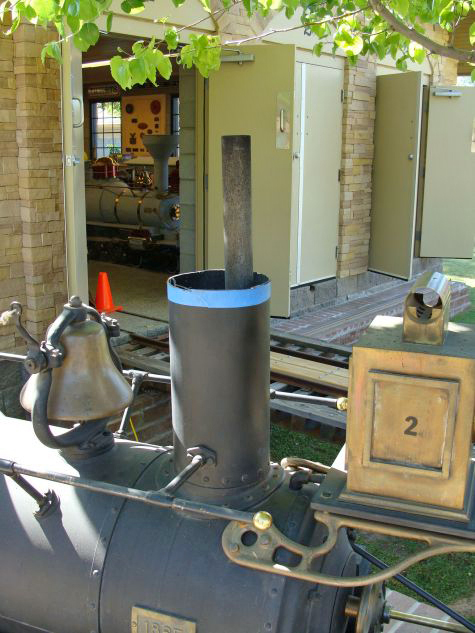
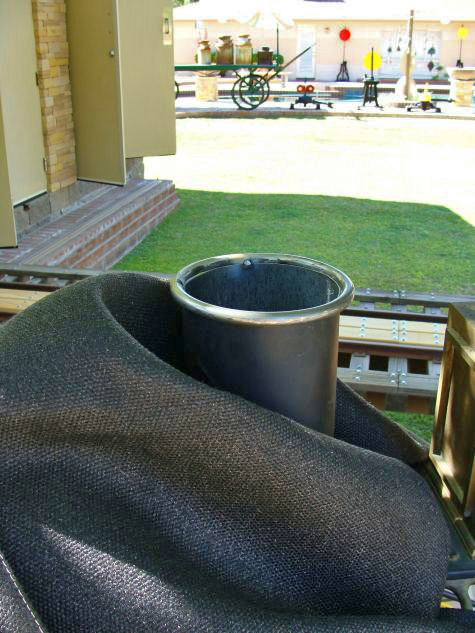
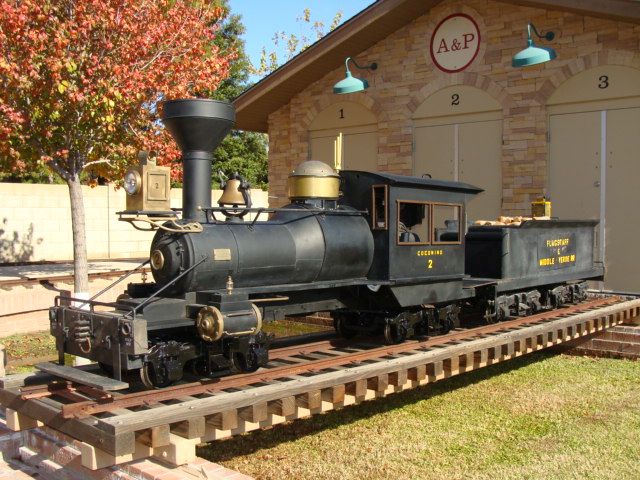
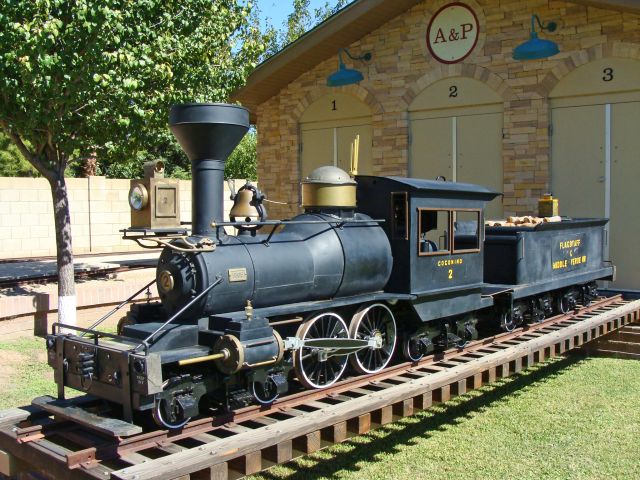
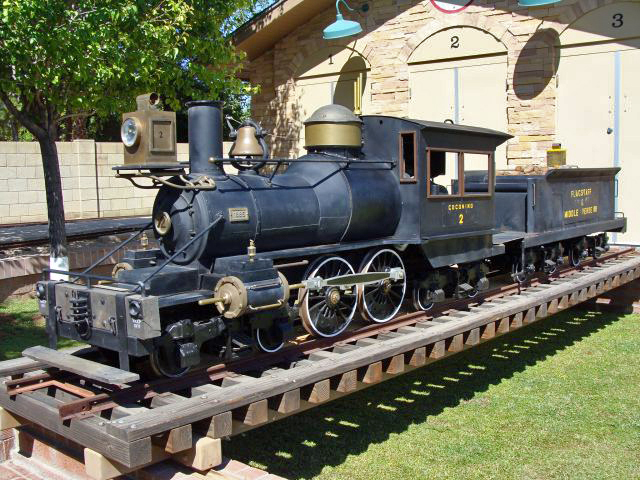
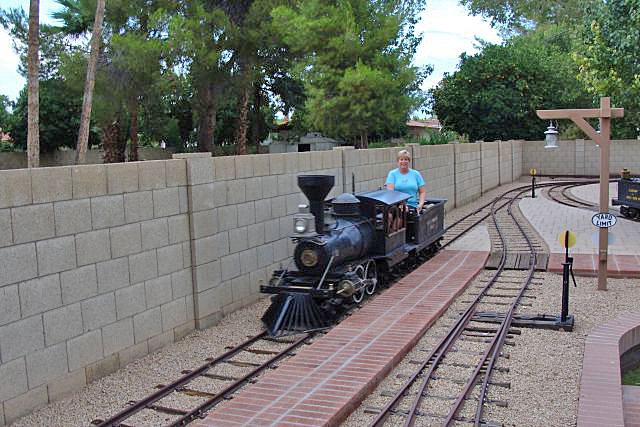
Malcolm Mackey originally acquired the Coconino in 1991 and she was in rough shape. He spent several years acquiring parts and rebuilding her. She returned to operation on May 31, 2000 on the F & MV Railroad. I heard many times over the years that he wished he had modified the Allan Herschell smokestack into a straight smokestack common on many turn of the century locomotives. This project has been a long time in the making, but this month we removed the balloon portion of the stack, shortened the stack and exhaust pipe, welded a cold-rolled 1/2 inch ring in place that we fabricated and filled the remaining holes and painted the stack. It looks exactly like the modified stack on No. 37. I think it looks great and represents a little different era in American railroading. Despite the fact that I really like the way it came out, we will NOT be altering the stacks on any of the other three S16s.
|
|
|
|
The look of the Coconino has changed dramatically in the past two years with the addition of the drive wheels and the alteration of the smokestack.
|
|
|
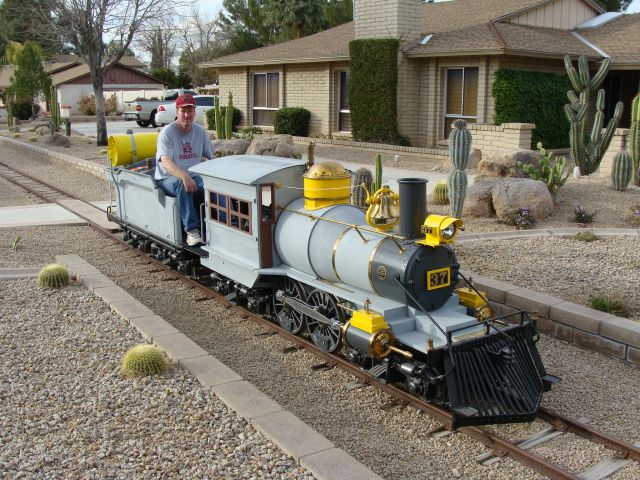
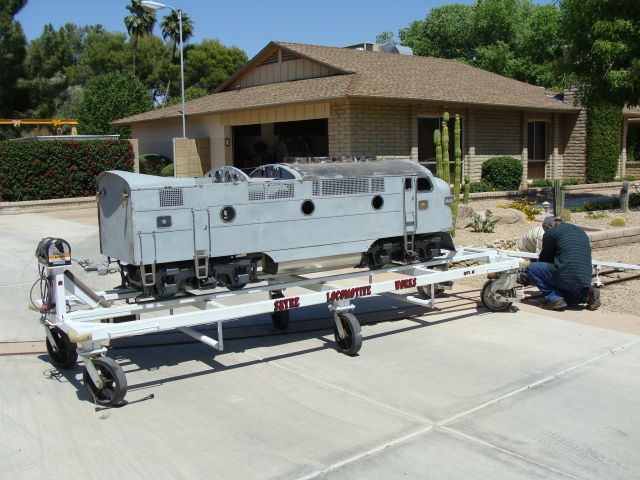
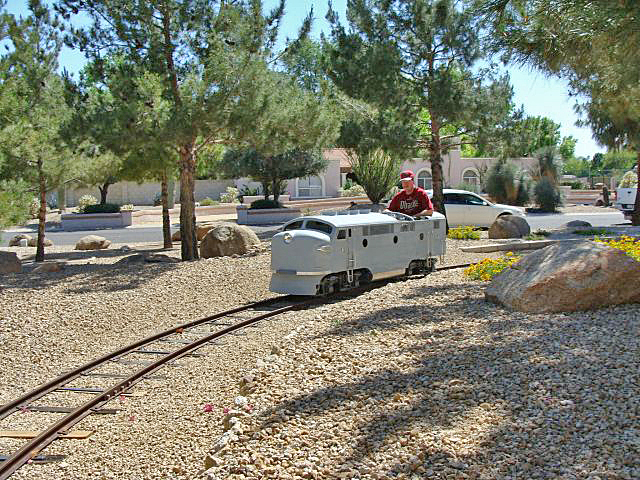
The most exciting activity of the month, by far, was the first run of the No. 582 on April 13. Dave, Jerry, Eddie and I had some challenges getting her off the rack and onto the mainline as our rack was built for S16s and the G16 geometry is a little different. A longer ramp and flatter angle would have helped considerably, but we eventually figured out a work around and got her on the mainline in the front yard without incident.
|
|
|
|
It wasn't long before we had her started and Dave was at the controls as she made her first trip around the A & P layout. Some minor carburetor adjustments were really all we modified during the day. If you have been following this site for a few years, you will remember we replaced the original Wisconsin VE-4 engine with a VH-4. The footprint is the same, but the engine is about two inches taller requiring the fabrication of custom manifolds and headers. Parts are virtually impossible to find for the VE and are still readily available for the VH, it also has an internal alternator and creates 6 additional horsepower.
|
She ran great. The sound of the VH running through the straight headers is a deep rumble that is awesome. We have glass pack mufflers on the S16s; the straight header sound is so sweet. The VH is noticeably more powerful than the original VE or even the VF model. We have a VH in the Phoenix and a VF in the Tucson, Coconino and Red River. Although we had spent quite a bit of time debugging the No. 582 while she was on the rack, I was pleasantly surprised at how great she ran and the few problems that we encountered once we had her on the rails. There were no vacuum leaks, the gauges and all electrical components worked as designed and the parking brake worked even better than hoped. We should have the cowl back next month and will get it installed.
|
|
We took quite a bit more video this month of the Phoenix, Red River and No. 582. The Tucson, Coconino and Sandusky were also run and received some camera time as well. I'm not sure how many videos we will make, but we are working to get some video in the can in the next few weeks as our operating season here ends on June 1 as a result of the heat. The engines still get started early in the morning or after dark just to keep everything charged and moist, but temperatures of 112 to 120 don't allow operating. We start counting the days until October 1 when operations resume. It doesn't mean we aren't working on projects in the summer, just don't get to play with the trains.
National Train Day is May 10; it is a great time to show support for a local railroad museum or park railroad in your community and let them know you appreciate their efforts. A few dollars in their donation jar is always appreciated or maybe you can volunteer some of your time in the weeks ahead...
Happy and safe railroading everybody.
06/12/14
Our biggest project this month was reorganizing all the parts that had been stacked in boxes in the original engine house and moving our second long locomotive rack out of that engine house and onto our new side yard concrete slab. This project took parts of three weekends as the number of boxes and amount of parts was far greater than I had realized (most of that is good news). We organized everything and then found other places to store the parts. Then the rack came out and we had to be creative to get the several hundred pound rack moved over gravel to its new storage area. We stored rack No. 2 next to rack No. 1 on our new concrete slab. We got a great deal of use out of the racks over the last 19 years and although I don't have any plans to acquire and rebuild any more S16s in the immediate future, you just never know.
|
|
|
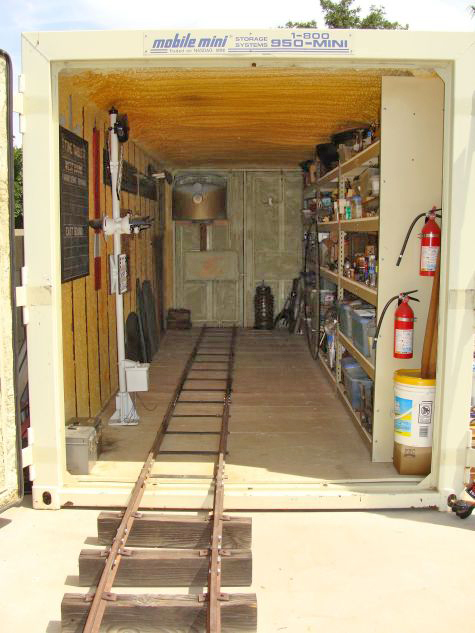
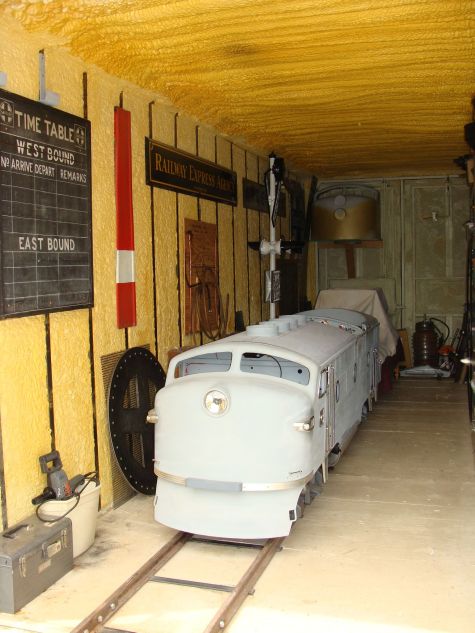
Then the engine house got swept and the handcar and No. 582 were parked inside. I had originally planned to store the track inspection car inside as well, but that made it just too tight to be comfortable driving the No. 582 inside. For the summer months, I am storing the track inspection car inside the large engine house to keep it out of the summer weather and elements.
|
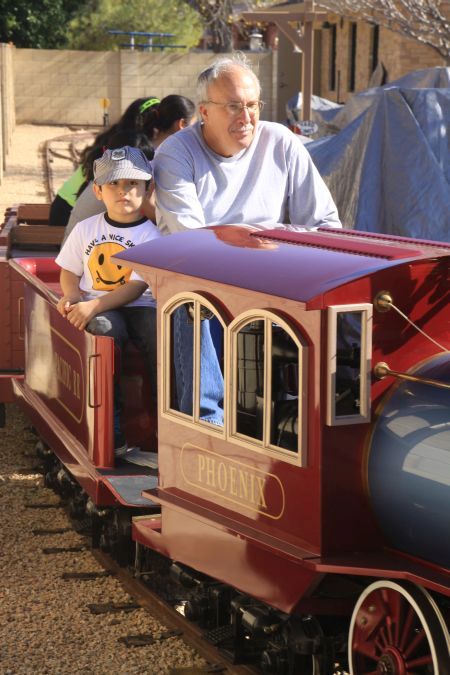
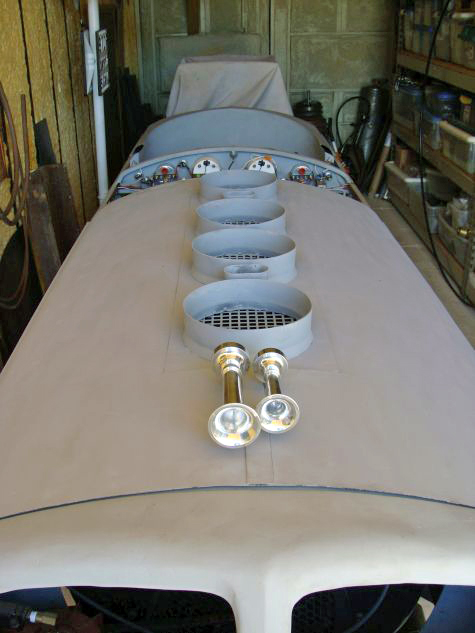
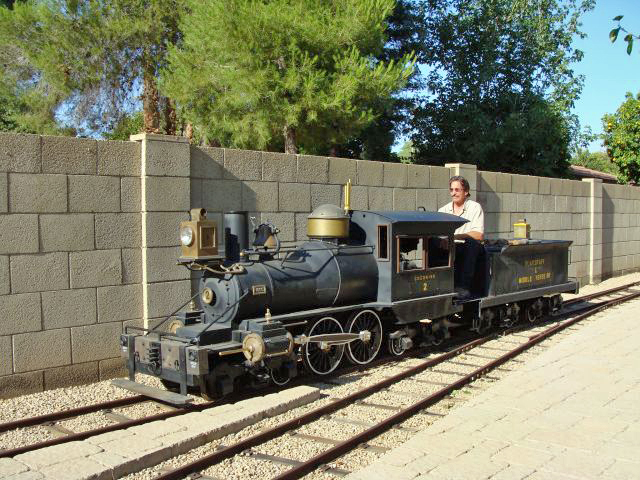
We had the No. 582 out for several runs during the month. She is just such a sweet running locomotive. We attached the faux horns to the roof and they help set off her appearance.
|

|
|
|
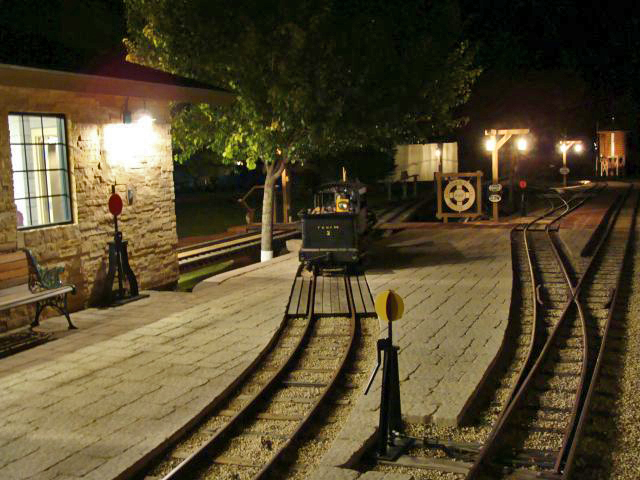
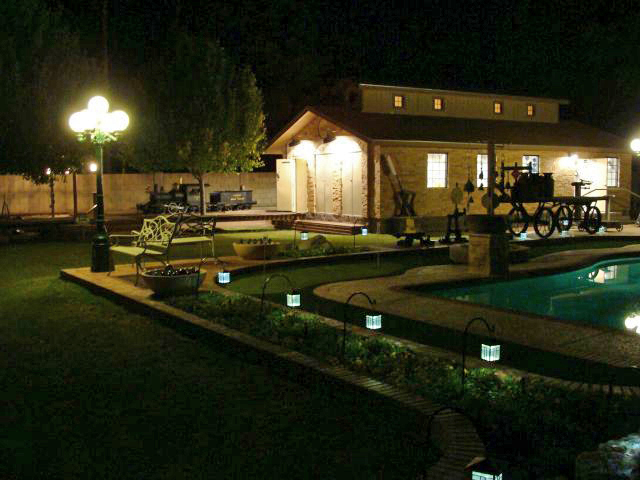
The coolest thing we did during the month was our Memorial Day weekend night run. There is just something different about the night runs. We light up the backyard reasonably well with lights on the engine house and the water tank and the four lamp posts with their period style lamps. Once you venture a short distance away from those lights, however, it gets dark - real dark out here. Your experience is dictated by the headlight and what it illuminates... The instrument panel gauges are illuminated and stand out, but your senses are focused on the sounds and the track in the headlight... We ran the Tucson and the Coconino for a couple of hours and had a great time.
|
|
|
|
|
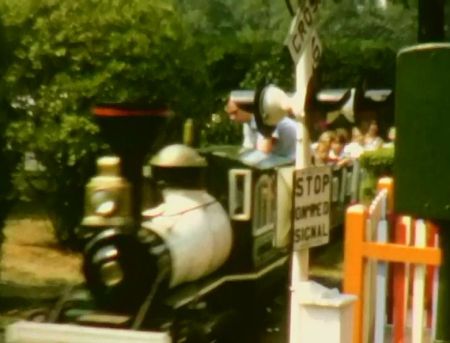
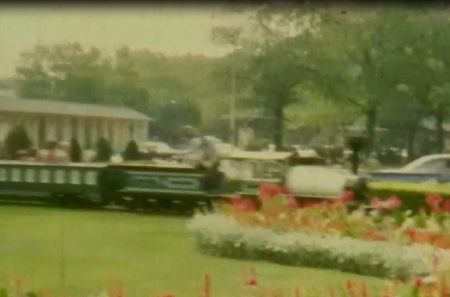
Ed Loesche was in town from Camp Verde and stopped by with some vintage film footage taken by his family of the Coconino when she operated at Playland Park in Rye, New York. We are in the process of having the film converted to a DVD and hope to be able to obtain some screen captures that we will be able to share on here in the future. The unique thing about Ed operating the Coconino is that as a small child he was a passenger on the Coconino many times in the early sixties when she was still at Playland. Pretty cool to have the opportunity to operate the locomotive you couldn't wait to ride behind as a child some fifty years later. Sometimes it is a small world.
|
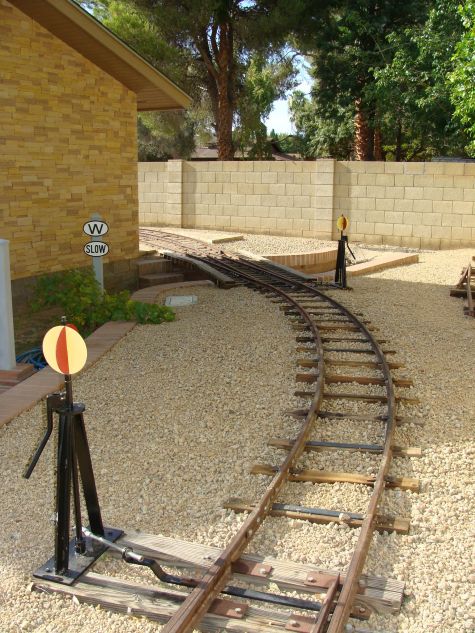
We replaced about a dozen ties this month and many of those replaced were among some of the first ties layed on the A & P. We will probably replace another 50 ties or so this summer as part of our regular track maintenance program.
This winter we did some extensive work on our curves and welded flat iron between the rails on every third tie in an effort to combat the rail creep we deal with every winter and summer as the weather changes and the rails grow and shrink. I have been very pleased with the outcome so far and it has been plenty hot out here. It is important to note that we also shortened the rail a bit in the rail joiners so that the lengthened rail in the summer would have plenty of room to expand. So far no issues at all with the gauge staying consistent while the curves move slightly. Season after season we spent dozens of hours regauging our track as each rail grew and shrank independently. With the rails tied together into track panels they now move in and out a as a unit and the gauge remains unchanged. If I had known how many hours this change was going to save us annually, I would have done this many years ago.
|
The summer is here as we are already in June. We have experienced several 110 degree days and the hottest part of the summer is still two or three weeks away. We are already counting the days until October when the weather will afford us the opportunity to get the equipment out and run it again. It just gets too hot on these air cooled engines out here to operate in the summer months.
We will continue work on our projects and keep all the batteries charged and fluids circulating every few days.
We will have some great photographs and more from a several day Northern California trip we have planned later this month that has a distinct park train theme. We should have those posted next month.
We will plug away on putting a few short videos out of our equipment running around here and should have some new information on that next month. Dave and his family got a new puppy this month and finding computer time away from the puppy to edit video footage has been difficult.
|
Happy and safe railroading everybody.
07/18/14
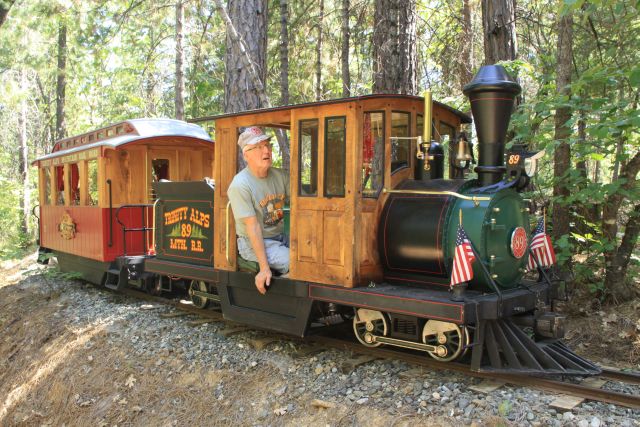
Dave and I traveled to Northern California this month for a total of four days of large-scale railroading.The first two days we attended an invitation-only meet at the Trinity Alps Mountain Railroad of Russ and Susie Robinson. The third and fourth days were spent at the Nut Tree Railroad, the Billy Jones Wildcat Railroad, the Golden Gate Live Steamers and the Redwood Valley Railroad.
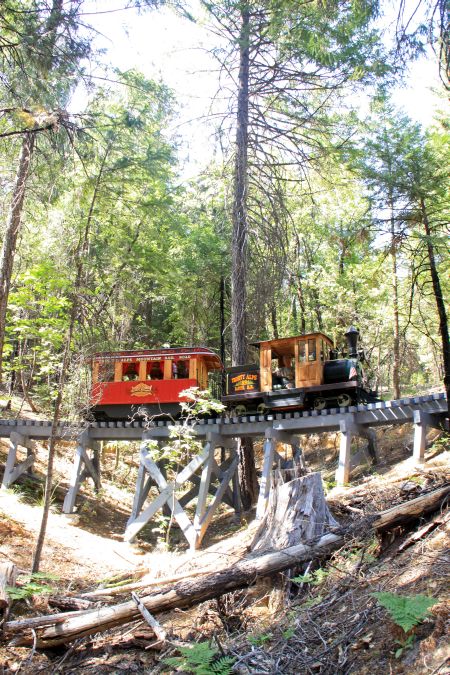
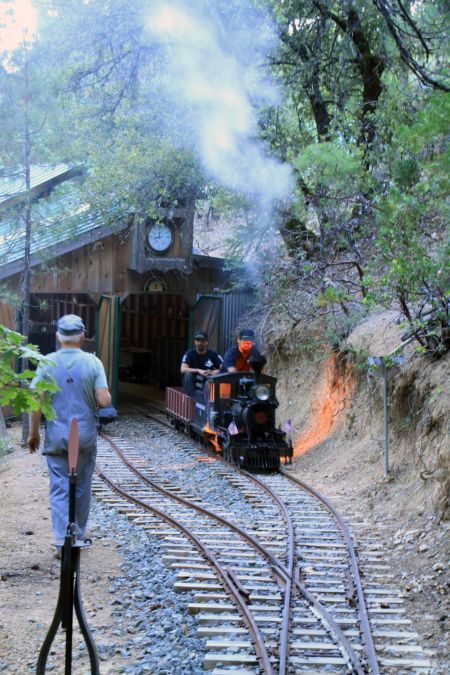
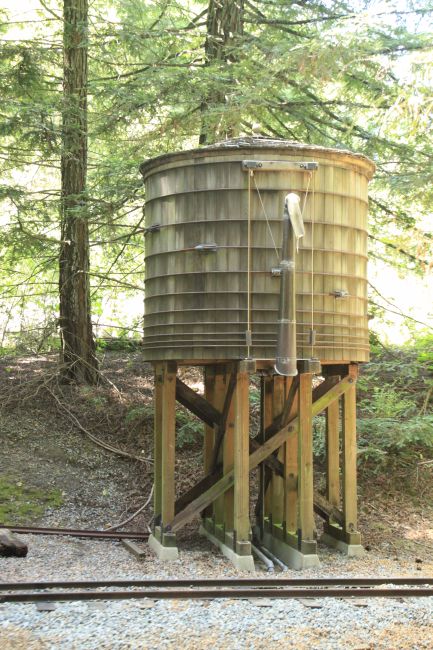
We flew into Sacramento and then drove about four and a half hours north to the Robinson estate and private railroad. The TAMRR is an amazing mountain railroad with 6 percent grades in places and that winds its way through some of the most beautiful country that you will ever see. The railroad features an impressive bridge and 4 massive curved trestles. The tallest of the trestles is about 30 foot tall at its tallest point. A concrete tunnel, snowshed, watertank, two engine houses and other outbuildings are situated along the 1.3 miles of track. Side tracks are present at key l locations along the railroad.
|
|
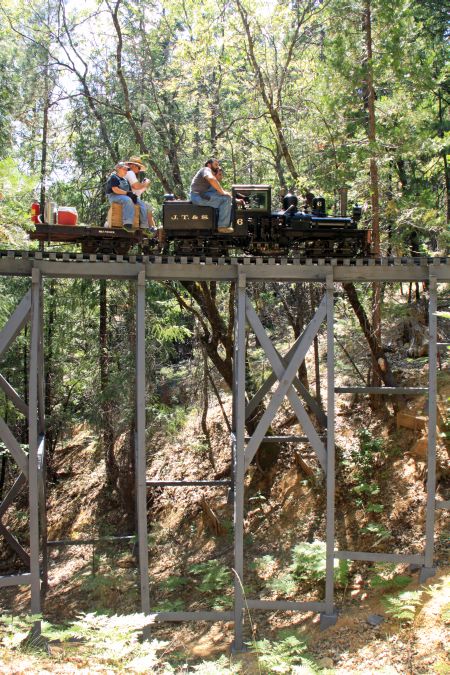
John, Robert, Brendon and others from the Joshua Tree and Southern railroad were in attendance and trailered several pieces of their rolling stock as well as Mohave Southern engines 2 and 3 and JT & S steam engine No. 6 to the meet.
|

|
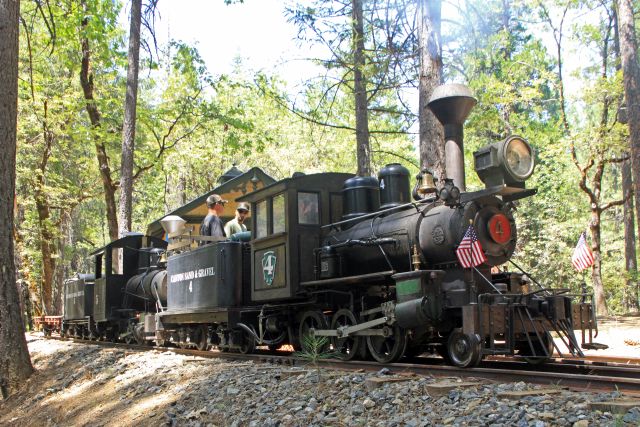
The Sessums family and friends brought their Canyon Sand and Gravel steam engines Nos. 4 and 5 and they ran beautifully on the steep grades.
|
|
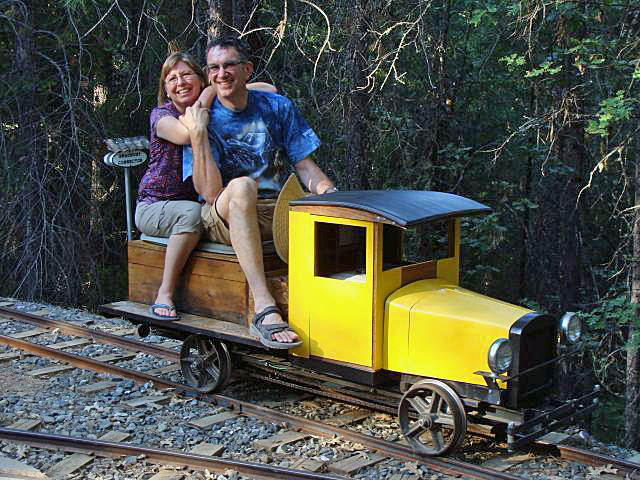
Mike and Lois Davis of the MP and BH Railroad brought their rail truck and it also handled the steep grades well.
|
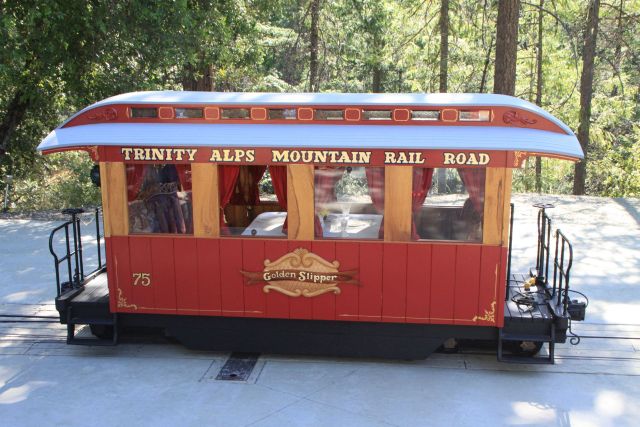
It was a fantastic weekend with night runs, double heading, the debut of the Golden Slipper luxury dining car and a live band and barbeque on Saturday night with roughly ninety guests. Russ and Susie put on a tremendous event for all of us that were fortunate enough to have been invited.
|
|
For photos of the amazing Trinity Alps Mountain Railroad and new photos from this recent visit, please see our Miniature Railroad Spotlight on the Trinity Alps Railroad. You can click here to see the Trinity Alps Mountain Railroad . We already have photos posted from our visit there four years ago and will be adding the photos from this trip shortly.
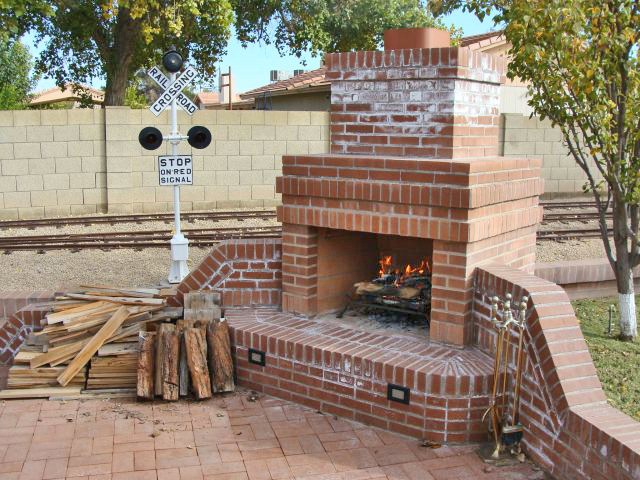
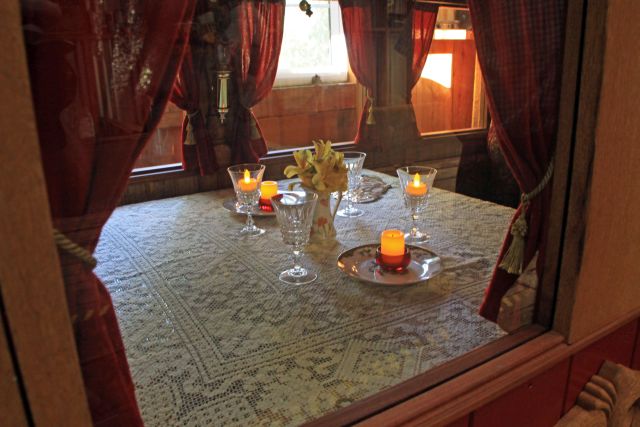
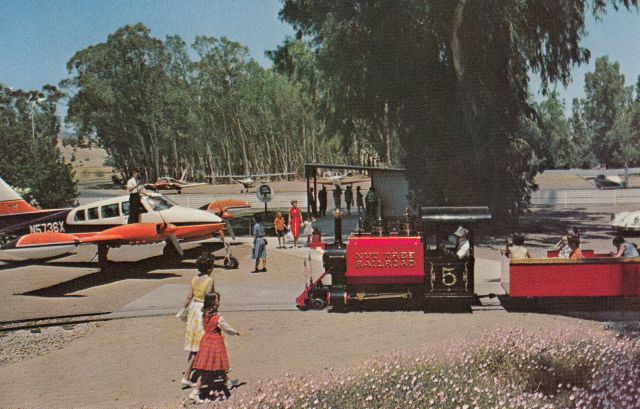
Our next stop was at the Nut Tree Railroad in Vacaville, CA. The Nut Tree Railroad was established circa 1953 with equipment built by the late Bud Hurlbut. The railroad carried passengers back and forth between the airport, restaurant, toy shop and gift shop. Numerous large rocking horses, giant aviary, metal patio fireplaces and numerous sitting benches made the stay fun for all ages. The original family businesses ceased operation in 1996. All of the original buildings except a small one now used as a ticket pavillion were demolished in 2003. That building and one of the metal patio fireplaces remain as testaments to the past. Photos of some of the dignitaries that visited the Nut Tree including Governors of California Goodwin Knight, Ronald Reagan, Pat Brown, Richard Nixon and Earl Warren as well as hollywood stars Shirley Temple, Max Baer and Bozo the Clown are displayed on a Wall of Fame on the side of the ticket pavilion.
|
|
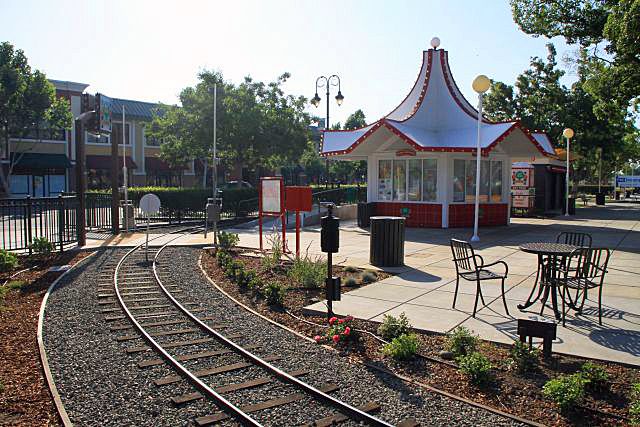
The current Nut Tree reopened in 2006 as a retail complex adjacent to I-80 with a small loop of train track surrounding a merry go round and other playground features. The train storage facility is a distance behind the shopping complex and a second much larger loop of track connects a beautifully built loading platform and appears to travel through gardens and past a couple of other buildings. That area was fenced off and locked up. From the high weeds and lack of maintenance, it was clear the loop in the rear hadn't been operated in quite some time. The airport, now operated by the County, still sits a short distance from the rear loop of the railroad.
|
|
We didn't actually see the train as we had a very busy schedule and the sign said the train didn't run out front until two hours after we needed to hit the road again. It was still a great stop and I'm glad we had time to fit it in.
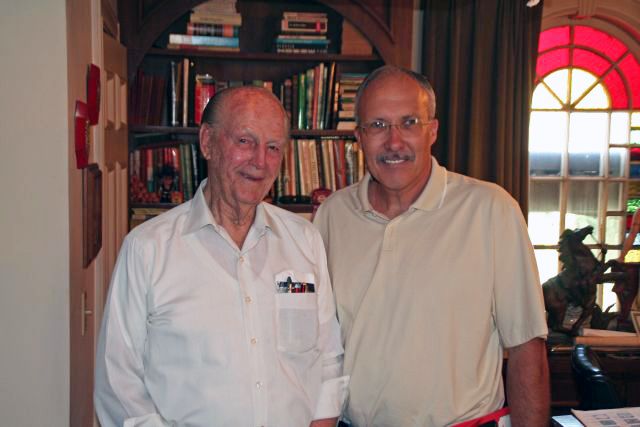
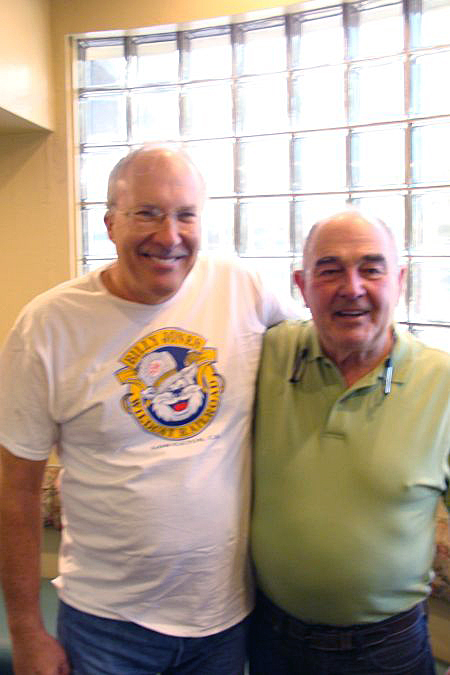
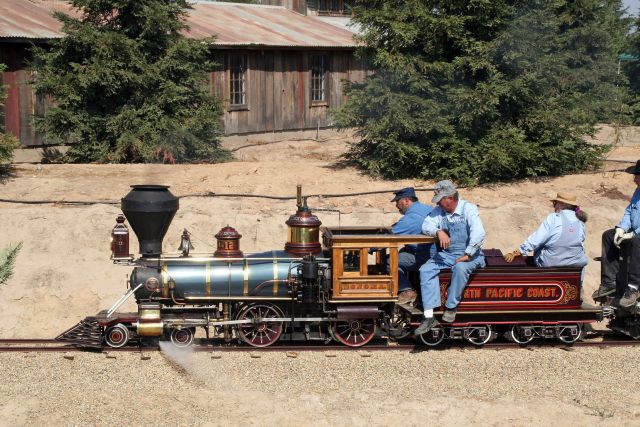
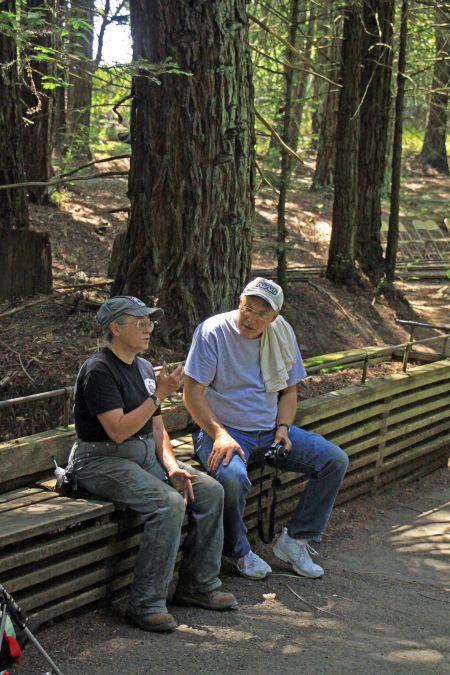
On our last day in California, we had breakfast with our long time friend Bob "Smitty" Smith formerly of the Panella Pacific Railroad in Lodi, California. Smitty and Marty Melish were the two that restored the first G16 built, MTC No. 501 originally in Griffith park, CA. They also rebuilt and restored several other G16s and two S16s of the Panella Pacific Railroad. They restored the other PP RR equipment and maintained the railroad out there for several years. Both have moved on, but remain two of the most knowledgeable experts on MTC and AH equipment and operation. It was great seeing Smitty again and he is ornery as ever.
|
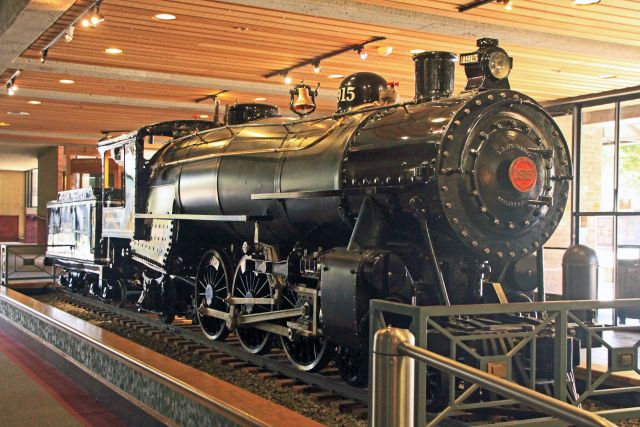
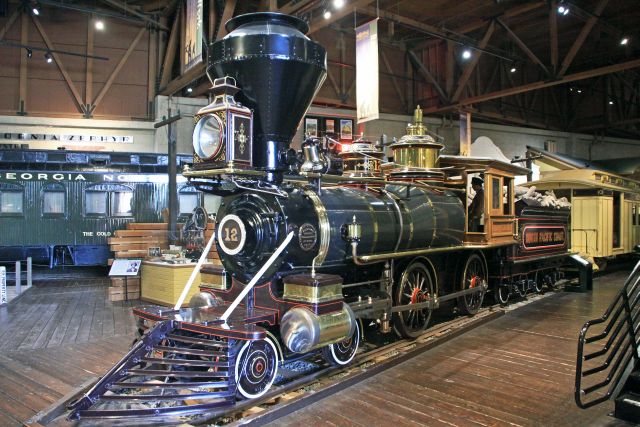
Our last stop on our four day sojourn was the California State Railroad Museum in Sacramento. Dave and I had been there twice previously, but each time the museum was closing in 15 minutes and we didn't get the chance to see much. This time we made sure we had time to see everything and spent about three hours touring the exhibits of meticulously restored engines, coaches, equipment and collections. It was very cool.
|
|
|
We drove about 800 miles over the four days, but had a great time. We saw a number of long time friends, made a few more and experienced some of the finest large scale railroads in the country. Over the next two months, we will cover our visits to the Billy Jones Wildcat Railroad, Golden Gate Live Steamers and the Redwood Valley Railway.
|
|
|
Back in Phoenix, it was still hot. We had the opportunity to acquire two additional G-16 journal boxes and covers during the month and added them to our parts department.
In other parts of the country, you guys conduct your maintenance programs in the winter when weather has shut down your normal operations. Out here, the summer is when those things take place. We topped off the gear oil in the transmissions and gear boxes of each of the AH and MTC engines. It isn't easy getting to the fill area on the gear boxes and I suspect that is why so many of the gear boxes were damaged by being run without oil. All of the gear boxes leak a bit and it is important to keep them filled with gear oil.
The needle valve had been sticking on the Tucson making her tough to start at times and the idle circuit on the No. 582 wasn't quite right. The gasoline sold in Maricopa County much of the year (Summer in particular) has many additives designed to minimize emissions, but they make the fuel sticky which causes ongoing maintenance issues with the carburetors. Needle valves stuck in the open or closed positions as well as floats stuck in place are an ongoing problem. We removed and thoroughly cleaned the carb on the Tucson; she is back to starting the first time the engine turns over. No. 582 runs great, but had a lope at idle reminiscent of a small block Chevy rebuilt with a radical camshaft. We had it off and apart numerous times before we pulled a rebuilt carburetor off our parts self and replaced it. Now she not only runs great at speed, but the idle is smooth and consistent. We also traced a brake vacuum leak to two vacuum cylinders that we rebuilt, but had a taken a set between rebuild and use. There is another small leak somewhere in the brake applied system that we will diagnose and resolve as time permits.
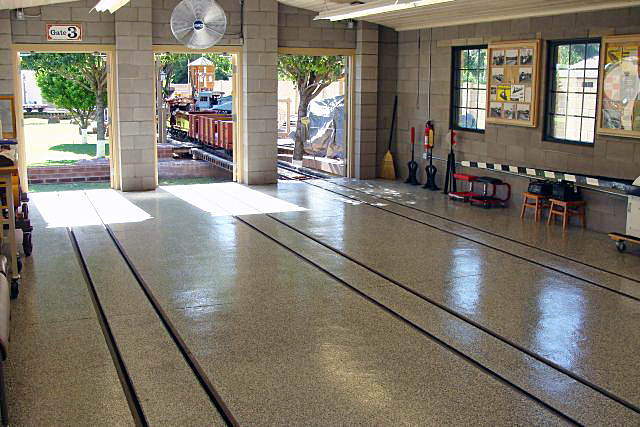
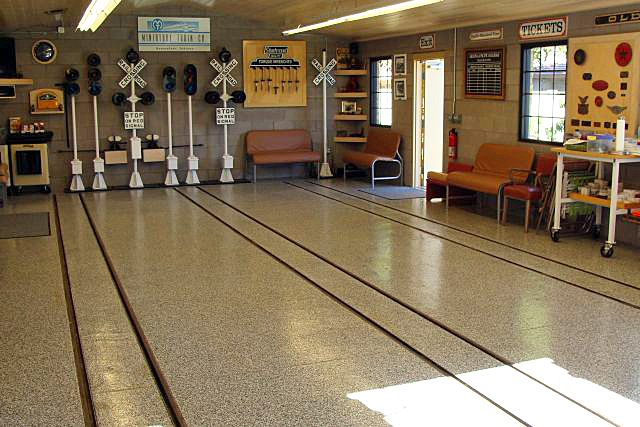
We had a spring cleaning Sunday on the A & P this month. Everything came out of the engine house and the floor was swept, scrubbed and mopped. The inside of the windows were washed and all the exhibits were dusted and cleaned. It sure does look big in there when all the equipment is outside...
|
|
|
|
|
We had all of the engines out and started during the month and made sure we moved everything to keep the fluids circulating and the batteries charged. It is a battle keeping everything charged and all the seals moist during the summer out here, but we have gotten used to it.
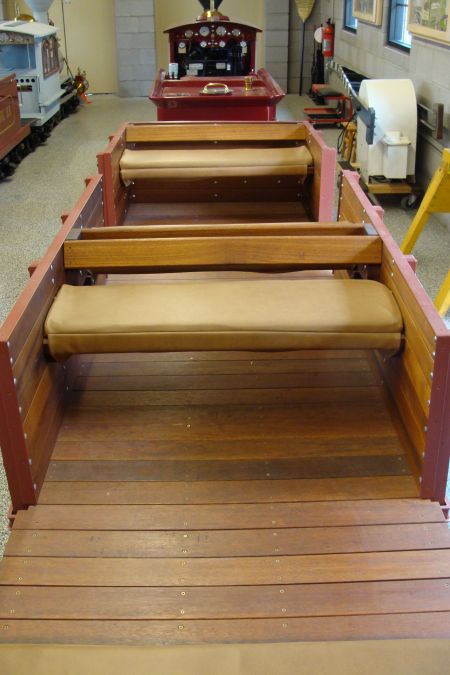
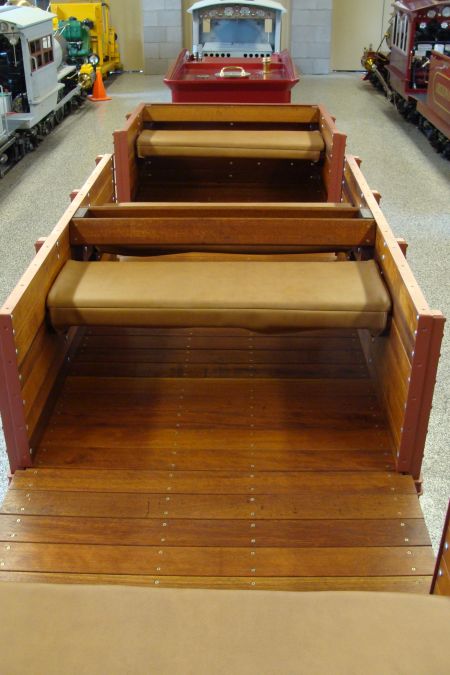
We re-treated the teak flooring and seats in gons Nos. 218 and 219 with teak oil. Every year they get re-treated as the dry climate here just draws the moisture out of the wood. We repainted our MTC cross buck that is mounted in the eastern portion of the yard. She looks great again.
|
|
|
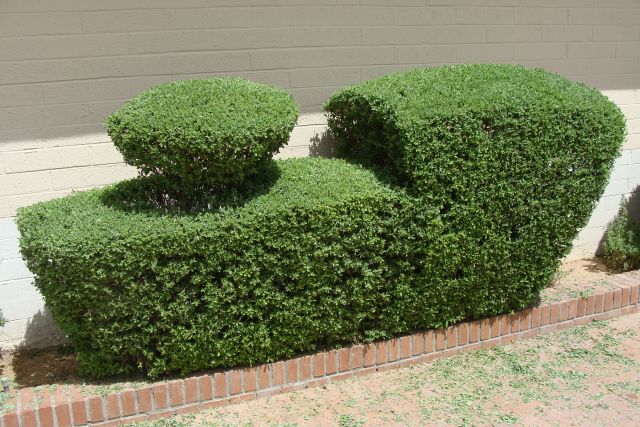
The rear side of the house is lined with Texas sage bushes. Over the years we have trimmed them to resemble a railroad engine. I am pretty sure you don't visit this site looking for Topiary ideas, but there you go. We planted a couple more a month ago and will have a tender in another couple of years.
|
Happy and safe railroading everybody.
|
08/11/14
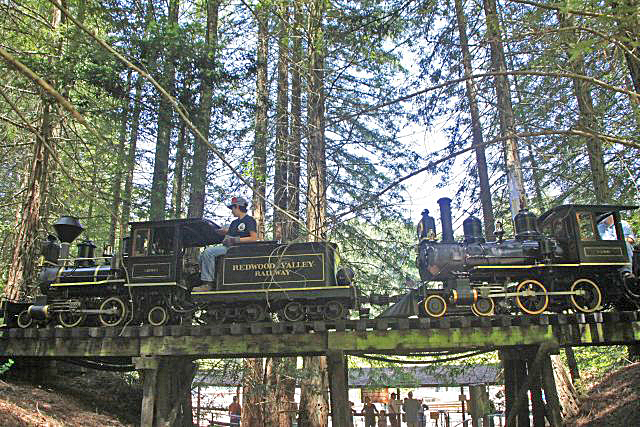
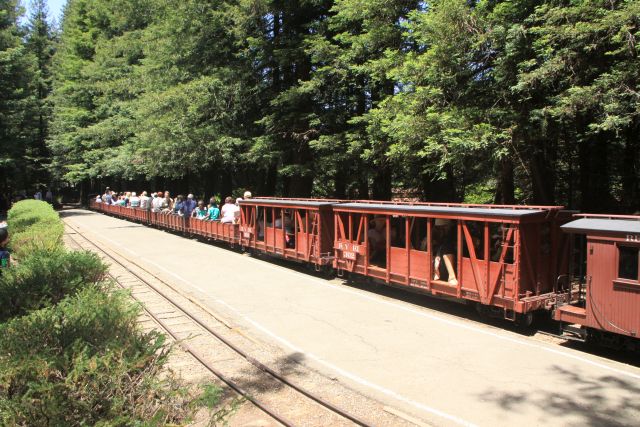
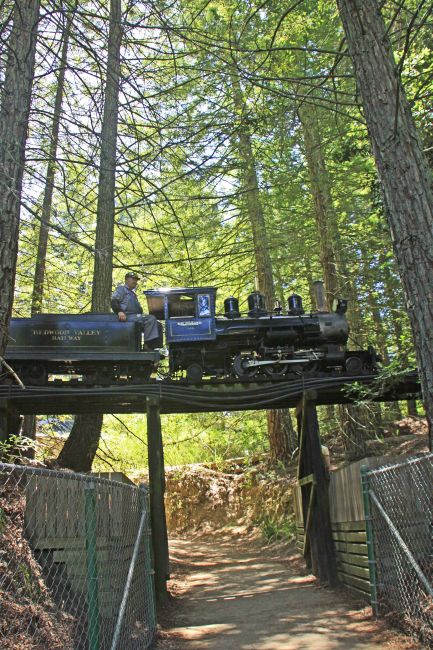
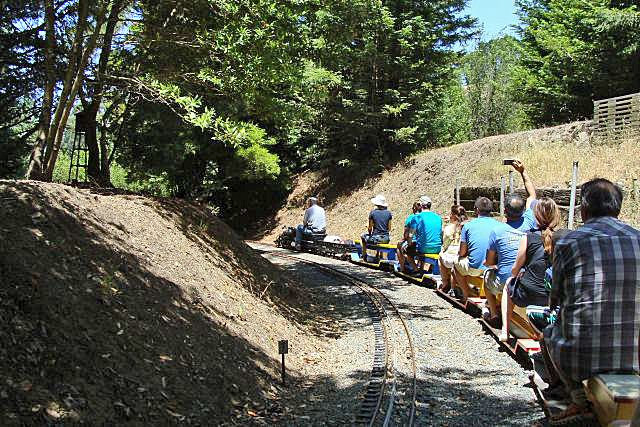
On our trip to California last month Dave and I had the opportunity to visit the Redwood Valley Railroad. This was our second visit to the RVRR as we visited many years ago in the late 1990s.
|
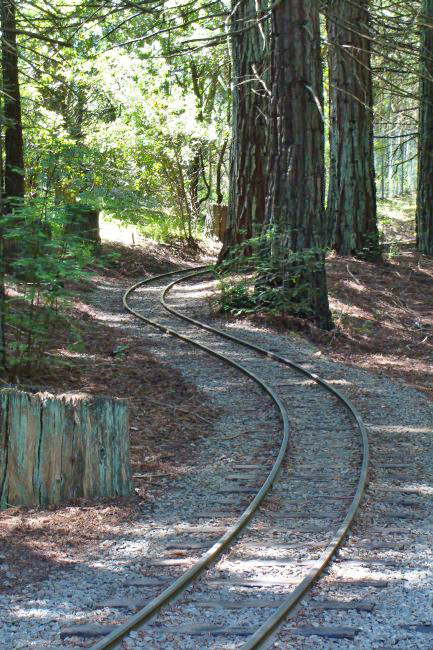
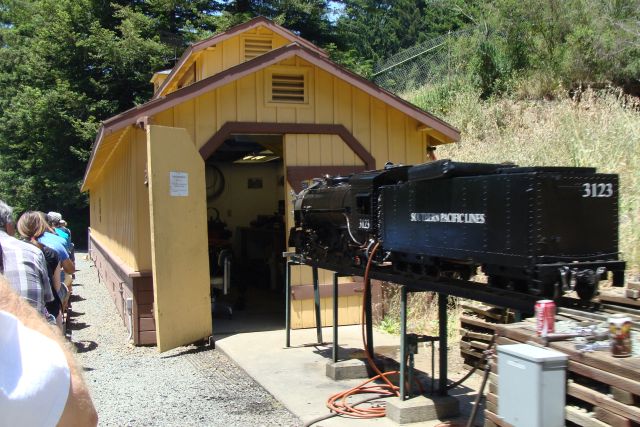
The RVRR was founded in 1952 by Erich Thompsen one of the founding fathers of the 15 inch gauge 5/12 narrow gauge movement.It is located in Tilden Park high above Berkeley, California. Many of the trees he planted years ago are now huge and provide shade for much of the 1.25 mile right-of-way. When we were there, the original car barn was having its roof including the plywood sheathing replaced. The original water tank has been moved, but still sits gracefully along the tracks.
|

|
|
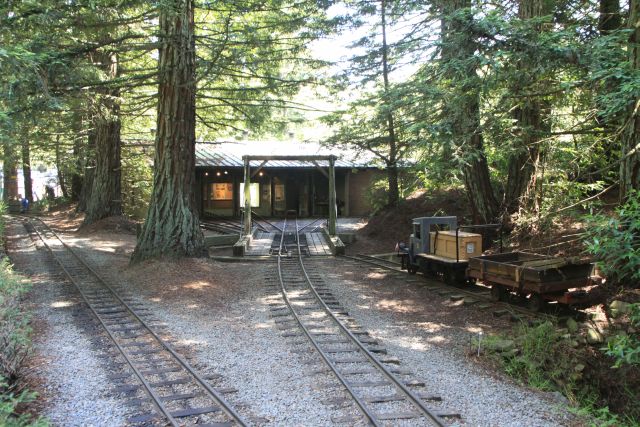
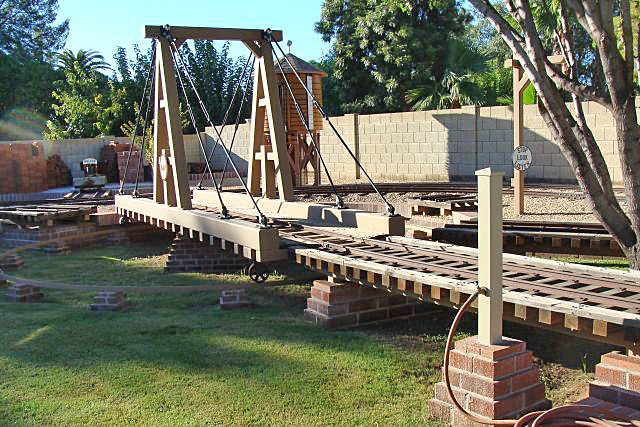
The second car barn was relatively new upon our first visit; a large third car barn has now been constructed and appears to only be a year or two old. We incorporated many of the features of the second RV RR car barn that we really liked into the design of our engine house on the A & P RR. The gallows style turntable was also an inspiration. The engine house is a classic design and windows allow visitors to see the equipment and activities inside.
|
|
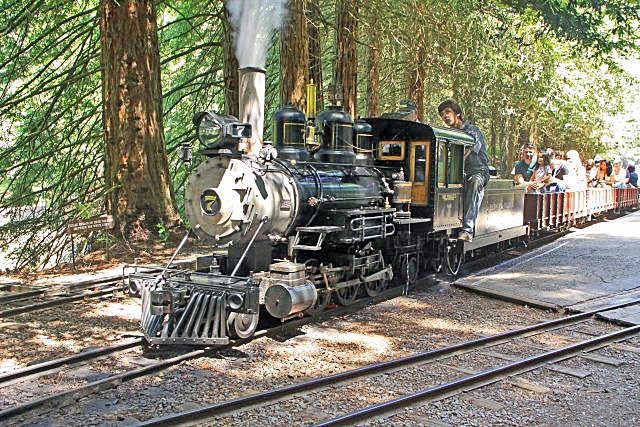
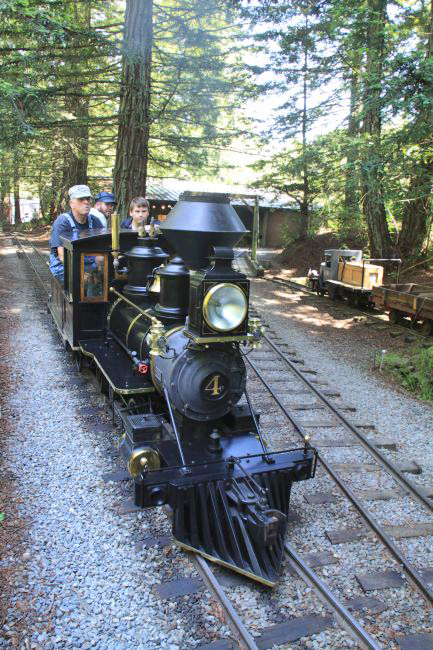
The beautiful scenery, amazing right-of-way that winds through the hillside terrain, the period looking structures and the tunnel aren't the most impressive components of this railroad - the equipment is... Four of the steam engines made appearances while we visited - three of them in revenue service. They are amazing. The gons, stock cars and caboose were filled on each trip as we rode and watched. The equipment and buildings were also an inspiration for Sean and Melissa of the Hillcrest and Wahtoke Railroad in Reedley. You may have noticed our gons bear a striking resemblance to those on the RV RR; the only difference being we have the side openings to make boarding easier. Erich Thompsen passed away several years ago, but his daughter Ellen keeps his dream alive and well. We had the opportunity to visit with her during the afternoon that we were there and she loves these things as much as we do.
|
|
|
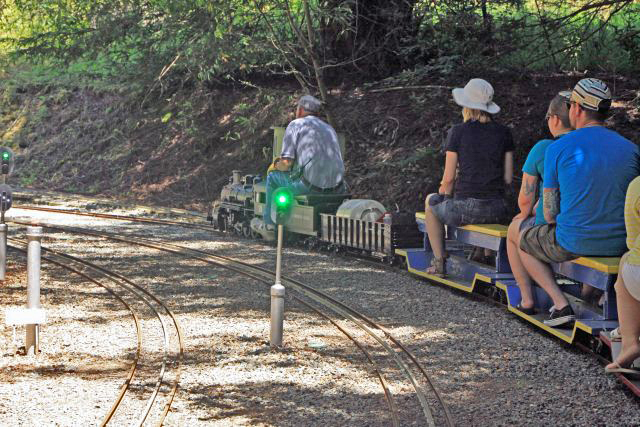
The Golden Gate Live Steamers were running their 7.5 inch equipment and offering rides to the public and we couldn't resist experiencing their layout and equipment as well. The GGLS moved their operation from Oakland's Redwood Park to Tilden in 1972. They were advertising their 79th year of operation as a club this summer. They not only have the 7.5 inch layout, but also have elevated 4.75, 3.5 and 2.5 inch gauge track. They have a beautiful car barn and steam bays and their right-of-way is as spectacular as that of the RV RR.

|
|
|
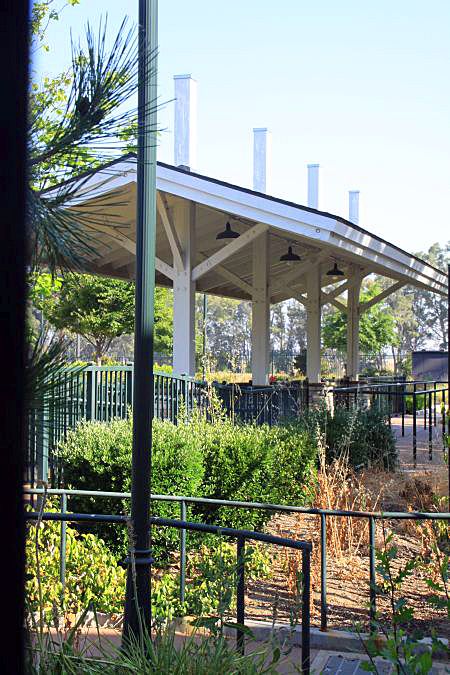
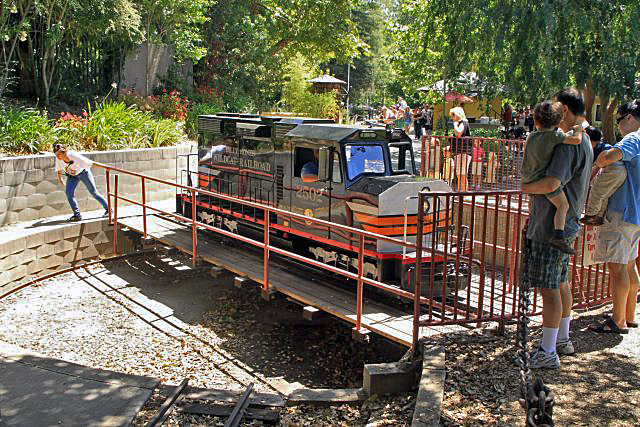
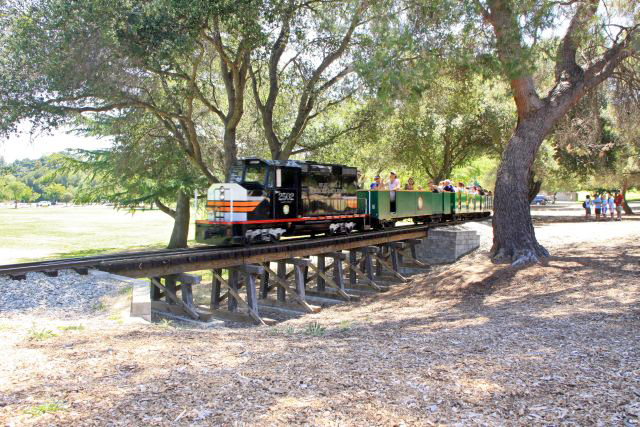
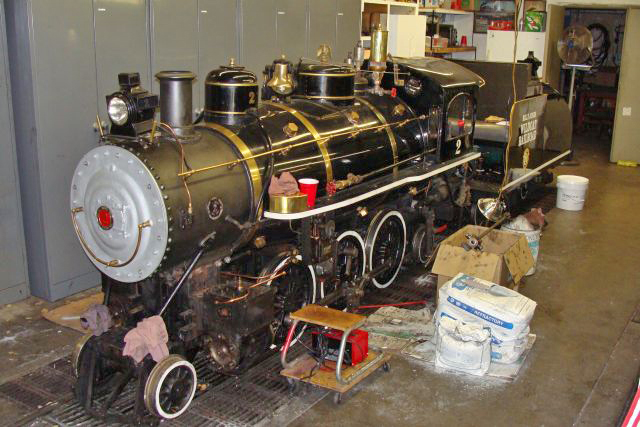
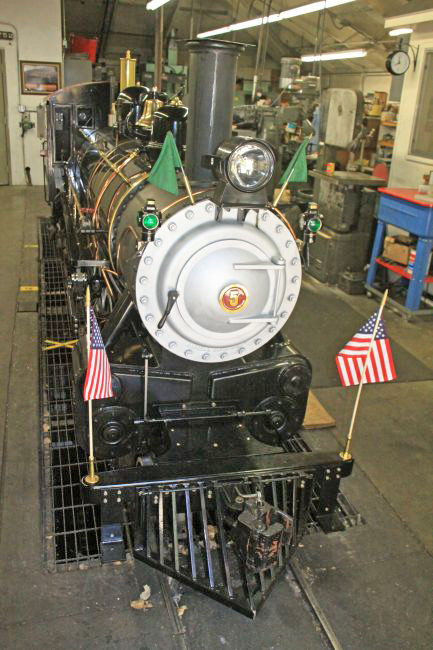
It was hot is Los Gatos when we visited the Billy Jones Wildcat Railroad. Neither of the two steamers was running the day we were there, but we were able to view both of the steamers in the engine house. They are both beautiful pieces of equipment! We rode behind the diesel and enjoyed the ride. An unusual touch is the passing track and the turning of the engine on the turntable after each trip to get it back to the front of the string of cars and directed forward. It is a nice long ride through the grassy park. We will be back one day when the steam engines are running and we can experience them.
|
|
|
|
|
Ed Loesche shared a movie reel of his family vacationing at Rye Playland that was made in the summer of 1964. There are a few seconds of our S-16, the "Coconino", operating on the film. The S-16 train was delivered to the park in April of 1959. It is a testimony to the park as the train and cars were still very shiny and appeared to be in great shape and looked almost new after 4+ seasons of use. Thank you, Ed.
|
|
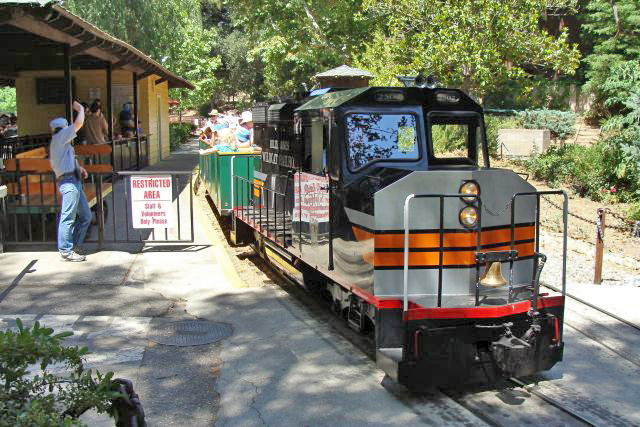
We had several visitors to the A & P this month despite the extreme heat. Among them was Chris Churilla, long-time C.P. Huntington engineer at the Pittsburgh Zoo. Chris has been a long-time visitor of this site, but this was his first visit to the railroad. We also had several visitors from different cities in California and Chris's friend from Pittsburgh.
|
|
|
We did accomplish a couple of things on the railroad this month. We rebuilt the carburetors on the Phoenix and the Red River. This is the result of the fuel additives out here that are designed to cut exhaust emissions. They tend to make the fuel sticky and thus sticky floats and needle valves are an ongoing issue out here. I have been told by a couple of folks that Lucas Oil makes a fuel additive to combat this problem and I am investigating that possibility. It gets old going through each of these carburetors at least once a year...
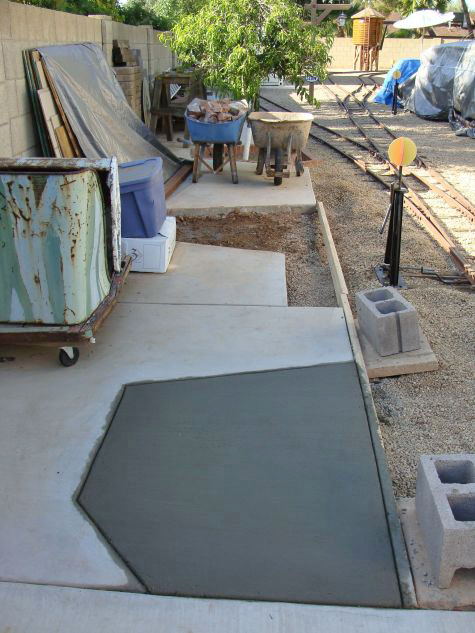
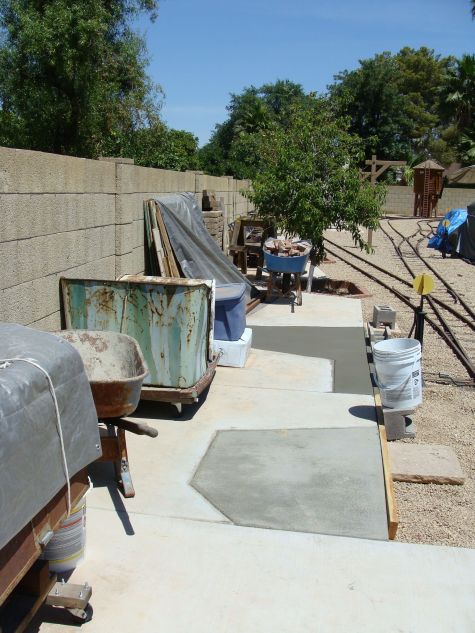
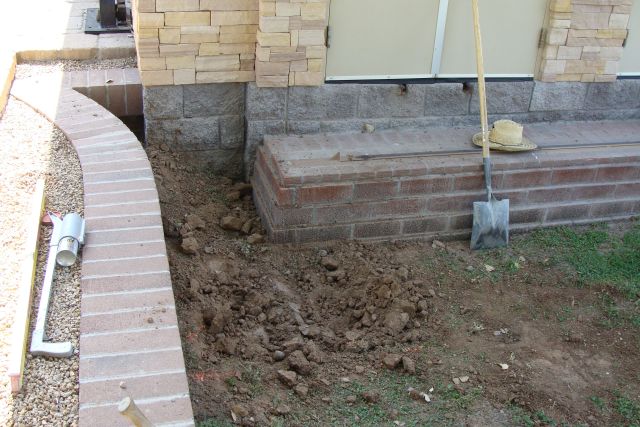
We completed a couple of masonry projects this month. We expanded our ramp into the rear portion of the backyard - originally built for my previous truck and now for our classic five wheel John Deere AMT.
|
|
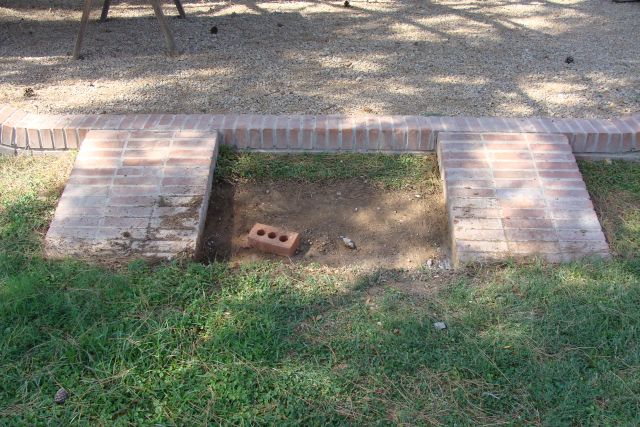
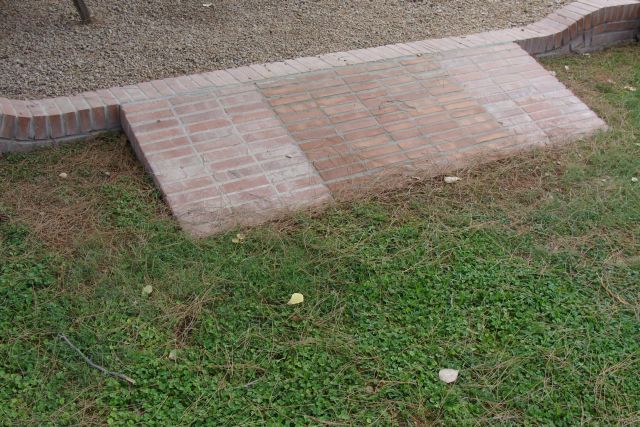
We also built a new access area for getting off the rear patio deck and into engine house stall number 1 as we are often carrying tools and or parts back and forth. As my knees are getting older, the large step down followed by the large step up isn't as much fun as it once was... Just walking across is much easier, especially when carrying things. More than halfway through this project, I decided I wanted to make the walkway larger than I originally envisioned and created a great deal of extra work... The large pavers are a bear to cut and it took a couple of weekends to finish the entire project. The rear patio of the engine house is about 50 square feet bigger with the strategically placed extension. I like the way it turned out and the knees will definitely appreciate the completion.
|

|
|
|
Happy and safe railroading everybody.
09/13/14
It was two years ago August 5 that we filmed the last run on the Flagstaff and Middle Verde Railroad. I am so glad that we made that video of the main line loop as when I watch the video it takes me back to all the hours and years I spent up there working on and enjoying that railroad. Malcolm and Martha Mackey, and later I, had the opportunity to share that railroad with so many people over the years. I really miss having the opportunity to run on the F & MV. In my memory, I can still hear the sounds and feel the rail as it winds through Mesquite Flats and then starts uphill at Gopher Gulch. The engine really had to work through Mud Cut as it passed Rabbit Rock and climbed toward Sinton Summit. The two drainage culverts up there really magnified the sounds of the rail and the engine as we passed over top. Down the grade from Hilltop was an adventure until you got the feel of the brakes before throttling back and rolling through the yard and toward Eden station.

|
|
|
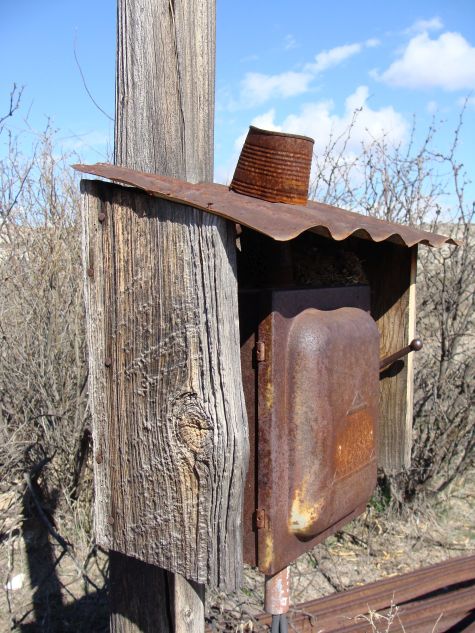
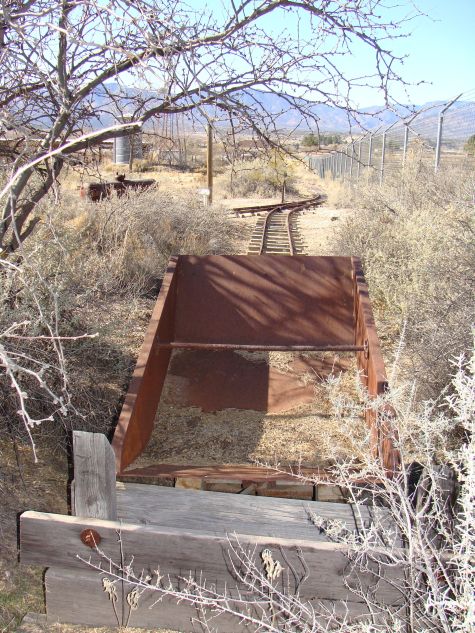
The equipment has been rebuilt and runs here in Peoria on the A & P RR. The Tucson has a certain cadence to her Wisconsin engine and the whistle has its distinctive sound that I can still hear when they operate down here, but it just isn't quite the same. Malcolm Mackey the builder of the F & MV spent hours and hours making new construction look old and weathered. His theme was an 1880s Colorado narrow gauge railroad struggling to make it through the depression fifty years later. Weathered wood, rusted metal, faded paint and repurposed hardware helped capture that look and feel. Paint was thinned and then thinned again, if the item was still too colorful we might rub dirt on it or tie it to the back of his Chevy pickup bumper "old blue" and distress it a little bit...
|
|
|
|
|
|
|
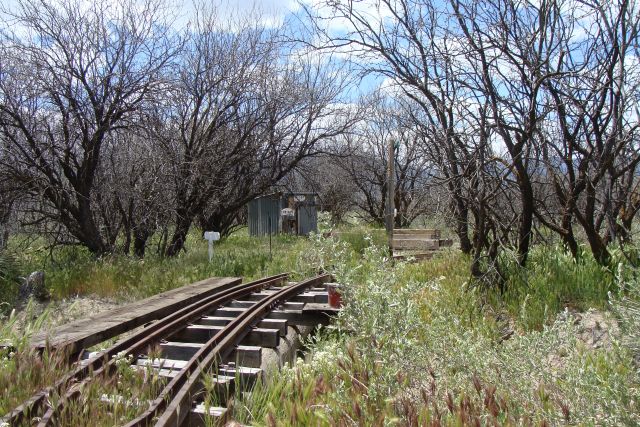
Open houses were always fun for me and it was rewarding to get to see so many people smile and light up when they got train rides or got to help line switches or in some cases run the Tucson. We always tried to pick someone who was enthusiastic to "help me" make up a second train and get to help operate the turntable and a couple of yard switches. In the early years Malcolm and later I would pick someone that we would train to operate the Tucson and get to engineer the Tucson for a couple of laps. We would try to pick someone that was hoping, but not expecting, to get to engineer. After the laps were completed "velvet throttle Mackey" would critique the performance of the engineer. He didn't even have to watch, he could hear the engine cadence and the clickity-clack of the rail joiners and tell where you went too fast and went you needed more speed... Gosh, I miss those days. I have included a few photos of different open houses up there over the years and some of the trackside ambience that helped capture the feel up there. The video of the last run is on You Tube and available here: Last run of the Flagstaff and Middle Verde Railroad

|
|

|
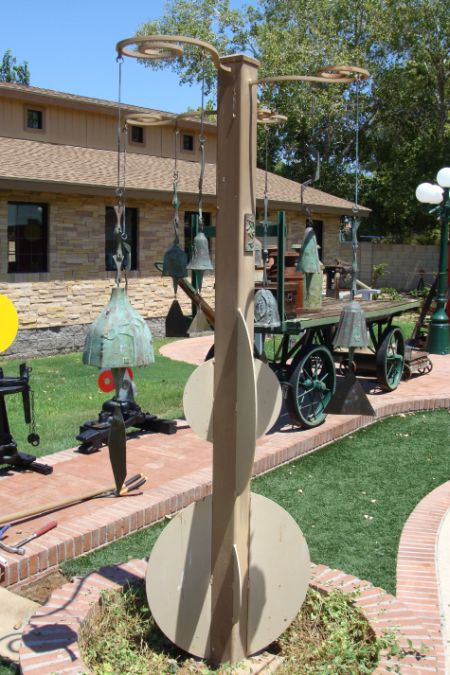
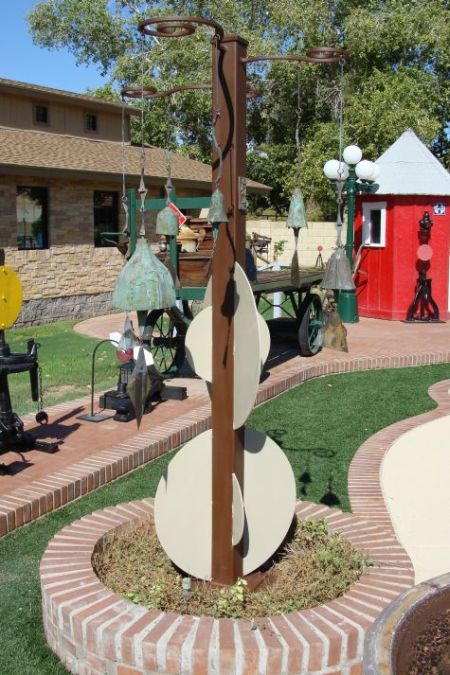
It is still summer here (read hot) until the first week or two of October, but we got a couple of things done here. We sanded and refinished the wind bell tree we have in the back yard. Although not an official part of the railroad, it is whimsical and sounds great with a little bit of breeze. Some of the neighbors confuse the sound of the larger bell for the sound of the bells on our engines... When the breeze is ringing the bells, the old wives tale says it brings you good luck. You can never have too much good luck.
|
|
We added an additional MT & RR Co. torque wrench to our collection in the engine house. There are so many different variations in the style of these wrenches; length, name plate shape, lettering, pointer style etc. I think we have somewhere between 15 and 20 of the wrenches either on display or scattered around and only a couple are identical.
We had a few visitors to the A & P during the month. Outside of those from the metro Phoenix area, we had Harry Guyer and wife Becky from Robinson, Illinois and Ed Lecuyer from Hampstead, New Hampshire. Ed is very active with the WW & F Railway Museum in Maine. It is a 24 inch gauge common carrier that operated from 1894 - 1933. They are restoring equipment and relaying rail on the original right-of-way. You can check out the museum website at wwfry.org
|
|
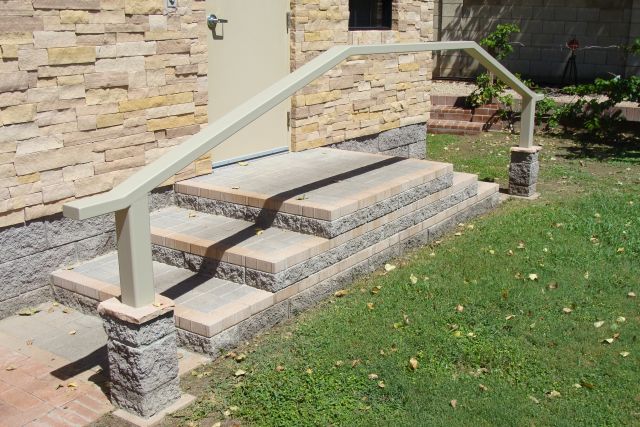
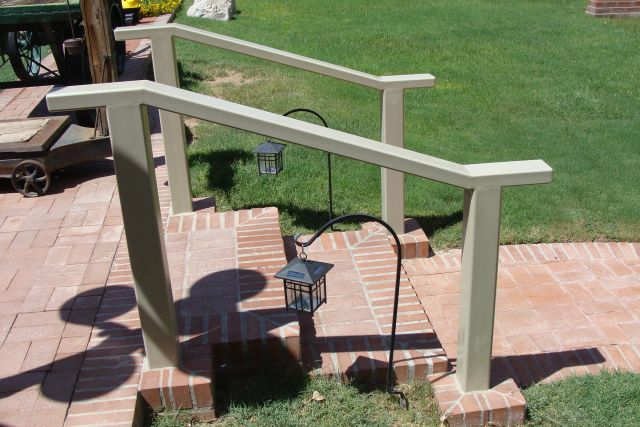
We painted three handrails this month. One of the handrails assists with access on the south side of the engine house and the other two are on alternate sides of the steps and sidewalk that lead to the engine house. We still have more posts and handrails to paint here in the new few weeks.
|
|
The Tucson and the Coconino were the only engines that got started and moved around this month as we still had multiple days of 109 degrees and when it wasn't 109 it was raining. We had one of the wettest August in history out here and we really needed it.
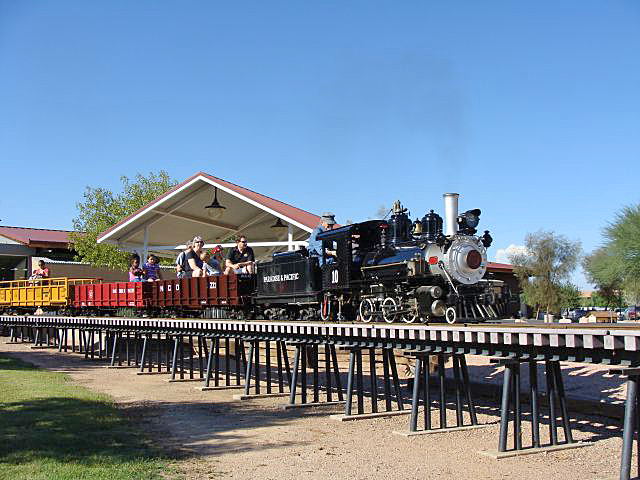
Things start to pick up on the large scale railroad front here in the next few weeks with McCormick Railroad Park hosting its Railfair weekend October 11 and 12, the Maricopa Live Steamers resume rides for the public on Sundays in mid-September, the Pumpkin and Chili festival at Schnepf Farms is the full month of October which includes their train ride and most of the other park train venues ramp up their operations in October. You never know, we might even get some of our equipment out and blow the summer dust off of it.
Happy and safe railroading everybody.
10/14/14
September wasn't a big month of productivity on the A & P as I had to work a couple of the Saturdays and another entire weekend was consumed by repair and cleanup after a violent wind and rainstorm.
On Sat Sept. 27, we received 5.1 inches of rain and had wind gusts of 70 mph in the west valley. We average less than 8 inches of rain per year; in August and September alone, the A & P received more than 12 inches. Power was out for almost 8 hours. Trees were uprooted and rows of telephone poles and trees were snapped as if they were twigs. I spent the weekend checking for damage and cleaning up the sizable mess. Thankfully, I just had a few broken limbs and some of the front yard washed out into the street. Of course, there was debris everywhere. It really took most of two weekends to get everything all the way cleaned up and back in order. The railroad and equipment made it through in good shape.
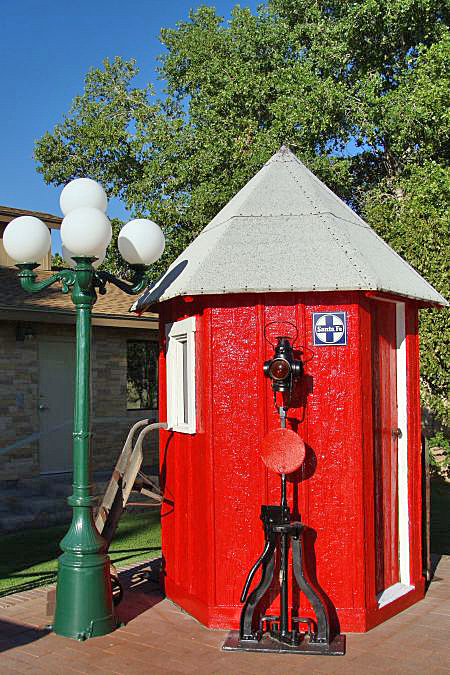
We did get a few things painted this month now that it isn't so hot. We painted the red on our Santa Fe Railroad phone booth as it had faded over the last three years. We finally painted four more handrails and four more posts.
|
|
|
We repainted our operating harp switch stand, touched up the paint and lettering on four of our signs and painted one of the two picnic tables. The picnic table gets used at various times including when guests are here for A & P open houses.
|
We added a small amount of brick work around a post near the pedestrian sidewalk. It was the only one of the many posts here that didn't have brick work of some sort and now it does.

|
I acquired another MT & RR Co. torque wrench variation - second month in a row. You just never know when one of these things is going to turn up. I am going to have to figure out a way to display more of these wrenches as the main display is full. It is a good problem to have.
We started getting all the trains ready for operating season which is mid-October here. That process means charging the batteries, lubricating zerk fittings, adding gas, Stabil, Mystery oil and ethanol additive to the gas tanks and checking the oil and other fluids. We have nine pieces of powered equipment here and that process takes longer than you might think... Again, a very good problem to have.
Those of you that have been visiting this site for an extended period of time know that a year ago we undertook a major project to deal with the rail creep that we experience here in the Summer months. Rail creep is a challenge we have when the rail heats up and grows in length. It isn't an issue in the straight away as it expands at the same rate in the parallel rails and splice bars compensate for the expansion. In the curves, (especially tight curves like we have) it creates a problem as the outer rail is much longer than the inner rail and thus it grows in length more than the inner rail - the result is the railroad gauge becomes too wide and creates problems. We welded flat bars into our curves last year and created track panels instead of independent rails. The gauge never changed this summer. The track panels still float and there is a couple of inches of movement between the summer and winter, but they float as an assembly and the gauge always remains constant. I am very happy with the result of all of our hard work.
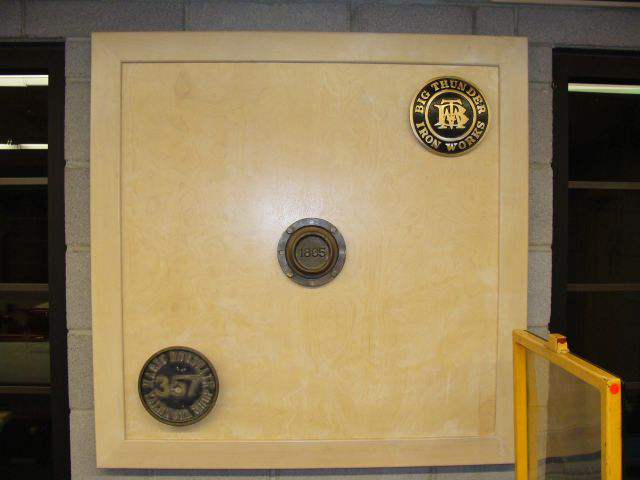
We added three plates to our displays in the engine house. One is a front number plate off of an Allan Herschell 1865 model. One is from Magic Mountain and the third is from the Big Thunder Shops. None of the three is new to our collection, but it has taken a while to get them mounted and on display.
|
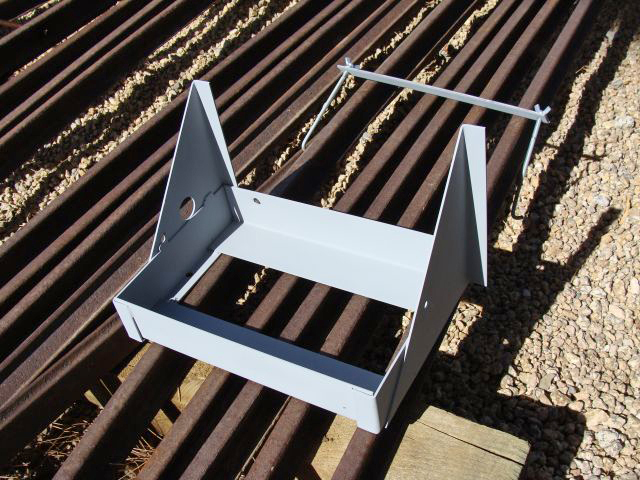
I hope to find time in October to get the B Unit sandblasted so we can get started on that project. We need to add three ribs, cut the slots for the hinges and weld those tabs in place, fabricate a hood latch and mount the hood release mechanism and release handle. There will be several weeks of work once we get started on her.
We renewed the Arizona and Pacific Railroad trade name in AZ for 5 more years so I guess we may be playing with trains and updating this website for a little while longer...
Happy and safe railroading everybody.
11/12/14
October is the first opportunity to get equipment out and run it in Phoenix after the long hot summer here. Despite trying to keep batteries charged and starting the equipment periodically during the summer, there are always things that need attention once the equipment is out and running.
We replaced the choke cable on the Tucson as it had been difficult to operate for awhile and gave up over the summer.
Inconsistent fuel flow had been a challenge on the Red River since its rebuild and reassembly. Some days it ran great; others not so much... Previously, we replaced the mechanical fuel pump, replaced the fuel regulator and rebuilt the carburetor. Still the intermittent problems persisted. We finally determined that wear on the camshaft lobe that operates the mechanical fuel pump was causing inconsistent fuel flow. We replaced the mechanical pump with a low volume electric fuel pump and it appears we resolved the problem - at least for today...
The track inspection car starter mounting bracket had become loose and the fuel line had become old and petrified. It had several deep cracks and was starting to leak gasoline onto the alternator - a recipe for disaster. The starter had to be removed to tighten the bracket and then be reinstalled. We accomplished that task, installed a new fuel line and fittings and adjusted the idle.
Dave installed a 30 amp fuse in the ignition circuit of our G16, No. 582. Each of our other trains are fused and we wanted to have that extra security in case of a catastrophic failure. We are still chasing vacuum leaks on the 582 and found and eliminated two that affected the throttle system. There was a pinhole leak in the weld of the intake manifold and a second leak around the butterfly shaft bushing of the carburetor. We still have a couple more bothersome leaks on the brake side that I suspect are in vacuum canisters. As time permits in the next few weeks, we'll get those eliminated too.
|
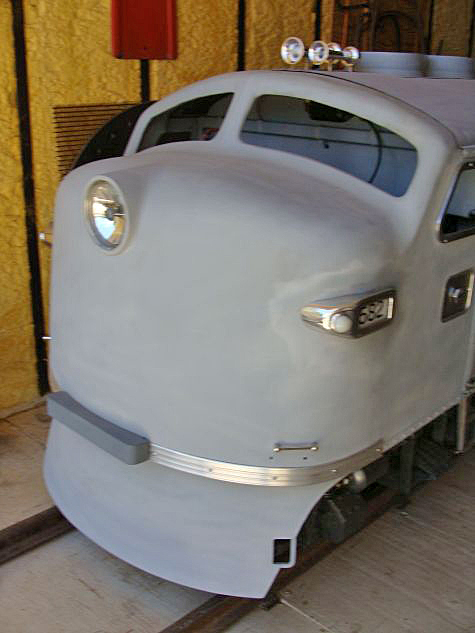
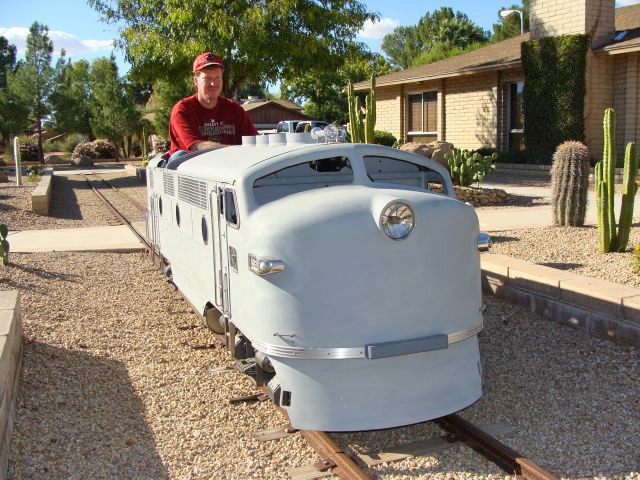
You may have noticed we haven't been in much of a hurry to get our cowl panel mounted on the G16. We do have some minor work to complete with our dremel tool on the cowl panel screen welds to tidy them up a bit before remounting the cowl, but the primary reason is it makes it so difficult to view the gauges. Dave is 6'2" and I am 6'1" and I guess the operators were much shorter in 1948 as the cowl requires we bend over sideways to see the gauges.
|
We hope to find time in November to get the B Unit sandblasted so we can get started on that project. We need to fit the seat, cowl, hood and header panels, add four ribs, cut the slots for the hinges and weld those tabs in place, fabricate a hood latch and mount the hood release mechanism and release handle. There will be several weeks of fitting and fabrication work once we get started on her.
We spent some time this month working on the 1987 John Deere AMT that is utilized by the railroad. We replaced the solenoid, then a new starter, fabricated a battery box for a full size battery to replace the small lawn and garden battery that is standard. We also added new battery cables and a new ignition switch. We also replaced the headlight switch. We still have some work to get her back in dependable running shape.
|
We painted our second picnic table.
Dave and I attended Railfair at Scottsdale's McCormick-Stillman Railroad Park. It was super weather which isn't always the case in early October and the turnout was great. Two steam engines were running and late in the day they double headed for a few runs. It was great to see so many train fans enjoying the day.
|
|
|
|
|
We hosted an open house weekend for some select guests this month. We had about twenty-five folks by on Saturday and operated the Phoenix, Tucson and the track inspection car. On Sunday it was a smaller group of nine and we operated the Tucson and the Coconino. Everything operated great and a good time was had by all - including me.
|
|
Our dear friend, the man that originally got us started with MTC and Allan Herschell railroad equipment and the founder of the Flagstaff and Middle Verde Railroad, Malcolm Mackey, passed away this month after a long illness. His contributions to saving historical railroad equipment in Flagstaff, Arizona, Chama, New Mexico and Ely, Nevada were generous in time and money. He was equally kind teaching me how to disassemble and reassemble these trains and to understand how everything worked. Over about 25 years, we had several trains apart, had a couple in the dirt, diagnosed and fixed lots of problems, created a few, laid rail together and swapped stories and lies. I will miss my mentor and a very dear friend.
|
Malcolm Mackey was an excavator by trade. But he wrote essays and told stories in his spare time, and he had a thing about old railroads. Mackey died Sunday in Flagstaff at the age of 87, but he leaves a pair of railroad steam engines in town to remember him by. According to Joe Meehan of the Northern Arizona Pioneer Historical Museum, Mackey was responsible for the saving and moving of the museum�s Baldwin #12 locomotive not once but twice. And he was also responsible for the plot that saved and moved Two Spot, another local steam engine, which is now located next to the 1889 Santa Fe Depot in downtown Flagstaff.
In recognition, Mackey was a recipient of the Bent Spittoon Award and the El Merito Award, both given to him for his service to the Arizona Historical Society. Mackey was born May 24, 1927, and lived most of his life in the family home on North Leroux Street.
He graduated from Flagstaff High School in 1944 and from Arizona State College (now NAU) in 1948. He married Martha Webber in 1949 and she preceded him in death in 2001. He is survived by son Charles Mackey of Cottonwood and daughter Anna M. Reager (Bill) of Richmond, Va.
He served on the board of the Arizona State Historical Society from 1986-2002 and also on the board of the Pioneer Museum. He researched, wrote and self-published numerous books and monographs about events and places in northern Arizona and sold them in the Pioneer Museum. He wrote a weekly column for the Arizona Daily Sun titled �Back Then.�
Anticipating his death, Mackey provided some notes for his obituary. How would he like to be remembered? �Plain spoken but honored to have had loyal friends from many walks of life.�
Memorial contributions may be made to Pioneer Museum, 2340 N. Fort Valley Rd., Flagstaff, AZ 86001 or Sunshine Rescue Mission, 124 S. San Francisco St., Flagstaff, AZ 86001.
|
Happy and safe railroading everybody.
12/31/14
The Wildlife World Zoo and Aquarium got a new CP Huntington engine and Dave took a trip to visit it. Click here to see the article in our Guide to Arizona's Miniature Railroads
12/26/14
Dave got an opportunity to edit the video we shot in April (just before he got his puppy). We posted 3 new videos of the A&P and updated the video page. Click here to see the A&P RR video page
12/17/14
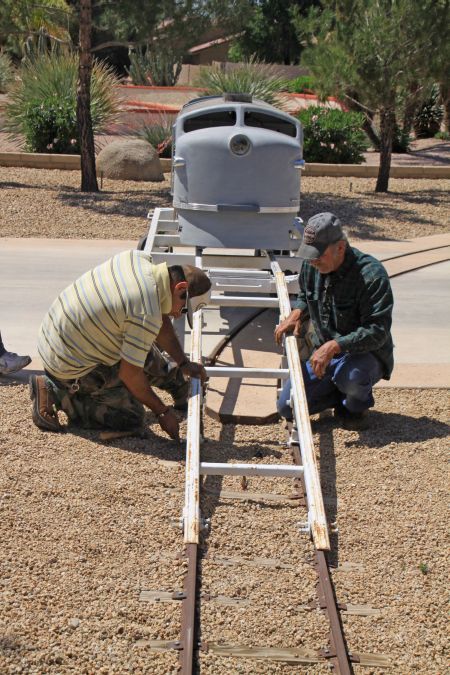
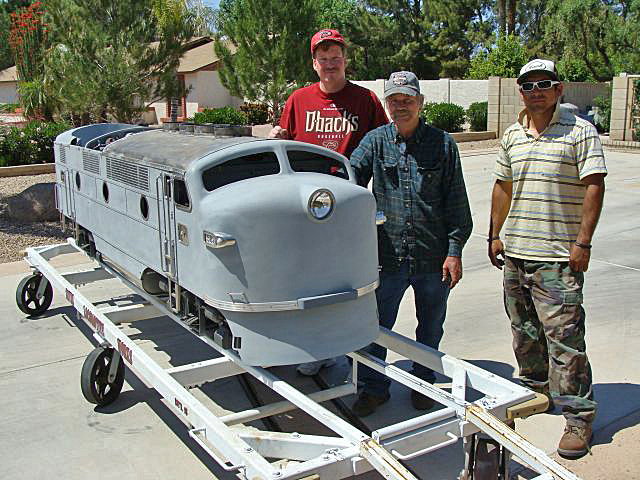
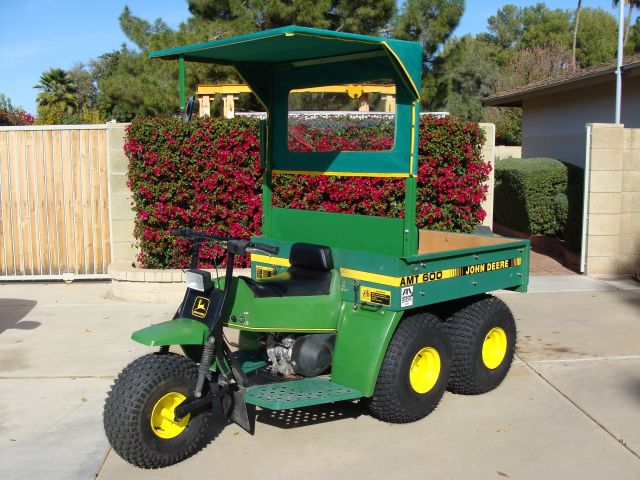
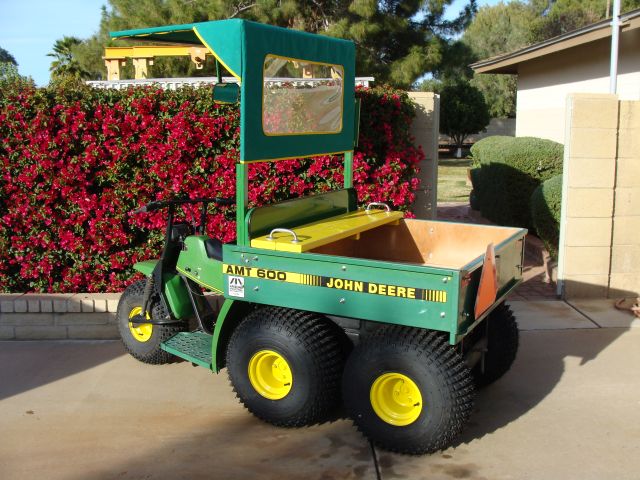
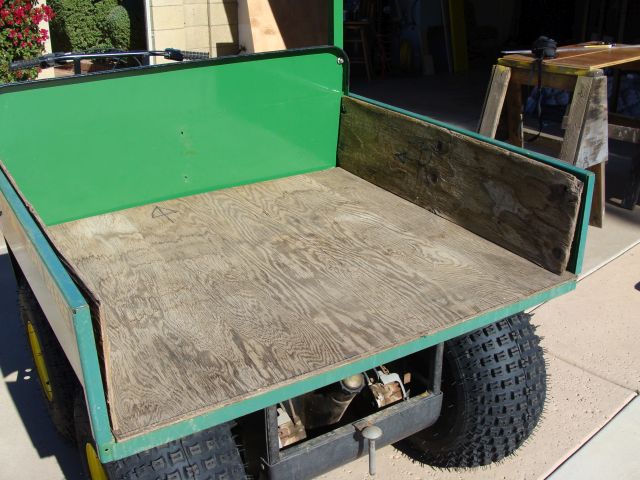
Most of our time this month was focused on two projects - our G16 B unit and our 1987 John Deere AMT 600. We made considerable progress on both, but there is still a great deal that remains to be done. The John Deere AMT (All Material Transport) was in use on Malcolm Mackey's F & MV Railroad since 1987. We used it for moving, tools, materials and getting more easily to areas that weren't immediately adjacent to the railroad tracks. As the AMT wasn't listed on the roster of F & MV railroad equipment, it wasn't part of the agreement when I acquired the F & MV in 2012. I purchased it from Malcolm's son a few months ago with thoughts that we could use it around here in a number of ways.
|
It had been sitting in a garage without use since 2010 and it needed a fair amount of work even then. Last month, we replaced the starter and solenoid, ignition switch, battery cables and several other wires in the wiring harness. We also fabricated a much larger battery tray so that it will hold a full size car battery instead of the small farm and mower battery that it was designed with. Those batteries only seem to last about a year and are constantly needing charged.
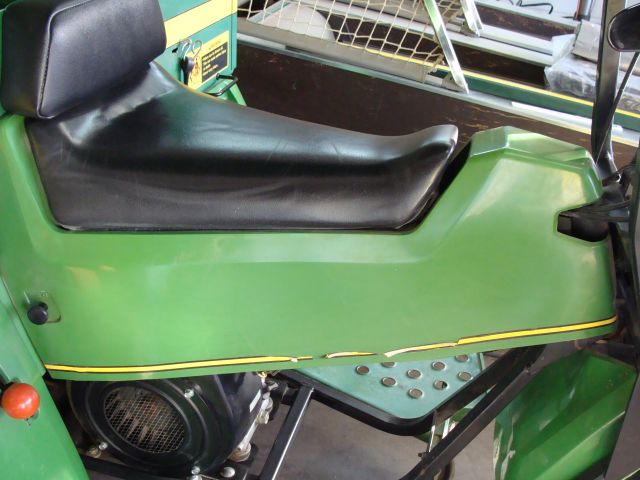
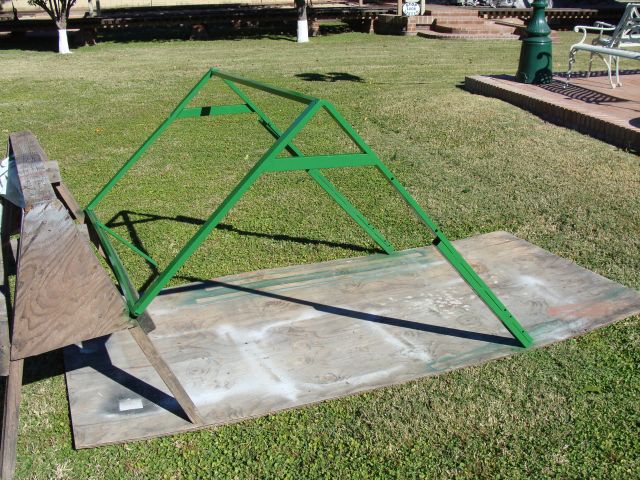
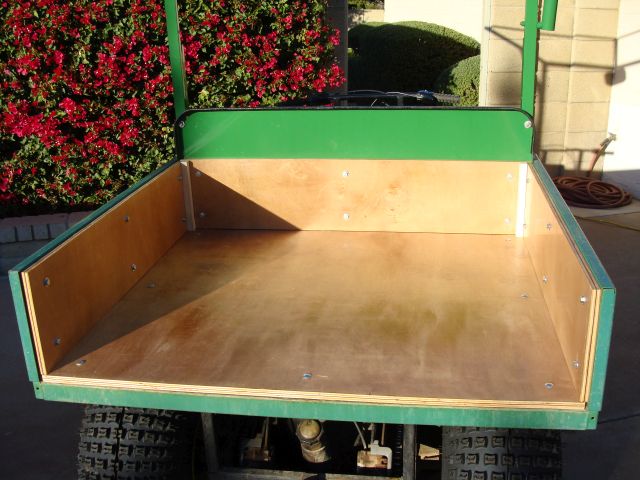
This month we replaced the 5 tires, painted the rims, made a new seat back (was missing for many years) replaced the wood in the bed with newer plywood, made a new bench seat and painted it with John Deere yellow and added a couple of handles. My neighbor made a new sun top for me which he claims will fade a bit and match the John Deere green perfectly; it is a bit dark now, but he seems confident and has been doing this stuff a long time.
|
|
|
I still have cleats to stain and install in the corners of the bed and found some NOS pinstriping to replace the one side that is a little rough. I am going to fabricate a rear bumper and incorporate a set of tail lights and brake lights into it off an AMT 626 that I found. That way if I want to use it to run over to other friend's houses in the neighborhood, I should be able to do so without getting rear ended. I hope to have the AMT finished in the next six weeks or so.
|
|
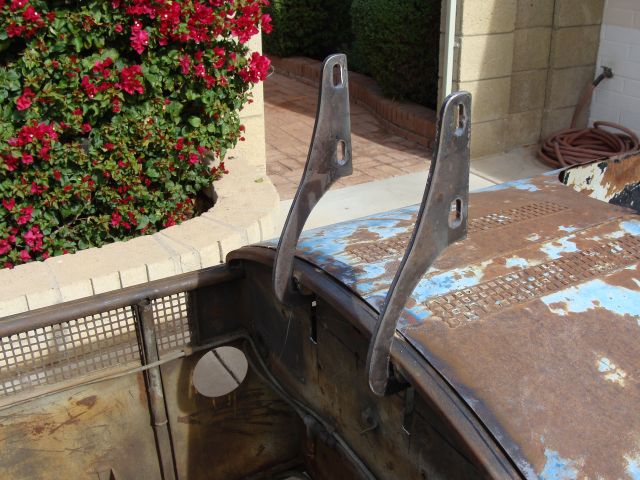
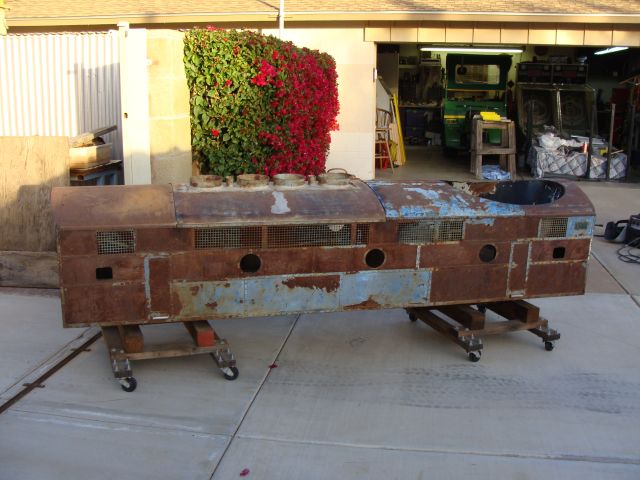
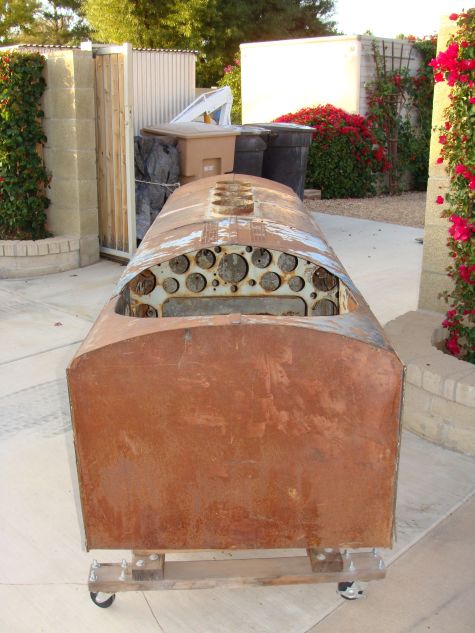
As I stated above, we also got started on the G16 B unit project. The main body had a bit of a tweak in it and the seat assembly was twisted. We spent a few hours just getting those pieces relatively straight and happy. The cowl panel was an awful fit and was flattened as if people had stood on it over the years. We got it roughed in reasonably well after a couple hours of work. We have elected to hinge this hood just like we did the A unit. We made all of our calculations and installed four ribs that we fabricated. One is adjacent to an original rib and helps support the hinge assembly. Two of the ribs mount on opposite sides of the bulkhead at the other end of the hood where the latch and release cable will be mounted and the last rib is to help support and mount the top, front sheet metal panel.
We cut the slots for the hinges and welded those tabs in place. We got the hood hinges adjusted and it now fits very nicely. We got started on the front panel which isn't original, but was fabricated and never finished by the prior owner. Just like the cowl, for installation it is cut down the middle and each side fit separately. Once everything fits just right, the trim strip is welded in the center to dress it up and conceal that it is two separate pieces.
|
We still have a great deal of preliminary work to complete. We need to fabricate a hood latch and mount the hood release mechanism and release handle. We need to fabricate the lower skirts for each side, drill the holes and mount two 6 pin electrical connectors in the front and one in the back, mount new vacuum line connectors, fabricate the straps for mounting the vacuum tank, fabricate the mounting brackets for the gas and brake hand valves.
|
It also needs bead blasted and primed, re-plumbed, re-wired, couplers installed and too many smaller tasks than I can mention here. Then we'll get the folks that really know what they're doing to get our "roughed in " body work looking really good. We have a few months of work ahead of us on this one, but I'm confident we can get her looking pretty darn good.
|
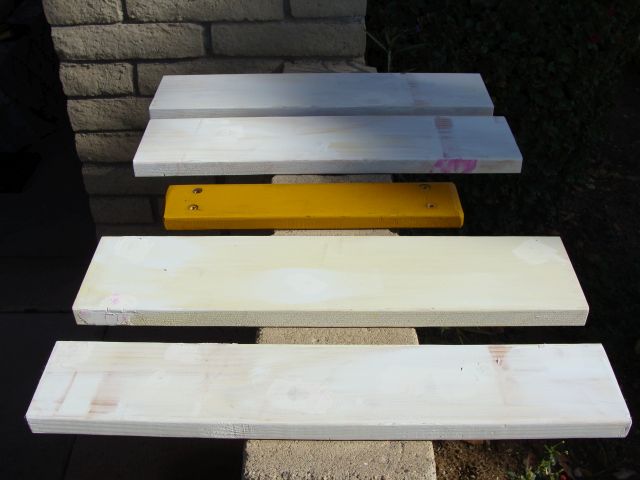
I also got started on widening the seat on the track inspection car. When Malcolm built it back in 1993, he made the seat wide enough for one person. There was room to make the seat several inches wider to match the width of the car, but at the time it seemed unnecessary. Over the years, it became pretty clear to both of us that it would have been more functional at open houses and other events if the seat was wider. We talked about widening it several times, but it always seemed like laying additional rail, rebuilding a carburetor or transmission or some other more pressing project was the priority. We just never got to it. I purchased and cut the wood last week and had a can of paint mixed to match the color of the inspection car. We will get a good coat of paint or two on all of the wood as it all needs it, but I want the color to stay the same. The seat was originally 21 inches wide and will now be 30 inches wide. This project will be completed early in 2015.
|
I found the vacuum horns for the A and the B unit; they need some work, but will look cool once eventually installed.
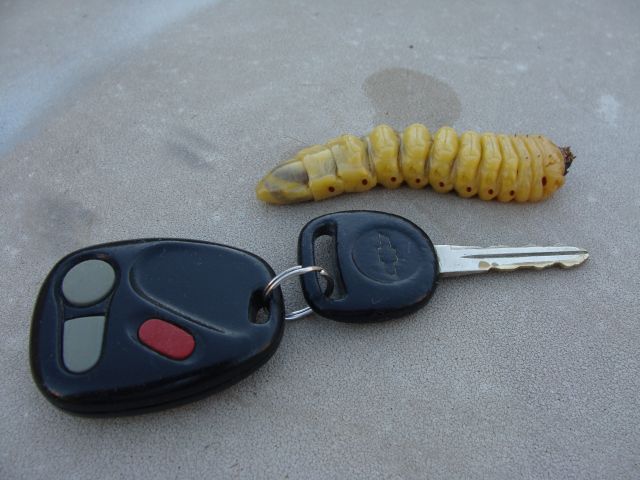
Over the years, I have lost several apple trees here as a result of wood bores. I removed an apple tree a few weeks ago that they had eaten up. The bores that I would find in the branches were small things. I had the root ball laying here for about a month before I found the time and energy to get the axe out and split it into pieces so I could get rid of it. I found this wood bore in the root ball - no wonder the tree didn't make it.
|
Merry Christmas!
|
Happy and safe railroading everybody.