Arizona and Pacific RR Current Projects
Arizona & Pacific RR Projects 2018
Arizona and Pacific Railroad Project Pages: Current Projects
/ 2020 Projects / 2019 Projects / 2018 Projects / 2017 Projects
/ 2016 Projects / 2015 Projects / 2014 Projects / 2013 Projects
/ 2012 Projects / 2011 Projects / 2010 Projects / 2009 Projects
/ 2008 Projects / 2007 Projects
Back to The A&P RR Home Page
This page of the website follows projects taking place at the Arizona and Pacific Railroad
and gives visitors a chance to see the progress that has been made throughout the years...
January
01/04/18
I visited the Maricopa Live Steamers Holiday Lights Display this month. It was a cold and windy night on Friday night,
Dec. 8 when I had planned to attend so I waited until Saturday to go. The turnout on Friday was pretty light I was told.
On Saturday, December 9, it was 10 degrees warmer and wasn’t windy and the turnout was reportedly the largest ever.
The rides were planned to be from 6 – 9 PM. We got there at 6:30 and the lines were so long that we waited two hours to
board the train. When we finished our ride and hot chocolate and headed out to the parking lot, it was 9:15 and the line
was still long. The volunteers were committed to staying open until everyone that had waited hours for a ride got to have one.
A special shout out is deserved for the volunteers that spent hundreds of hours hanging lights, setting up the light displays,
running trains, controlling the crowds, directing traffic and so much more behind the scenes.
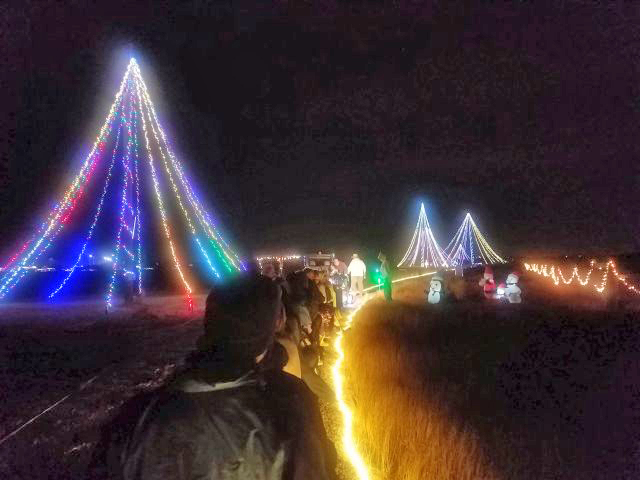 Maricopa Live Steamers Holiday Lights
|
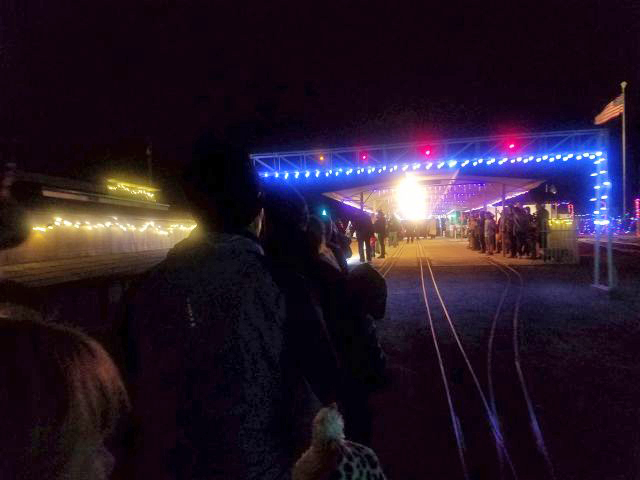 Maricopa Live Steamers Returning to the Depot
|
Our ride was great. We were lucky enough to draw a 2-6-2 steam engine lettered for the Sahuaro Central Short Line Railroad,
no. 3. They had six trains running on the night we were there, but it just wasn’t enough for the immense size of the crowd.
I would estimate that about ½ of the riders, at least around us, were 12 and under. That is great news for the hobby, but
it is difficult to keep the young folks content waiting in line for two hours… The lights and displays were spectacular.
One of the volunteers shared there are 800,000 lights spread across the property. I’m not sure if that is the official number
or his estimate, but there are an incredible number of lights. The ride is 25 minutes or so and must be a mile and a half long
as it winds through the property. Admission is free, but donations are appreciated. I am definitely going again next year,
but might pick a Friday instead of Saturday! My guests, 6 year old Aria and her grandmother, had a great time. Aria couldn’t
stop talking about her fun train ride all weekend.
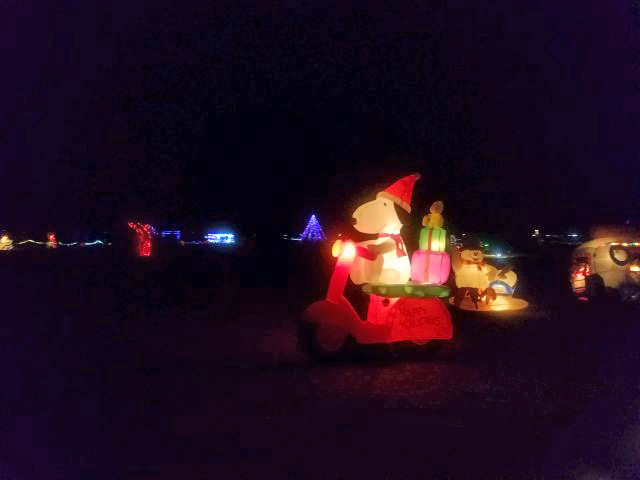 Maricopa Live Steamers Holiday Decorations
|
I work very near the McCormick-Stillman Railroad Park. Instead of driving
all the way across town on a weekend, I just worked a little late and grabbed some fast food on that side of town and checked
out their Holiday Lights Festival. I was there on Wednesday, December 13. I have known Tom Opperman, mechanical engineer in
the Paradise & Pacific shops, for close to thirty years and got a behind the scenes look at the progress of the complete rebuild
of diesel no. 208. The entire power train is new as are the gauges and all the wiring. The work is first rate and nearing completion.
Matt who was engineering the no. 10 that night let me get a few photos before he started his revenue runs. I got in line at 6:30
and the wait was about an hour; the family in line ahead of me stated they were there the prior Saturday and the wait was an hour
and forty-five minutes. With the packed lines on the weekend at both Maricopa Live Steamers and McCormick-Stillman, it looks like
trains and Christmas light have never been more popular.
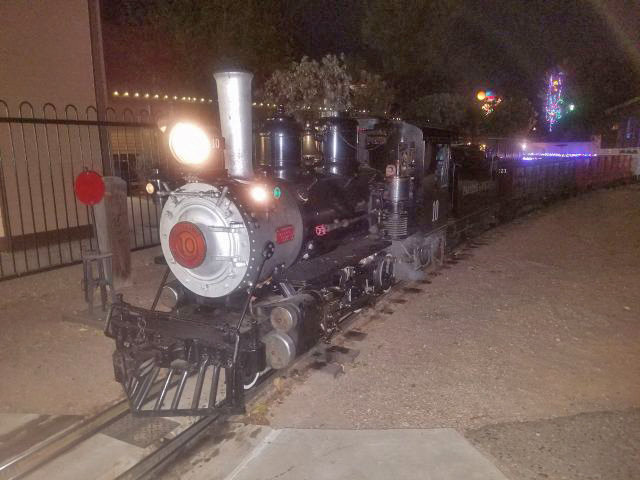 McCormick - Stillman Park
|
The Holiday Light Festival at McCormick-Stillman underwent several changes this year. Instead of the usual 3 weeks run, it
has been expanded to 5 weeks and will end January 7. Instead of $4 per ticket for those over two years old, it is now $5.
They were also offering a fast pass for $15 which allows all holders to pre-board and avoid waiting in the line. I saw a dozen
or more fast pass passengers on each train. Each train holds approximately 100 passengers and with two trains running, a train
pulled out of the station every 7.5 minutes.
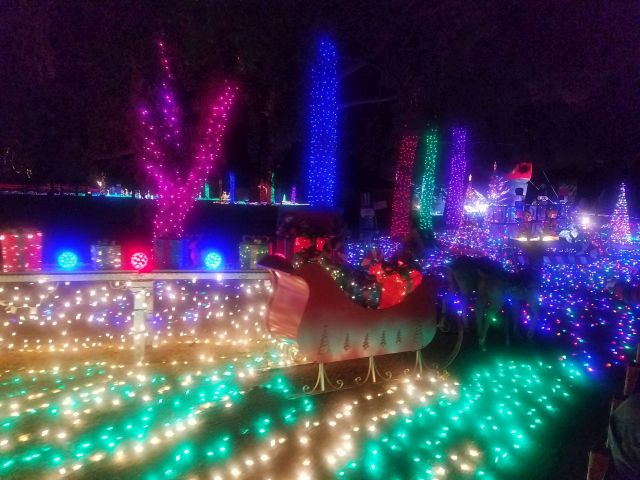 McCormick - Stillman Park Holiday Light Festival
|
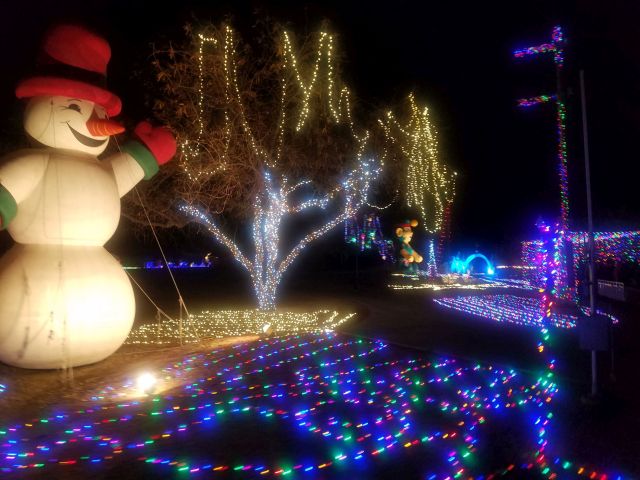 McCormick - Stillman Park Holiday Lights
|
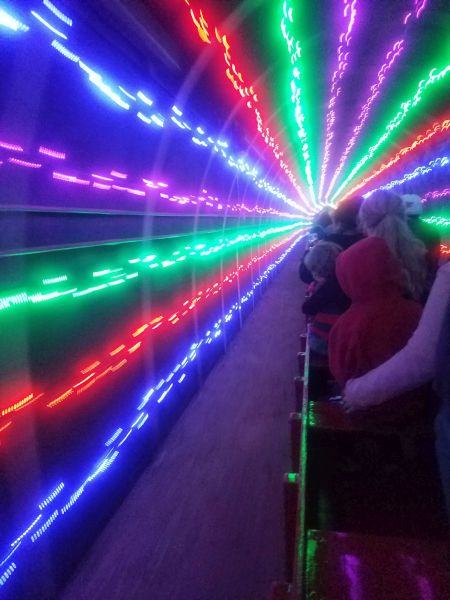 Lighted Tunnel
|
The lights were spectacular. No one is sure how many lights there are as they quit counting at a million a few years ago and
have added lights every year since then. There wasn’t a spot without lights in the entire back half of the park. There were
electronic lights racing back and forth, elevated lights that resembled fireworks, massive blow up figures, multiple snow making
machines wafting snowflakes down on passengers and much more. The Scottsdale Live Steamers area was also decorated and they were
offering rides as well. Santa Claus was at the front of the park in one of the coaches visiting with children and the smell of
the steam engines on the cold night was fabulous!!! I can’t imagine two better displays of lights and train rides than I got
to experience that week. It was just awesome.
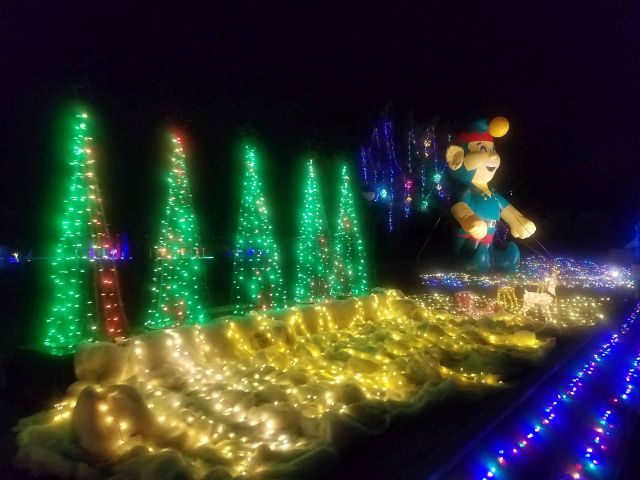 McCormick - Stillman Park Holiday Lights
|
Around Thanksgiving, we had the Sandusky out on the A & P two weeks in a row for multiple runs. Just a couple of weeks ago, we
had the Coconino out for several runs and last week we had the Tucson out polishing the rails. I started the track inspection car
and she ran great. She still needs a new chain and chain tensioner which we will get to this winter. The Phoenix started and I
moved her back and forth, but she was running pretty rough and will need a carburetor rebuild in January. The Red River will also
need a carburetor rebuild. Next month we will work on getting those projects completed and also start and run the no. 582 a little bit.
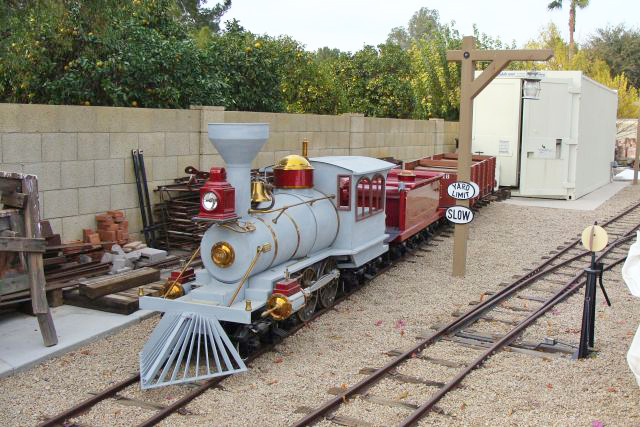 The Sandusky
|
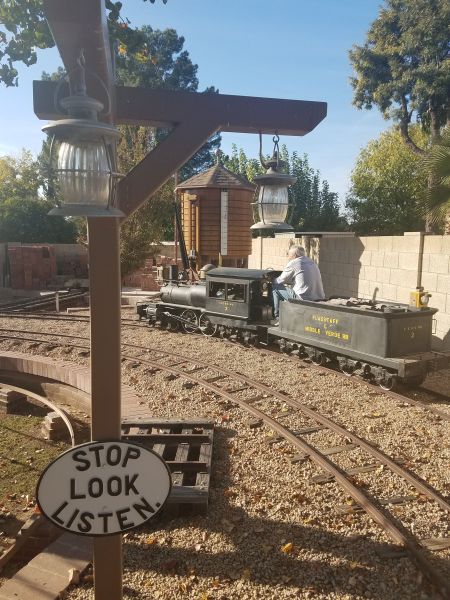 The Coconino
|
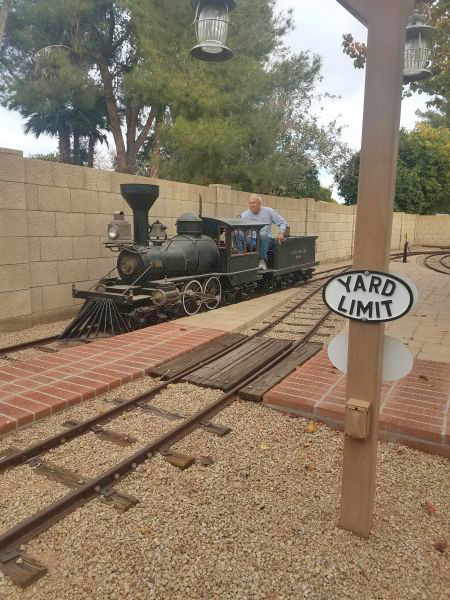 The Tucson
|
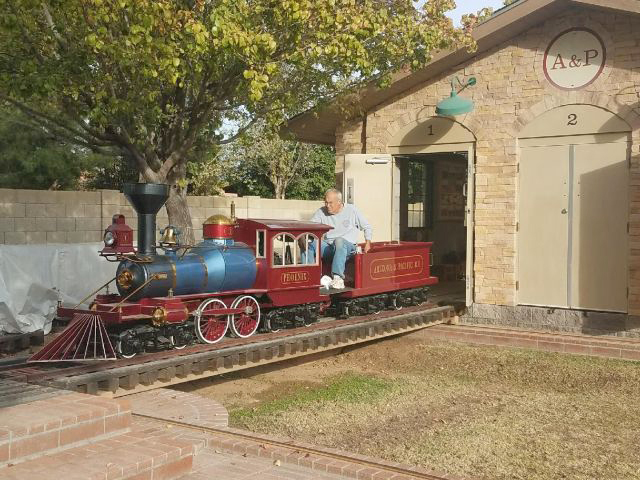 The Phoenix
|
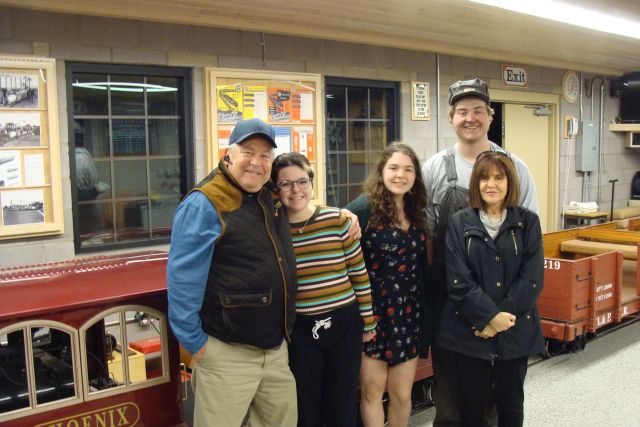
Joey Klein, from Caldwell, NJ, visited the A & P just before Christmas. He is one of the CP Huntington operators at the Turtle
Back Zoo. We did a little switch work and then had the Tucson, Coconino and Sandusky out on the rails for multiple trips each.
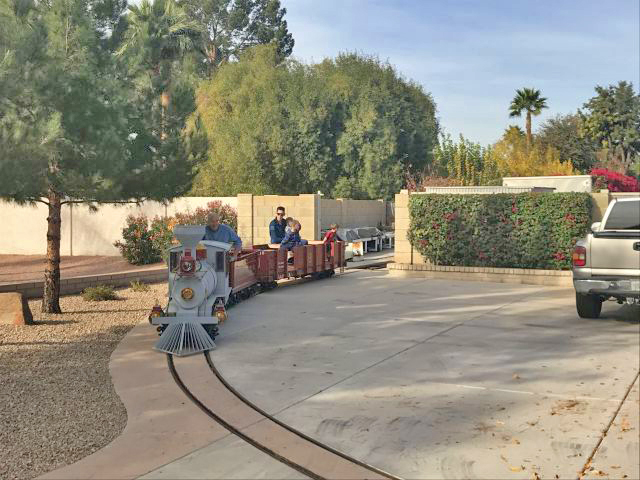
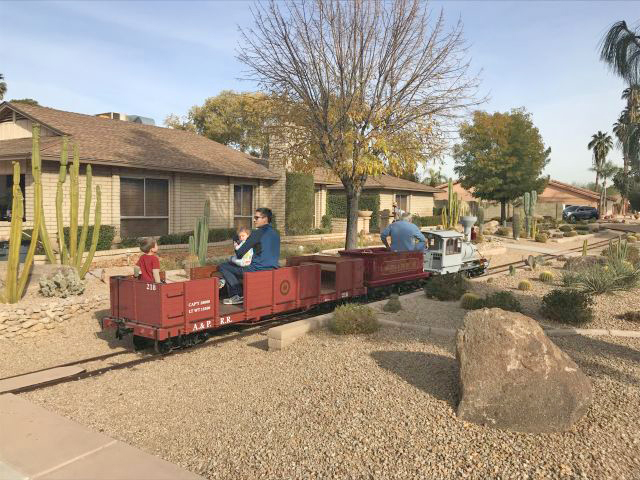
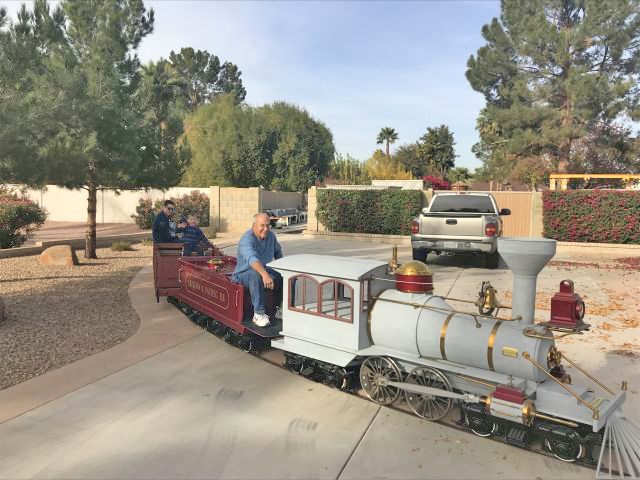
One of the new neighbors from down the street heard the train whistle and stopped by with his wife and three young children plus
his father, brother and his girl friend. They got the tour and we made a few laps with the Sandusky and gon 218 and everyone had fun.
His oldest son (6ish) had never met me before, but had such a great time that when his rides were over he ran over and hugged me and
said he loved my trains.
 Joey Klein and Family visit the Arizona and Pacific Railroad
|
 Riding the Arizona and Pacific Railroad
|
 Taking a Ride on the A & P RR
|
 December Train Rides
|
We also had the pump car out and Joey and I made a couple of laps and he made a lap or two by himself.
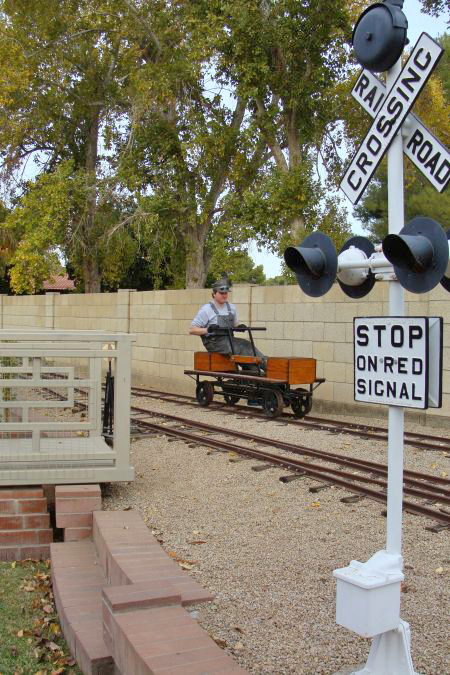 Joey Klein runs the pump car
|
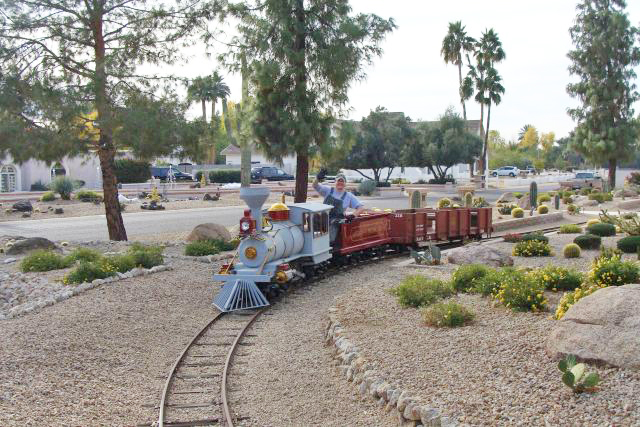 Joey Klein running the Sandusky
|
Dave and I have inspected and worked on the entire mainline this past year and it is in good shape, but I just haven’t had time to
work on the side tracks or siding yet. Well, we when got out the pump car, I moved the Sandusky and gon 218 to the original engine
house spur. It was out of gauge and the Sandusky dropped off the rails rather innocently. Of the half dozen times we have had a
derailment here, this was by far the biggest struggle getting the engine back on the rails. We had limited space and the way the truck
was positioned, we just couldn’t get under it to get it back on the rails. Finally, about two and a half hours later we prevailed just
as it was getting dark. So we ran for a while after dark with the lights on. Joey’s father, mother and two sisters stopped by and got
night rides on the A & P which not too many people can say. We hadn’t intended it that way, but it was fun. One of his sisters declared
my backyard “the coolest backyard ever” which clearly isn’t true, but is flattering nonetheless.
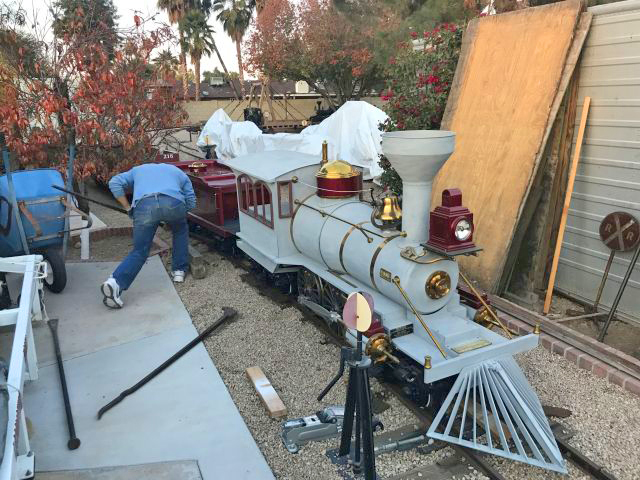 Working to re-rail the Sandusky
|
After seeing all the young people enjoying the train rides and light festivals in north Phoenix and Scottsdale and the reactions of
guests at the A & P this month, I have renewed confidence in the future of our great hobby.
On December 31st, Dave and I regauged the switch and first several feet of the original engine house spur where the derailment took place.
We will finish the remainder of the 68 feet of that spur in January. The next track work project at the A & P will be the siding.
Happy new year and happy and safe railroading everybody!
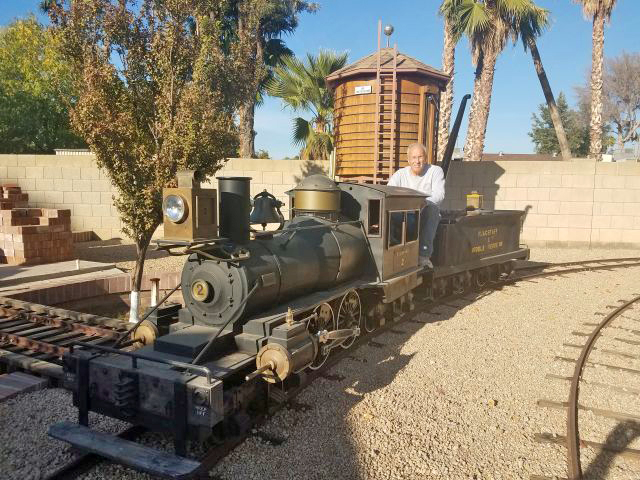 Arizona & Pacific Railroad
|
February
01/28/18
If you have been following our site over the years, you may remember, when we acquired our B unit, she was an orphan,
stripped of all parts usable on other projects and without a builder's plate. She had been owned by four different
owners since the early 1990s and stored for many years. None of the prior owners that we were able contact had any
idea what her production number might have been. If you have followed our site for any length of time, you will also
know that we are very interested in the history of all of our equipment. I was hopeful we could determine the production
number of our B unit, but the chances were admittedly pretty slim.
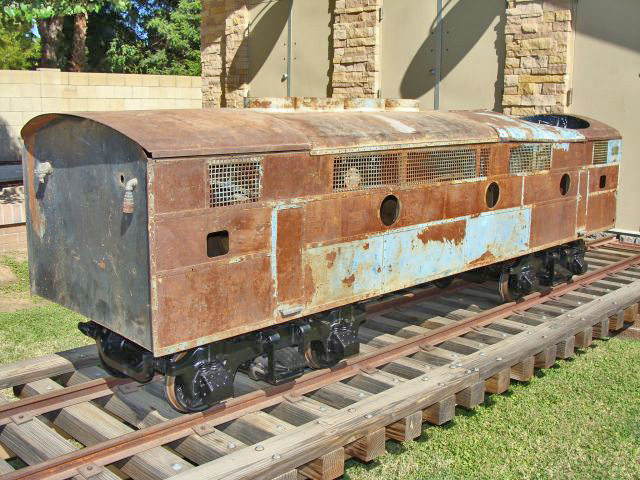 G-16 B-Unit
|
There were a handful of clues that seemed to indicate she was one of the earlier B units produced. There was no
consistency in the rivet patterns of the port hole window frames and it looked as if they freelanced where the four
rivets were placed. On our A unit, no. 582, they are all symmetrical and evenly spaced. The rectangular sand box
openings were 4” x 3” on our A unit and match those of the G12 rectangular frames. The sand box openings on our B
unit were 3 ½ inches by 3 inches. The B unit instrument panel is set up for the older style throttle and brake valves
and there are vacuum horn mounting holes.
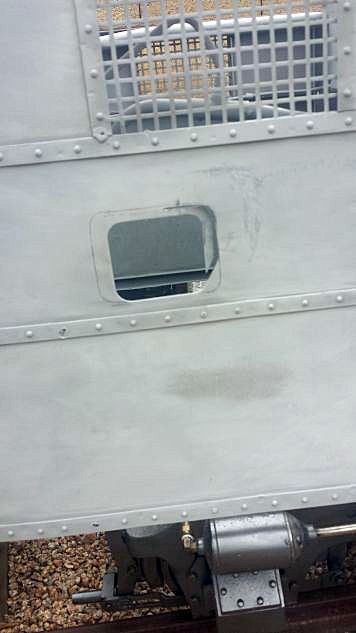 Resizing the B-Unit sand box opening
|
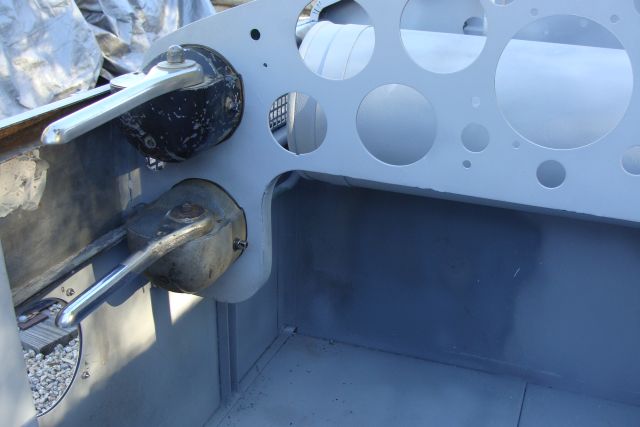 Dash mounted throttle and brake
|
The original paint scheme on our B unit was the green and yellow of the Chicago and Northwestern. When we bought
our two dual side load coaches, we discovered one is a coach from train no. 504 and one is from the no. 506 both of
which ran in Chicago at Riverview Park. The paint scheme was the green and yellow of the Chicago and Northwestern
at that park. At one point the gentleman that we purchased the coaches from owned our B unit, but he sold it to someone
else. After a couple of additional owners, none of whom did anything with it, we were able to acquire it. Under where
the builders tag had been, you could see green and in places you could see the yellow of the Chicago and Northwestern.
I was starting to suspect this B unit was either no. 504 or no. 506, but didn’t have any solid substantiation.
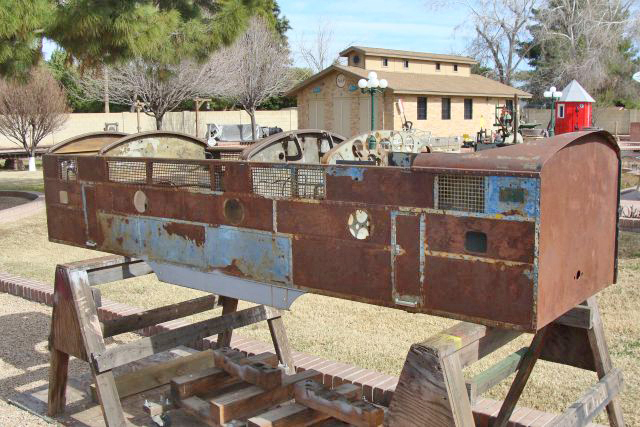 G-16 B-Unit with baby blue house paint
|
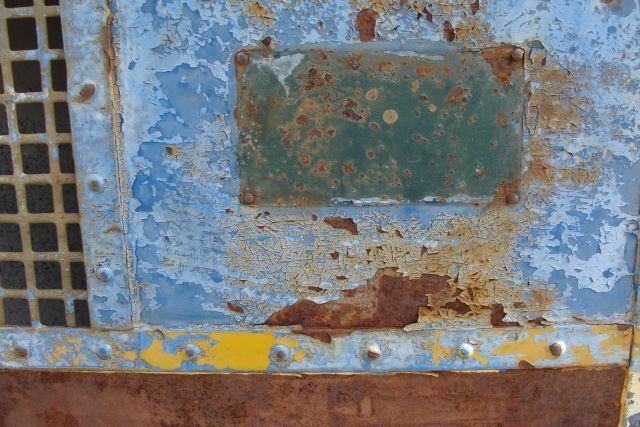 Spot where the builder's tag once adorned the B-Unit
|
When we bought our B unit it was mostly rust covered, but the original paint scheme had been painted over with a baby blue
layer of house paint that was peeling off in most places. It was thick and appeared applied by a large paint brush.
It was a distinctive color and not railroad themed. Out of the blue one day, I get a text from my friend Joey Klein telling
me to check out new items listed on Ebay. Among other MTC builders plates for sale were the builders plates for B unit no. 504
and B unit no.506. The plate for unit 504 was clear of paint; the one for unit no. 506 was in part covered by the same blue paint
that was on our B unit sheet metal and it matches up exactly. The distinctive paint stain on the rear of the plate was the final
clincher.
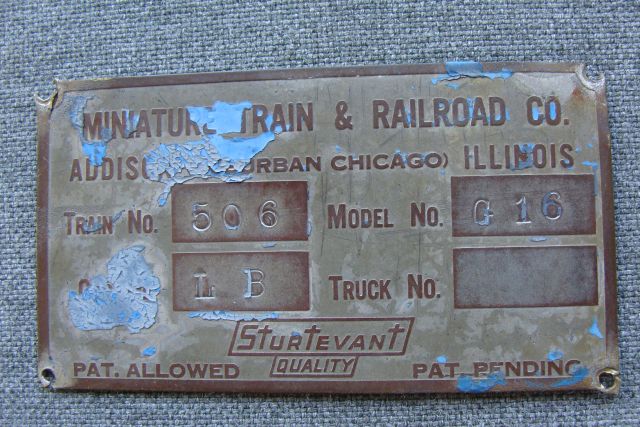 506 B-Unit Builder's Plate with baby blue house paint
|
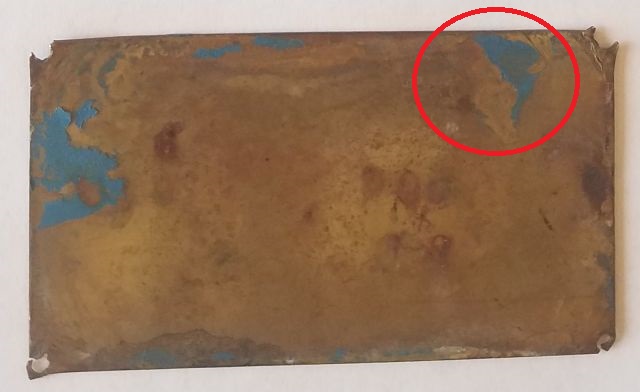 The distinctive paint shapes on the back of the plate were mirrored in the B-Unit
|
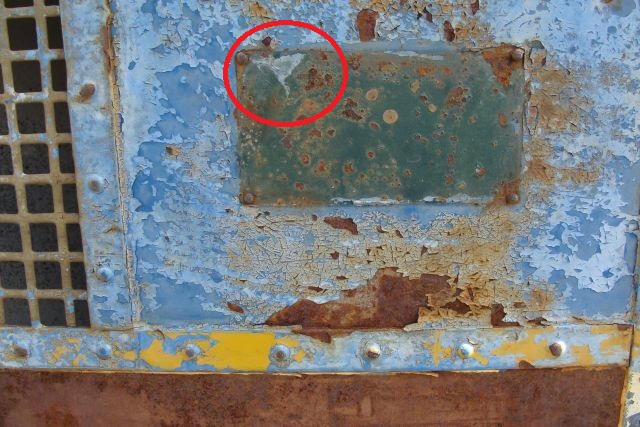 We found our builder's plate
|
It turns out the builders plate was removed sometime in the 70s by the owner at that time, L. Gray Tuttle, when the B unit
was headed to scrap. Mr. Tuttle bought G16s and S16s from service organizations primarily in North Carolina, South Carolina,
Georgia and Virginia when they were converting to CP Huntingtons in the 1970s and early 80s. He purchased and sold somewhere
between 35 and 50 of the trains over the years.
Later, someone saved our B unit from scrap and it passed through many owners not knowing or caring what its production
number was. The builder’s plate passed from Mr.Tuttle to Les Kasten along with a huge MTC collection maybe 30 years ago and was
in an envelope forgotten in his desk all those years. It recently resurfaced when he was reorganizing and it became available online.
I am thrilled we were able to obtain it and solve the mystery about our B unit production number. I am torn whether to mount it
on the B unit or display it in the engine house with its unlikely story. Thanks to Joey Klein, Les Kasten and L. Gray Tuttle for
helping us solve this mystery.
Dave and I finished regauging the entire engine house spur and we also trimmed 4 rail ends to create slightly bigger rail joints
to allow for summer rail expansion.
We added MT & RR Co. - Addison and MTC - Rensselaer builder plates as well as an Allan Herschell Inc.- Miniature Train Co.
Division plate to our builders display in the engine house.
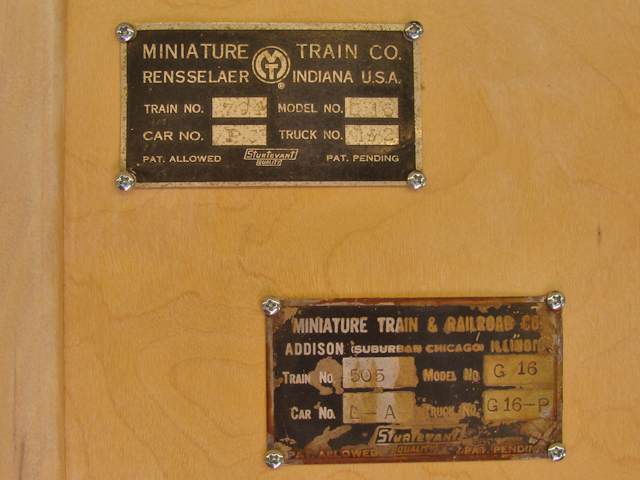 Two styles of Miniature Train Company builder's plates
|
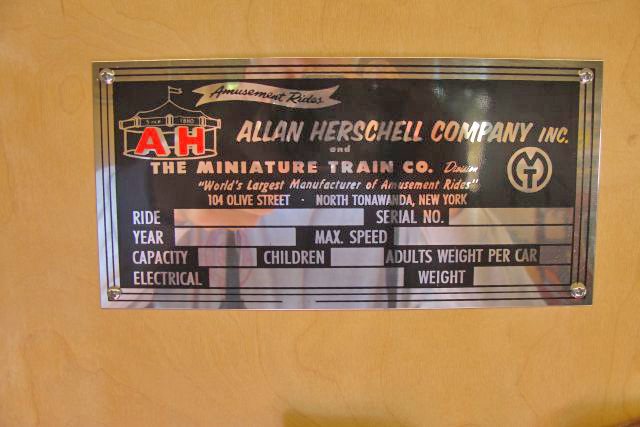 Allan Herschell Miniature Train Company builder's plate
|
I hadn’t polished the brass components on the Phoenix, Sandusky or Red River in a couple of years and it really showed.
We spent fourteen man hours over two Saturdays hand rubbing and polishing the handrails, sand dome, bell and all the other
brass pieces on the three engines and Tenders in the engine house. The Red River went a little faster than the other two as
it has a little less brass on both the engine and tender. They all look so much better with the gleaming brass rather than the
dull and tarnished yellow color – it is just a lot of work.
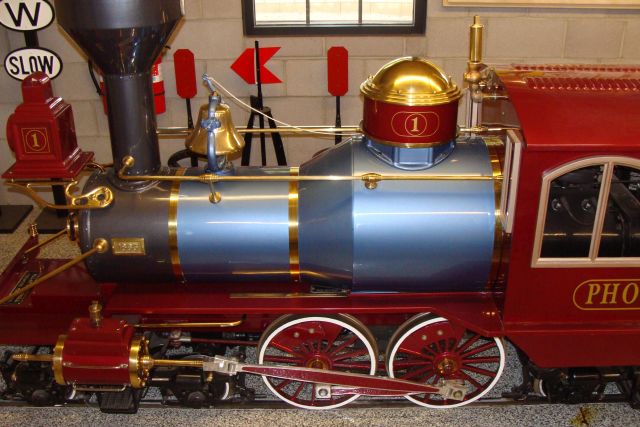 We polished the brass on the Phoenix
|
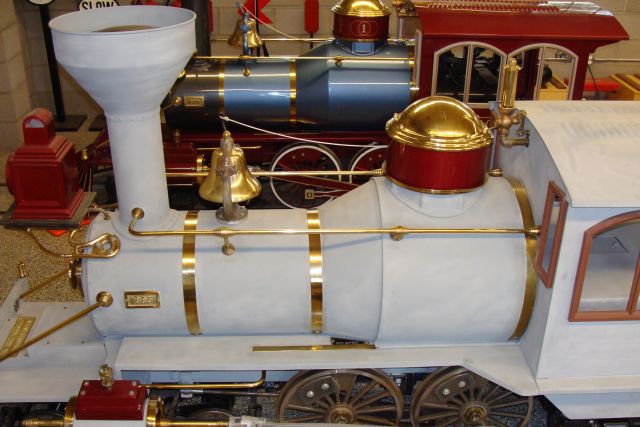 The Sandusky's brass was polished too
|
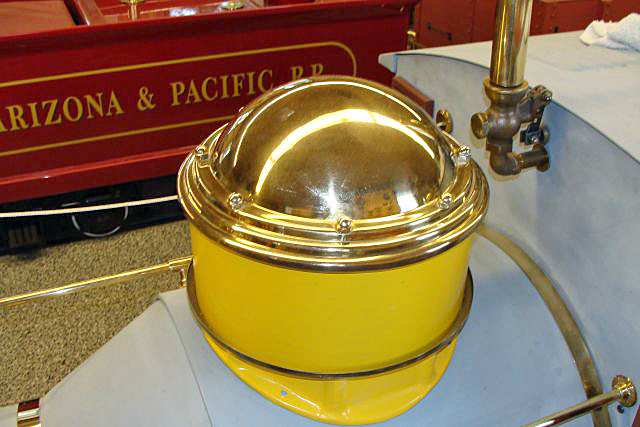 Partially polished sand dome on the Red River
|
Dave and I will start tie and gauge maintenance work on our siding next month and depending on available time, it may be March
before that segment of track work is finished.
Our friend Jerry Graves was over and we rebuilt the carburetors of the Phoenix and the Red River and we replaced the fuel pump
on the Red River. They are now running very smoothly as they should.
We also started no. 582, but she isn’t running quite as smoothly as we would like. It might be timing: we’ll see.
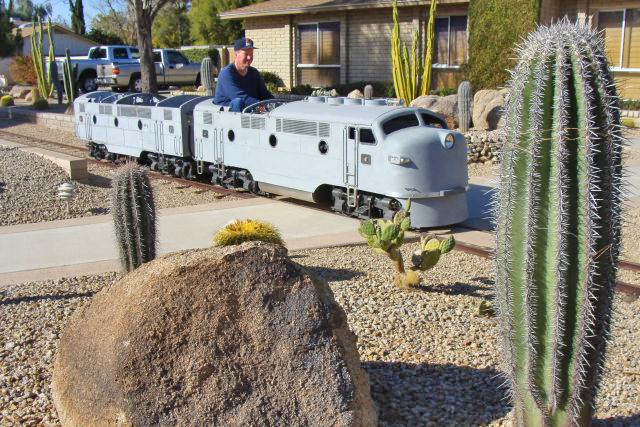 Dave runs the 582
|
We intended to replace the chain on the track inspection car. When we got it all the way apart, we realized the teeth on the one
sprocket were badly worn. We are going to replace the sprocket with a new and larger one that will provide more teeth on the
chain at any given time and slightly increase our top speed. It will probably be March for completion of that project too.
We have always wanted to have an observation car as part of our G16 equipment. We don’t really need another car and entire cars
are expensive to purchase and sometimes even more expensive to ship. We acquired our first couple of observation car end components
and are tracking the balance of the parts we need to convert one of our coaches into an observation car. Thank you to Shaun and
Rick for their help. We are going to have a friend aluminum TIG weld the portion that of the lower casting that is broken away.
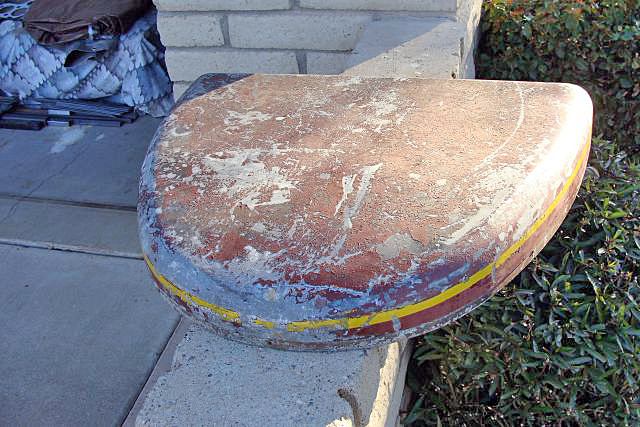 Observation car end component
|
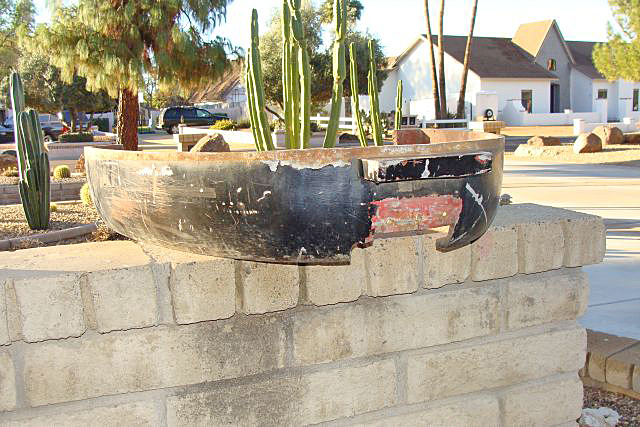 A second observation car end component needing some repair
|
We had guests from Murrieta, CA visit the A & P for the first time this month. Katherine and Edward Moreland stopped by and we
all enjoyed the visit.
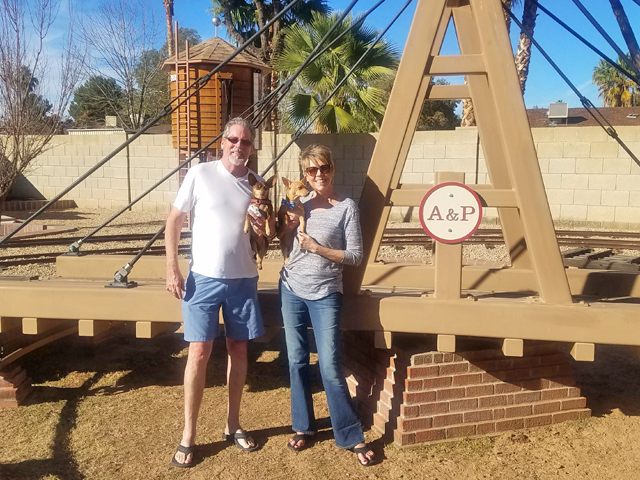 Katherine and Edward Moreland visit the A&P RR
|
Happy and safe railroading everybody!
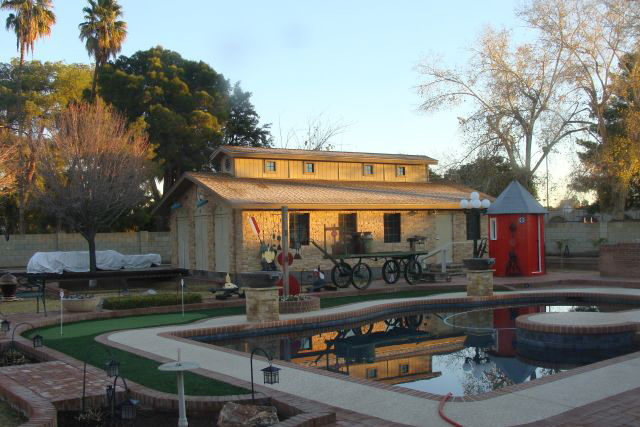 Arizona and Pacific Railroad
|
March
03/10/18
Spring cleaning at the Arizona and Pacific this year was focused in the engine house. Each piece of equipment was
moved out of the engine house. Everything was cleaned and dusted including the window ledges, shelves, display items,
top of picture frames and signs, tool boxes, fire extinguishers, MTC and AH collections, TV screen – all of it.
The mats were removed and vacuumed. The floor was swept and then mopped twice. OMG the floor is shining again and
looks great; it even smells clean. We dusted and wiped off all of the equipment before it was moved back into the
engine house.
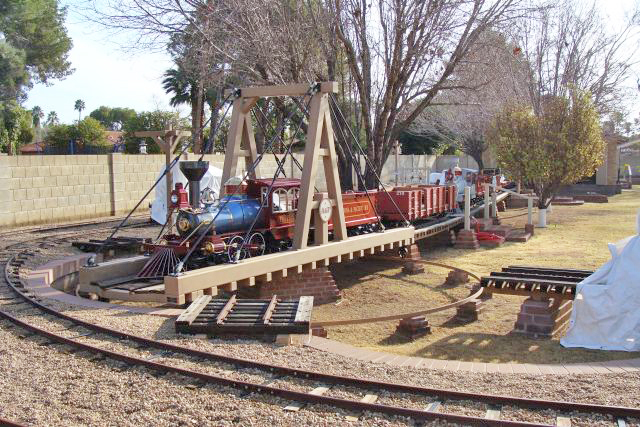 Emptying the engine house for spring cleaning
|
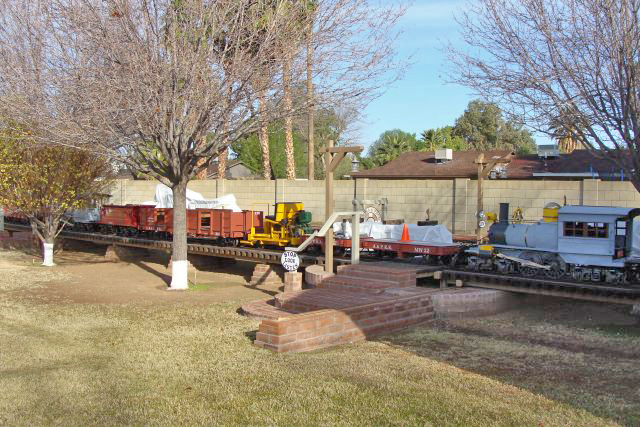 Preparing to clean the engine house
|
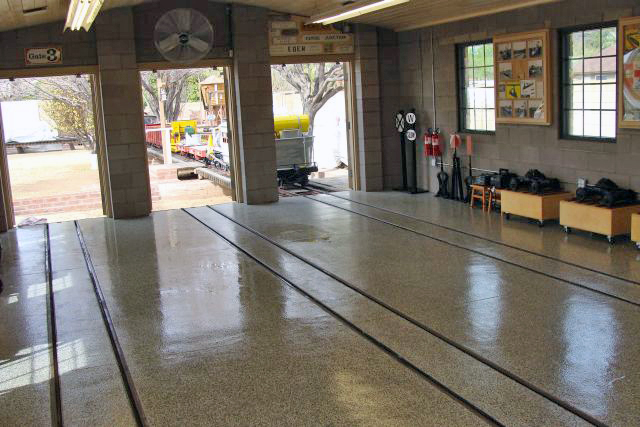 Giving the floors a good mopping
|
The non painted portion of our gons 218 and 219 were starting to look a bit dry so I wiped then off good and got
two good coats of Teak oil on all of the beautiful teak wood. They really soaked it up and gosh the cars look
great as if they were still new instead of almost 10 years old (placed in service 11/2008).
The standard postcard that is frequently shown of Riverview Park is no. 504, the Riverview Chief, which was painted
in the SP paint colors. Our B unit is from no. 506, the Riverview Scout, which was painted in the Chicago and
Northwestern colors. I went through my photo archives and found a pretty good photo of the Riverview Scout in
operation showing our G16 B unit circa 1950; train no. 506 arrived at the park in early March 1948. She will be
70 years old in a few days.
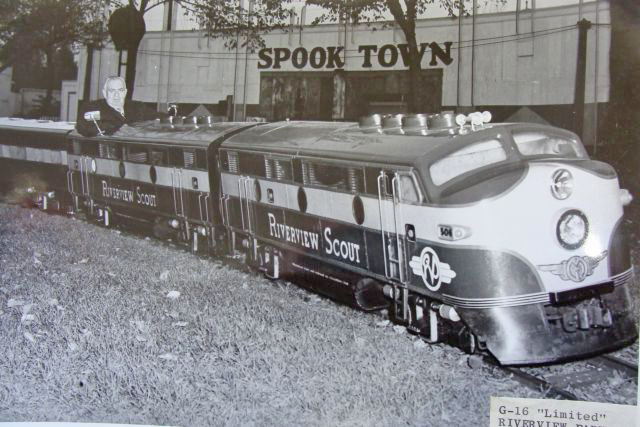 Our G-16 B unit at Riverview Park in Chicago
|
After I had the opportunity to operate a S16 and then a G16 many years ago, I became a big fan of MTC equipment.
Over almost twenty-five years, we acquired and restored a G16, switch stands, switches, multiple varieties of block
and crossing signals, a track gauge, torque wrenches and the S16s. Along the way, we acquired a number of advertising
and paper items as well. A few years ago, it became a goal of mine to try and obtain one of most of the items
manufactured by the Miniature Train and Railroad Company, Miniature Train Company and Miniature Train Division of
the Allan Herschell Company (S16s) and restore the items for display.
If an item became available at the right price we would try to buy it and ship it in here. Often, that meant
the items were in pretty poor shape. We have had a lot of help from many people finding parts and pieces all
over the country and appreciate all the assistance.
In March of 2012, I bought a G12 engine shell that we will cosmetically restore and paint in period colors.
A couple of years later, I purchased and rebuilt two G12 power trucks and two coach trucks. We have located
missing parts a few at a time since we bought the shell. We have a way to go, but have made significant progress.
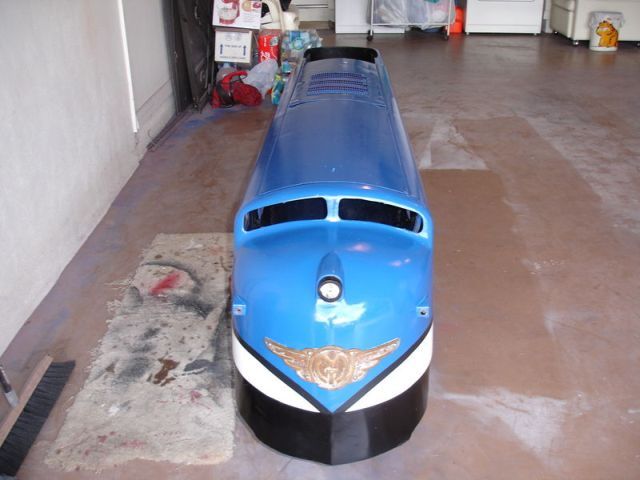 Our G-12
|
I have always hoped to add an E10 or E Series G12 to our collection at some point. Back in about 2002, I had
the opportunity to purchase an E10 locally that was still complete with its original electrical system and running
gear and four cars for $10,000. I am not going to lay additional track or a third rail and at the time I thought
it was too much money just for a display piece and I passed on the sale. Off and on over the years I have regretted
that decision.
A couple of years ago, I had the opportunity again to purchase an E10 that was mostly shell (no drive train or trucks)
and two cars out of Indiana, but again didn’t need the cars and the timing just wasn’t right. This month I went ahead
and purchased an E10 locomotive shell only. It is missing the hood and instrument panel and has no trucks or drive
train. The MTC breast emblem is there along with some of the door handles and bolt on parts, but it is missing many
parts even for a cosmetic restoration. It does appear to have good bones. I have seen many photos, but it won’t
actually arrive here for a few more days.
Like the G12, it will be a long–term project, but at least I finally have the main shell and will set about trying to
find or authentically fabricate all the pieces that I am missing. If you know of sources for E10 parts, please give
me a shout out. The E10s that I had seen previously were no. 22 (produced circa 1936), no. 26 (unknown production year)
and no. 32 believed to have been produced circa 1948. If you have an E10 or an “E” series body style G12 and can provide a
ny photos or information, please contact me. If I can create the room, one day I may decide I need a G12 observation car
and an E10 observation car too. I haven’t ruled either out entirely.
I purchased the 4 x 6 timbers to replace the switch stand ties of our 10 switch stands. I got a third of them cut to
length and a couple of coats of Jasco Termin-8 on them which helps them stand up to the termites out here. Hopefully,
in March or April we will get them in the ground and I’ll cut to length and treat the lumber for the others.
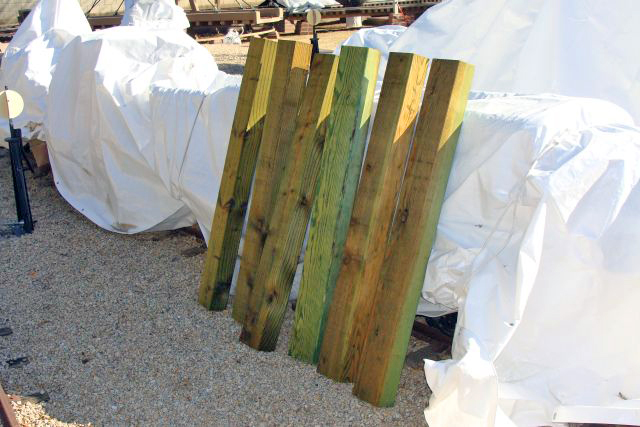 New 4x6 timber to replace our switch stand ties
|
Last month, I had three pine large trees cut down in the front yard. I had bark beetles and wood bores in one and the
other two I considered removing 26 years ago when I bought this place. Somehow they stayed until last month.
One of my neighbors is adding onto his house and re-landscaping his backyard. He had quite a bit of nice dirt that he
said I could have. We moved about 40 tons of dirt from his property to mine. About a fourth of the dirt went in the
front yard where I built three mounds between the street and where the three removed trees had been. I planted 14 golden
barrel cactus, 2 torch cactus, 3 trichocerus cactus, 2 ocotillo, 16 golden lantanas, 2 cherry lantanas, and 36 red-violet
ice plants to the new areas. We already had sprinklers at the base of the three trees so I re-plumbed and added drip to
all of the new lantanas. I still have some granite boulders to add in the coming months, but made significant progress
on the project.
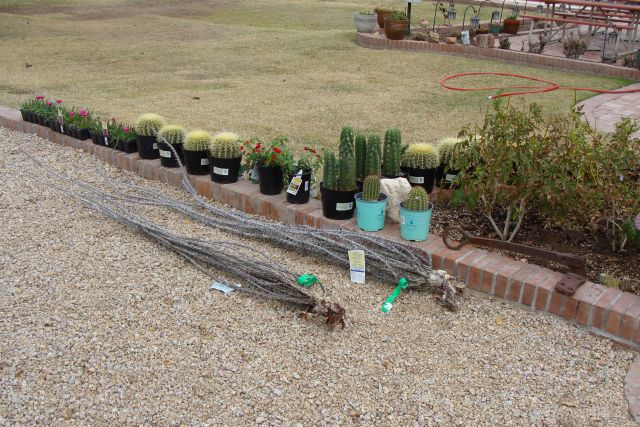 Two ocotillo cactus and many other plants await planting
|
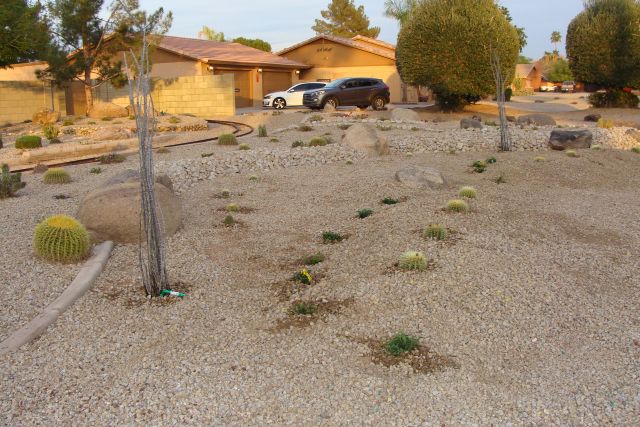 New landscaping in the front yard
|
The balance of the dirt went into the back yard and split between two main areas: 1) under the transfer table and
2) the turntable area. The transfer table area was always about 3 inches lower than the grade of the yard. The original
footer for a pony wall that I had built before the City changed the rules and regulations about where the engine house
could be built ran just beneath the ground in the area and I could never grow grass in much in the area for a variety of
reasons. I added three inches of dirt throughout. It still needs graded and leveled and an ample amount of organics added.
When I plant grass in there in April it should grow everywhere and do well.
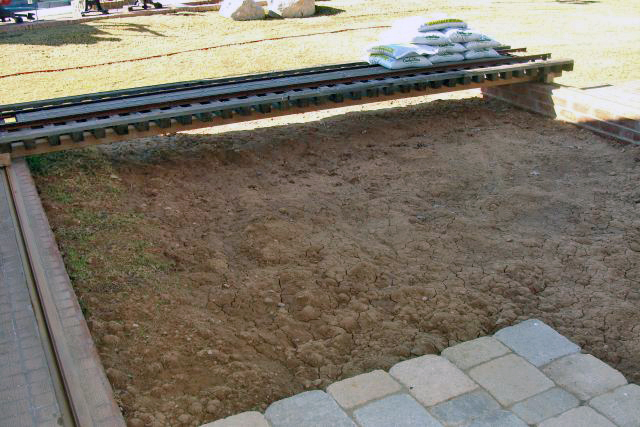 Raising the ground level under the transfer table
|
I also added about 2 inches of dirt around the turntable pit where over the years some of that dirt that I brought in
to cover the caliche had settled. I still need to grade this area as well and will add organics in this area too. I
purchased 24 large bags of unscented manure for the two backyard areas. Don’t believe the unscented part…
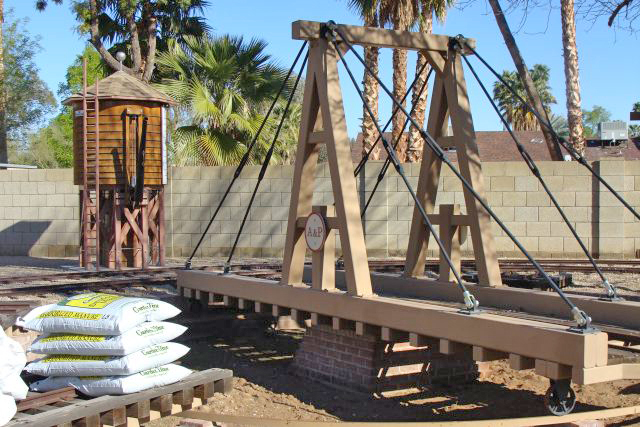 Fresh dirt added to the turntable ring
|
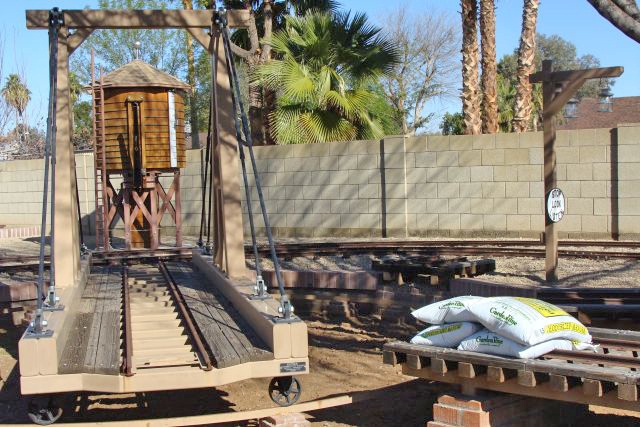 Good organics are being added to the dirt
|
On February 24, I attended the Arizona Railway Days 2018 event at the Arizona Railway Museum in Chandler. I became a
lifetime member out there in the early 1980s when I was impressed with the work ethic of the original founders and was
in a position to help them out financially. I have never been an active member, but travel over there every other year
to see what new has been accomplished and I am always amazed at their progress.
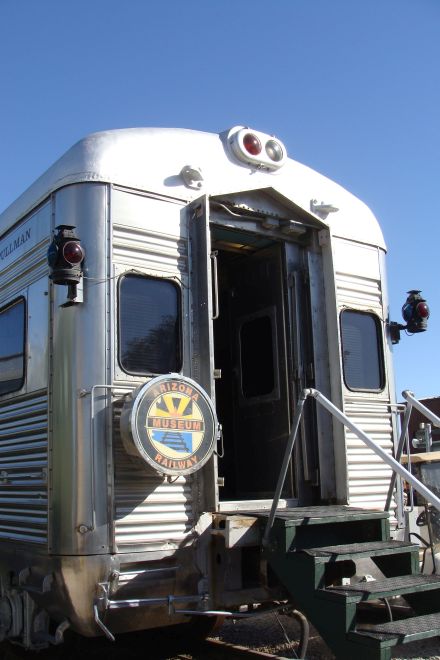 Arizona Railway Museum in Chandler
|
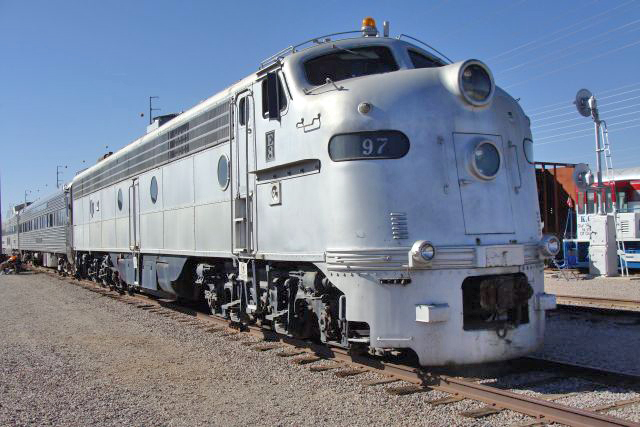 It looks familiar, only bigger
|
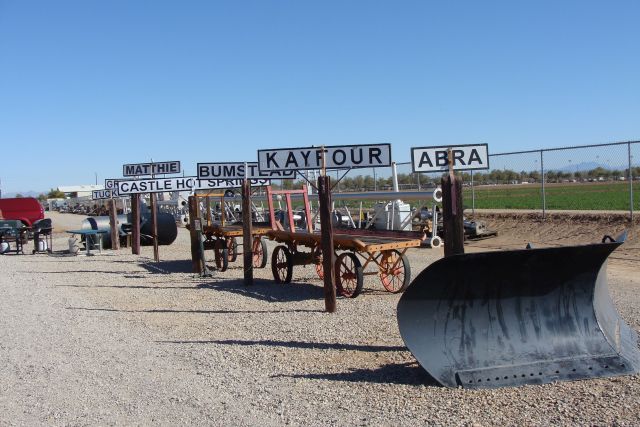 Sign post collection at the Arizona Railway Museum
|
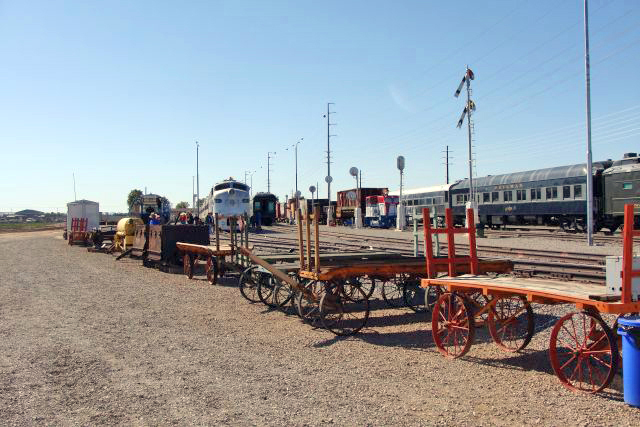 Baggage cart collection at the Arizona Railway Museum
|
Char Robinson, Pete Robinson and Jerry Steibring were in town for their annual winter trip and has become our yearly
tradition, we meet at Manuel’s in Glendale for Mexican food. I had just received my first irrigation water of the year
so the Arizona and Pacific was full of water and was out of play. They decided to join me the following day at Arizona
Railway Days in Chandler. It was their first trip to that museum and we all had a great time.
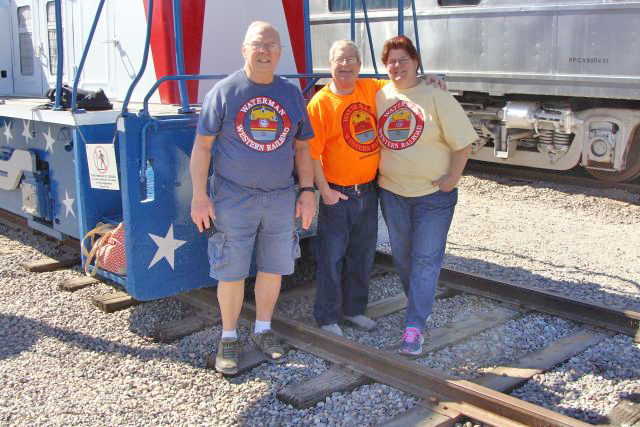 Char & Pete Robinson and Jerry Steibring at the Arizona Railway Museum
|
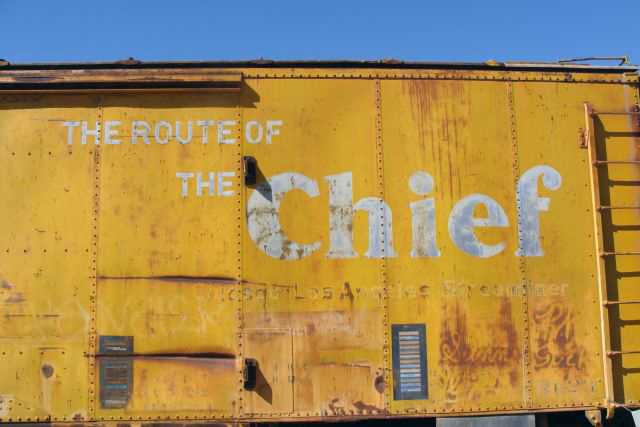 Chicago to Los Angeles
|
It is always interesting for me when I attend a railroad related event as my life in the railroad community has had
three distinct phases. In the 80s and 90s, I authored books and gave presentations on Arizona territorial railroads,
I have been an AH and MTC owner since 1996 and contributor to this site since 2002 and I owned and edited Large-Scale
Railroading magazine in 2008 – 2009. There is some cross over, but most people only know me from whichever of those
three they are interested in. While at Arizona Railway days, one of my friends who knows me from this site and the
magazines introduced me to a docent friend of his. His other friend only knew me from the books and speaking engagements
years ago. They were both surprised to find out I was the same person. In fact, Marc stated I was his inspiration years
ago to get into the transportation field as a profession. It was a nice moment for all of us.
Dave was in the Philippines for a week on business which is a 15 hour time difference and requires a 20 hour flight both ways.
He is still trying to get re-acclimated to our time zone. I was here all month and still struggle to get up at 5 a.m.
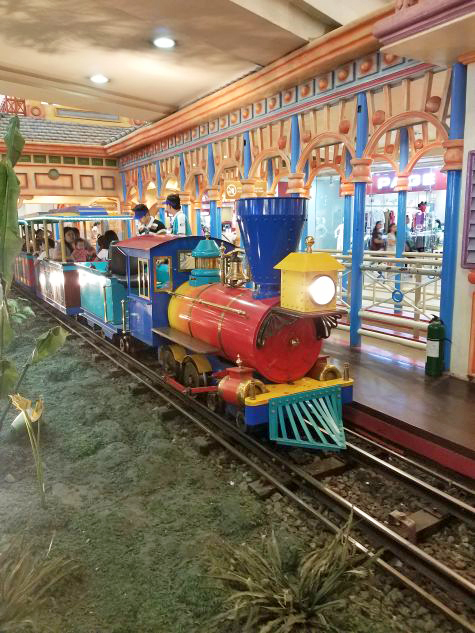 The Junction Express in Festival Mall, Alabang City Philippines
|
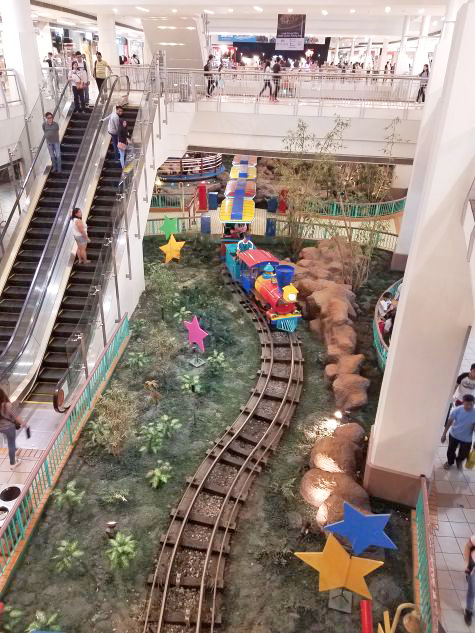 The train in the 4 story Festival mall in the Philippines
|
Happy and safe railroading everybody!
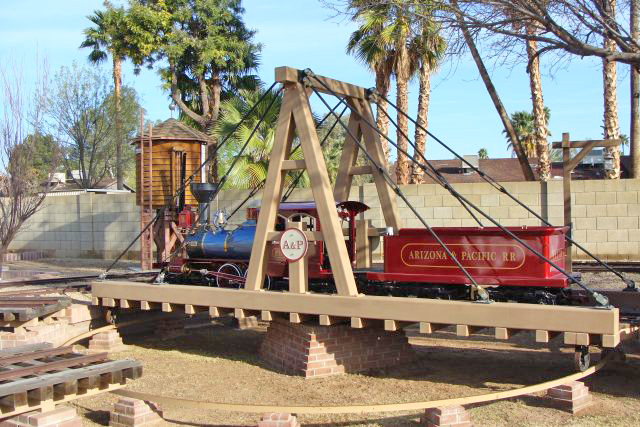 S-16 Phoenix
|
April
04/01/18
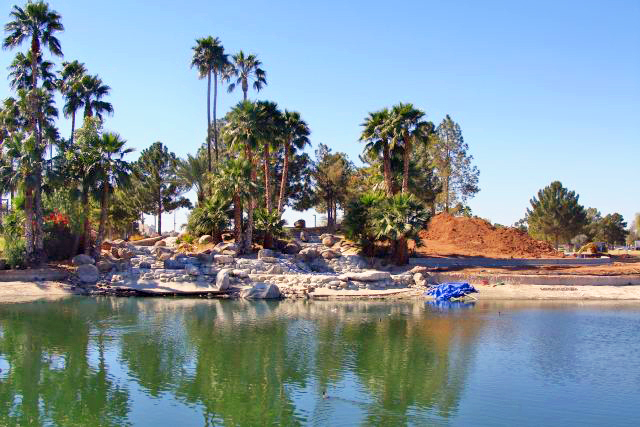
I managed to get out and visit a couple of the local park train operations this month. I traveled out to Freestone Park in Gilbert, AZ
during the month and rode the large-scale train out there. There is a great deal of construction underway at the park and the lake
is drained as new retention walls are being built and a great deal of earth is being moved. I enjoyed the train ride behind an older
J & E piece of equipment lettered for the Santa Fe. It had been quite a while since I had been to Freestone and was a little surprised
that the ticket price had risen to $4.50, but got my ticket and took my ride. It is a very slow ride right along the sidewalk much of
the way, but the view is pretty amazing as it ventures away from the parking lot, along the crest of a long curved hill and around the
backside of the lake before returning to the station. I enjoyed it very much.
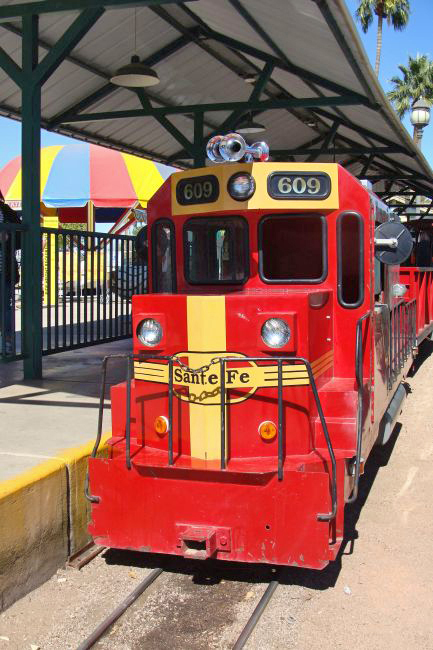 Freestone Park Railroad
|
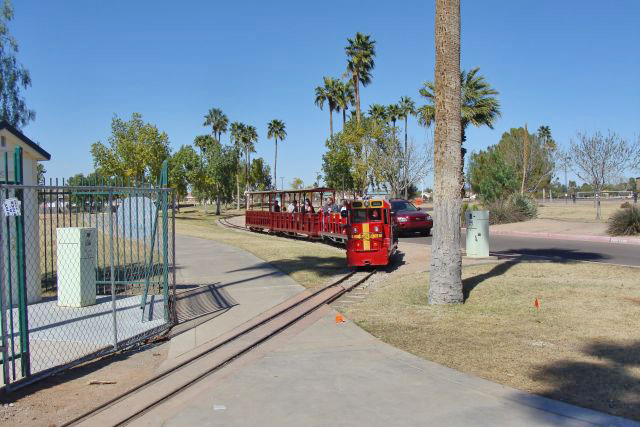 Freestone Park Railroad in Gilbert
|
 Construction at Freestone Park
|
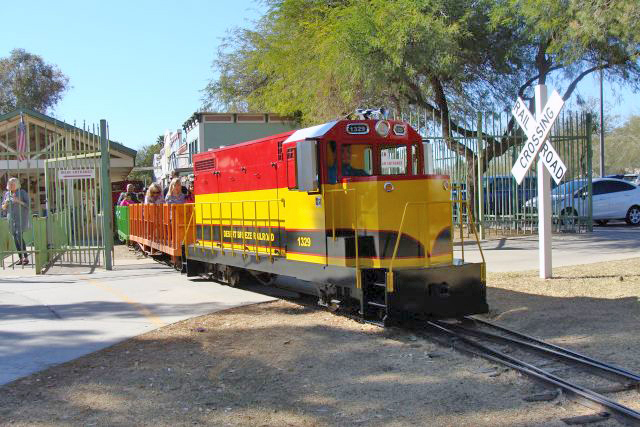
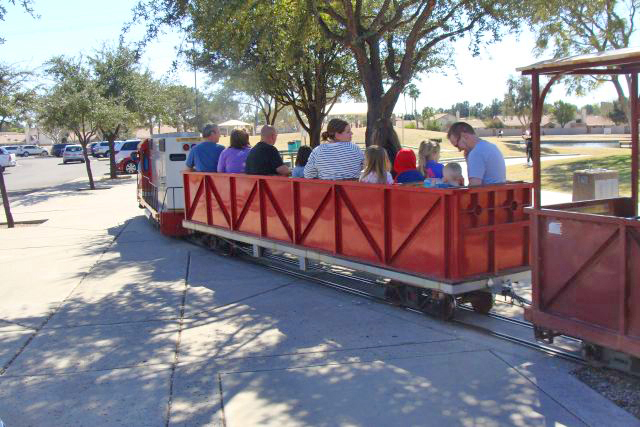
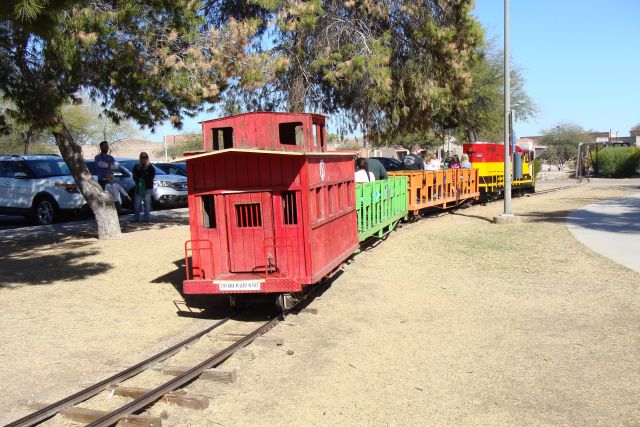
I also made it out to Desert Breeze Park in Chandler this month and rode its train. It had been a year since my last visit out there
when many of the passengers were complaining of the diesel fumes from the new engine. Not a great deal has changed. The smell of the
diesel exhaust was brutal at times, but a light breeze helped make it more bearable than a year ago. There was one less gon behind the
engine than a year ago and one of the engineers said a derailment had damaged one of the trucks and they were waiting on replacement
parts to get it back in service. Our ride (tickets also $4.50) was largely uneventful and it was a nice ride on a breezy and sunny day.
 Desert Breeze Railroad
|
 Passengers riding the Desert Breeze Railroad
|
 Desert Breeze Railroad in Chandler
|
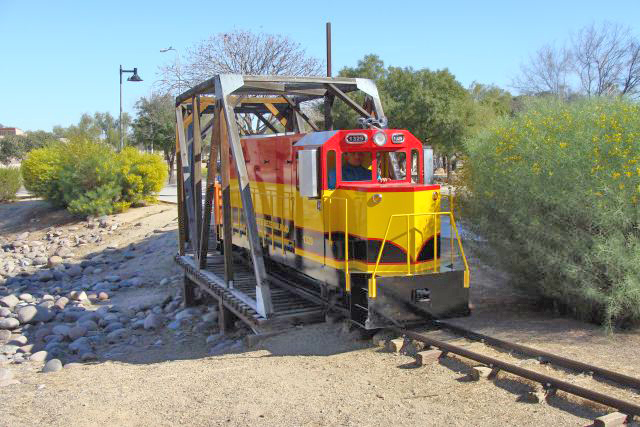 Crossing a trestle at the Desert Breeze Railroad
|
I finished getting our new switch ties cut to length and got two coats of Termin8 on all of them. We will start installing a few at a
time over the weeks ahead.
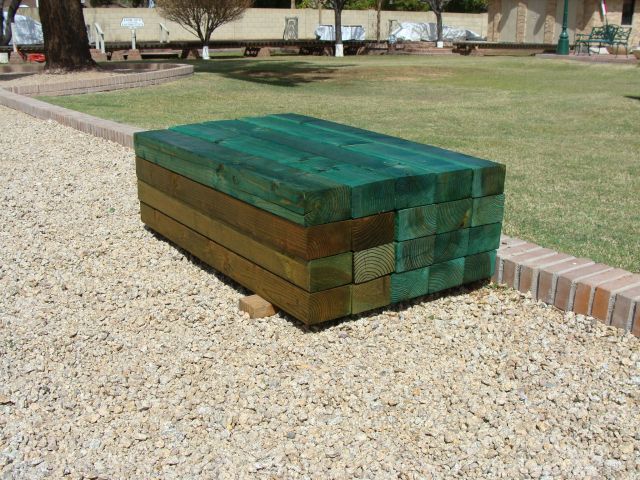 Switch ties cut to length and soaked
|
Our E10 shell arrived in Peoria this month. The production number is no. 28 and shows built by the Miniature Train and Railroad Company
in Addison. We believe it was produced between mid-year 1946 and late 1947 which likely makes it our oldest piece of MTC equipment.
Our coach no. 504 was shipped in December of 1947 and our B unit no. 506 and coach no. 506 were shipped in March of 1948 all also produced
in Addison. Shortly after train no. 506 was produced, the entire MT & RR Co. operation moved to Rensselaer, IN. We have a MT & RR Co.
brochure printed in March of 1948 announcing that the new plant in Rensselaer is open and touting the new and improved design of the G12.
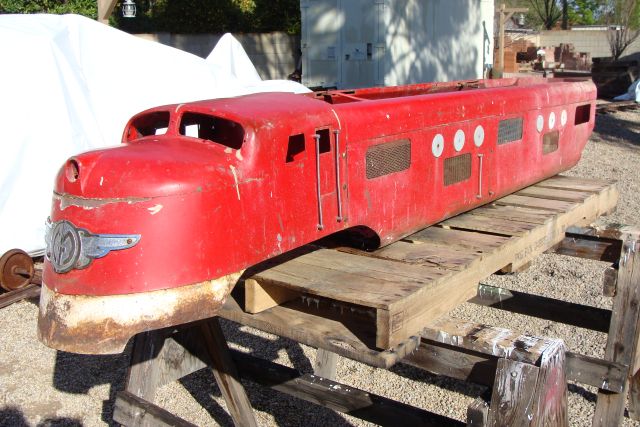 E10 Engine
|
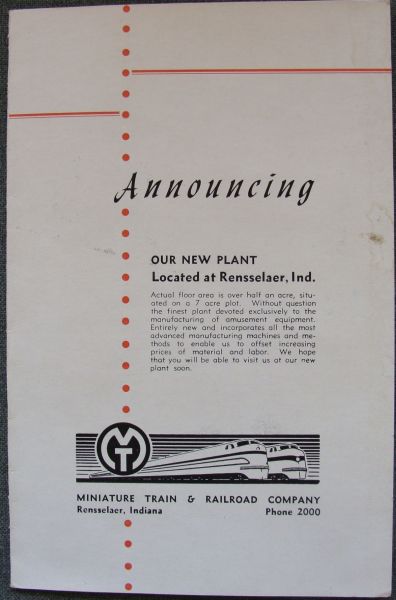 MT & RR Co. Brochure
|
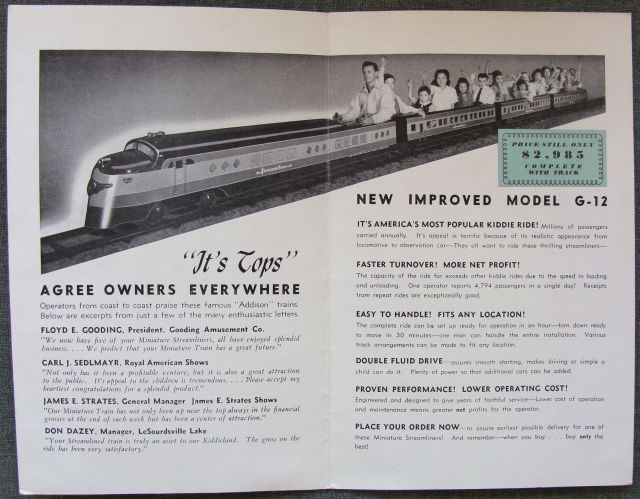 MT & RR Co. Brochure
|
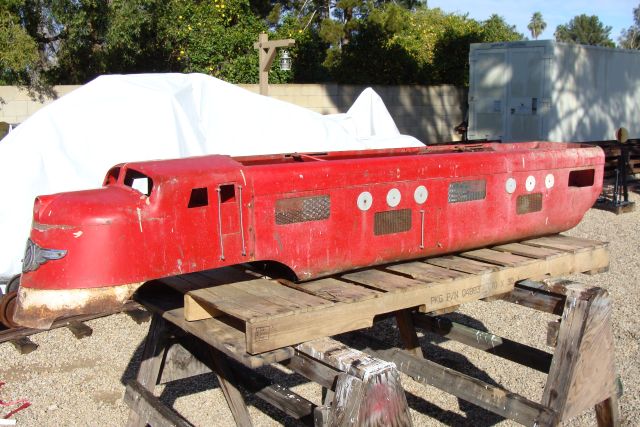 Miniature Train and Railroad Company E10
|
Our E10 locomotive shell is missing the hood and instrument panel and has no trucks or drive train. The MTC breast emblem is there along
with some of the door handles and bolt on parts, but it is missing many parts even for a cosmetic restoration. It does have its old wiring
and a couple of the original electrical components. It doesn’t have much rust which is helpful.
If you have an E10 or an “E” series body style G12 and can provide any photos or information or know of sources for E10 parts, please
give me a shout out. I took a few photos of the E10 sitting on a pallet in the side yard and then couldn’t pass up the opportunity to
have the Miniature Train Company G16, G12 and E10 in a photo together. Years ago, I saw xerox copy of a promotional photo taken in the
factory at Rensselaer of the three different size engines and I thought it would be great to recreate that photo. A few years from now
when all are restored and repainted it will be a better photo, but for now I am very happy with it.
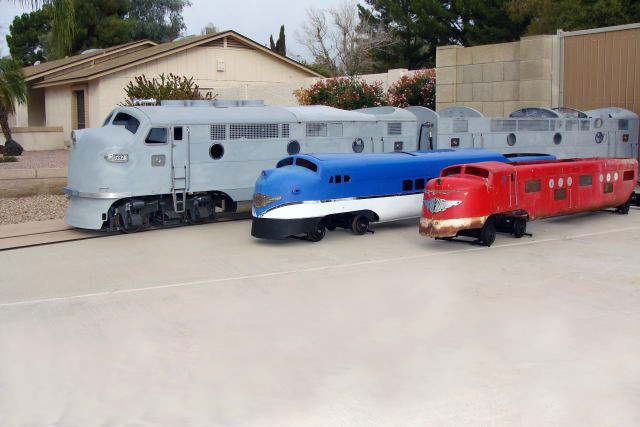 G16, G12 & E10
|
For the purpose of the photos, the E10 was sitting on G12 coach trucks. A slight bend in the front pin was keeping the truck from
fully seating and I was reluctant to force it all the way on as I may have had a tough time getting it back off so it is sitting a
little high in the front. Anyone have any E10 trucks complete or in parts that are for sale?
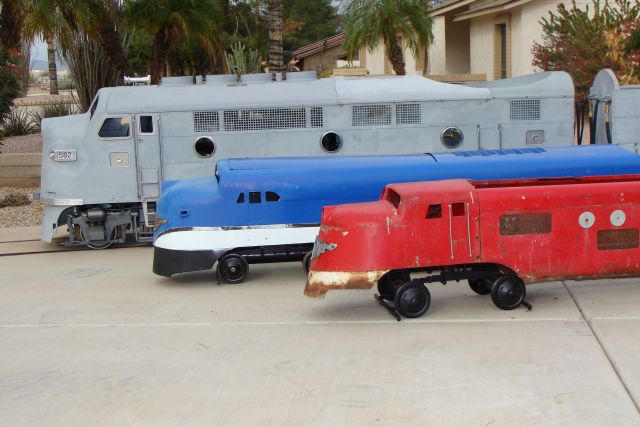 G16, G12 & E10
|
The E10 brake and throttle controls were rusted in place. Some WD40, convincing with a 12 inch riser pipe for leverage and some minor
filing and everything slides and rotates very nicely now. As I mentioned earlier, there is no instrument panel, just the mounting holes.
We started phase one of the fabrication process with several small pieces of poster board and lots of masking tape. We roughed each side
in and then used the curvature of the nose to determine the curvature of the hood (also missing). We made several cuts to get the overall
width right. I used a handful of photos I have of other E10 instrument panels to determine the proper length of the panel. After we were
happy with the fit, we laid the dimensions out on a ¼ thick piece of wood panel and cut it out with a jig saw. We made a couple of additional
adjustments with a small file. It still needs a couple of minor adjustments and the slits made where the hood will fit, but is getting
pretty close. After we get it the way we want it, we will get a couple made out of sheet metal. I will cut the holes with a hole saw later.
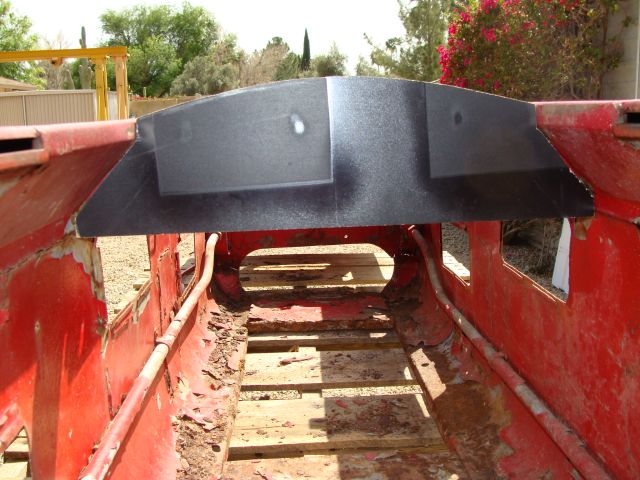 E10 instrument panel model
|
I finished the dirt work around the turntable and transfer table this month as I got the remainder of the dirt spread, raked, leveled and
mixed with organics. I picked up an additional 10 bags of unscented manure and got it worked in with all the new dirt. The grass seed
will get planted in mid-April and hopefully within a couple of months after that grass will be in place – we’ll see.
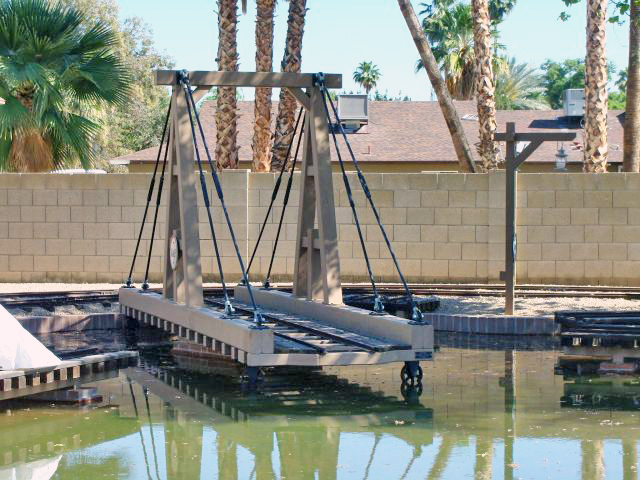
Next month (mid-month) I will be adding another construction article to this site. This one is on the construction of the trestles and
transfer table on the A & P. The last of our trestles constructed was completed in early 2006 which was before we were adding monthly
updates about our activities out here and I thought some of you might find it interesting. I am also working on an article on the lighting
and loading platform projects on the A & P that we will get added in May or June after I track down all of the photos.
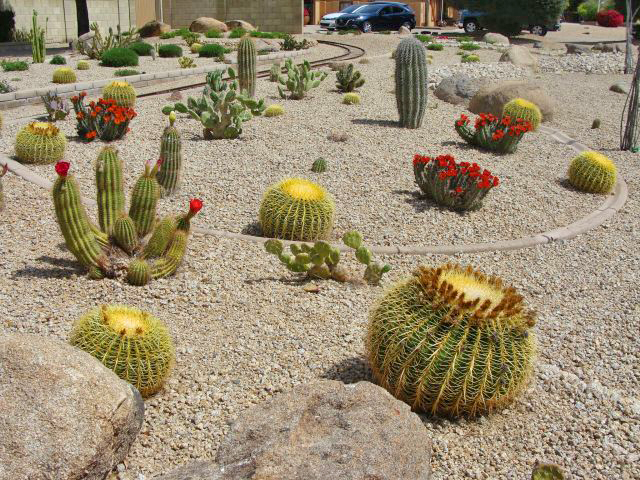
It is spring in the desert and the cactus are just starting to bloom at the A & P. Some of the varieties are spectacular because they
are covered with flowers while others have only a few flowers, but those flowers are eye catching.
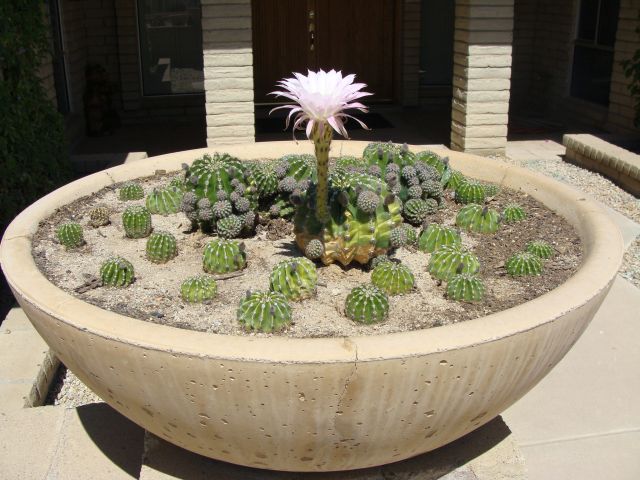 Springtime in the desert
|
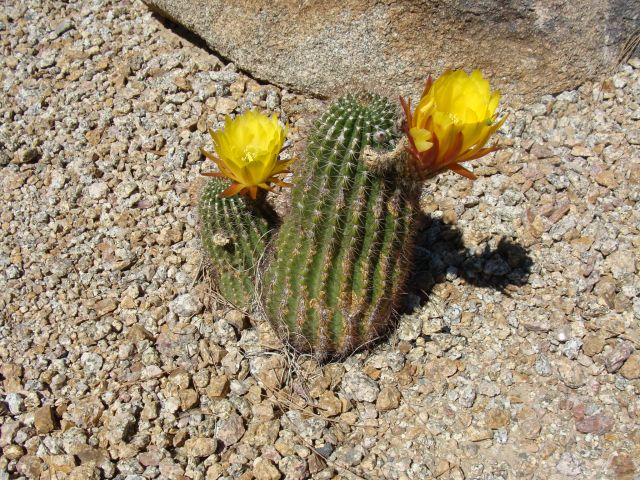 Cactus flowers
|
 Strawberry hedgehog
|
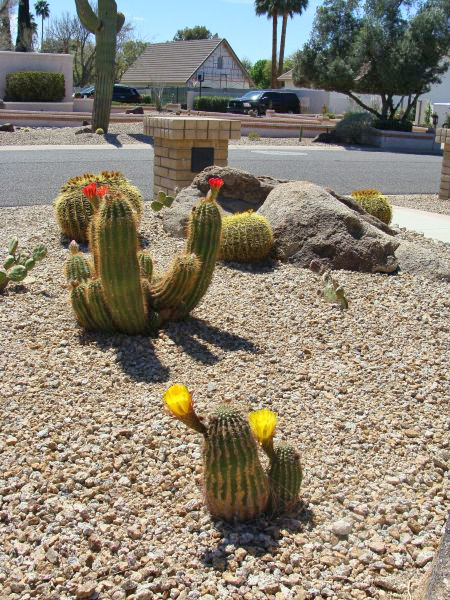 Torch cacti in bloom
|
 A&P RR front xeriscape
|
Happy and safe railroading everybody!
May
05/05/18
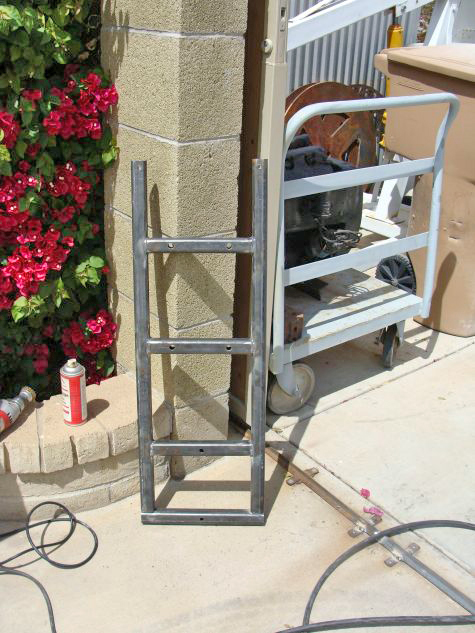
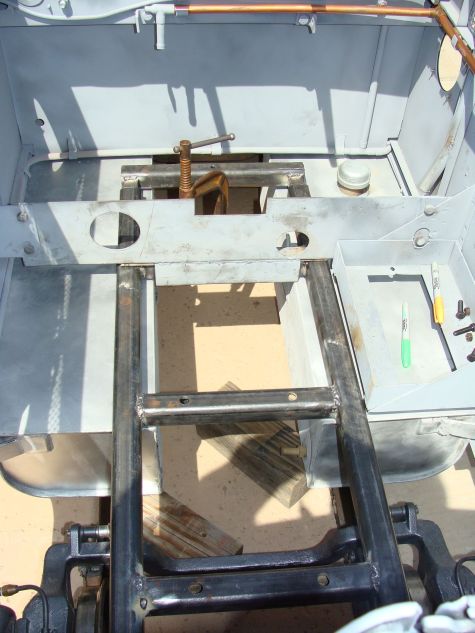
We did quite a bit of work on the 506 B unit sub frame assembly this month. I had cut the inch and a half wide, ¼ inch
thick wall tubing components to length a few months ago and later Dave and I drilled the front mounting bolt holes, Wisconsin
engine mounting holes and the transmission mounting holes in the various pieces. This month it was time to finish the fabrication.
Our friend Jerry Graves was over and he and I spent almost an entire day working on finishing fabrication of the sub
assembly. We wanted to do most of the welding on the ground and not in place. We welded a couple of pieces of flat strap
across the long pieces of the assembly to hold the spacing and keep the pieces square when we removed them. We also
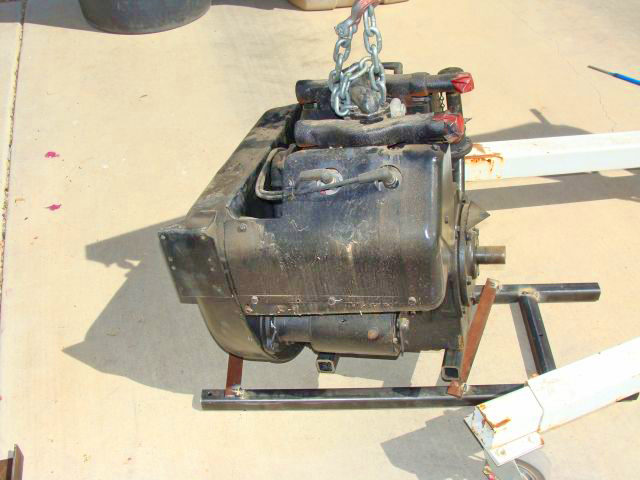
tacked the front transmission mounting cross member in place. We wanted to make sure that the Wisconsin engine was
mounted in the correct location for the predrilled holes. I lifted the Wisconsin engine with the cherry picker and
mounted the precut and predrilled two engine cross members to the Wisconsin. Then, I lowered the engine to the ground
in between our long components. With a hammer we tapped the engine cross members forward and backward until they were
positioned correctly for where we wanted the Wisconsin to sit. Then we tacked the cross members in place. The rear
transmission cross member slides in and out of the sub frame to allow for some minor transmission mounting flexibility.
 506 B Unit motor sitting on the sub assembly for a custom fitting
|
I unbolted and removed the engine from the sub frame and we welded and ground the four sides of each cross member
except for the sliding one. Then we fit the assembly in place within the B unit. We had to remove and make some
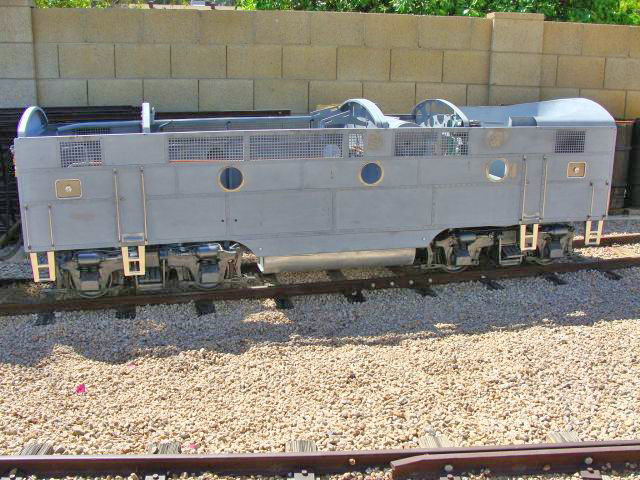
minor adjustments to the rear mounting bulkhead to have everything fitting correctly. The sub frame is also where
the upper mounting brackets for each gas tank are located. We mounted each of our gas tanks to the lower skirts so
we knew exactly where the tanks and upper brackets needed to be. Any of you that have mounted these tanks with the
train engine on the rails know how little clearance there is to get the tanks in place with the fuel filler neck and
the tank brackets protruding above the tanks themselves.
 506 B Unit Sub Assembly
|
 The gas tanks were mounted on the 506 B Unit
|
With the tanks finally in place, we fabricated the angular tank upper mounting brackets out of flat bar. We drilled
and tapped the brackets before welding them to the sub assembly and bolting the tanks in place. The last part of the
process was drilling and tapping the two holes for the bolts that mount the front transmission cross member to the rear
mounting bulkhead. Everything fits great and looks pretty good in there.
 Sub Assembly being mounted in the 506 B Unit
|
I still need to remove the sub assembly one last time to clean up some welds and tack marks, round a couple of corners
and prime the entire assembly. The gas tanks will also need removed in that process. Once that process is complete,
the sub assembly and gas tanks can be remounted. The Wisconsin motor has been out back under a tarp for some time and
will need wiped clean and then repainted before we mount it in the B unit. I know it doesn’t sound like much, but we
invested 15 man hours in the B unit this month. Hopefully, next month we will finish our activities with the B unit
subassembly and get the Wisconsin and gas tanks in place.
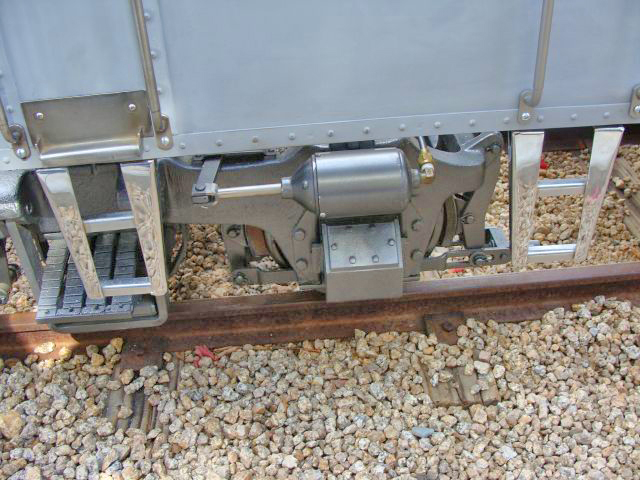
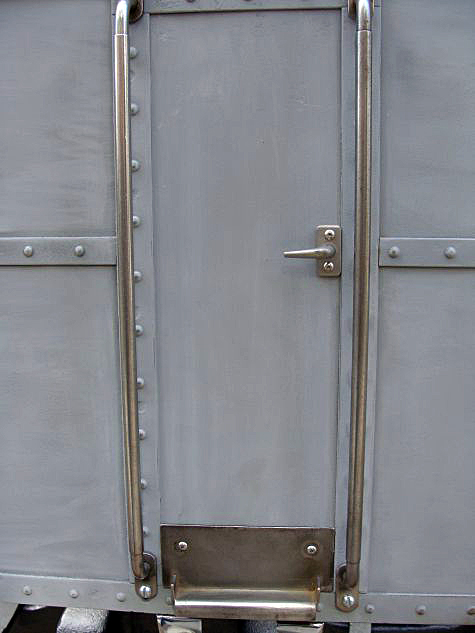
We got the two additional stirrups and door step mounted on our B Unit that she was missing and that we acquired a
few months ago.
 The final two stirrups were mounted
|
 The last door step was mounted
|
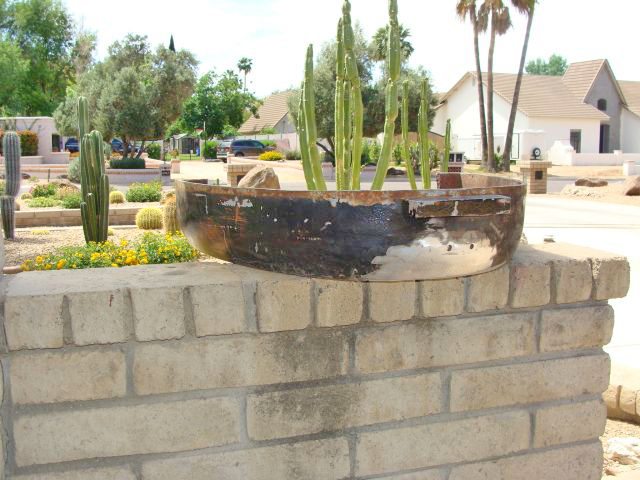
I had dropped off our recently acquired G16 observation car lower housing at a friend’s shop a few weeks ago to repair
and weld where a chunk was missing out of the aluminum casting. We picked it up this month; the repair looks amazing.
It will take a very thin layer of bondo and will look great. Thanks to Allan at Canyon State Metal Products for the
great work!
 G16 observation car lower housing before repair
|
 G16 observation car lower housing after repair
|
We finally got the time to get back to the track inspection car. We replaced the drive sprocket with a significantly
larger one. It has dramatically changed the speed of the workhorse unit. We also replaced both chains with new chain.
I was a little concerned that we may have given up more power than I had hoped. We attached the Red River to the track
inspection car and its trailer to check out the pulling power. We had the Red River in neutral, but it is still 4000
pounds and a load to push or pull. The track inspection car pulled it with ease. It is great to have her back running
again. I will probably have to raise the minimum age to operate the TIC now as the potential speed could be an issue.
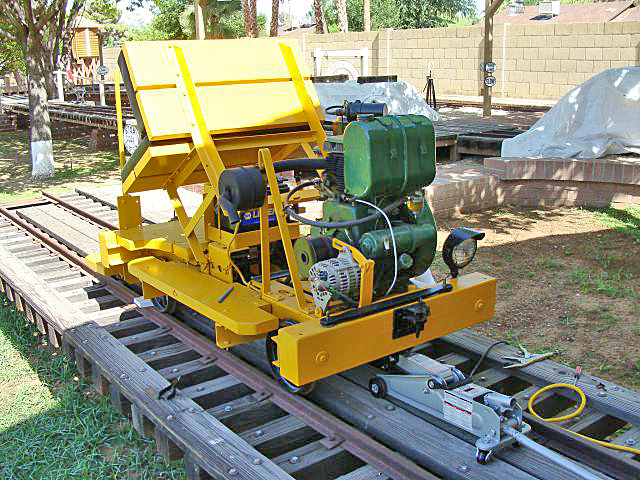 Track inspection car getting a new drive sprocket and chain
|
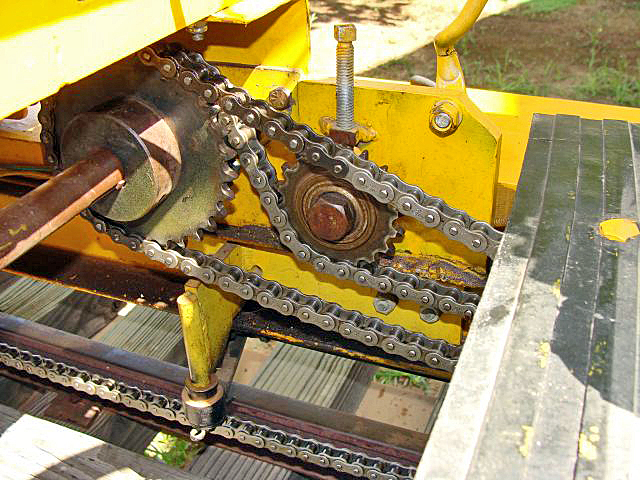 New drive sprocket and chain
|
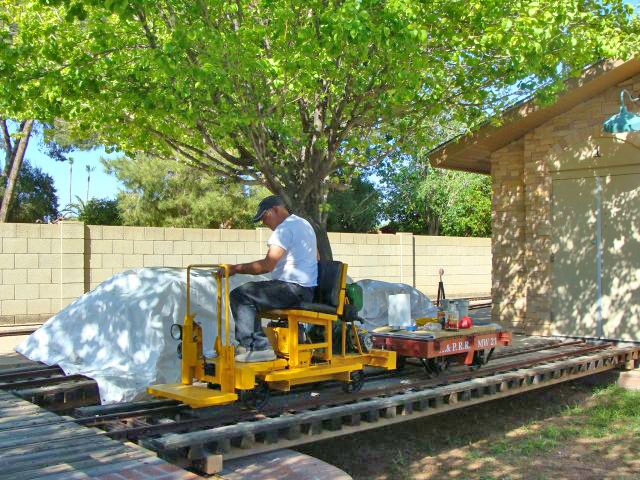 Test driving the track inspection car
|
We were fortunate enough to acquire some parts this month that we needed for our restoration projects. For the G16,
we acquired the observation car rear light housing, OB rear side marker lights and a set of short handles.
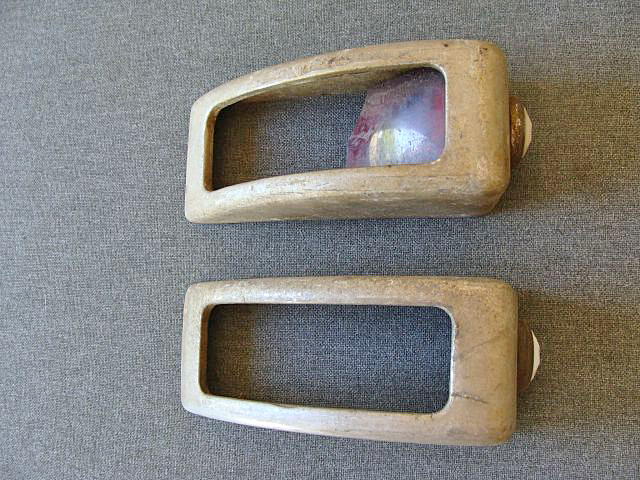 G16 observation car side marker lights
|
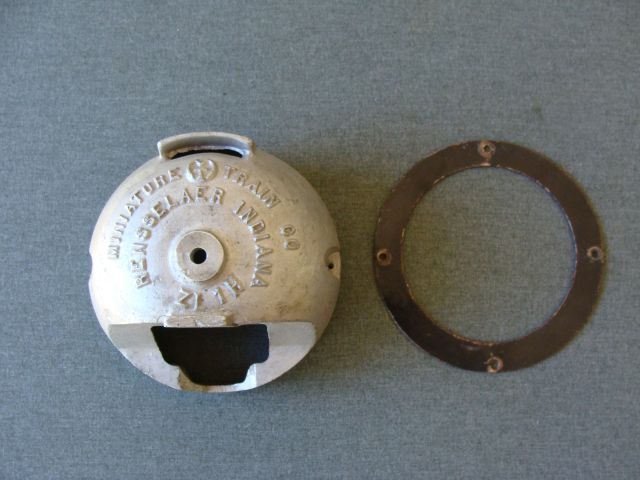 G16 observation car rear light housing
|
For the G12, we acquired: exterior trim handles, posts, the right side engine side marker light, a floor pan for the
engine and are having fabricated the drive line tunnel.
For the E10, we acquired exterior trim handles, posts, circles, a floor pan for the motor and components and side
screens. We are having fabricated a drive line tunnel, brake and throttle handles, a set of trim horns and the
instrument panel.
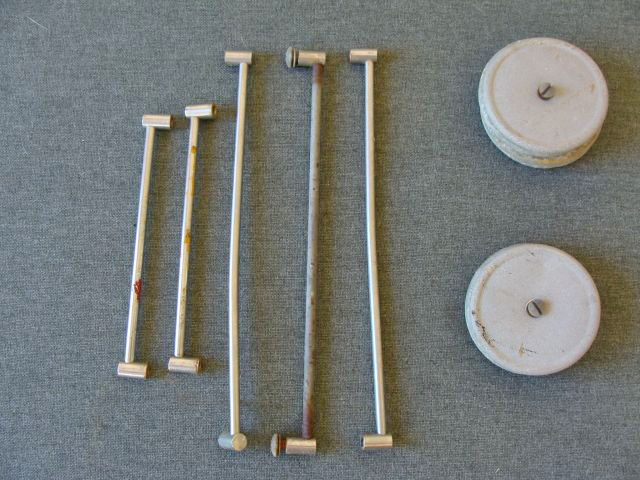 E10 trim handles and circles
|
We have Rick Nairn, Kevin Evans and Ben Morriston to thank for various parts we have acquired for the G16 observation
car end, the G12 and the E10 trains, Jerry Graves, Russ Robinson and Able Steel to thank for sheet metal fabrication
of parts and Mark Skipworth to thank for sending us E10 and G12 photos that were helpful. Thank you to each of you.
Happy and safe railroading everybody!
June
06/09/18
We made some progress on a couple of things this month. The Red River was an easy starting and great running engine the first few years after
she was placed back in service. Over the last couple of years she has become very difficult to start and to keep running. We have replaced
multiple fuel pumps, fuel filters and fuel lines without any long term success. Diagnostic tests indicated the issue is the fuel system and
not electrical.
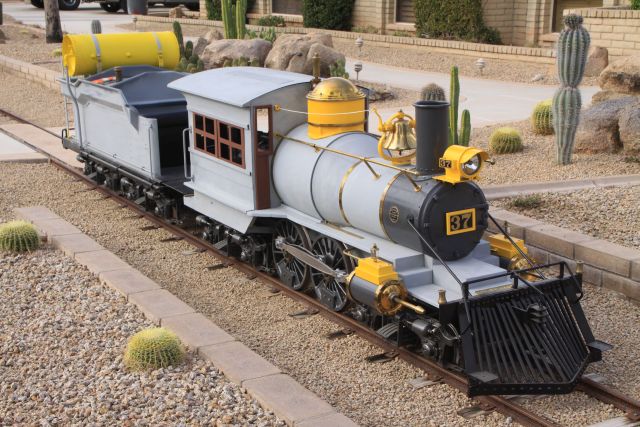 A&P RR Engine Red River
|
This month we completely drained the gas tank of all of its old fuel. It was old, but had Stabil and Marvel Mystery oil in it and the fuel
didn’t appear to be the primary problem. It was replaced with new fuel and the additives – no change. All the fuel lines in the engine had
been replaced within a year or so and I was confident that they were clear and free. We decided to replace the fuel lines in the tender.
As we removed the fuel line from the quick connect couplers that terminate on the back of the engine and front of the tender the problem
became apparent. The inside of the quick release couplers were rusted and crusty and very little fuel could make it way through the blockage.
We replaced both sets of male and female couplers and the engine started the first time it turned over – what a difference! When we had
quick release couplers spec'd out for the fuel system, the representative recommended these and told us these were rated for fuel. It
turns out they were rated for hydraulic oil and not fuel… I should have done my homework too, but didn’t – mistake.
After we had her running well, we fine tuned the compressor output and distribution between suction (vacuum) production for the brake system
and pressure production for the whistle operation. We had it set too high for vacuum and not high enough for pressure. We got it dialed in
and tuned the whistle. It is a still just a little shrill for my tastes, but with the dry air of these units you just can’t get the deep,
rich and moist sound of the whistles on the live steamers. There is no denying that it is loud…
We also performed some diagnostic tests on the Wisconsin in the No. 582. She idles great and smoothly, but under load she has a flat spot and
a small miss that has been troublesome. We ran a compression test and had 110 psi in each cylinder. We looked at timing, fuels, vacuum leaks
and everything we could think of and started taking things apart. We found a few things that we are going to change. The right exhaust manifold
gasket was compromised and will be replaced. We also found at least two and maybe three welding cracks in the intake manifold that we will repair.
It will be next month before we get her back together, but we are cautiously optimistic that we found our issues.
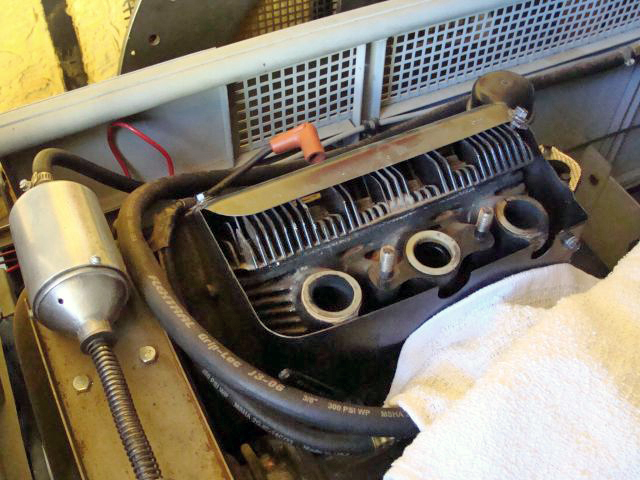 G-16 #582 A Unit motor with manifold removed
|
I ground all the welding tack marks off of the sub-frame that we have fabricated for our B Unit No. 506. I cleaned up all of our welds and got a
couple of good coats of primer on it. Dave and I got it installed in the unit and got the gas tanks reinstalled. We still need to clean up the
Wisconsin motor and touch up her paint and will then get it reinstalled. Hopefully, we will get to that next month.
When we obtained the Flagstaff and Middle Verde motive power and rolling stock almost six years ago most of the equipment had numbers or names,
but most did not have the numbers or names on the actual equipment. We added them to the equipment with vinyl letters. After six years in the
Arizona heat, the letters and numbers are showing the effects by curling around the edges and just don’t look as crisp as they once did. We
are in the process of having stencils made for all the various pieces of equipment and will paint the letters and numbers in place this winter.
There are eleven pieces of equipment that we will convert to painted letters and numbers and some of the work on equipment will be far more extensive
than others. The tank car will be pretty time consuming, but it has a great look and I think the lettering sets it off. It was never called
Mackey Oil in the day, but I made that change once it got here to honor my long-time friends Martha and Malcolm Mackey who got me started in this hobby.
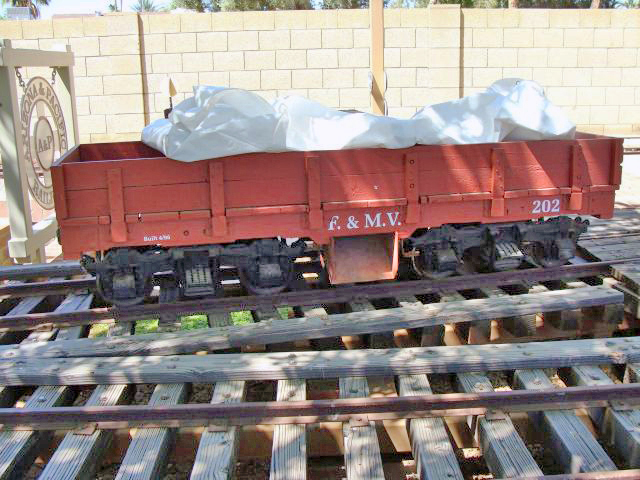 Former F&MV RR rolling stock vinyl lettering is starting to curl
|
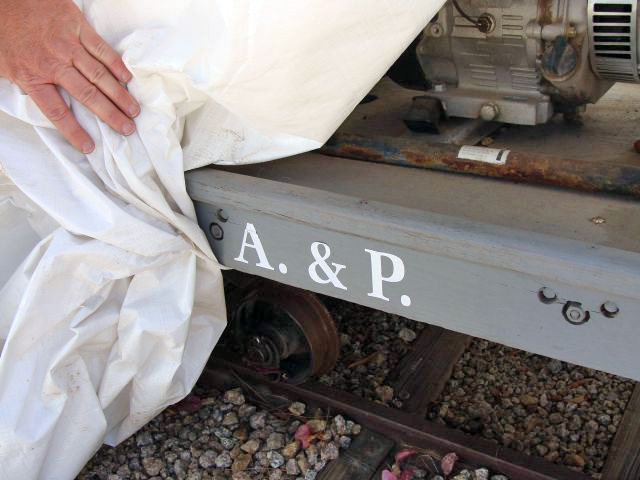 The Arizona heat has taken a toll on the vinyl lettering
|
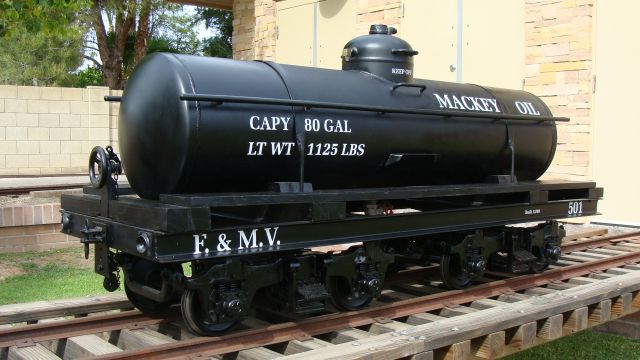 The Mackey Oil tank car
|
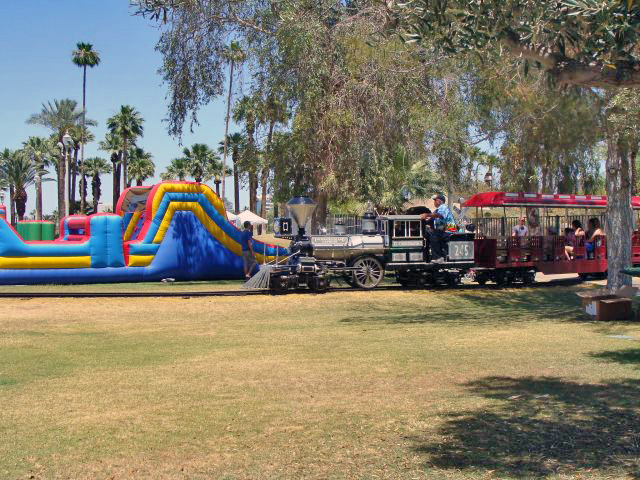
I made it out to Encanto Park on a Saturday during the month and saw their C.P. Huntington No. 245 and three passenger coaches in action. It had
been awhile since I had been out to visit Encanto Park and it was good to be back. The train ride ticket was $6.25. It is a nice ride as the
first half of the journey winds along the lagoon under dozens of mature palm trees, then through a short tunnel and out onto the grassy area of
Enchanted Island where company picnics are generally held. It is a 7 minute ride and the train leaves the station every 10 minutes if there are
passengers waiting to board.
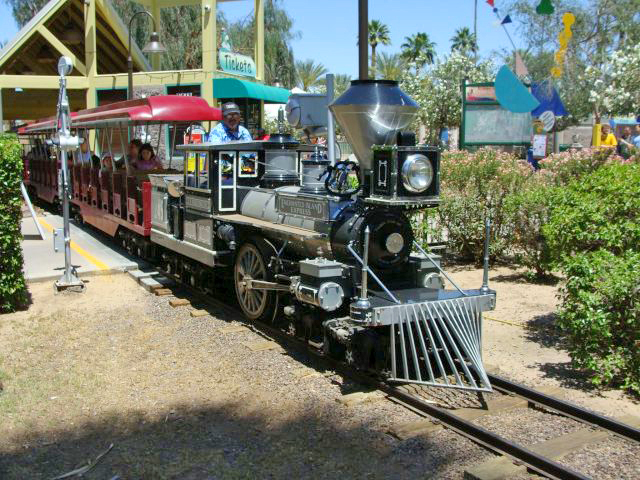 Encanto Park CP Huntington
|
 Encanto Park CP Huntington
|
I trenched for and added a hundred additional feet of pvc sprinkler line this month and added eleven sprinklers. These will help water around the
transfer table, the turntable and trestle no. 5. I am close to being done with additional sprinkler work in the back, but do have one other line
I would like to splice into if I can find the time this summer.
 Turntable during irrigation
|
I hope you are enjoying the articles about our early projects on that A & P that we have been adding this year. There will be another added in late
June or early July on “The Lighting and Loading Platforms” and another likely in August or September on “Completing the Loop Through the Front Yard”.
Happy and safe railroading everybody!
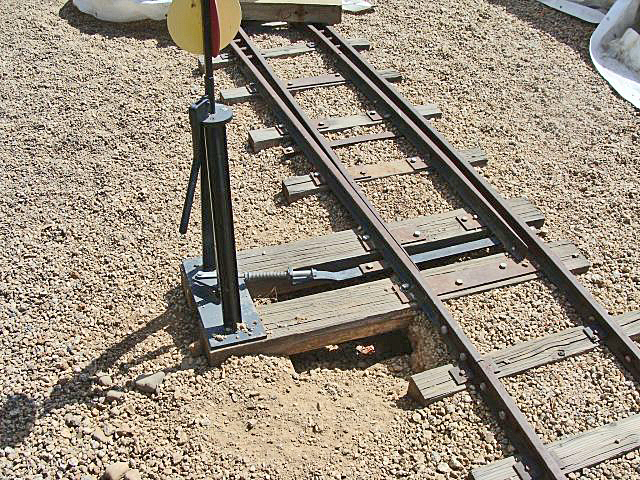 A rabbit has burrowed under the ties to one of our switch stands
|
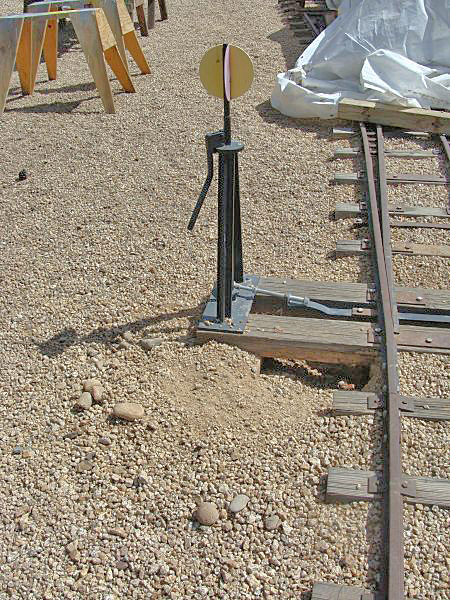 A rabbit has decided to help us with the digging necessary to replace our switch ties
|
July
07/19/18
On a business trip to Manhattan during the month, I had a half day layover in Newark, NJ and was fortunate enough
to get a tour of the nearby Turtle Back Zoo Railroad in West Orange, NJ. As some of you may know, the zoo was home
to two Allan Herschell S-24s back in the day and is currently home to three CP Huntington engines and two sets of coaches.
The morning I was there it rained all morning, but I had the chance to visit with the engine crew as they serviced,
prepped and polished the two engines that were going to be in operation later that day. Two members of the engine crew,
Joey Klein and Tom Rose, had visited the Arizona & Pacific Railroad previously. It was great comparing notes with the two
of them as well as Jack Craig on parts requiring daily servicing and servicing protocols of CP Huntington equipment as
compared to the Allan Herschell equipment with which I am familiar.
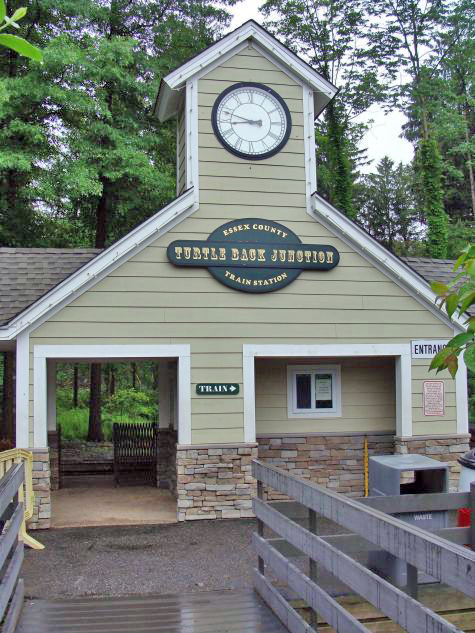 The Turtle Back Zoo Raiload in West Orange New Jersey
|
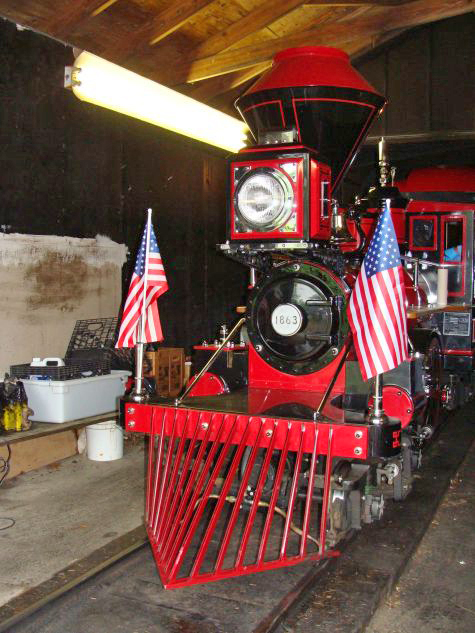 One of the Turtle Back Zoo Raiload's 3 CP Huntingtons
|
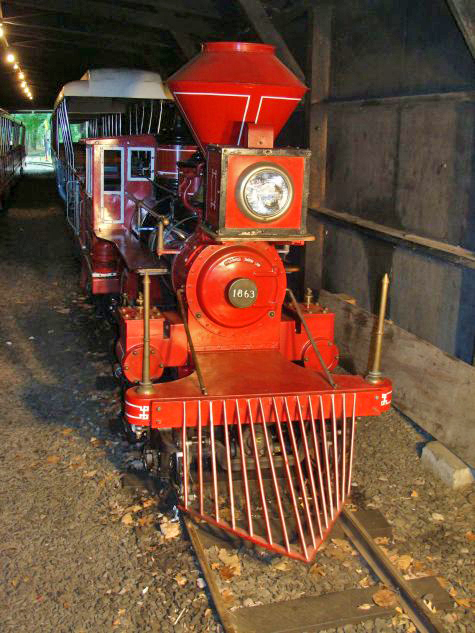 A second of three CP Huntingtons at the Turtle Back Zoo
|
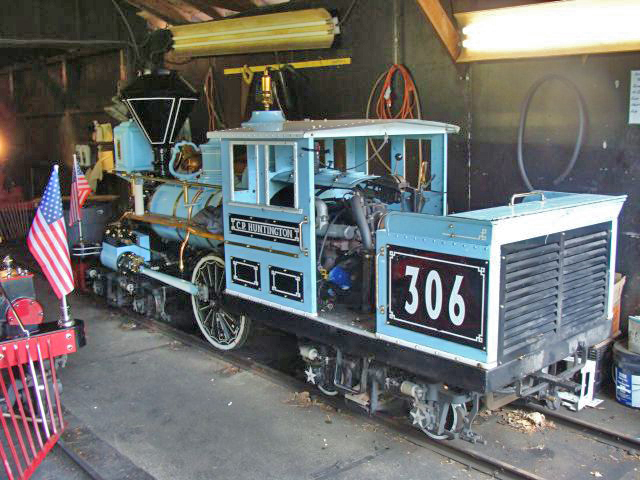 Turtle Back Zoo Raiload's CP Huntington #306
|
The location of this railroad is amazing! It is heavily wooded and in a long stretch runs along a massive water reservoir
with jogging path and rental paddle boats. Opposite the water reservoir, the giraffe enclosure can be seen as two of the
majestic animals had ventured out in the rain during my brief visit. The Turtle Back Junction station building is nicely
themed and one of the original structures (1963) of the railroad. Many thanks to Caitlin Sharp, Joey Klein, Tom Rose and
Jack Craig for allowing me a brief look behind the curtain at the TBZ Railroad. If you haven’t been to this zoo and
railroad yet you need to add it to your "must visit" list. It really is spectacular! The train ride is free with
admission to the zoo.
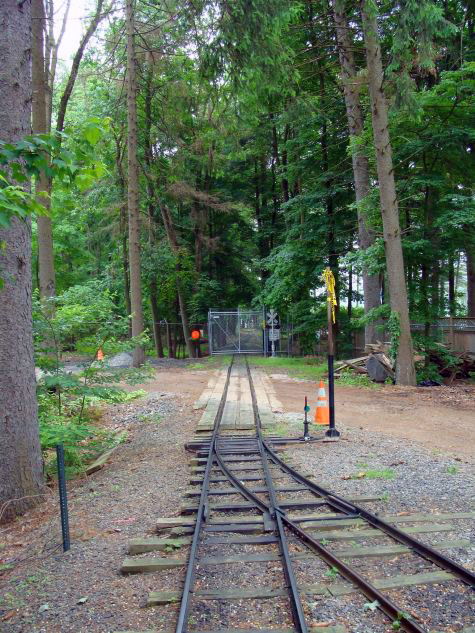 The tracks pass through scenic wooded areas
|
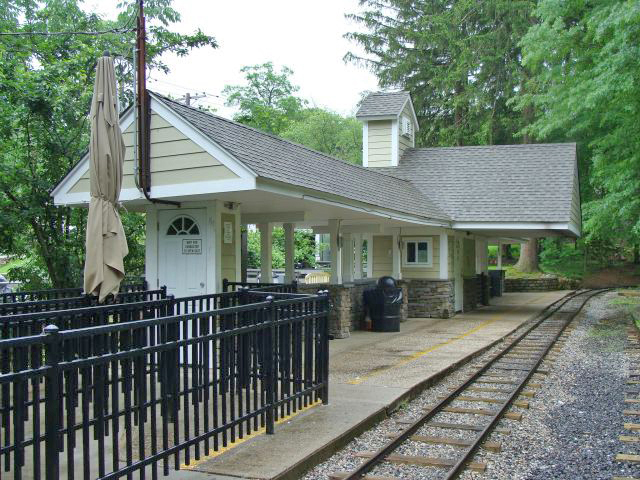 Turtle Back Zoo Loading Platform
|
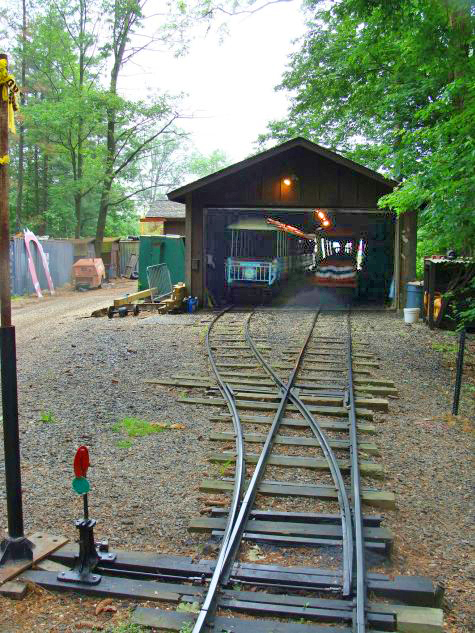 Car Barn
|
In the interest of full disclosure, the only parts of New Jersey I had seen before were the heavily urban/industrial/decaying
areas between the Newark Airport and along the Penn Lines into Manhattan. I had no idea what I was missing. I was really
impressed with the rolling hills, heavily wooded areas, interesting architecture and rich history of the area.
Note to self – plan more layovers on business trips and get away from the airports! I am far from a foodie, but if
you are near Fairfield, NJ around lunch time, the Versailles Diner on Route 46 gets a big thumbs up!
Our long time friend and fellow railroad nut, Russ Robinson, is the owner of the Trinity Alps Railroad in northern CA.
He is also a master machinist. He is retired, but makes custom light weight bicycle parts for elite racing cyclists all
over the world. He created a replacement set of G12/E10 horns for us for our E10. I had a set of G12 horns I sent him to
duplicate. So we now have a set of horns for both the G12 and E10 restoration projects. The only difference is that Russ
didn’t have any aluminum material handy for the hardware that connects the horns together so he made our new one out of
lightweight Titanium. How cool is that?
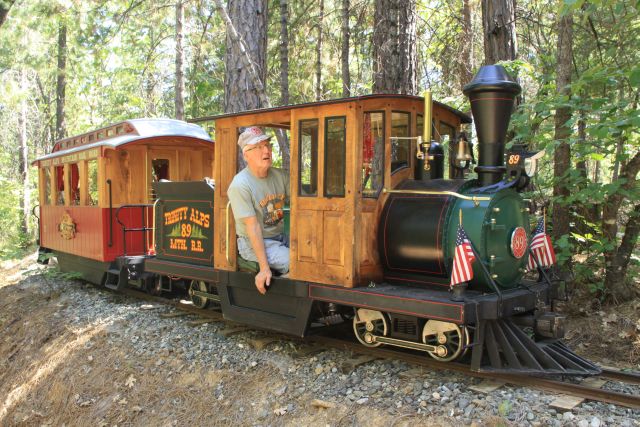 Russ Robinson's Trinity Alps Railroad
|
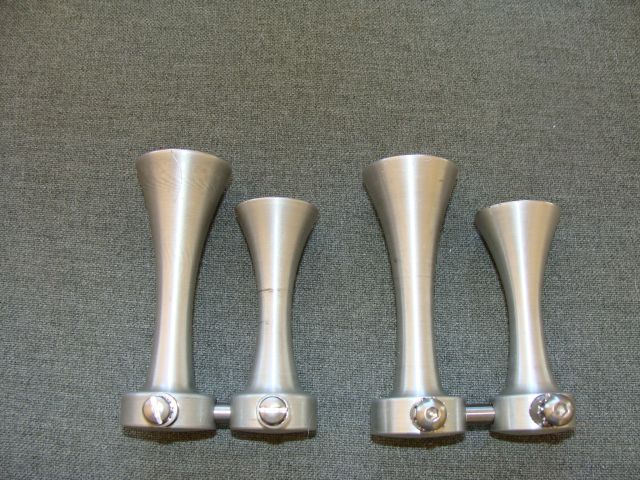 New horns for our E10 and the original G12 horns
|
Russ also made us two hood lock knobs (G12-237). The knob was used on the early G16s as the lock knob for the tool box
door under the operator’s seat and on the G12 and E10 as lock knobs for the latch that secured the hood shut. We had one on
our G16 that he used as the pattern for two new ones. The original one is made of copper while the two new ones we had made
from brass. The G12 and E10 hood lock knobs are on the top of the hood and very visible so I made the decision to go with
brass instead of copper. In my opinion, brass is just a prettier metal and has more of a railroad feel. Purists may feel
this makes the projects restomods instead of restorations. Oh well.
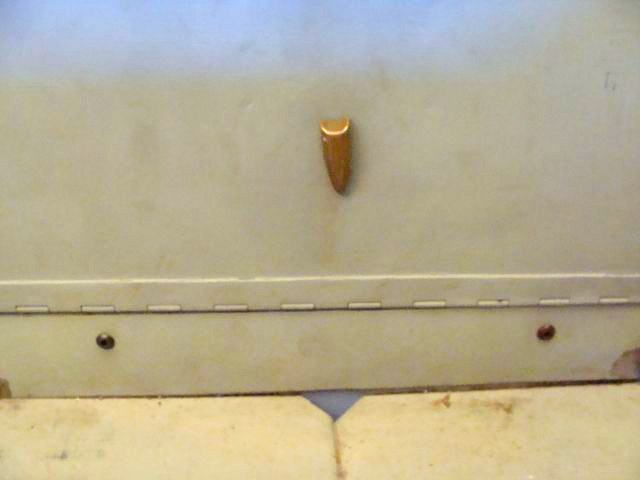 G16 tool box lock knob
|
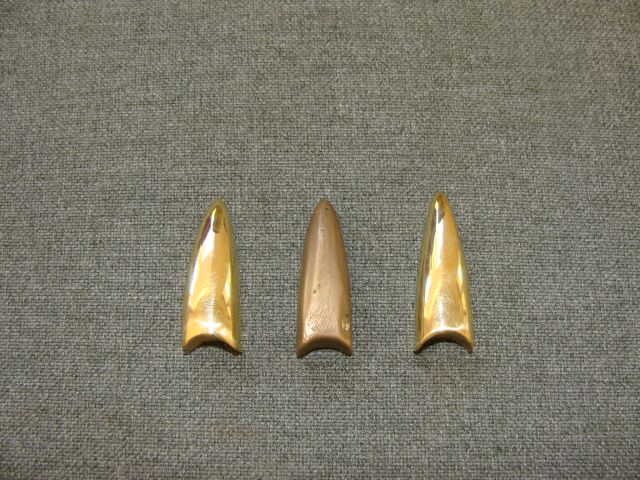 New G12/E10 hood lock knobs & G16 tool box lock knob
|
Last month we completely drained the gas tank of the Red River of its old fuel. It was old, but had Stabil and Marvel Mystery
oil in it. This month we did the same thing with the Phoenix and the Tucson. Their fuel was also replaced with new fuel and
the usual additives. Unlike the Red River, the inside of the quick release couplers on both of these engines were in good shape.
I am giving a huge shout out here to a wonderful lady I have never met except via email, Julie Dojahn. She spent her early
childhood in Indianapolis, IN and had the opportunity to visit Little America Kiddy Land there many times with her family.
One of her favorite rides was riding behind our engine No. 582 on the train ride there. Julie, an amateur historian, came
across our website and saw we are working to restore No. 582 and looking for information on Little America. She has forwarded
us a brief history she has compiled on the park, some newspaper clippings from the Indianapolis Star one of which shows No. 582
with her number board clearly displayed in April of 1955 and a family video showing No. 582 running at the park with her and her
mother onboard in 1959. Many thanks to Julie and her husband for all the time and effort spent to get the information and computer
capture of the 8mm film to us. There are many wonderful people out there; sometimes we are lucky enough that they find us.
You can view Julie’s work here: Little America Amusement Park
Our friend and master engine mechanic Jerry Graves was over one Saturday this month. We got the engine reassembled on the No. 582.
Not much change in the way she runs. We still have a flat spot and still have some smoke from the right cylinder bank. The compression
is fine on cylinder 2, but we are starting to suspect an oil ring may be compromised. It is too hot to look into that this time of
year, but it will be a winter project.
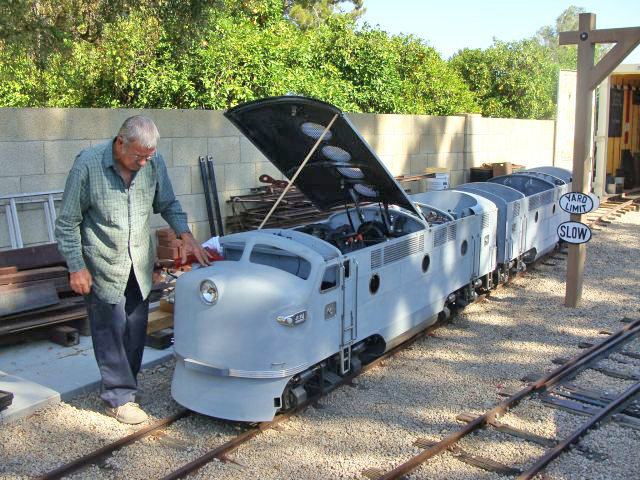 Jerry Graves and G16 #582
|
With sheet metal fabrication, it is a big step going from cardboard to paneling and then another big step from paneling to sheet
metal. We got some sheet metal work done this month. The new seat for our G12 is pretty much completed, it just needs a little
more finish work and will then be ready to weld in place when it cools down in the fall. I also roughed in the sheet metal dash
panel for our E10. I still have to fabricate the mounting brackets and cut the slits to accommodate the hood, but it fits and
looks pretty good.
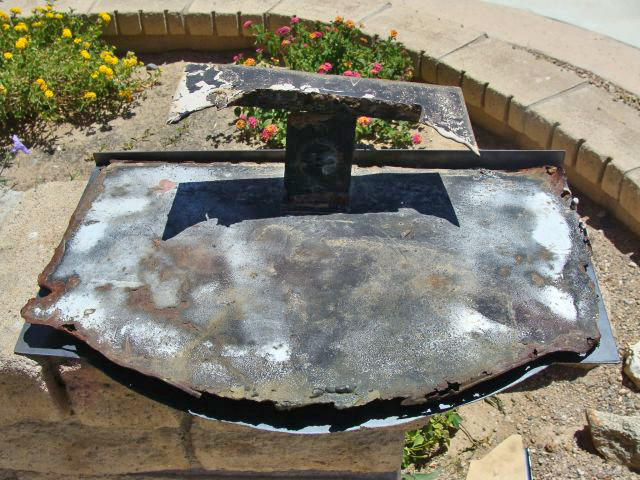 Old G12 seat
|
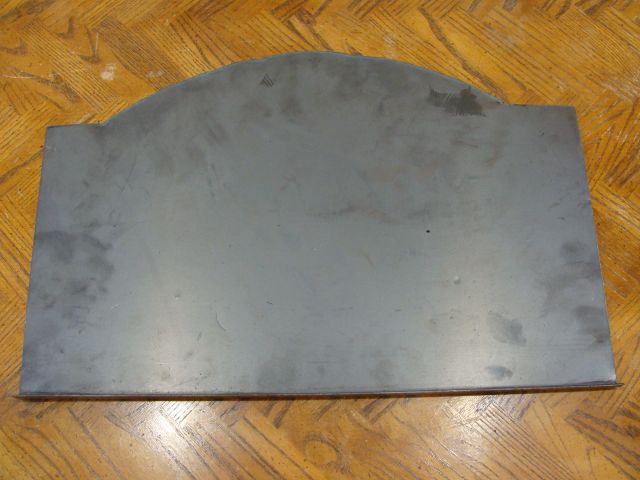 New G12 seat
|
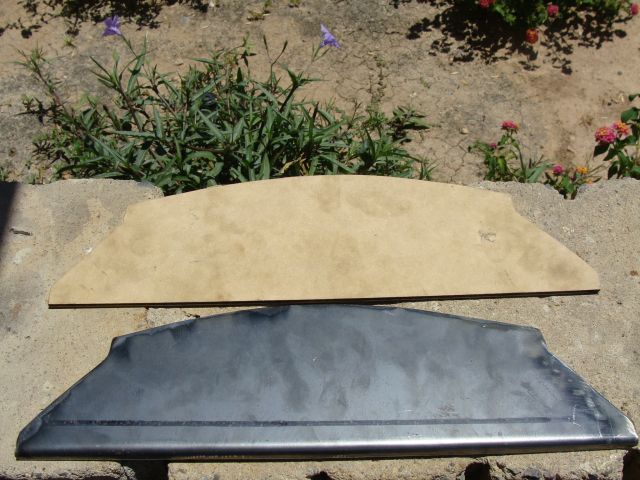 E10 dash in sheet metal
|
Happy and safe railroading everybody!
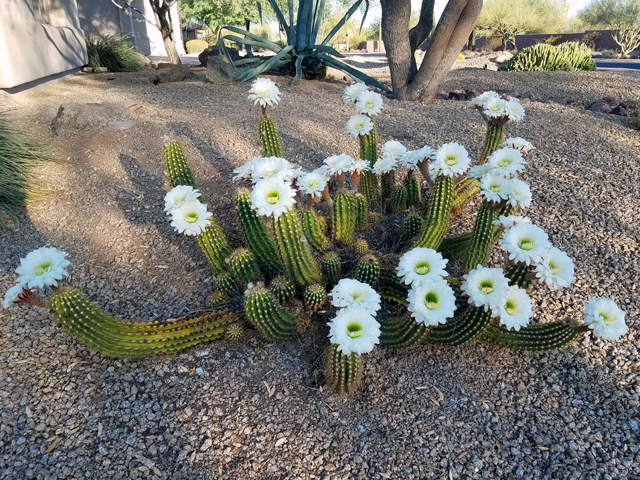 Summer blooms on an Argentine Giant cactus
|
August
08/19/18
We started the Tucson this month and checked the timing which was pretty close. Before we could get her started, we had to replace the battery.
The weather out here is tough on all batteries. Whether in our trains or cars and trucks out here, you can count on the batteries lasting through
two summers. The third summer you are on “borrowed time”.
Our ultimate goal is to have both the G12 and E10 engines restored and acquire observation car bodies to go with each. As E10 power trucks are
about impossible to find, the E10 will sit on G12 coach trucks. We had 2 G12 power trucks and 2 coach trucks that have been gone through and
we had a hodge-podge of other coach truck parts, but not nearly enough or the correct parts to complete two additional trucks. Our friend
Rick Nairn was great and located the parts we were missing to complete two more coach trucks. I purchased new hardware and we assembled the
basic components. Next month, we will work on getting the axles, wheels, new bearings and new seals installed.
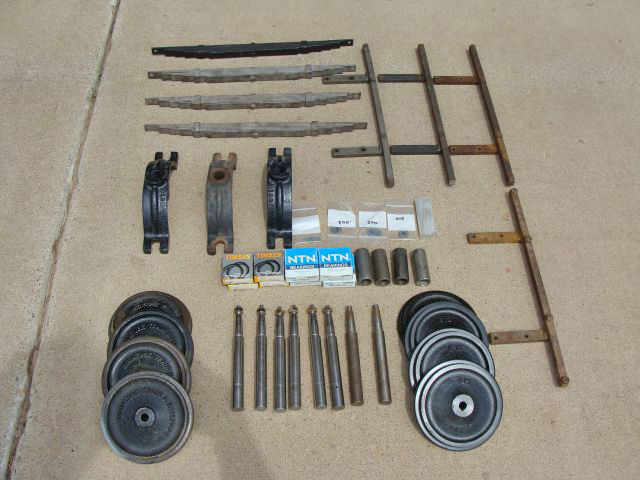 G12 truck components
|
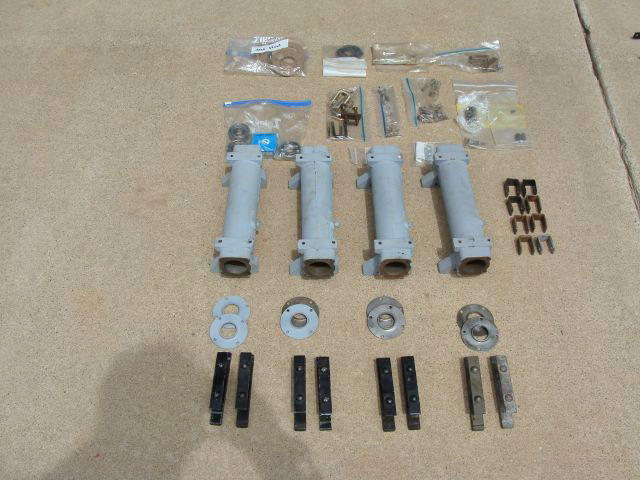 More G12 truck components
|
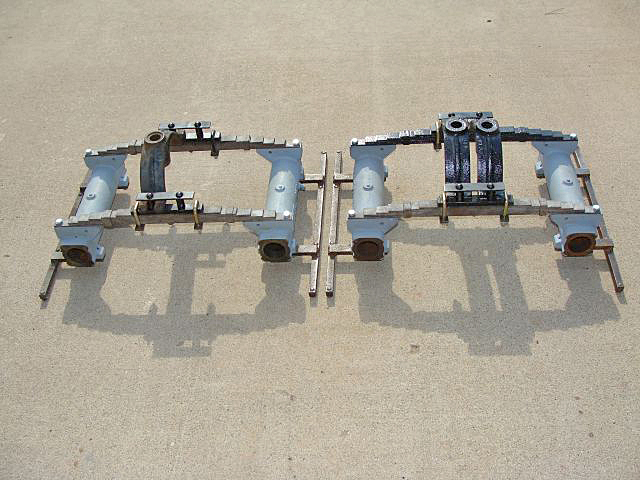 Partially assembled G12 trucks
|
We removed the nose from our E10. All of the bolts came out reasonable easy after liberal use of WD-40; I was a little concerned going into
that project, but it turned out fine. The nose fits in my bead blasting cabinet and as time permits latter this year, I will bead blast it
clean of rust and paint.
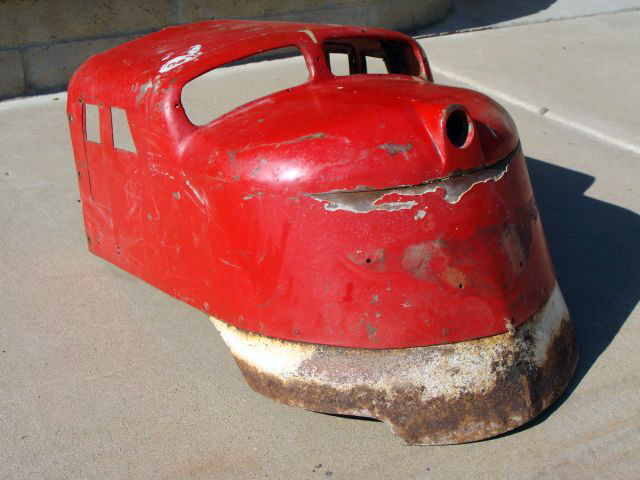 E10 nose section
|
A few weeks ago I bought replacement grilles for the E10. We looked all over and couldn’t match the original screen perfectly, but I found
some material that is close and definitely has the same feel to it. I think it will work fine. I had a friend of ours shear them to size
for us and I just picked them up this month.
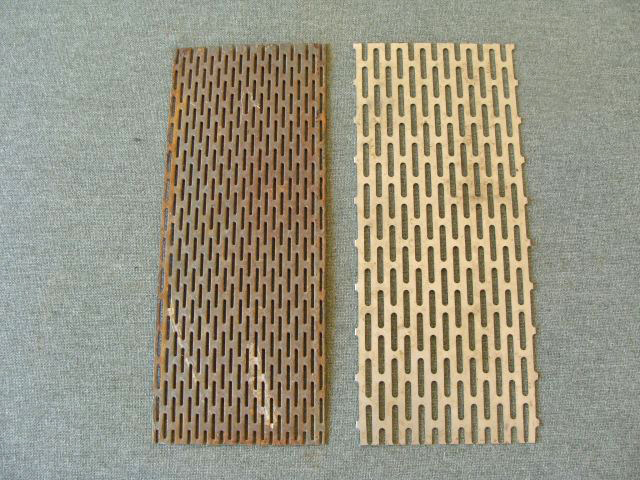 Replacement grille next to the orignal
|
The sheet metal driveline tunnel of our G12 had some significant rust and we didn’t receive a tunnel with our E10. I had replacements fabricated
and have seen photos, but just haven’t had time to travel across town this month to pick them up. I also had brake and throttle handles machined
for the E10 that will match the originals. I am told they are done, but haven’t seen or picked them up either. I hope to get that accomplished
next month.
Frequent visitors to this site will remember a few months ago we determined that our B unit was no. 506 based on the distinctive blue color house
paint that was on her and the same color of paint and drip pattern on a MTC builders plate that we purchased. We knew it was an early production
unit based on several factors, but the paint drip pattern nailed it. Shaun Hardte sent us photos of an A unit that he owned that was covered with
the same color blue paint. That A unit is now owned by Rick Nairn. We believed it to be A unit no. 506. The blue paint color matches and the sand
box doors are the smaller size and not in exactly the same place as on the later MTC units – just as they were on our B unit.
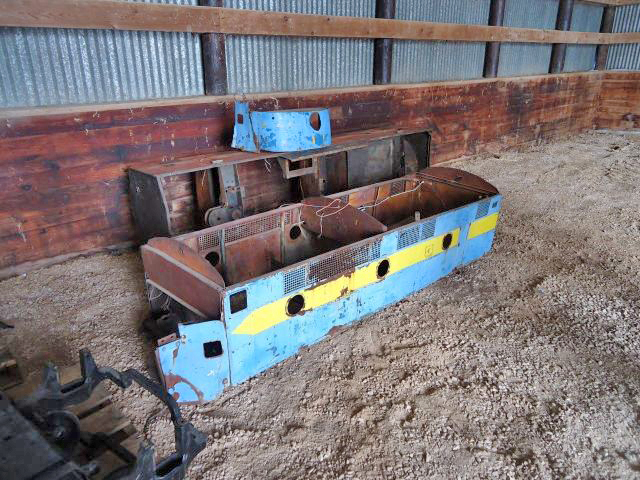 G16 #506 A Unit
|
Rick definitely confirmed our suspicions and sent us this note. “Well I was looking at the engine pretty close and initially all I could find was
blue paint in two different shades and some yellow. But then, lo and behold when they took the engine tag off they left three drive screws and a
good big patch of dark green that had been under the engine tag. The original color was green”. We appreciate Rick taking the time to confirm this
for us.
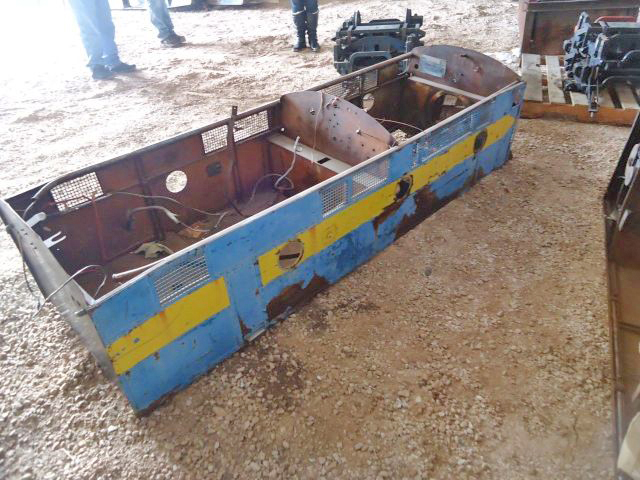 G16 #506 A Unit
|
There were also two coaches painted that same color blue that are now in Pennsylvania. We believe they were coaches from train no. 506. We have
one of the coaches from no. 506 (also one from no. 504) at the Arizona and Pacific. I’m not sure if they operated with four or five cars at
Riverview Park in Chicago, but there is at least one more coach from no. 506 out there somewhere. It would be interesting to know where she is
located. If anyone knows, please give us a heads up!
In a project that dragged on forever as other projects kept coming up, I finally got the second patio chair sanded, sealed, repainted and reassembled.
The little table that sits between the two chairs was also sanded, primed, refinished and the plastic end caps were replaced. They look pretty
good – about time.
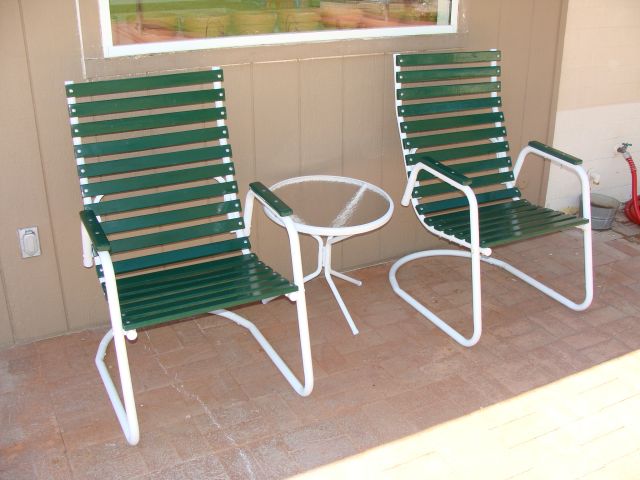 Both patio chairs have been refinished
|
The weather this month was hot, but that was expected. Typically, we get a handful of bad dust storms (haboobs) in July and August. We had seven in
July alone and three violent dust storms in the past two weeks. In the middle one, the winds were 60 plus mph with gusts beyond that. I had shingles
on the ground in the back yard, but they weren’t the right color for my house or any of the immediate neighbors… Trees were down and 100,000 people
were without power for several hours which is problematic when it is 110 degrees.
The patio tables with umbrellas on my patio each have a fifty pound base plate and four 50 lb sand bags on the tables to keep them from blowing over
in the wind. It didn’t matter, as two of the three were blown over and redistributed around the patio. We will have some repairs to make once summer
is over.
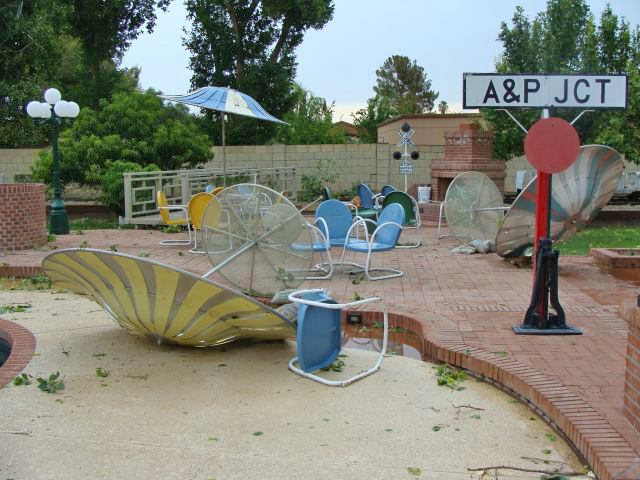 Strong winds toppled the sunbrella tables
|
The swimming pool looks like a pond after these storms with thousands of leaves, debris and branches in the water. It takes about three hours of work
to get the pool cleaned up and back in operating condition. I share this because that is three hours that doesn’t go toward railroad projects.
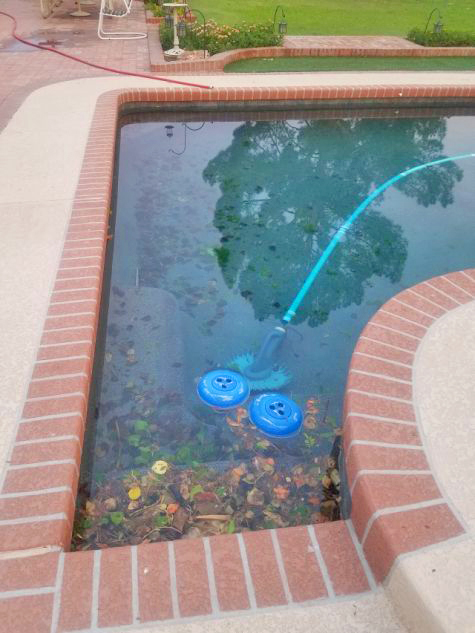 Storm debris in the swimming pool
|
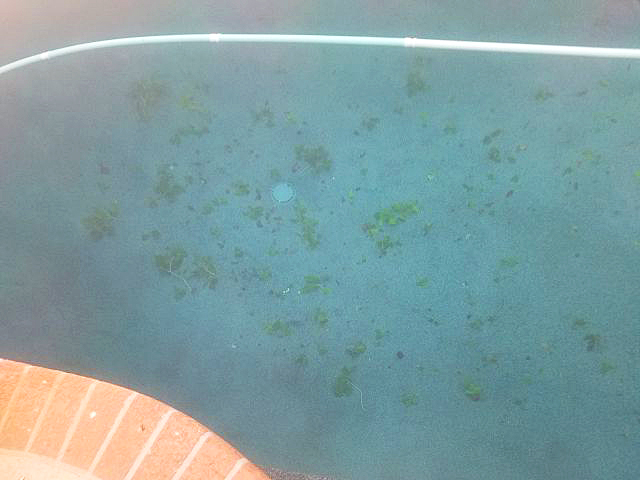 More storm debris in the swimming pool
|
The railroad avoided significant damage. A large branch was broken off of one of my ornamental pear trees and became wedged up against the A & P turntable.
The chainsaw made fairly quick work of that problem. One of my neighbor’s Cottonwood trees had a large branch snapped off that is still hanging precariously
above our fence. He reportedly has a friend coming to remove it – I hope he knows what he’s doing… Dozens of smaller branches were scattered about the
right of way that we had to clean up and hundreds of pine cones were on the ground on the other end of the property.
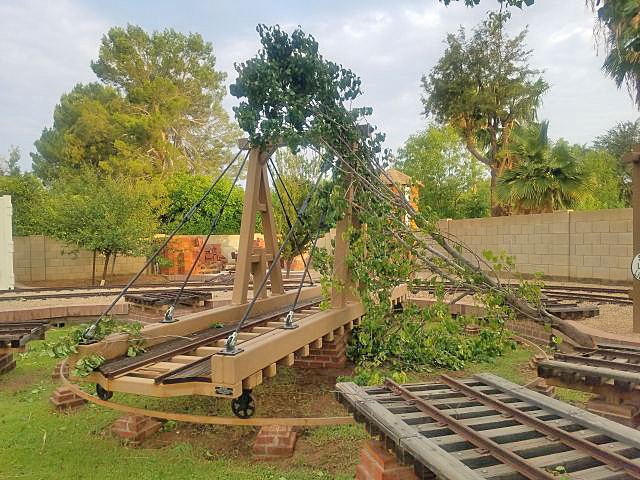 A large broken tree limb hit the turntable
|
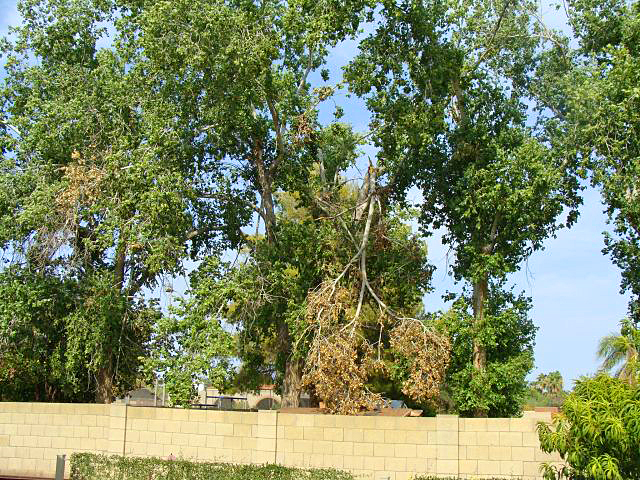 A broken cottonwood branch hangs precariously
|
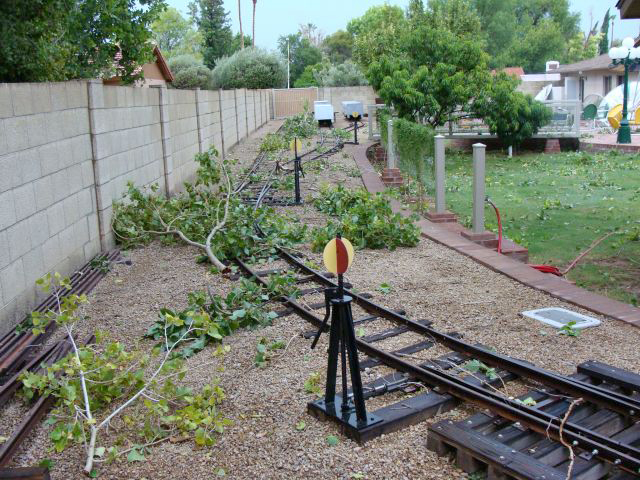 Broken tree limbs along the A&P right of way
|
I had a tough 10 day stretch this month when the washing machine gave up, the garage door opener quit working, the pool filter backwash valve malfunctioned
and needed rebuilt, I rear ended a truck with a trailer hitch protruding about a foot out the rear with my truck requiring a new front bumper assembly and
the right rear brake caliper on my truck failed on a different day. I just had to laugh and go about doing what needed done, but our railroad time was pretty
limited this month.
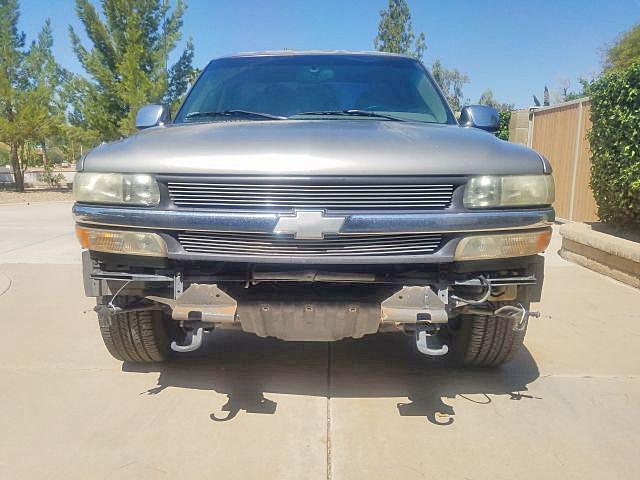 We removed the damaged front bumper
|
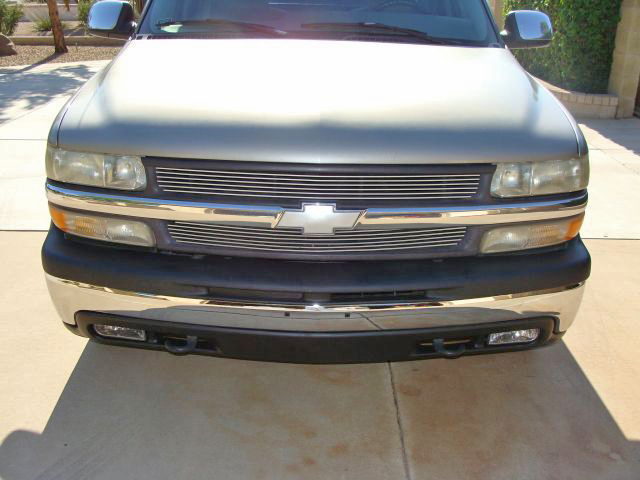 A new bumper assembly was installed
|
Happy and safe railroading everybody!
September
09/15/18
We got a few things accomplished on our no. 506 B unit this month. I have been digging through boxes looking for parts for a friend in NJ and started
setting some parts aside that we will add to our B unit. I found the mounting bracket for the generator, the mounting bracket for the vacuum pump and
the base plate for mounting the vacuum pump. I also found the vacuum throttle control that mounts in the engine compartment. We got the mounting brackets
bolted in place and made the compressor plate pivot pin out of some material that we had here in inventory.
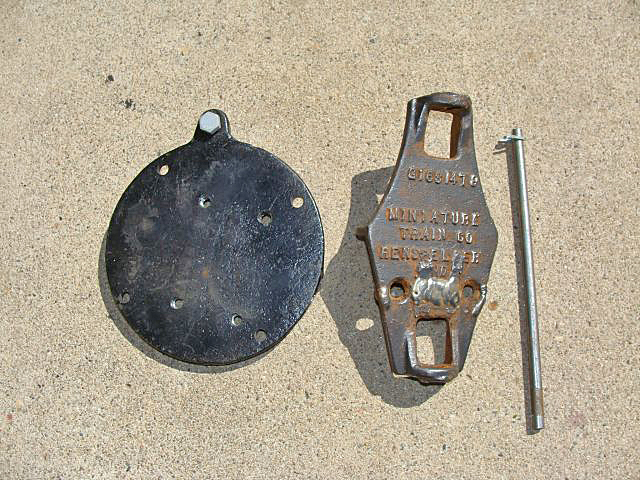 Base plate and mounting bracket for the G-16 B unit vacuum pump
|
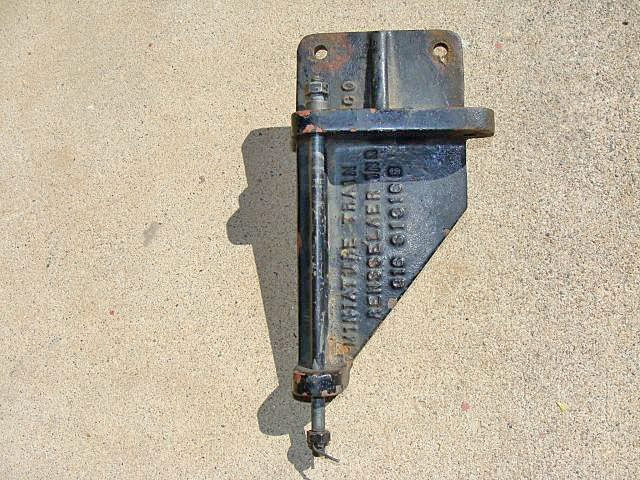 Mounting bracket for the generator on the G-16 B unit
|
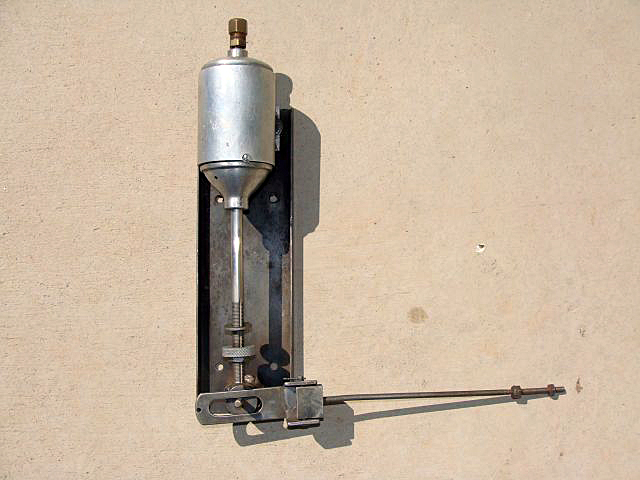 Vacuum throttle control for a G-16 engine
|
A few months ago someone had inquired if I had a vacuum pump mounting plate and I thought I might, but couldn’t find it anywhere. If I could have
located it I might not have it now, in any event I stumbled across it this month when looking for some other parts and we will add it to our B unit.
I am still looking for an actual vacuum pump if anyone out there has one give us a heads up. It doesn’t need to work, just needs to be period correct.
We have also been working on plumbing our B unit. We have been chasing down fittings and brackets and bending and flaring tubing off and on for a
few days. Hopefully we will have everything dry fit next month and get it soldered in place.
The brakes are plumbed so that the brakes on all cars are applied from the A unit as at this point “junior engineers” sit in the B unit and I
don’t want brakes or throttle being applied from back there. I am plumbing the B unit so that if an operational Wisconsin VF motor were acquired
later on, that motor would operate independently from the one in the A unit and would essentially be the A and B double heading. If I make the
B unit operational later, I can make a quick change and have the B unit brakes applied from the B unit. If the B unit was operational, I can remove
the ignition key to keep “junior engineers” out of trouble. With the little operation that we have here, I just don’t need the extra horsepower
so I am not sure if I will make it operational or not… we’ll see. I have plenty of other projects out here…
Repeat visitors to this site will remember that we determined that our B unit was no. 506 based on several clues including the distinctive blue
color house paint that was on her and the same color of paint and drip pattern on a MTC builder’s plate that we purchased. We have passenger
car no. 4 from no. 506 (also one from no. 504) at the Arizona and Pacific. A couple of months ago, Shaun Hardke advised he had sold what may
have been A unit no. 506 to Rick Nairn a few years ago. Last month, Rick confirmed that he owns the no. 506 A unit. He also stated that two
coaches painted in the same blue house paint are now in Pennsylvania. This month, Neil Boreczky advised that passenger cars nos. 2 and 3 from
train no. 506 are awaiting restoration at the Eden Springs Railroad at the House of David in Benton Harbor, MI. Thank you for the photos Neil.
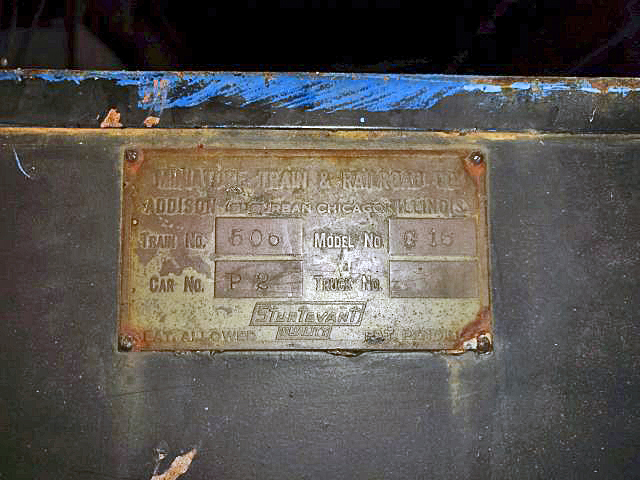 Builder's plate for G-16 506 coach number 2
|
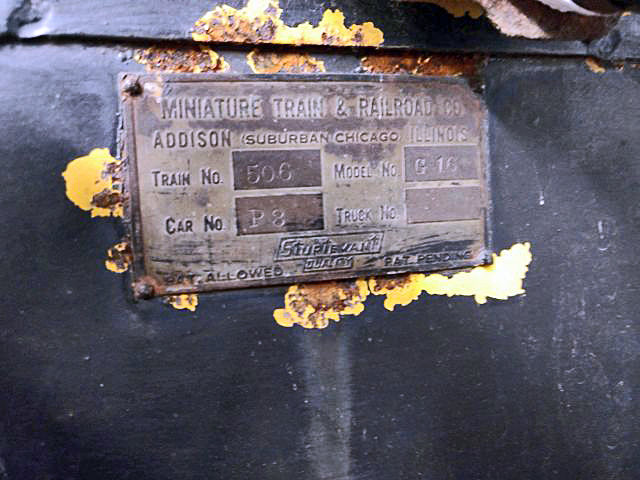 Builder's plate for G-16 506 coach number 3
|
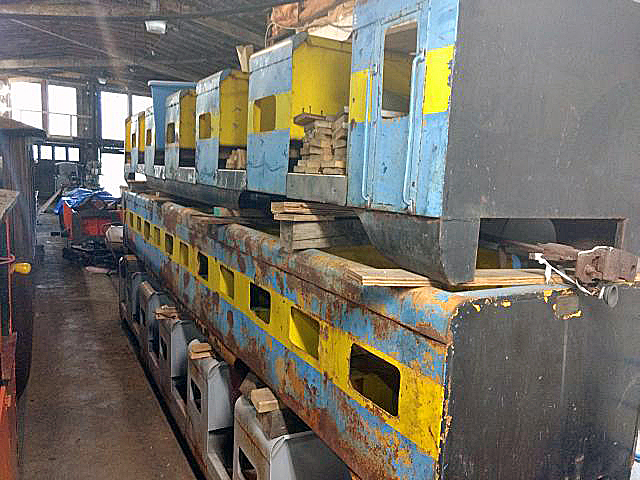 G-16 506 coaches number 2 and 3 awaiting restoration at the Eden Springs Railroad in Benton Harbor, Michigan
|
I’m not sure, but suspect they operated with five passenger cars at Riverview Park in Chicago; we have accounted for no. 506 power units A and B,
passenger cars 2, 3 and 4 and have it on good authority that two additional cars are in Pennsylvania. Perhaps these are passenger car 1 and the
observation car. If anyone has additional information on the passenger cars in PA, please give me a heads up and I will share with everyone.
Thank you to Joey Klein, Shaun Hardke, Rick Nairn and Neil Boreczky for helping us piece all this information together over the past few months
and for the photographs all have provided. For those of you only interested in operation and restoration of these trains, thank you for your
patience; the history of these trains is very interesting to some of us too.
I traveled to Anthem, Arizona this month and rode its Daisy Mountain Railroad. Anthem is a planned community about 25 miles north of Phoenix.
The railroad is a 24 inch gauge railroad located in the community park just off Anthem Avenue. The beautiful landscaping and the wildlife are
the highlights of this park railroad. Featured on the DMRR are a trestle across a small lake, a tunnel through a faux rock outcropping, lush green
landscaping, several sparkling water falls and an eye-catching playground for young children. It had been several years since I last rode this
railroad and a caboose has joined the three original coaches.
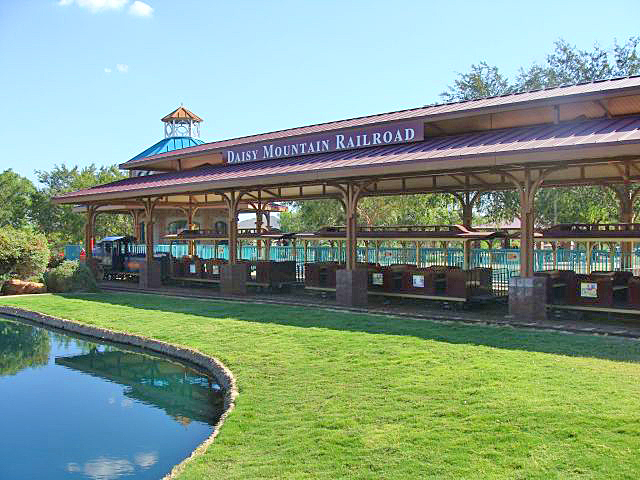 The Daisy Mountain Railroad in Anthem, Arizona
|
I arrived a few minutes before 3:00 P.M. as I had other commitments earlier in the day. Three o’clock is the worst time for operating the train
as the morning park crowd is getting ready to leave and the evening group isn’t there yet and at 3:00 it is still plenty hot out here this time of
year. I was wearing one of my Arizona and Pacific Railroad tee shirts and it was quickly noticed went I went to the depot to purchase my ticket.
 Ticket to ride on the Daisy Mountain Railroad
|
I was the only passenger with a ticket to ride the three o’clock train. The operator could not have been any more accommodating. She offered to
run the train for just me. I declined and volunteered to wait until 3:30 with the thought there would be more paying passengers by then. She and
I engaged in several minutes of conversation about park train operation during which she explained that they were looking to hire another engineer
to operate their train and she offered me the position. If I was retired I would have jumped at the opportunity as the location is beautiful and
she could not have been nicer. I am still a few years away though…
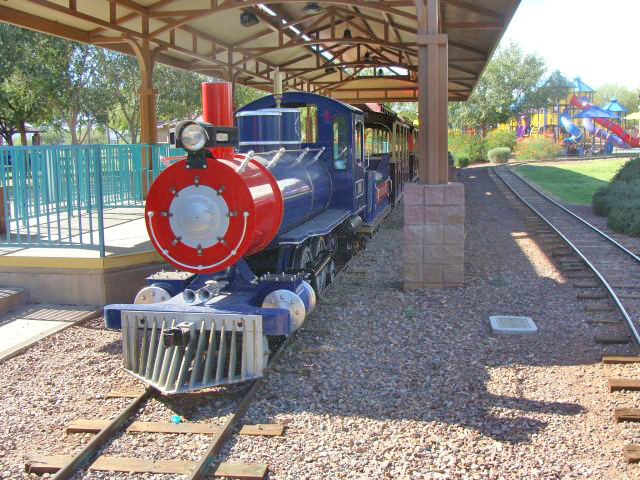 Daisy Mountain RR engine at the station
|
The 3:30 train still only had seven passengers, but it was a leisurely and thoroughly enjoyable ride through the park that lasted about 12 minutes.
The ticket price was $4.00 for me ($3.50 for Anthem residents) and ticket booklets are available and provide savings over individual ticket purchases.
The 4:00 train had close to fifty passengers and the park was starting to fill up again.
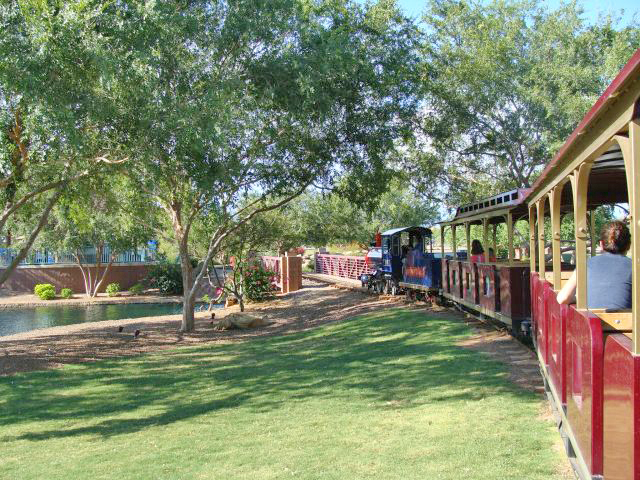 Riding the Daisy Mountain Railroad
|
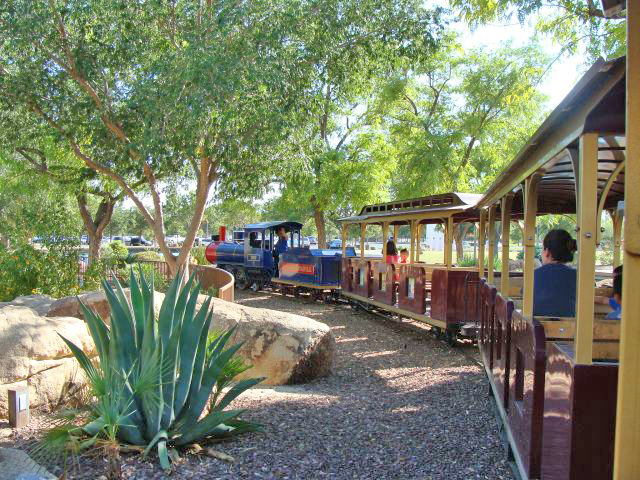 Enjoying the train ride at Anthem
|
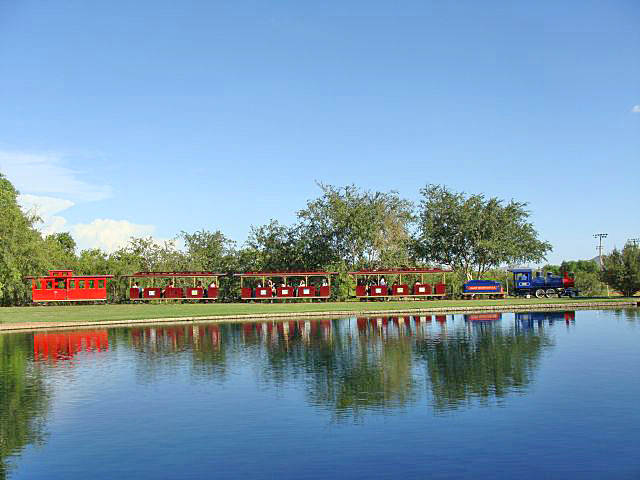 A caboose has been added to the consist since the last time I rode
|
As we boarded the train and awaited departure, turtles could be seen in the pond to the left of the loading platform. One was on the shore and
the second was in the water nearby with just its nose above the waterline. I saw several rabbits in shady areas on my lap around the park.
The operator explained they have an owl that returns year after year and has her babies in a Sahuaro cactus not far from the railroad tunnel.
On occasion, Javelina are seen in the park after dark and last May Arizona Game and Fish had to remove a young black bear that began frequenting
the park and adjacent residential neighborhood.
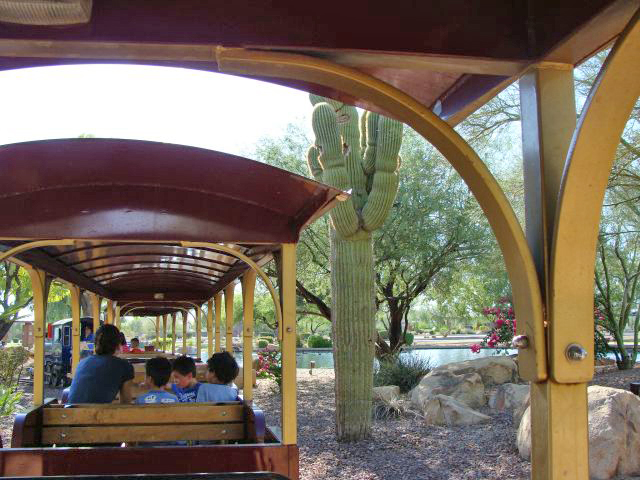 Approaching the lake
|
As with any of these park railroads, ticket prices and the days and hours of operation are subject to change; contact the operator directly for
current information.
Happy and safe railroading everybody!
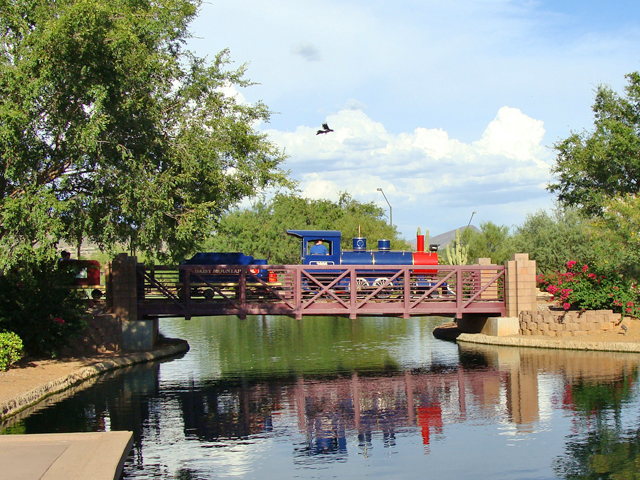 A large bird photo bombs the Daisy Mountain Railroad engine as it crosses the trestle
|
October
10/15/18
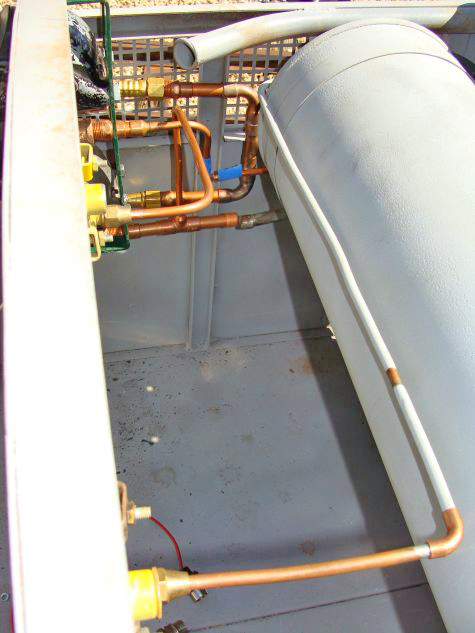
We have continued in our efforts of dry fitting all the plumbing on the B unit. We have been chasing down fittings and brackets and bending and flaring tubing off and
on for several weeks.
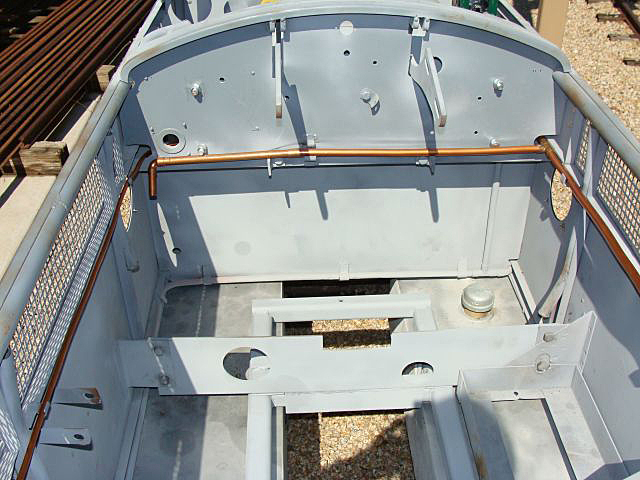 Some of the roughed-in G-16 B unit plumbing
|
 More G-16 B unit plumbing
|
I finally tracked down a source for a couple of unusual fittings that we needed and received them a few days ago. We also located a fitting to go
from the vacuum tank directly to ½ hose that we have been seeking. We are very close to having the dry fitting completed. We installed a couple of used Stewart Warner
vacuum gauges in the instrument panel so that we could finish the plumbing to those locations. In October, we will start soldering all the joints together and looking for
any leaks.
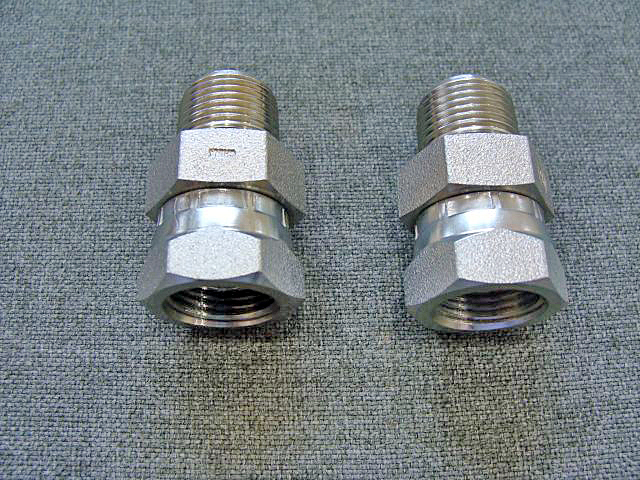 Fittings for the throttle and brake valves
|
The instrument panel on our B unit no. 506 will be pretty impressive once it is finished. It has eleven gauges, ten switches and pushbuttons, choke and the two hand valves
are mounted in the dash. I have seen several variations of the B unit instrument panel with varying numbers of gauges and location of switches. This is one of the earlier
units and is pretty amazing with all of its instrumentation.
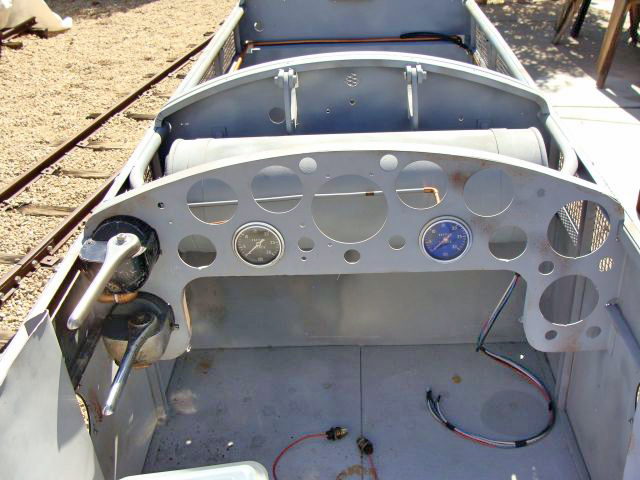 G-16 B unit instrument panel
|
We located all the Stewart-Warner gauges a few years ago and had them here for awhile. We have been sourcing
all the period Cole-Hersee push buttons and switches and now have all of those correct components to complete the instrument panel. We still are seeking a period ignition
switch. Unlike modern ignition switches, in these early units you turned the key to the “run” position and then pushed a button to start the engine. We are also looking for a
choke cable with knob that is period correct and the proto-type hand valve brackets that we designed will be replaced with heavier brackets that we will fabricate.
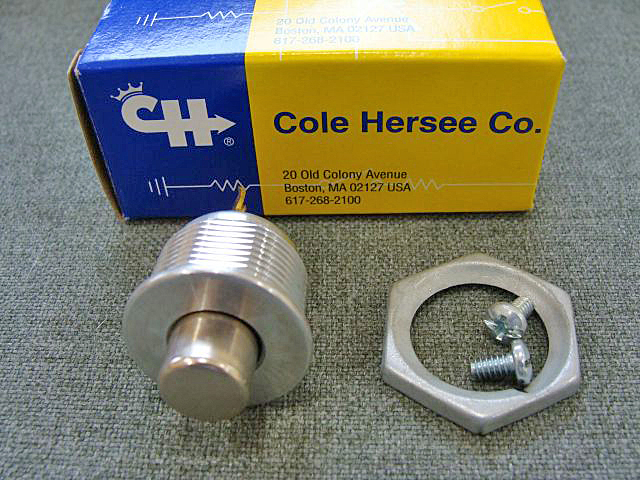 One of many Cole Hersee 9011-BX push button switches for the instrument panel
|
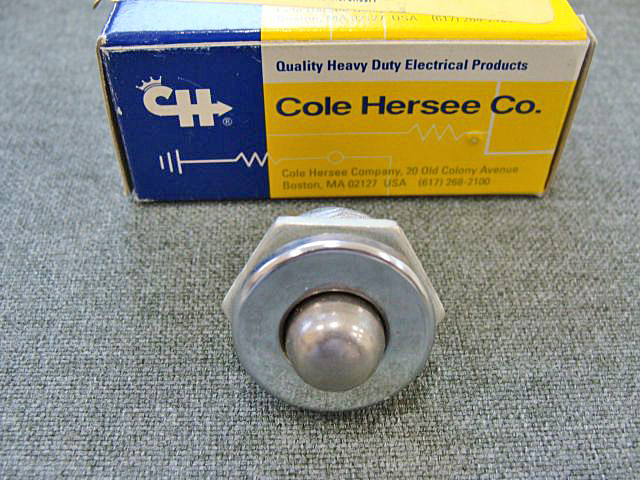 Cole Hersee 9011 old style push button switch (we'll use these in our G-12)
|
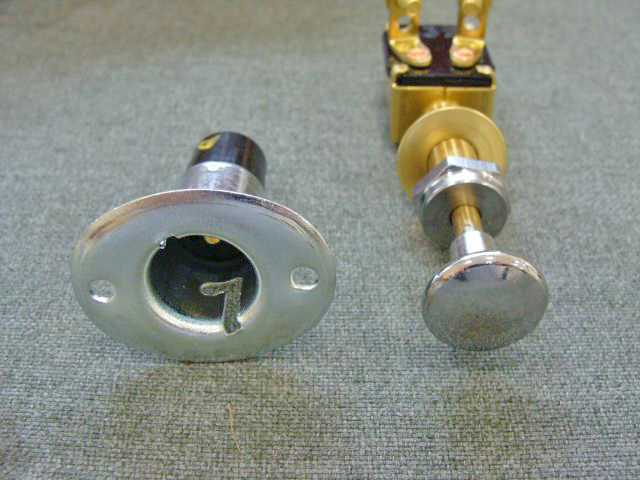 Lamp socket for the seat and pushpull switch for the instrument panel
|
The MTC AB units were operated from the B unit and there was a separate set of gauges (tachometer, fuel gauge, ammeter and voltmeter for each engine) and the speedometer
and two vacuum gauges (applied and in vacuum tank) for the B unit. There were push buttons for transmission forward and reverse, engine start and horn. Switches controlled
the bell and several combinations of lights. In all goes well, we hope to have the instrument panel reassembled by early next year.
As repeat visitors to this site are aware, I bought an MTC E-10 engine a few weeks ago. It was pretty well stripped of all of its components including trucks. We have been
slowly locating and fabricating some of the parts that we need for that restoration.
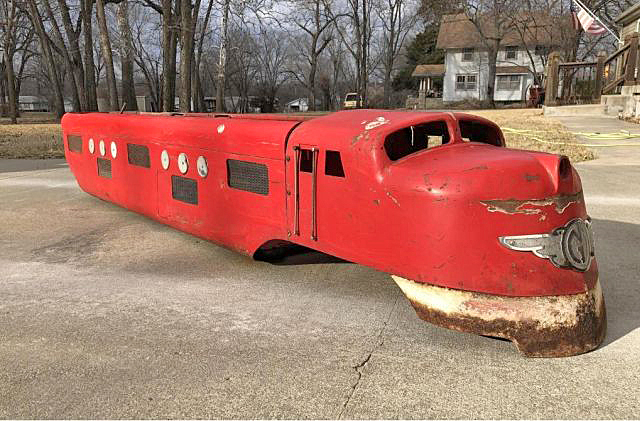 Miniature Train Company E-10
|
This month I was lucky enough to find a gentleman that was selling a complete E10 train
(engine, two coaches and observation car). He also had the original track and some spare electric components. We reached an agreement and I have purchased that train.
I will travel back east this spring and load up the train, parts and track and transport them to Arizona.
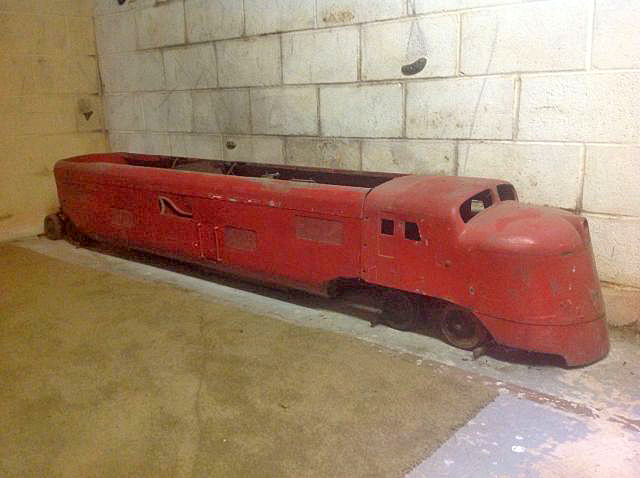 E-10 - photo courtesy of Jeff Waltermyer
|
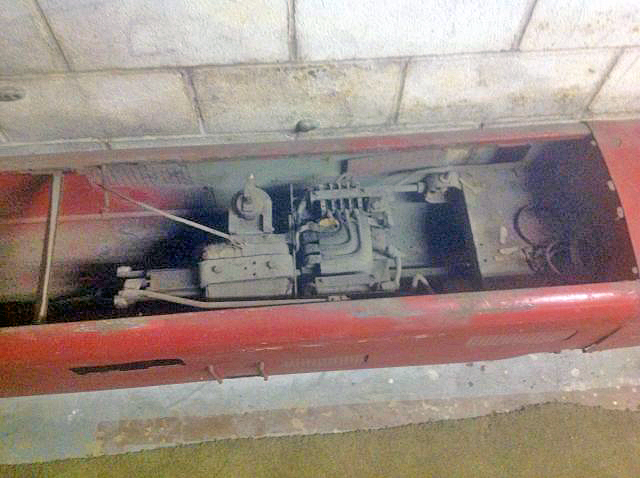 E-10 motor - photo courtesy of Jeff Waltermyer
|
The first E10s were manufactured in Elmhurst, IL, with later production in Addison, IL and then Rensselaer, IN. The first unit I purchased is MT & RR Co. no. 20 and built in
Addison, IL. This one is MTC No. 24 and built in Rensselaer, IN. There were a total of 33 produced.
A good friend of mine who is gone now, Bob Beach, started working at MTC in 1953 and moved to North Tonawanda, NY to work for Allan Herschell after it acquired the assets
of MTC in late 1956. He remained at AH for 16 years and served as a salesman, parts pilot and oversaw the installation of the trains. In 1964, he purchased the remaining 26 E10s
that were operable and a number of E10 parts from the Allan Herschell Co. He never elaborated to me on what had become of the other 7 units. He formed the Miniature Train Rental Co.
and operated out of the old Allan Herschell carousel assembly building on Thompson St. in North Tonawanda. Like Richard Robertson who had run the E10 lease operation for MTC,
Bob leased his trains to department stores and malls that operated them for Christmas, Easter and other promotions. After the event or promotion, the equipment was crated and
shipped back to North Tonawanda or if the client had a long-term lease, the equipment was crated and stored locally. He stated that none of the E10s were ever individually sold
through 1972. MTC sold them as a lot to Allan Herschell, he purchased them as a lot from AH in 1964 and then he sold them as a lot to Ken Pen Amusements in PA in 1972.
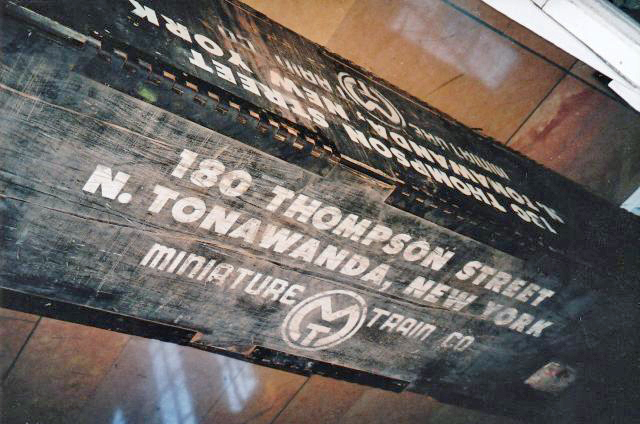 Miniature Train Rental Co crate - photo courtesy of Mark Skipworth
|
He shared that there were a handful of accidents involving the E10s during his years of ownership. All were operator error. He stated that the most interesting one occurred after an
employee Christmas party at a large department store in New York. Significant quantities of alcohol were consumed at the Christmas party and afterward several male and female
attendees decided it was a good idea to operate the train on the second floor and see who could make the fastest laps… It didn’t take long before the train was on its side and several
passengers sustained minor to moderate injuries.
As the E10 was the first foray of MTC into trains, I have long wanted one and now will have two. Many years ago, I was lucky enough to find and purchase an E-10 Instruction Book
for the Maintenance and Operation of Electric Trains that was produced by MTC in Rensselaer. It is the book that all renters and operators of the trains received. It is undated, but
the drawings are dated July 1947.
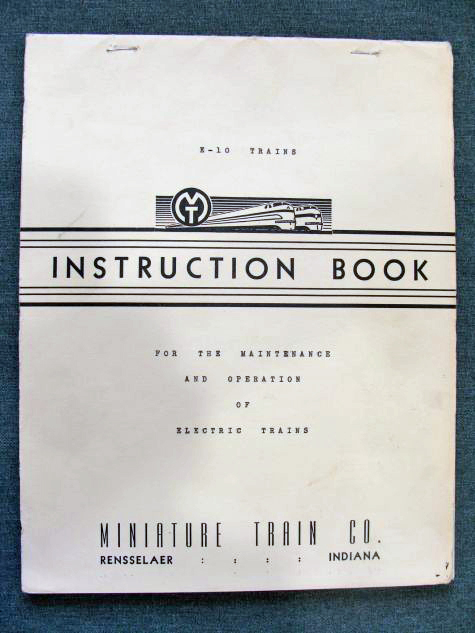 E-10 instruction book
|
I was told that the wiring in the E10 I just acquired is still the original cloth covered wiring and is pretty sketchy in places, but the train was operated back and forth a few months ago.
I am hopeful that we can replace the sketchy wiring with new old stock cloth covered wire and maybe operate that little E10 out here on special occasions. It would be cool to operate
it as just an E10, but to know my friend owned it fifty years ago also has significance to me.
E10 units 20, 24 and 32 were all painted the same color red. Does anyone out there know what the other paint schemes might have been. Please contact me if you have additional
information. Thank you.
Happy and safe railroading everybody!
November
11/5/18
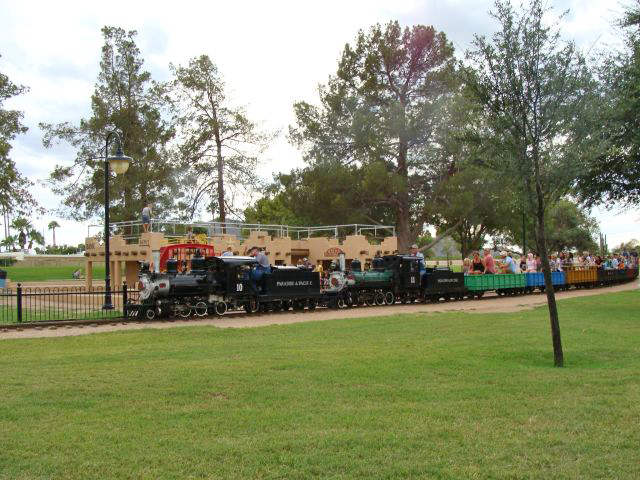
As has become an annual tradition, I made it out to Railfair at McCormick Railroad Park the first Saturday in October. It was a dark and overcast day by the time I arrived mid afternoon
which made most of the photographs pretty washed out. I got a couple of decent shots as the skies briefly lightened a couple of times. They operated two full trains earlier in the day,
but parked the first train shortly after my arrival and cut that engine loose and double-headed for several trips. It’s rare that you get to see a double-header of miniature steam locomotives
so that was fun to watch and listen to. After double heading for several trips, they cut off the front engine and she returned solo to the engine house where she rejoined the train she
pulled earlier in the day and was prepared for operating on Sunday. It is also rare to get to see an engine running solo on the Paradise and Pacific so that was pretty special too.
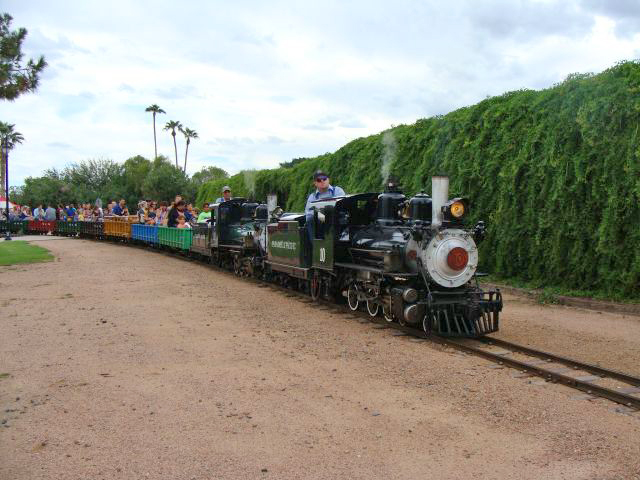 Steam double header at McCormick Railroad Park's Railfair 2018
|
 Rare double header at McCormick Railroad Park
|
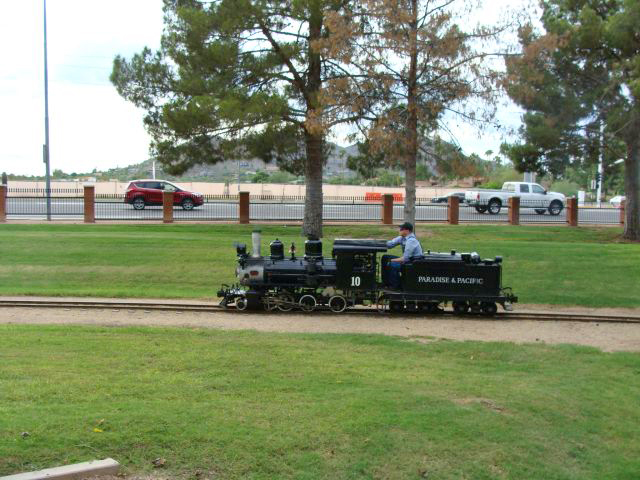 Engine #10 returns to her own consist
|
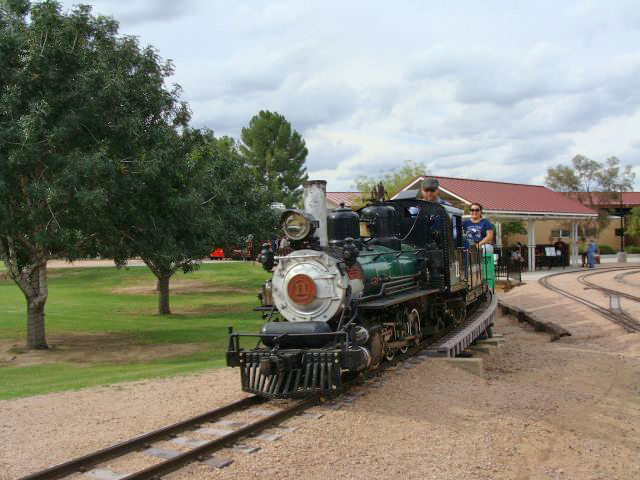 Engine #11 pulls her consist
|
The Scottsdale Live Steamers were running and providing rides for a short line of passengers and a few members were also running their equipment. They always do a really nice job with
these events.
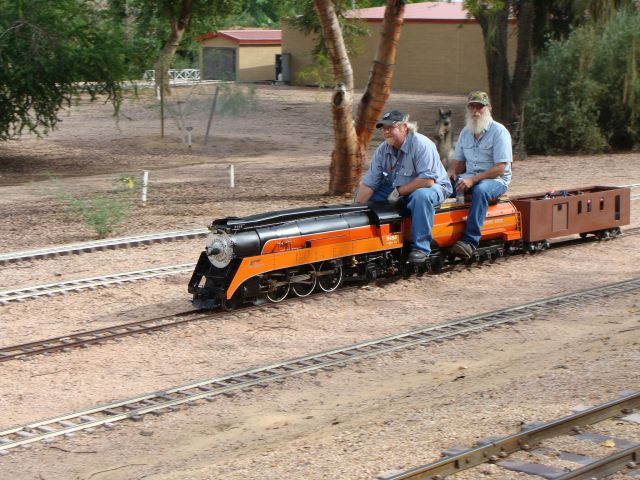 Scottsdale Live Steamers
|
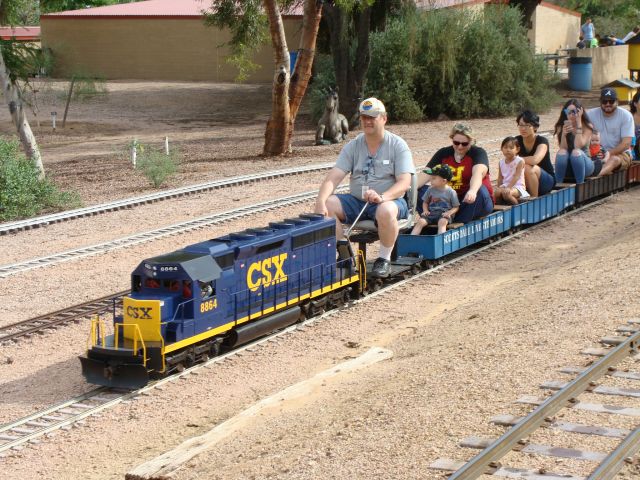 Scottsdale Live Steamers giving rides at Railfair
|
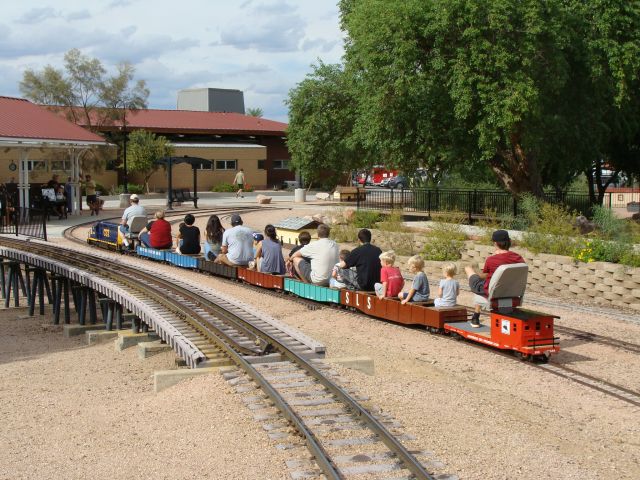 Passengers enjoying a ride from the Scottsdale Live Steamers
|
I ventured back into the engine house and visited with Frank for about an hour. He and Tom Opperman have been the shop team there for almost as long as I can remember and keep
everything in great running order.
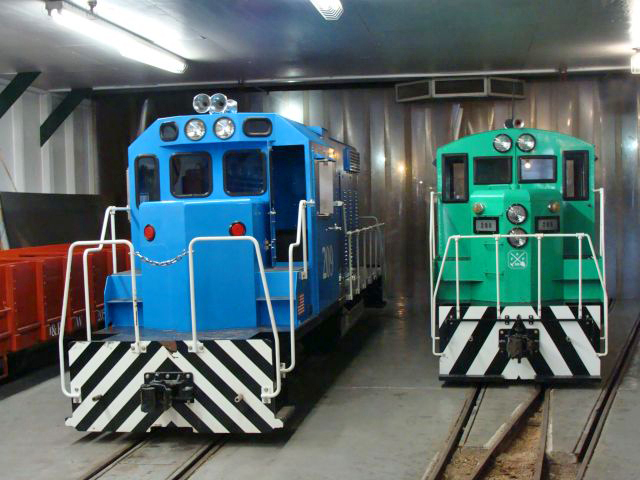 Engines 209 and 208 in the engine house
|
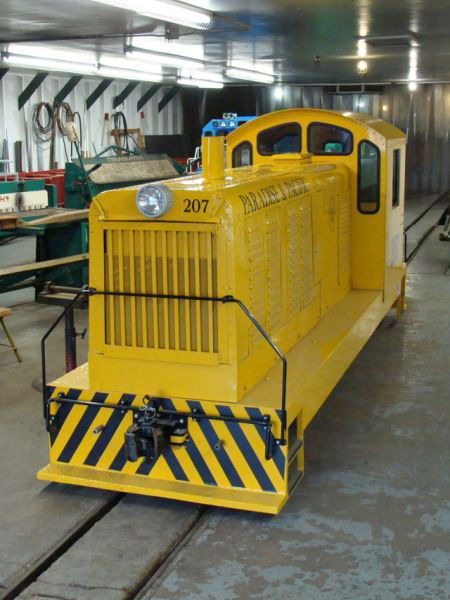 Engine 207 in the engine house
|
The last Saturday of the month, I traveled 63 miles across town to the Pumpkin and Chili Party at Schnepf’s Farm.
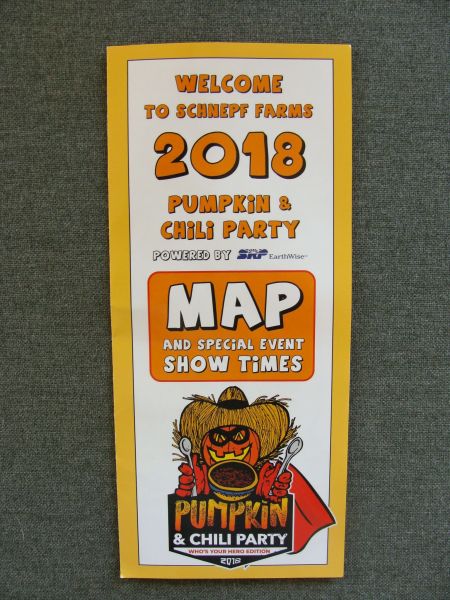 Schnepf Farms pumpkin and chili party 2018
|
The past few years I have traveled to Marana for the last Saturday of October, this year I hope to visit Marana for its Christmas on the Farm celebration and wanted to check out
Schnepf’s Farm this month.
 Schnepf Farms
|
My usual MO is to locate the train loading area and take a few photos there and then scout for locations where good photo opportunities exist. I got a couple of good shots at different locations here and there.
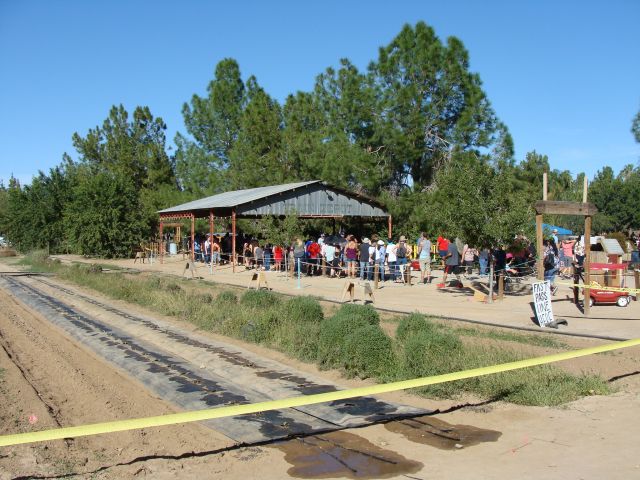 Passengers wait at the depot for a train ride at Schnepf Farms
|
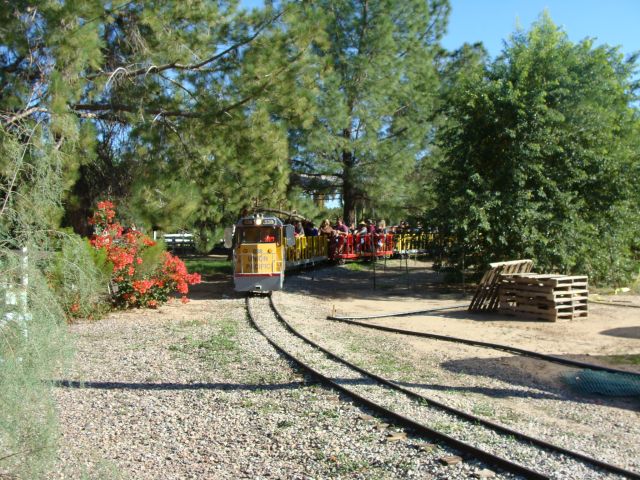 Schnepf Farms Railroad
|
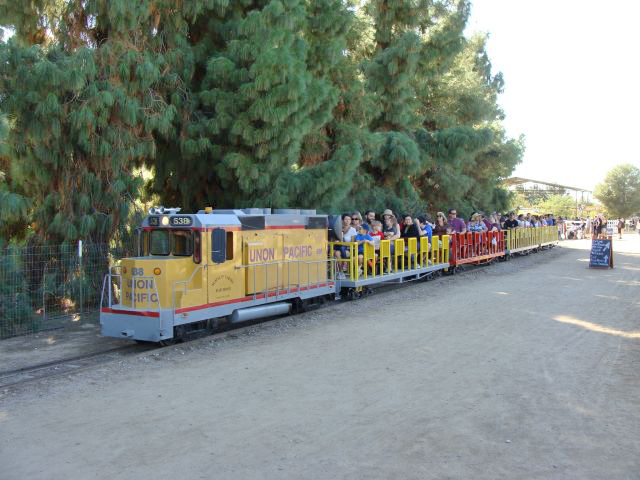 Passengers enjoying a train ride at Schnepf Farms
|
They have one sidetrack where the spare train was parked, but I ruled it out as a good photo opportunity because it was behind a fence and there was lots of vegetation blocking
the shot from the best angle over the fence. I purchased a diet drink and stood under the canopy enjoying the ice cold drink deciding where I would head next along the right of way.
As the train came around the curve about 30 feet behind me, there was a loud collision. The train that was parked on the sidetrack just 10 minutes earlier had rolled partway onto
the mainline and the fully loaded operating train was unable to stop and hit it. Many of us ran to the fence and jumped it to see if everyone was okay. The loaded train stayed
upright and on the tracks. The operating engine sideswiped two cars and then hit the rear of the parked train which was all the way on the mainline. At the scene anyway, there
were no apparent injuries; I hope it stays that way.
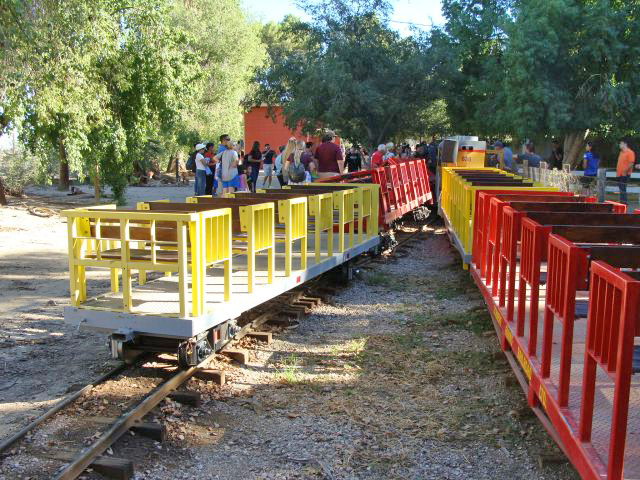 A parked train rolled out onto the mainline
|
I interviewed a couple of people standing right there and their versions of how the parked train got on the mainline were slightly different. Again, everything was fine when I had
been looking over the fence at the parked train less than 10 minutes earlier. Both witnesses agreed that a woman and a youngish boy maybe 10 got behind the fence somehow.
The mother took photos of the boy standing beside the parked engine and then had him sit inside the cab for more photos. After he got inside the cab, the train started to roll.
One person thought he started the train, the other said no it just started to roll. I think it is unlikely that a 10 year old started the engine and secondly I was maybe 30 feet away
and would have heard it. Anyway, after it stopped on the mainline the mother grabbed her son and they ran from the scene just a couple of minutes before the collision.
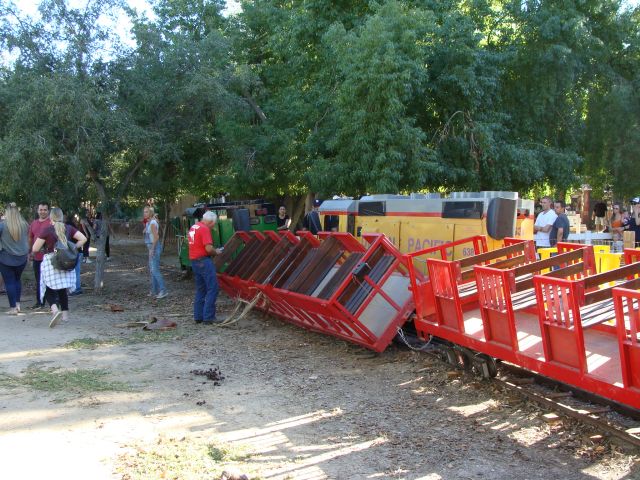 Train collision at Schnepf Farms
|
The trains were damaged and placed out of service while paramedics and investigators were called. I didn’t get my train ride, but got lots of photos from the other side of the fence
when helping people out of the cars and asking if everyone was okay.
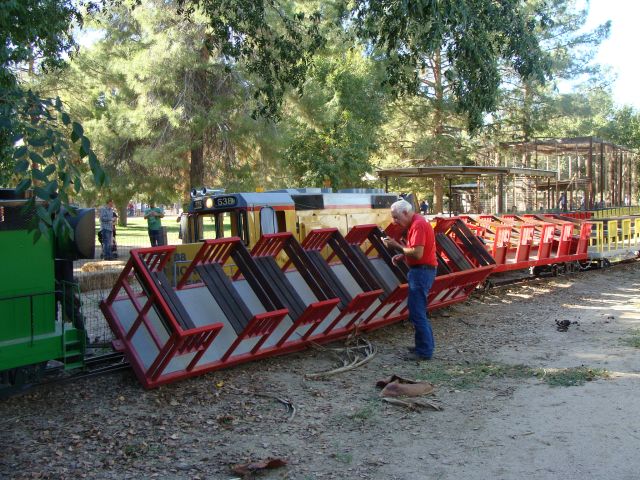 Inspecting the damage
|
We finished the plumbing on the B unit and re-primed the instrument panel. Next month we will start placing the gauges and start on the wiring. We are looking forward to seeing
how the instrument panel looks once all the gauges, switches and pushbuttons are in place. I have seen several variations of the instrument panel on B units. Ours is an early one,
no. 506, and has 11 gauges. It should look pretty cool.
We found the ignition switches that we needed, matching period correct knobs for the Cole Hersee switches and additional NOS Cole Hersee light switches. I am still looking for a
period correct choke cable.
The balance of the news this month is also in the acquisitions area. We acquired a specific version of a MT & RR Co. torque wrench that was in great condition and upgraded our collection.
We were lucky enough to acquire a period correct WR Brown vacuum pump for our B unit. We acquired some letterhead and envelopes for the Hiway House Hotel in Tucson, the original
owner of one of our S16s the “Tucson” for our Hiway House collection.
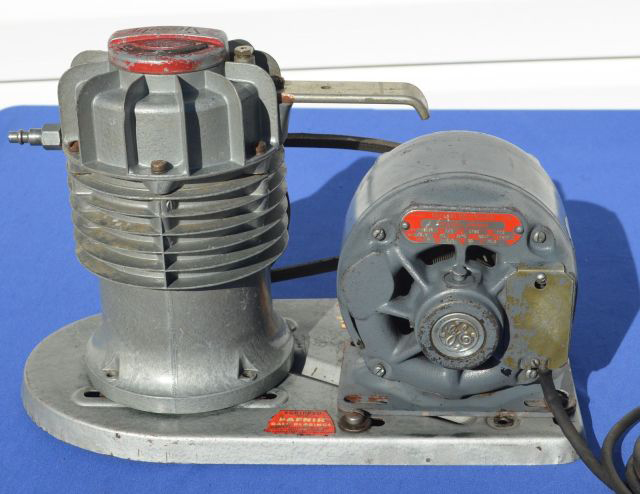 WR Brown vacuum pump
|
We purchased replacements for 3 of our large 14 mil white tarps this month. They lasted just short of two years and we are very pleased with their durability in our heat and UV.
The replacements are just like the ones being replaced.
Arguably, the biggest acquisition news this month for the railroad and collections is that I reached an agreement to purchase some G12 bodies including locomotive and observation car,
some bolt on parts and a small amount of display track. I will pick up the G12 equipment when I am on my east coast trip this spring/summer to pick up the E10 train and parts.
That will be an interesting trip and three thousand miles of fun I hope; either way it will be a three thousand mile trip…
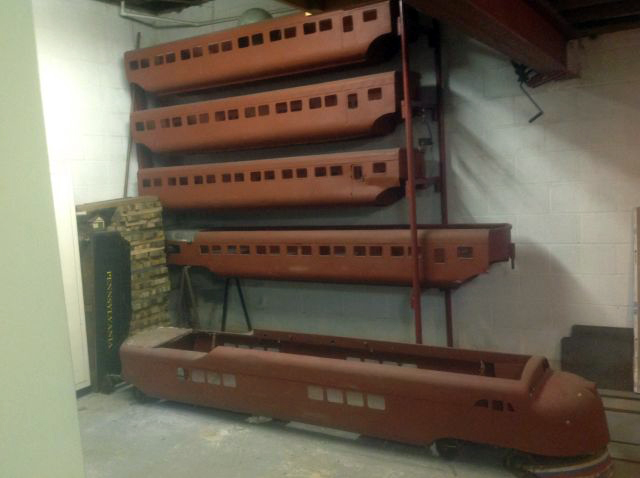 G12 Equipment
|
Happy and safe railroading everybody!
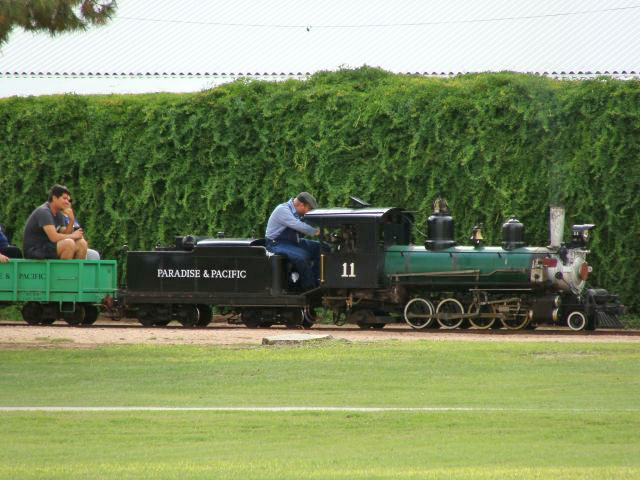 Engine #11 running the rails at Railfair 2018
|
December
12/3/18
I washed, polished and vacuumed all of the engines and cars outside under tarp and the ones inside in the engine house. Gosh, everything was either dusty or dirty, but looks so
much better now. I also charged the batteries of the Tucson and the Coconino.
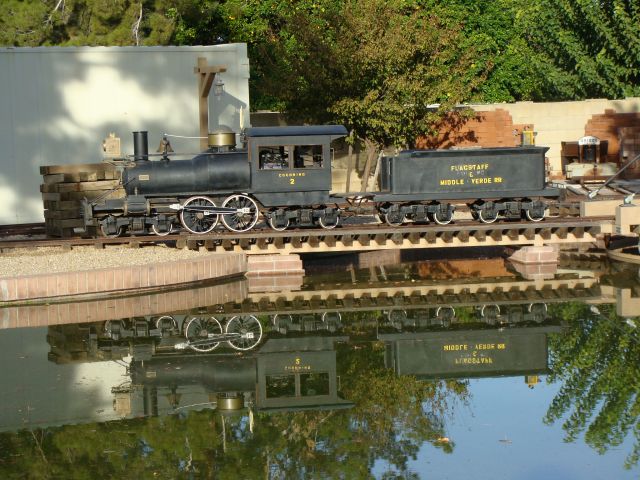 All the engines including the Coconino (pictured) were cleaned this month
|
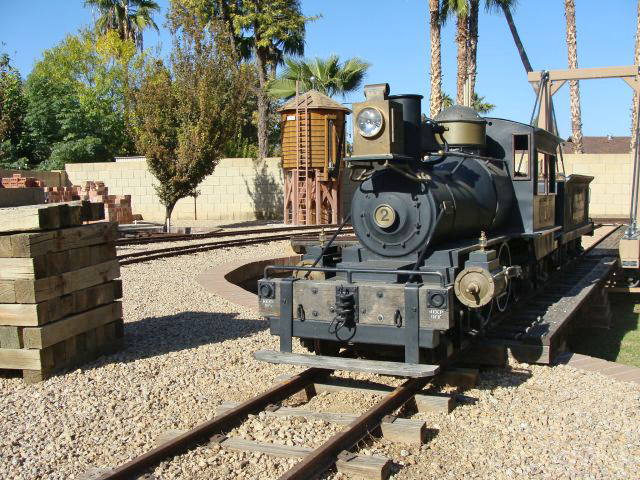 The Coconino also got a new battery this month
|
Our friend, Jerry Graves came over and we started all the equipment and Jerry fine tuned the carburetors as they are a bit sensitive to the extreme change of seasons here. They
all ran pretty well. The Tucson coughed up lots of condensation and soot out of the stack when we first started her and it went everywhere. I got to spend a couple of hours cleaning
her all up a second time. When I am thinking clearly, I throw a couple of sheets over her the first time we start her after the long summer and the sheets catch 99% of the soot and grime.
No good reason why I didn’t do that again this year, I was just so excited to get her started I forgot to go get the old sheets that I used every year. It will be a while before I forget
to do that again…
We finally finished assembling the last two G12 coach trucks that we had the parts to assemble and I got everything painted. They look pretty good and have new bearings, new seals,
new gaskets, six of the eight axles are new as are four of the wheels; the other four wheels are in great shape. These trucks should be trouble free in G12 service for a long time.
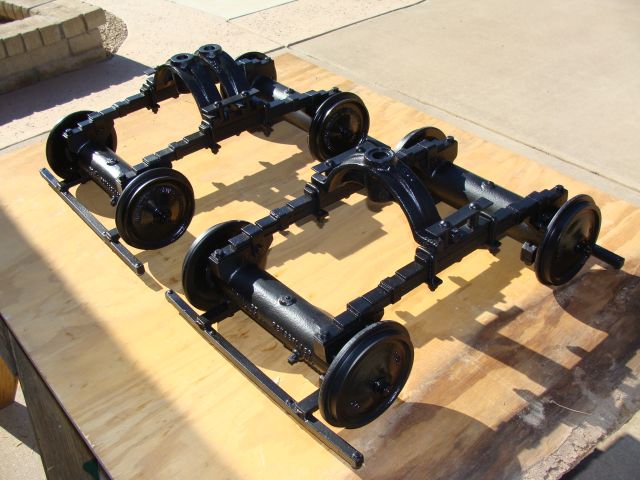 Completed G12 coach trucks
|
We started the wiring on our B unit no. 506 and installed some of the gauges, switches, buttons, light sockets and both cockpit shields. We still have a great deal of wiring work to complete.
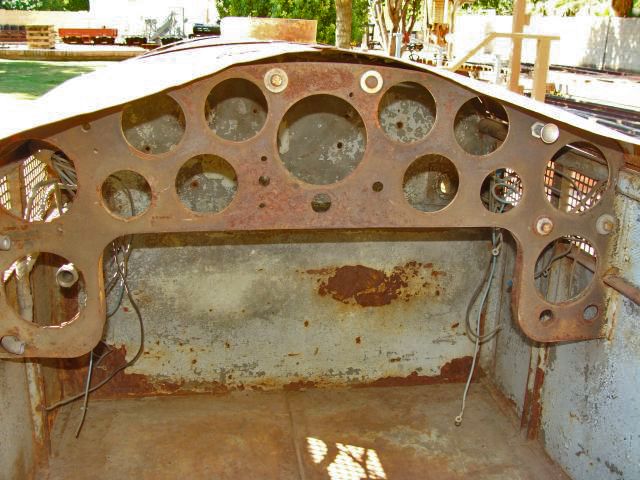 The empty instrument panel of G16 #506 B
|
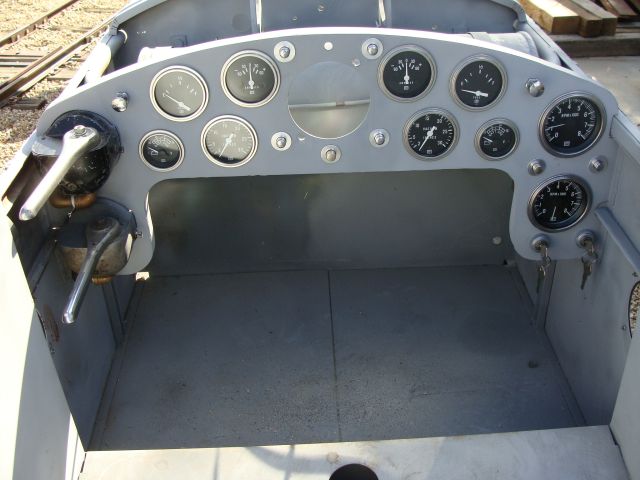 The instrument panel in our B unit is starting to take shape
|
I ordered the stencils for replacing the vinyl lettering on our equipment with painted letters. This will be a huge, time consuming job that we will work on over the next couple of years one
piece of equipment at a time.
Last month, I shared that we had reached an agreement to buy some G12 car bodies. They are a G12 engine, observation car and three coaches and a very limited number of the bolt on
parts such as a few of the handles and a couple of the window frames. This month we finalized a deal to purchase a complete set of G12 track and boxes and buckets of G12 truck parts.
I am not sure how many trucks we can build. There are tons of some parts and it appears very few of some others, but we will see once I get everything out here, sort it out and get an
accurate count of what we have. We still need a G12 original Wisconsin engine and most of the drive assembly and brake assembly. I do have the two clutches and the gas tank.
Our G12 engine no. 377 is missing so many parts and some of the sheet metal panels are riddled with rust. Other panels are straight and in pretty good shape. One of the G12 engine bodies
will get restored and the other will be a parts donor. I am not sure which engine will be which just yet. I understand the recently acquired engine and ob car are in pretty good shape, one coach
is reportedly perfect and another is pretty nice. The other coach has some issues so I will just wait and see first-hand what kind of shape they are all in once they get here and go from there.
We had two new drive line tunnels fabricated for the E10s and will cut them to length once the second E10 gets here.
 Driveline tunnels for the E10s
|
I also had four new control handles made for the E10 brake and throttle controls. They are aluminum. I still need to clean and polish them, but I think they will look pretty good.
The original ones on the E10 and the G12 were the same and were some sort of a bakelite product and just didn’t hold up over the years (although those trains are at least 72 years
old and I suspect the one is going on 80 years old).
 E10 brake and throttle handles
|
I was lucky enough to acquire a third set of horns (2 for the E10s and 1 for the G12) this month (thank you Gerry Warner).
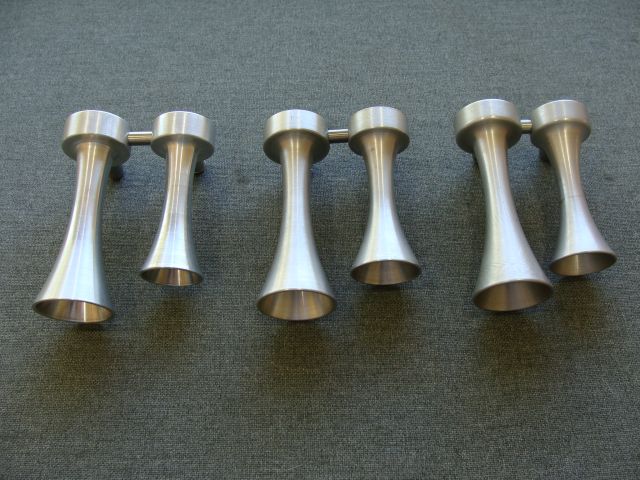 E10 & G12 horns
|
I have been spending money like a drunken sailor the past three months, but am starting to get really excited about all of the projects going on out here now and the future projects we will have to work on.
We have the B unit to finish all the wiring, gauges, switches and buttons as well as the wiring pass through that will one day light up the rear drumhead. Then we will install the engine, transmission and
fluid clutch. Then the bell, horn, vacuum pump, hood shocks, both hoods and the cowl cover. We have the upper and lower castings, the side markers, handles and rear can for a G16 observation car end.
We will fabricate the sheet metal for the ob end. We will have 2 of the 26 E10s that still existed in 1974 (33 were originally built) to rebuild and restore and a G12 to restore. We will have ob cars for one of
the E10s and the G12. We may have some extra trucks or truck parts once we sort through everything.
I think I am pretty much done with major new acquisitions after this, but I have said that before… The long term acquisition wish list includes another E10 1930s body style ob car, a 1930s body style
E10 baggage car, a couple of post-1947 E10 coaches (so I can show the contrast with the earlier 1930s style E10 coaches), maybe a S16 coach or two and a 16 inch gauge caboose.
The short term acquisition wish list includes an original G12 Wisconsin engine, several more G12 window frames and stainless steel spring clips, several sets of ends for G12 and E10 coach handles
and many other trim and bolt on parts.
I have been looking for 3 7/8 inch diameter Stewart-Warner speedometer which is the style used in the first several G16 models produced (A and B units) without success. This is the model that
our B unit no. 506 needs. I am not sure exactly what year the change took place, but our A unit no. 582 has the 3 3/8 inch diameter Stewart Warner speedometer that all the later produced A and B
units have. No. 582 was produced by MTC and shipped in October of 1951 so the transition to the 3 3/8 diameter speedometer took place sometime before that. Several years ago someone (sorry I
can’t remember who) sent me a photo of the instrument panel of B unit no. 548; it has the 3 3/8 diameter speedometer. It was shipped on Feb. 2, 1951. If any of you have access to MTC engines with
production numbers between no. 506 and 548 and are willing to share a photo of the instrument panel I would very much appreciate it. Maybe we can narrow down when the change in speedometer
styles occurred.
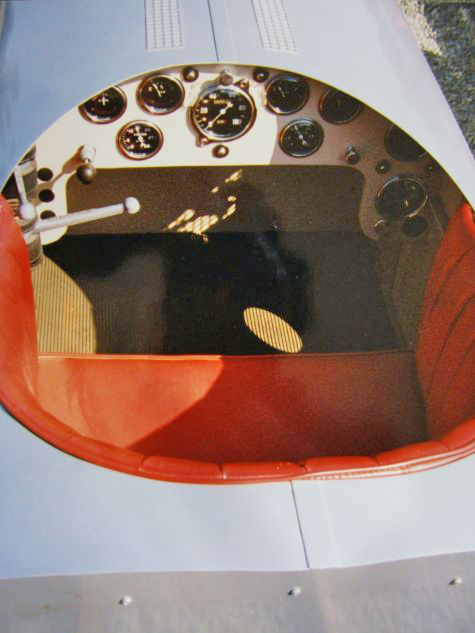 3 7/8" Stewart-Warner speedometer in an early G16 instrument panel
|
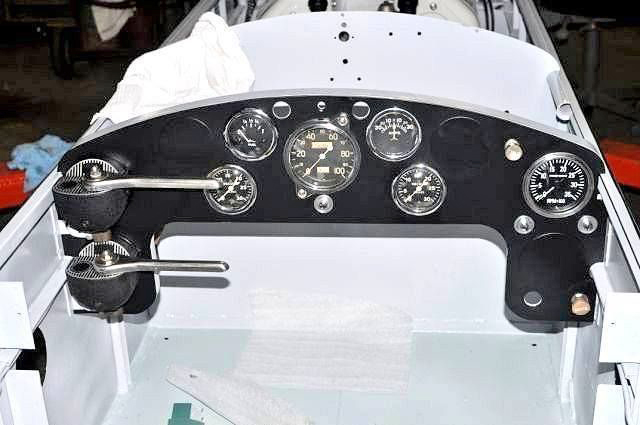 Another 3 7/8" Stewart-Warner speedometer in an early G16 instrument panel
|
I may have a solution to our speedometer dilemma (fitting a 3 3/8 diameter gauge in a 3 7/8 inch diameter instrument panel hole) and it involves a long out of business car company; I will keep you
posted and provide more information next month on whether this idea was hair-brained or maybe creatively brilliant.
Happy and safe railroading everybody!
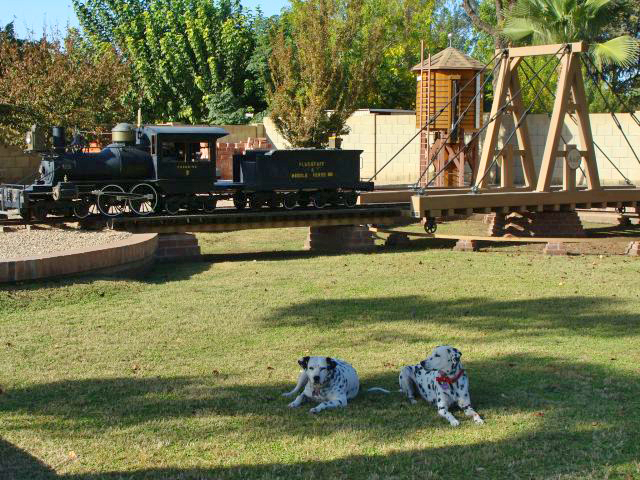 Lizzie and Lodi guard the Coconino from rascally rabbits
|
Arizona and Pacific Railroad Project Pages: Current Projects
/ 2020 Projects / 2019 Projects / 2018 Projects / 2017 Projects
/ 2016 Projects / 2015 Projects / 2014 Projects / 2013 Projects
/ 2012 Projects / 2011 Projects / 2010 Projects / 2009 Projects
/ 2008 Projects / 2007 Projects
Back to The A&P RR Home Page


